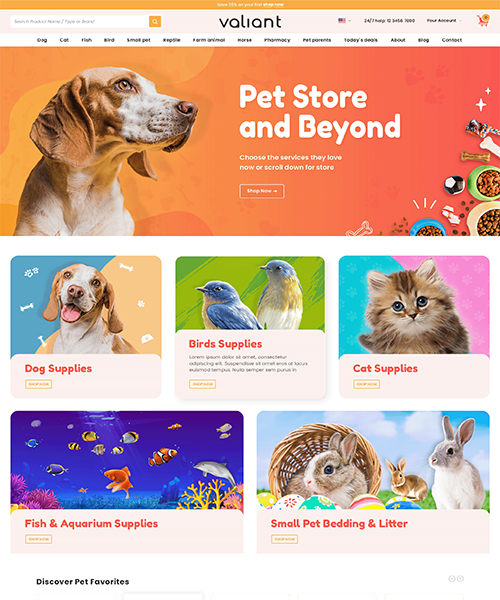
Valiant Bigcommerce Theme Manual
Valiant BigCommerce Theme is a multi-purpose theme that can be used for any type of online store. We have created 3 different variants for different types of industries. Valiant theme is tested by bigcommerce and Built with Stencil framework, latest version, and update to date. Compatible with BigCommerce latest version.
Valiant theme also supported various features of bigcommerce like mobile friendly, Schema data, Various applications supported, Page builder, Theme editor, Sidebar, Mega menu, Carousels, Newsletters, banners etc. We have tried to help our client with the documentation with a detailed explanation.
Header & Footer
In your control panel, go to Storefront > My Themes, and click the blue "Customize" button to launch Theme Editor.
In the left hand column of the Theme Editor, click the panel labelled 'Header & Footer'.
Pencil Banner

Pet:

GYM:

CBD:

Hide Pencil Banner: If checked, it will hide a pencil banner, i,e.Shop 35% on your first.
Pencil Banner Text: Pencil banner text that will be visible in all pages. Here, Shop 35% on your first.
Pencil Banner Link Text: Add Link text in Pencil Banner Link Text. i.e. Shop Now.
Pencil Banner Link: Add Link in Pencil Banner Link.
Pencil Banner Text Color: Add text color in pencil banner text color.
Pencil Banner Background Color: Add Background color in pencil banner Background color.
Channel Selector
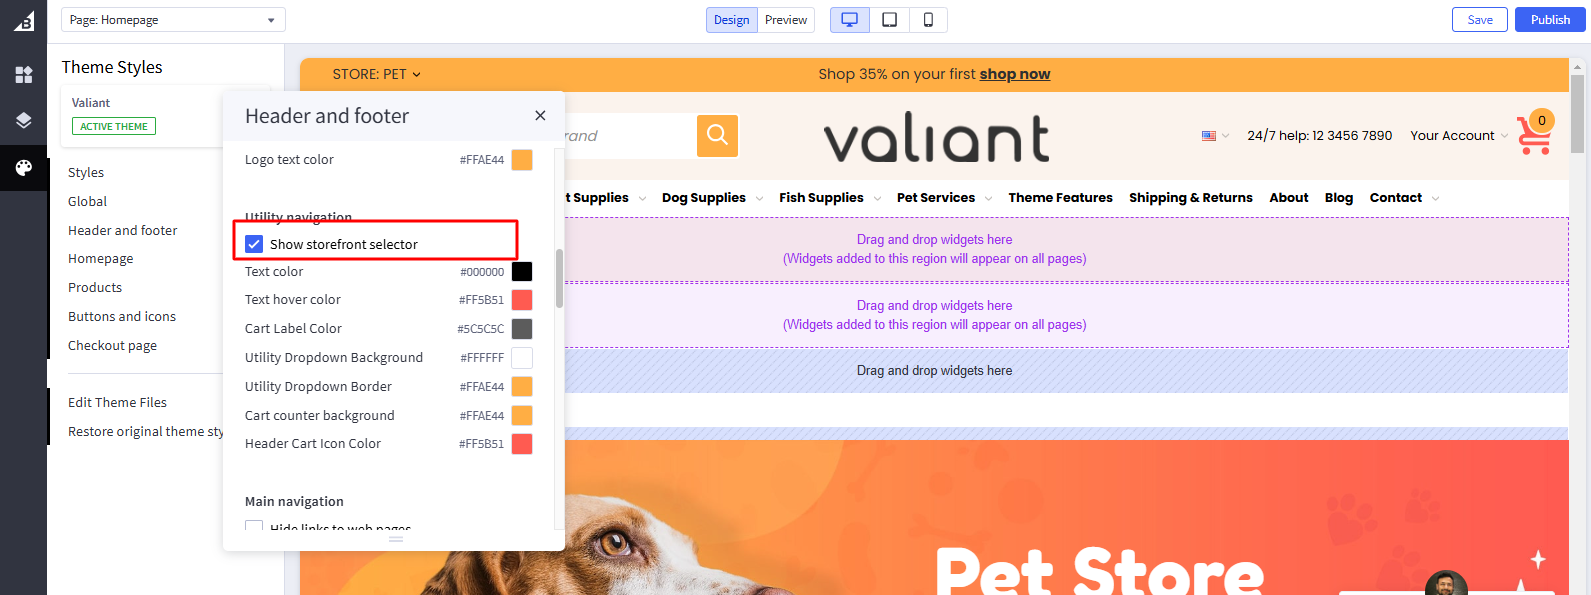
Pet:

GYM:

CBD:

Hide Channel Selector:If unchecked, it will hide a channel selector
Logo
Logo position: Aligns the logo left, center or right. Applicable for both image and header content.
Logo Center View :
Pet:

GYM:

CBD:

Logo Left View :
Pet:

GYM:

CBD:

Logo Right View :
Pet:

GYM:

CBD:

Header

Header Style: Set header style Normal or Sticky.
Header Background color: Set background color. It will appear behind the Logo.
Show Compare: Toggles the visibility of Show Compare.

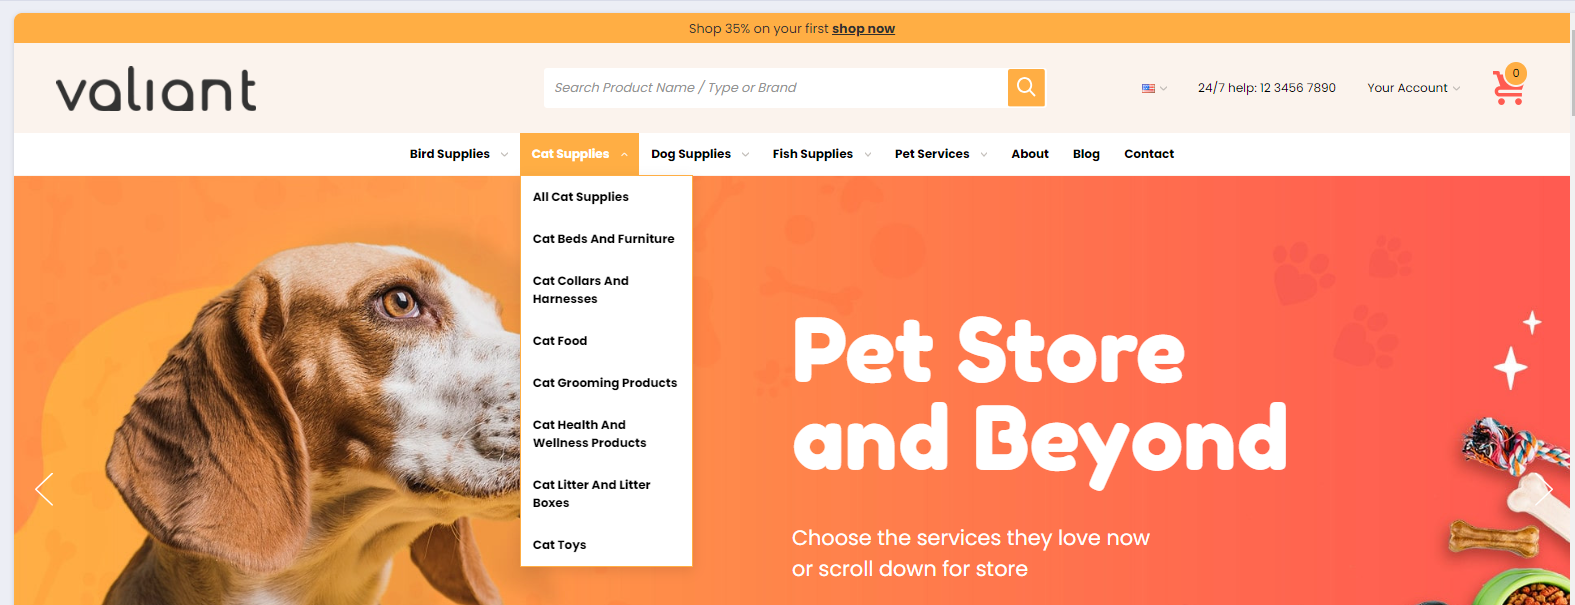
Dropdown menu display mode: Change Dropdown menu display Mode Simple or Alternate.
Simple Design:
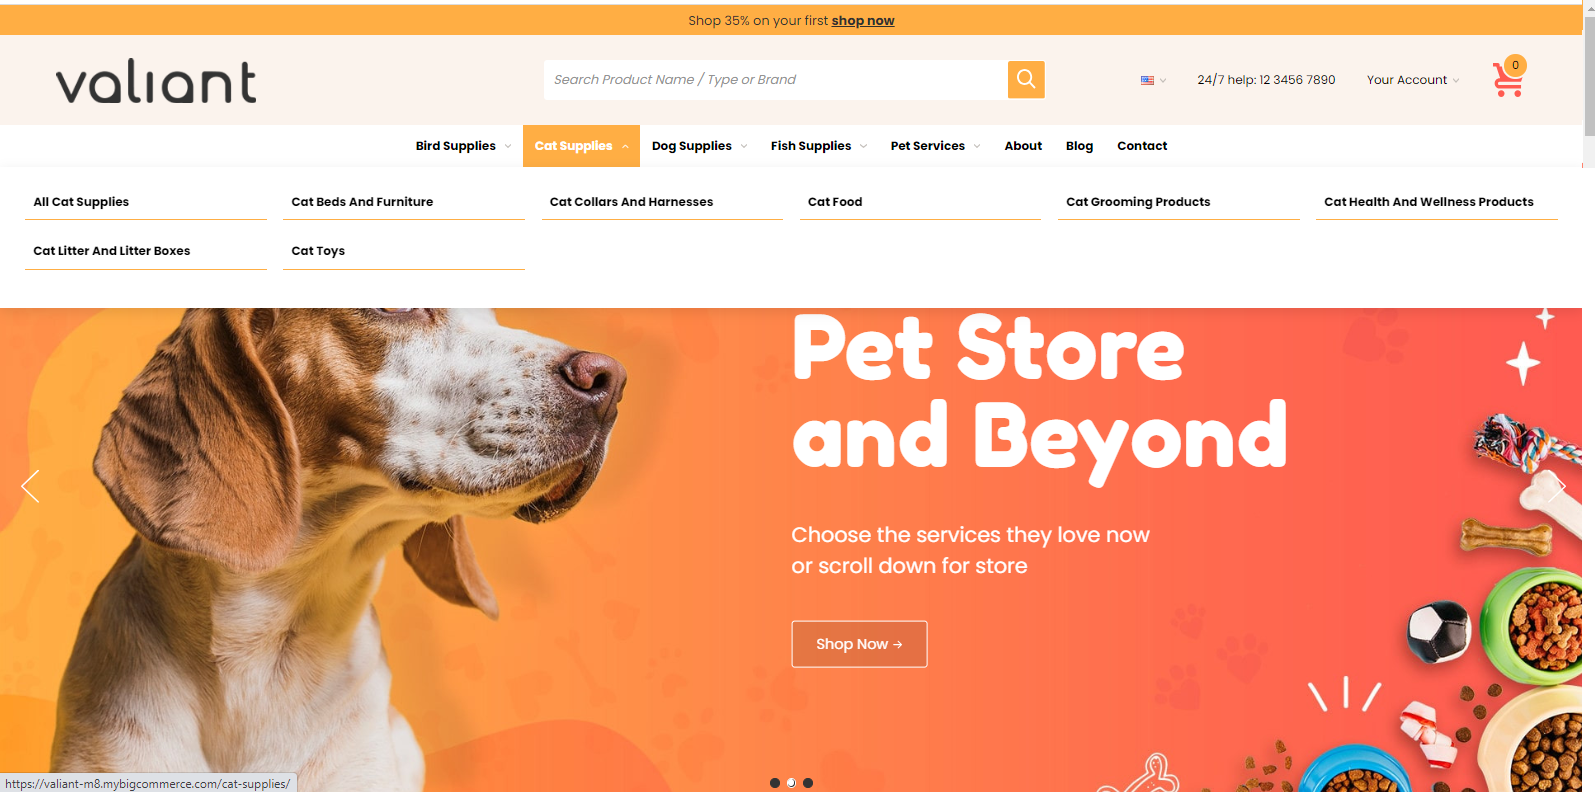
Alternate Design:
Navigation Menu Design: Change Navigation Menu design Simple or Compact.
Simple Design:

Compact Design:
Pet

GYM

CBD

Search Suggestion:
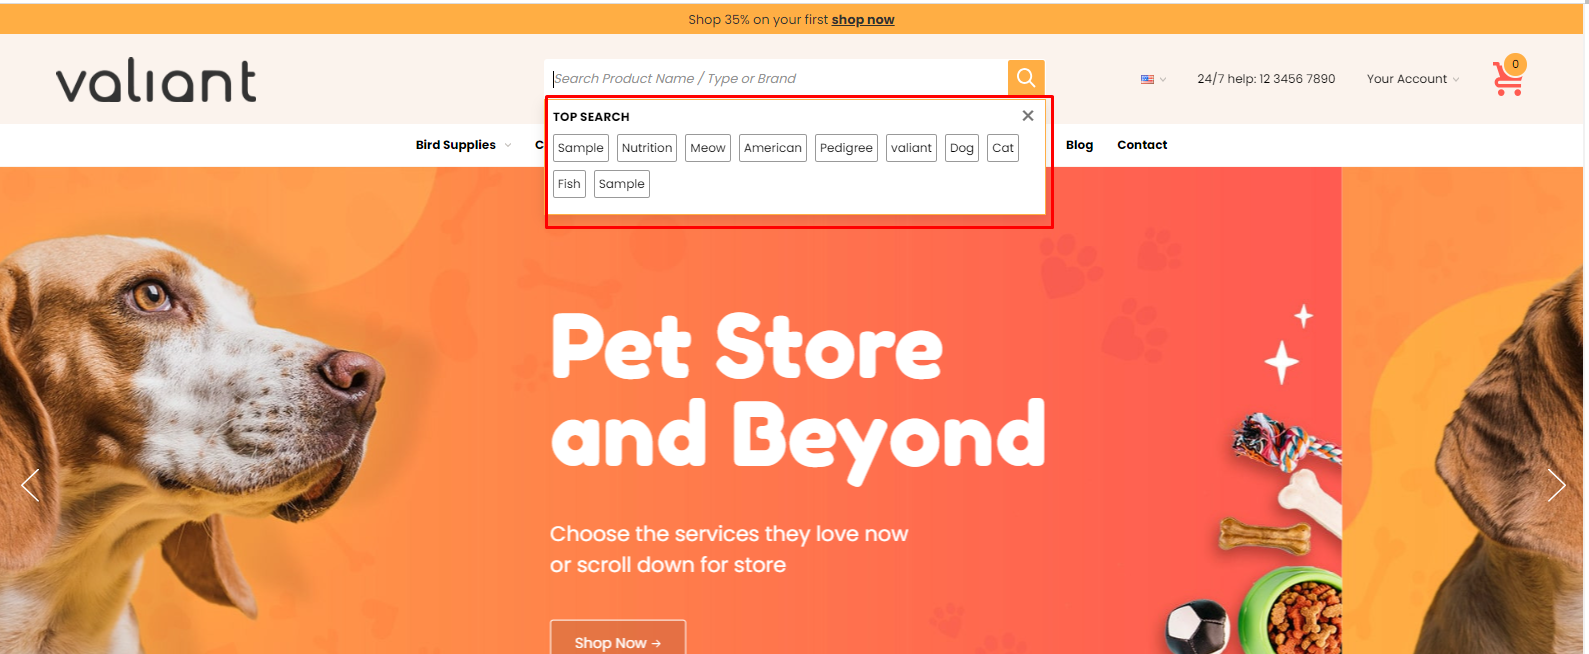
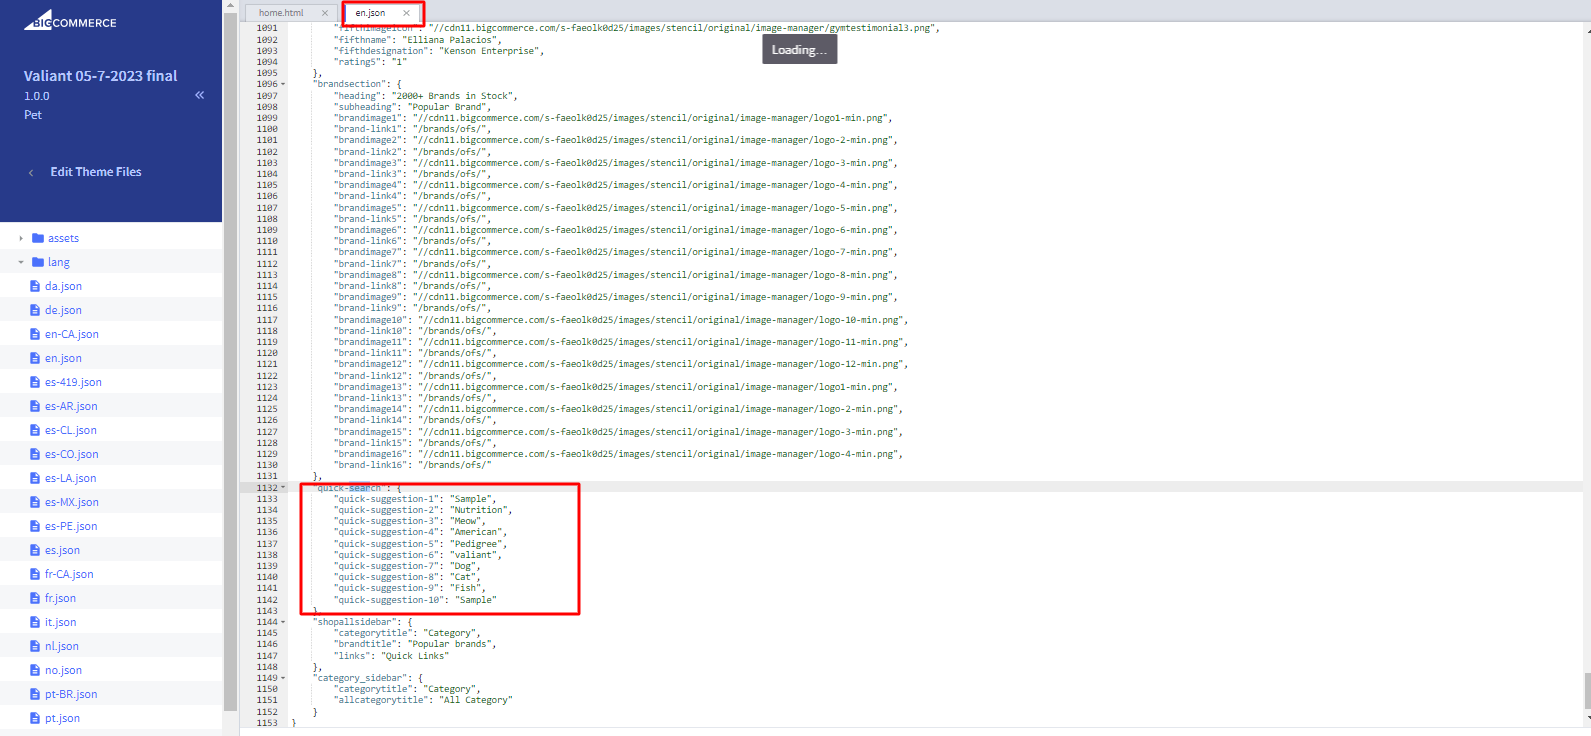
Steps to Generate and Add Code to Theme Files:
Generate Code on CodePen:
Begin by interacting with the suggestions fields displayed in the CodePen editor. You can input different suggestions to customize the final result as per your needs.
Preview the Final Output:
On the right-hand side, under "Final Output," you will see how the generated code behaves based on the suggestions you've entered.
Copy the Code:
Once you are satisfied with the output, click the "Copy Code" button to copy the generated code to your clipboard.
Add Code to Theme Files:
Navigate to your theme's files by going to Channels > Themes > Advanced > Edit Theme Files.
Find the appropriate language file, for example, en.json for text changes.
Paste the copied code in the relevant location and update any necessary values such as quick-suggestion-1 to quick-suggestion-10, or other items based on your custom needs.
Save and Apply:
Once the code is added to the respective files, save your changes.
Reload your theme or site to verify that the new code functions as expected.
See the Pen Quick Search Suggestion - Code Generator by bigcommerce_ditindia (@bigcommerce_ditindia) on CodePen.
Manage suggestion text: For text change Go to channels > Themes > Advanced > Edit Theme Files > lang > en.json and update text in quick-suggestion-1 to quick-suggestion-10.
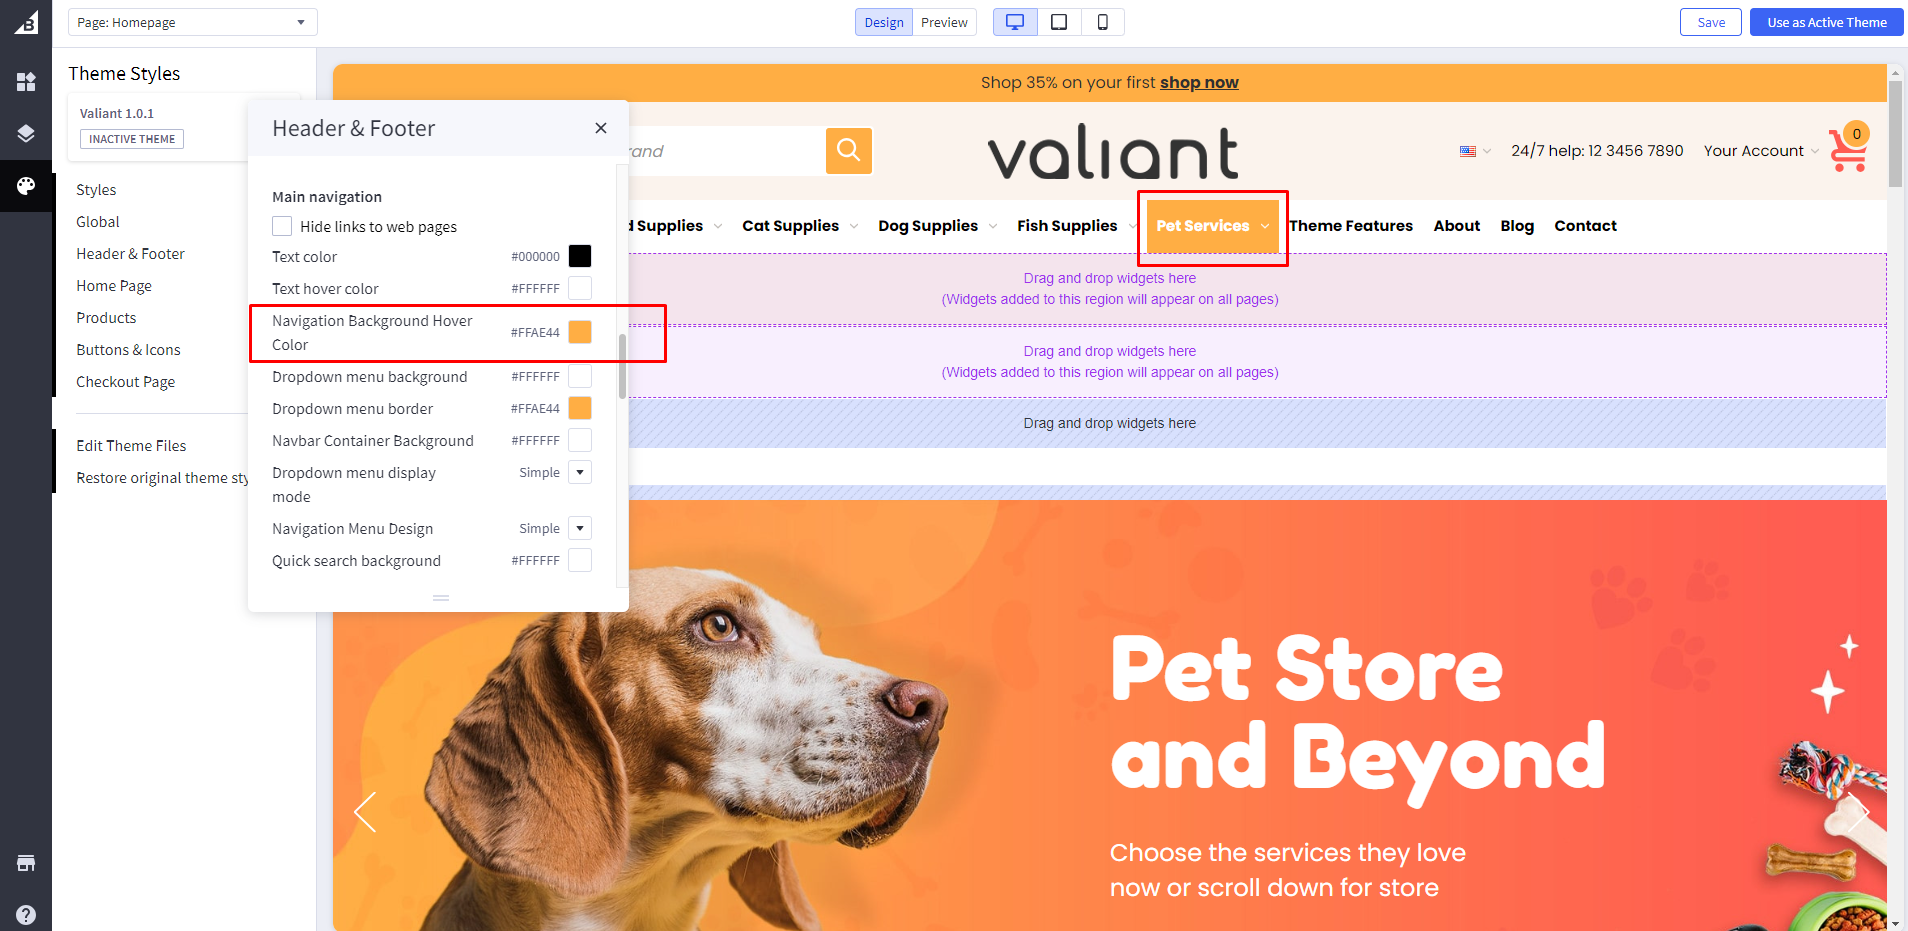
Navigation Background Hover Color
Header Cart Icon color
Cart counter background Color
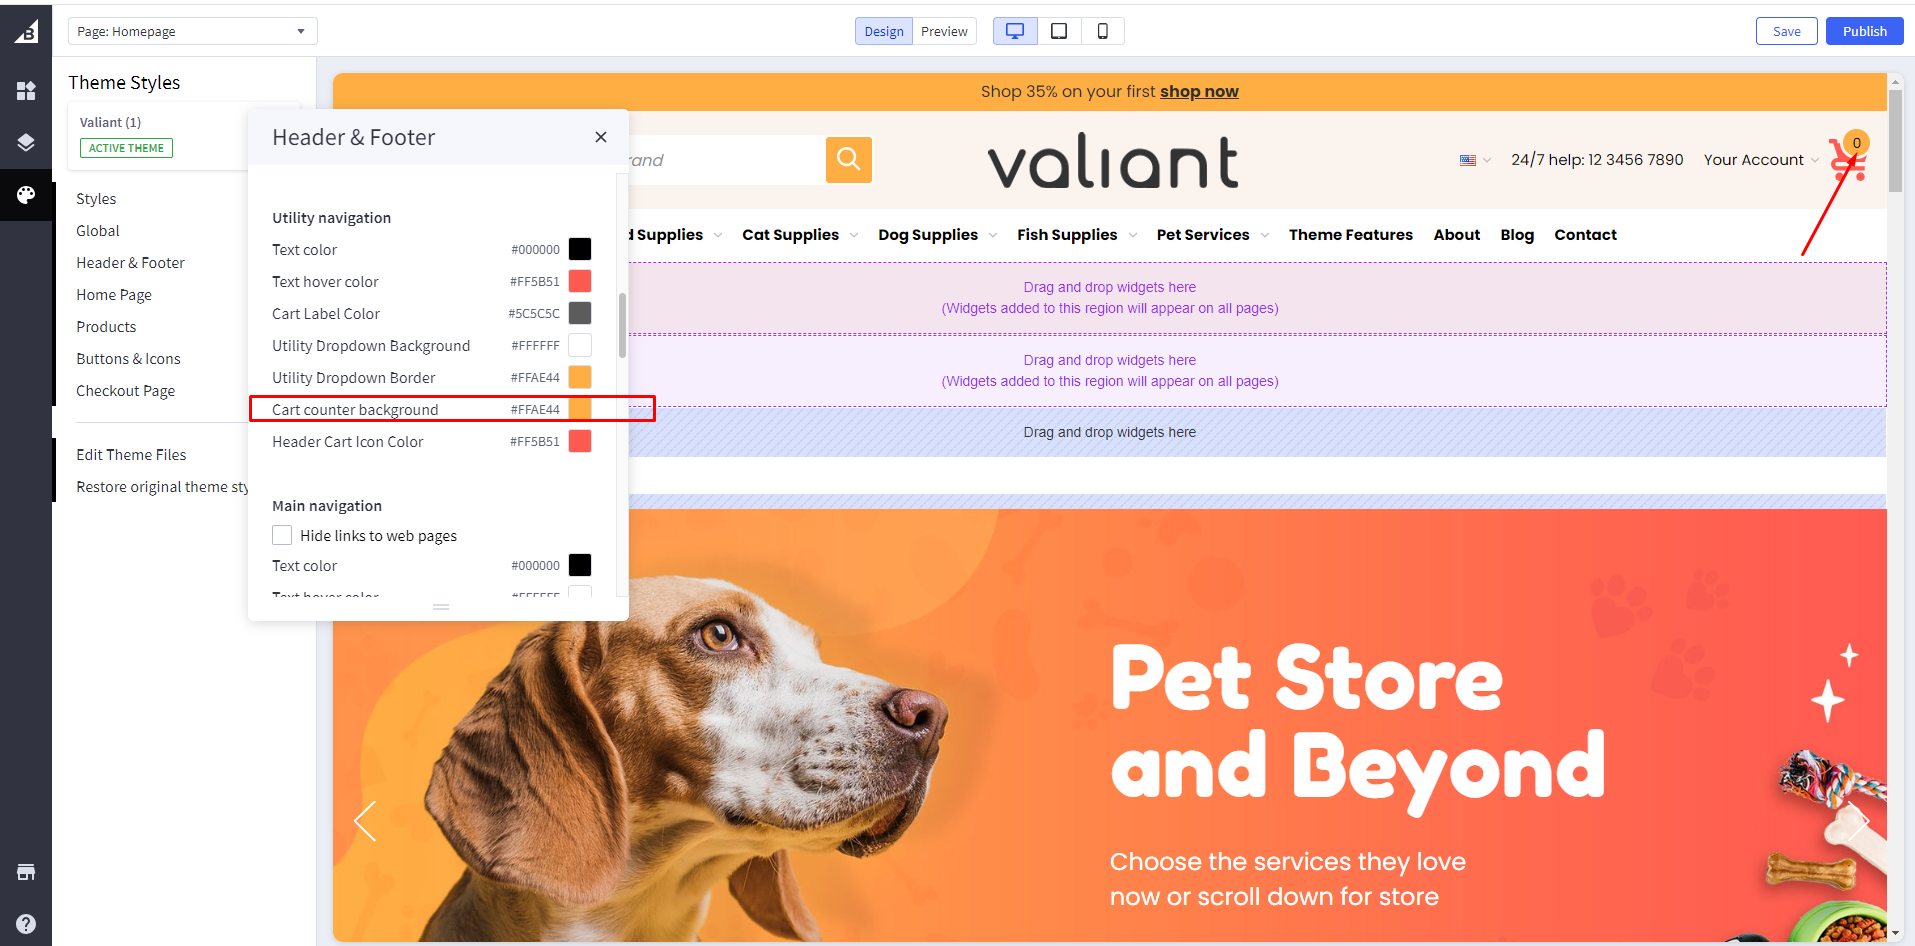
Cart counter background: Add cart counter background Color.
Footer
Pet

GYM

CBD

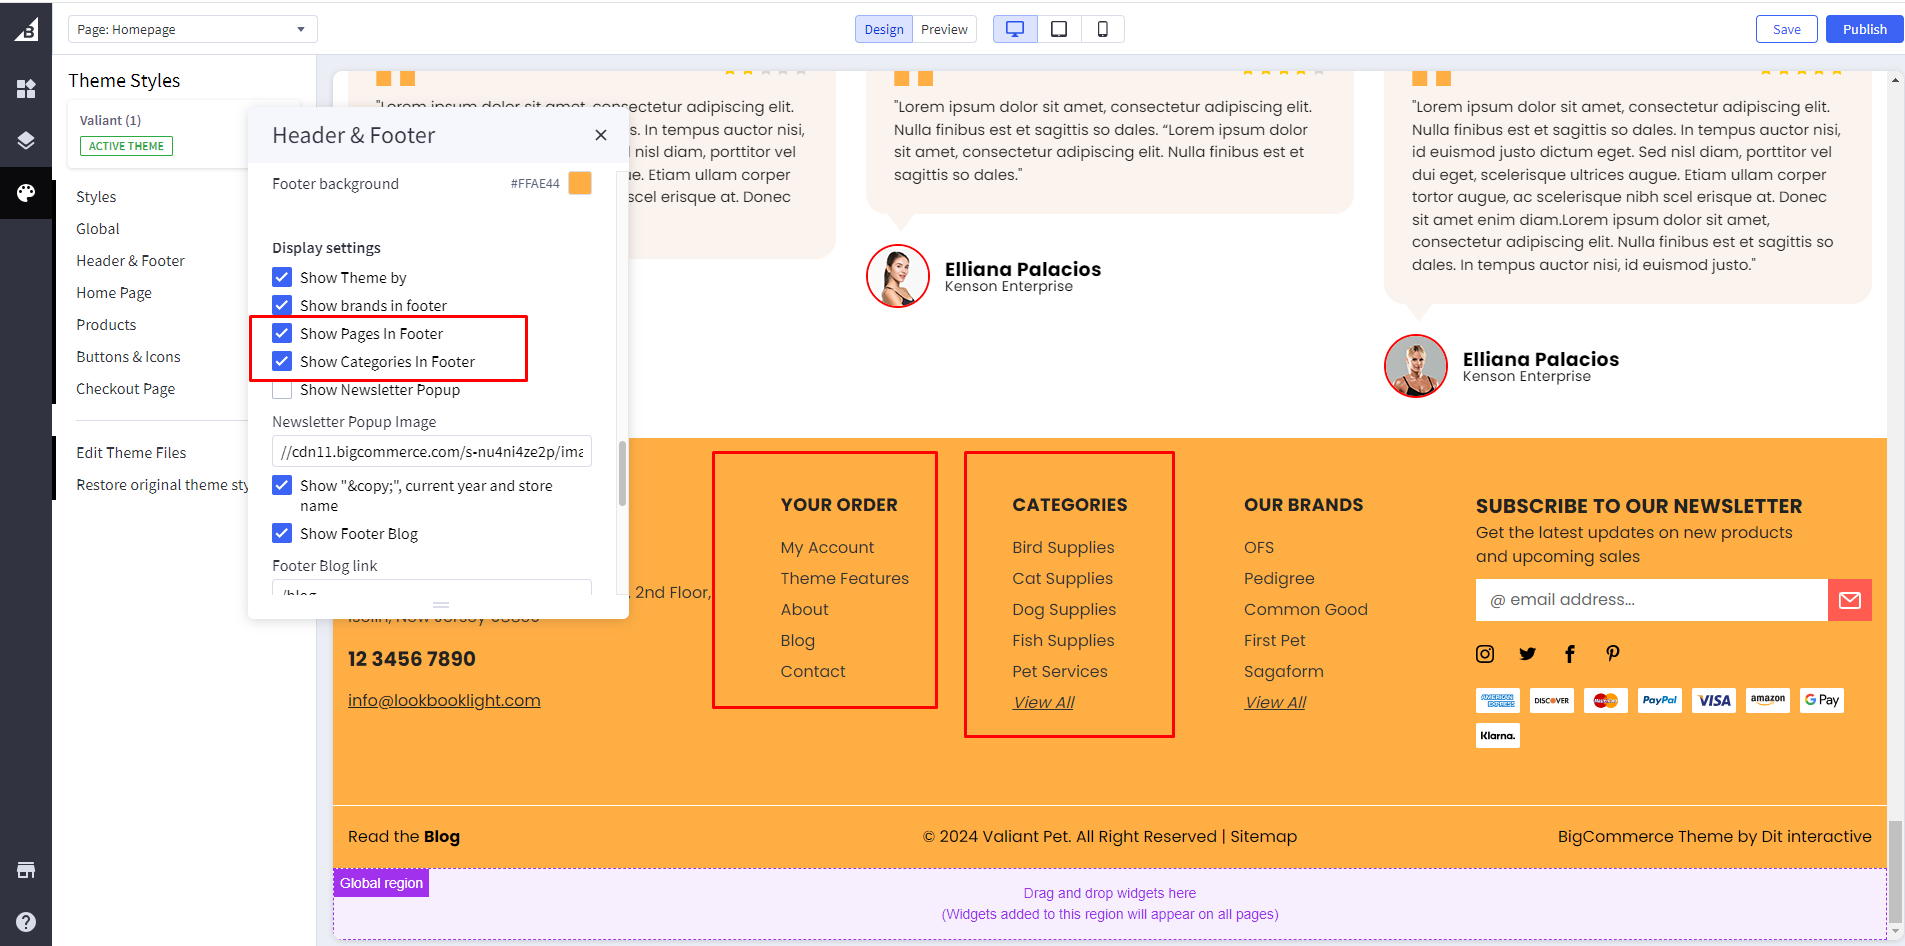
Show Pages In Footer: If checked, pages will appear in the footer.
Show Categories In Footer: If checked, Categories will appear in the footer.
Newsletter popup
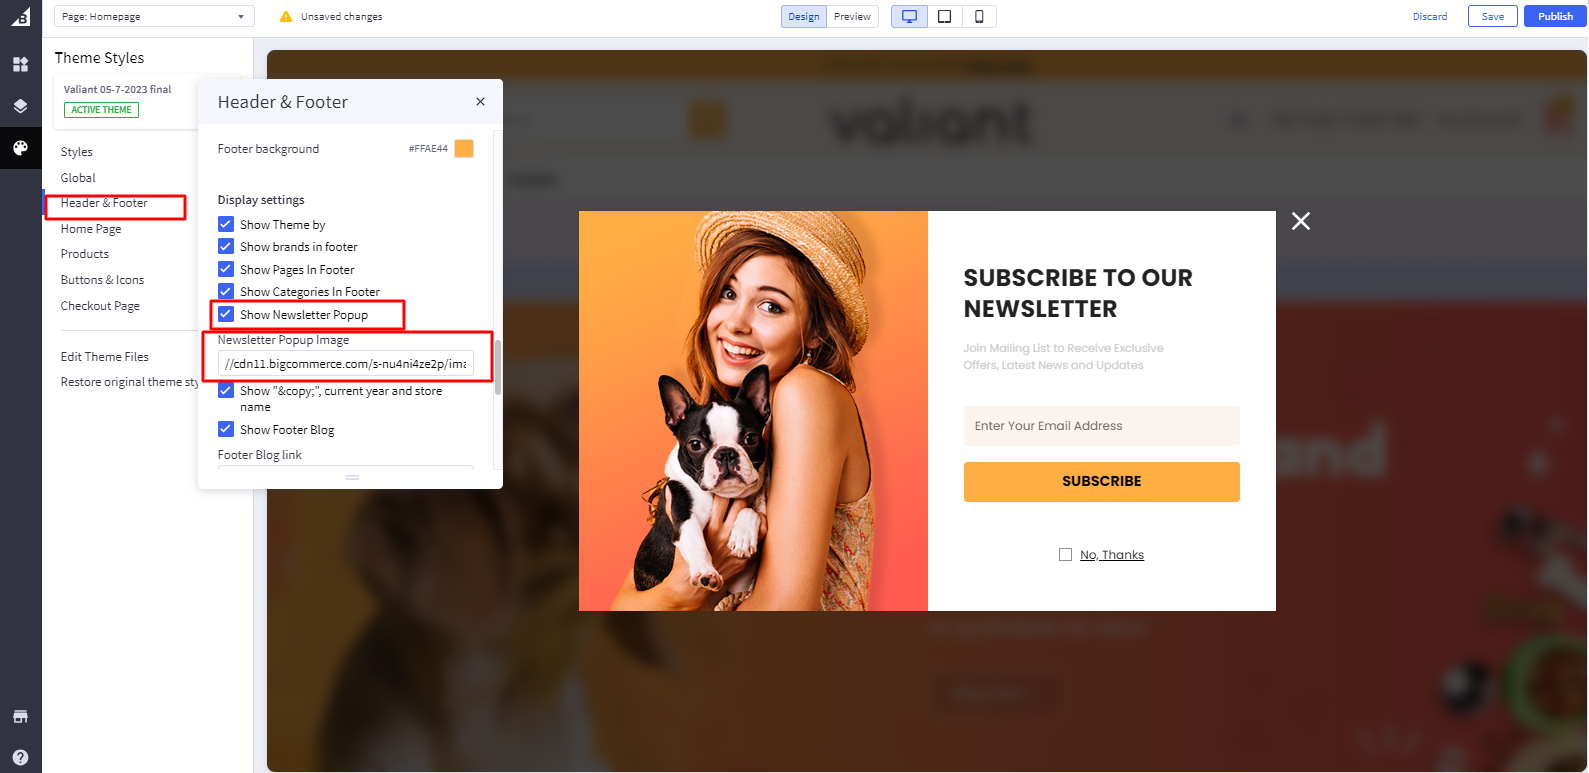
Show Newsletter Popup: If checked, it will appear as a newsletter popup. if unchecked then the newsletter appears in the footer.
Newsletter Popup Image: Add Image path in Newsletter Popup Image. (please check image related details at the last of this documents)
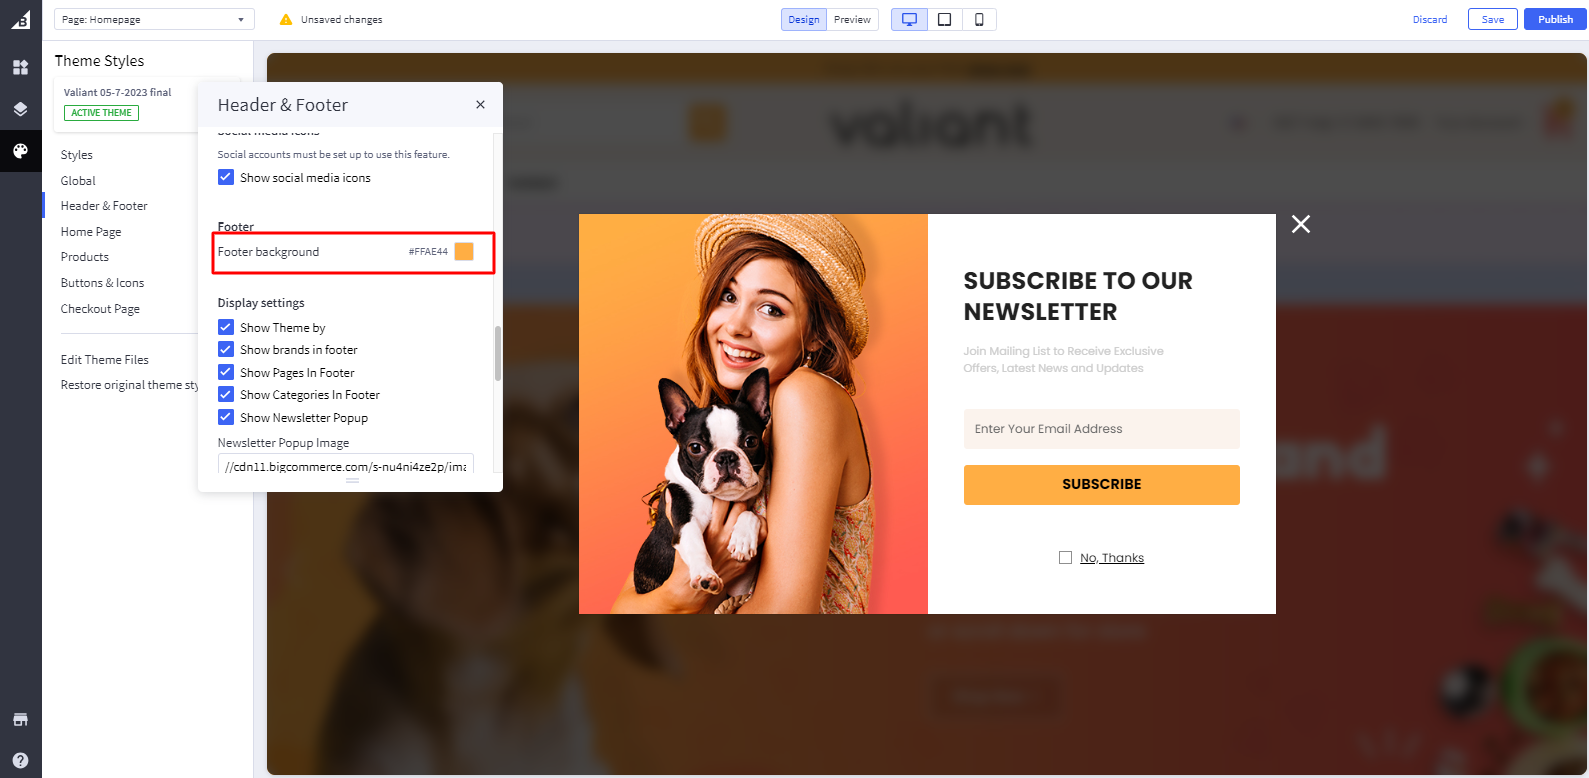
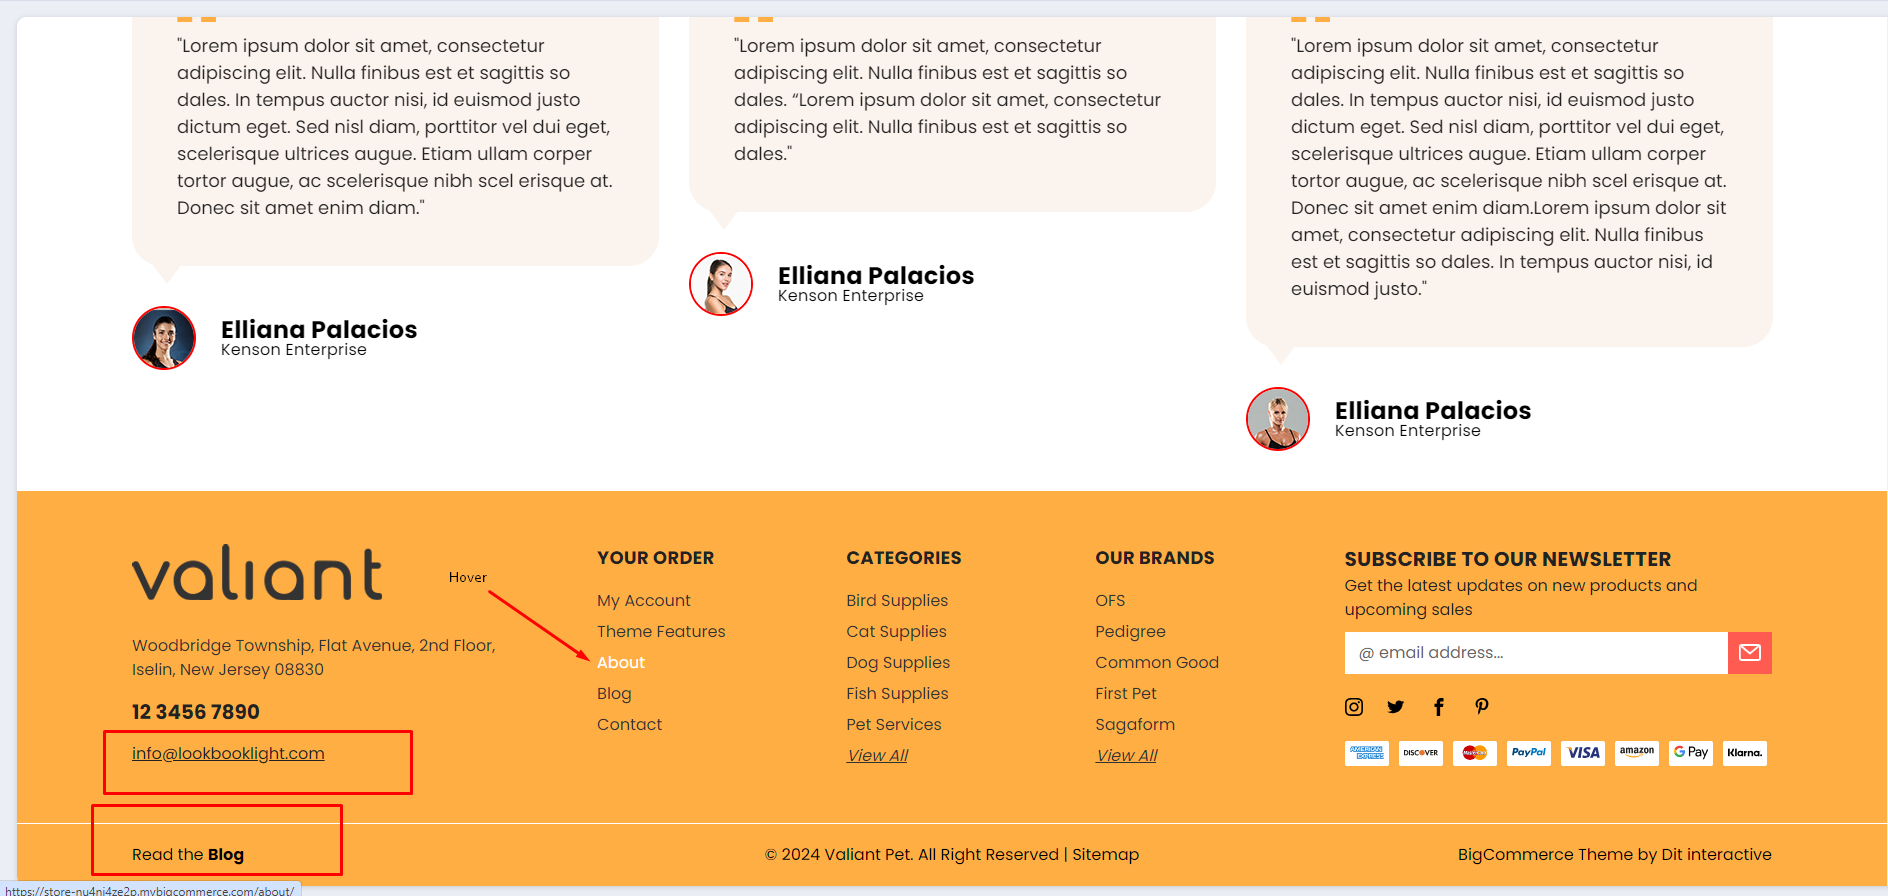
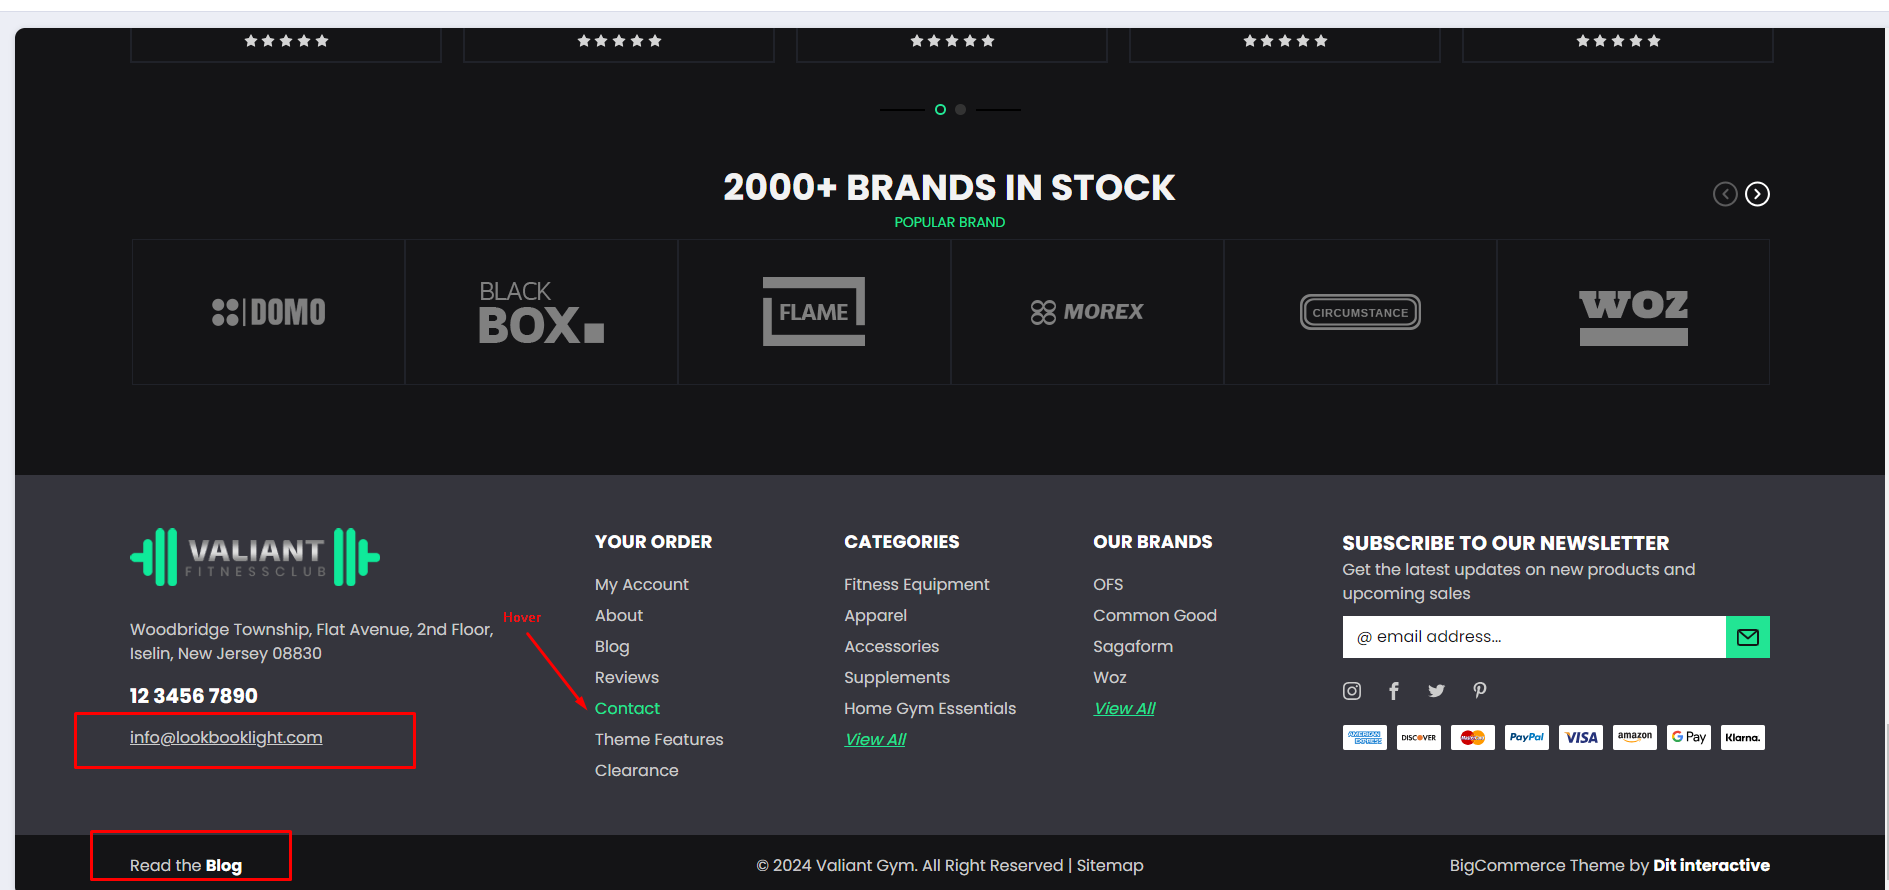
Footer Background color: Add color code in Footer background.
Pet
GYM
CBD
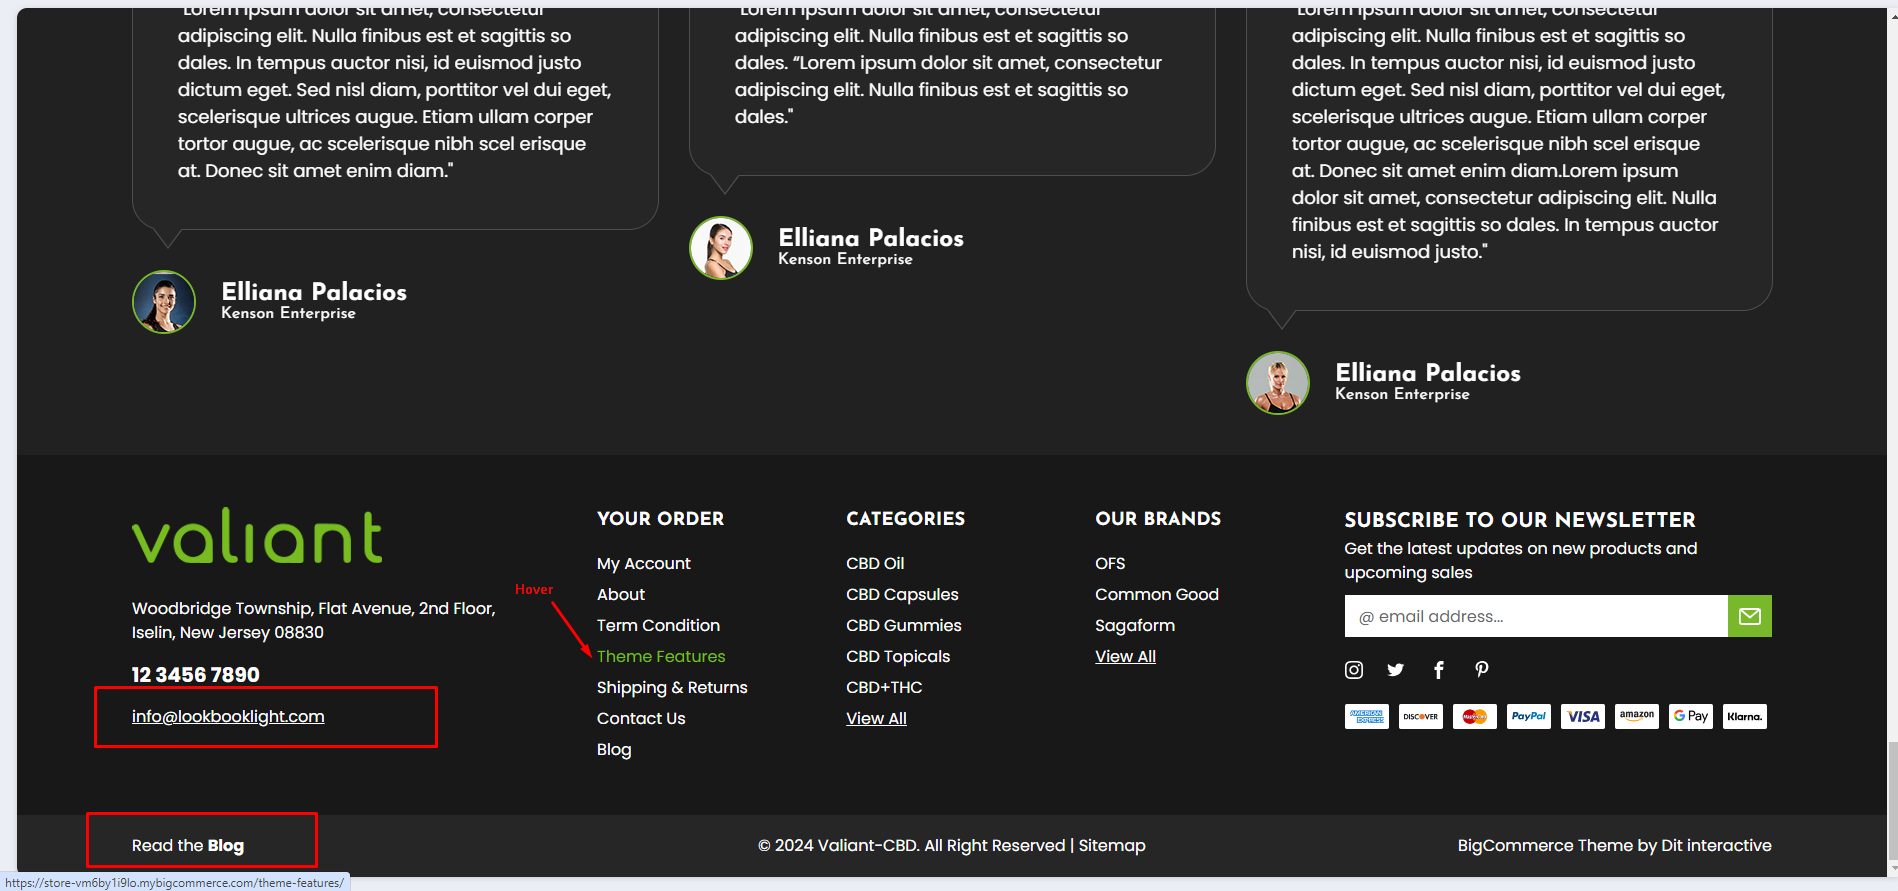
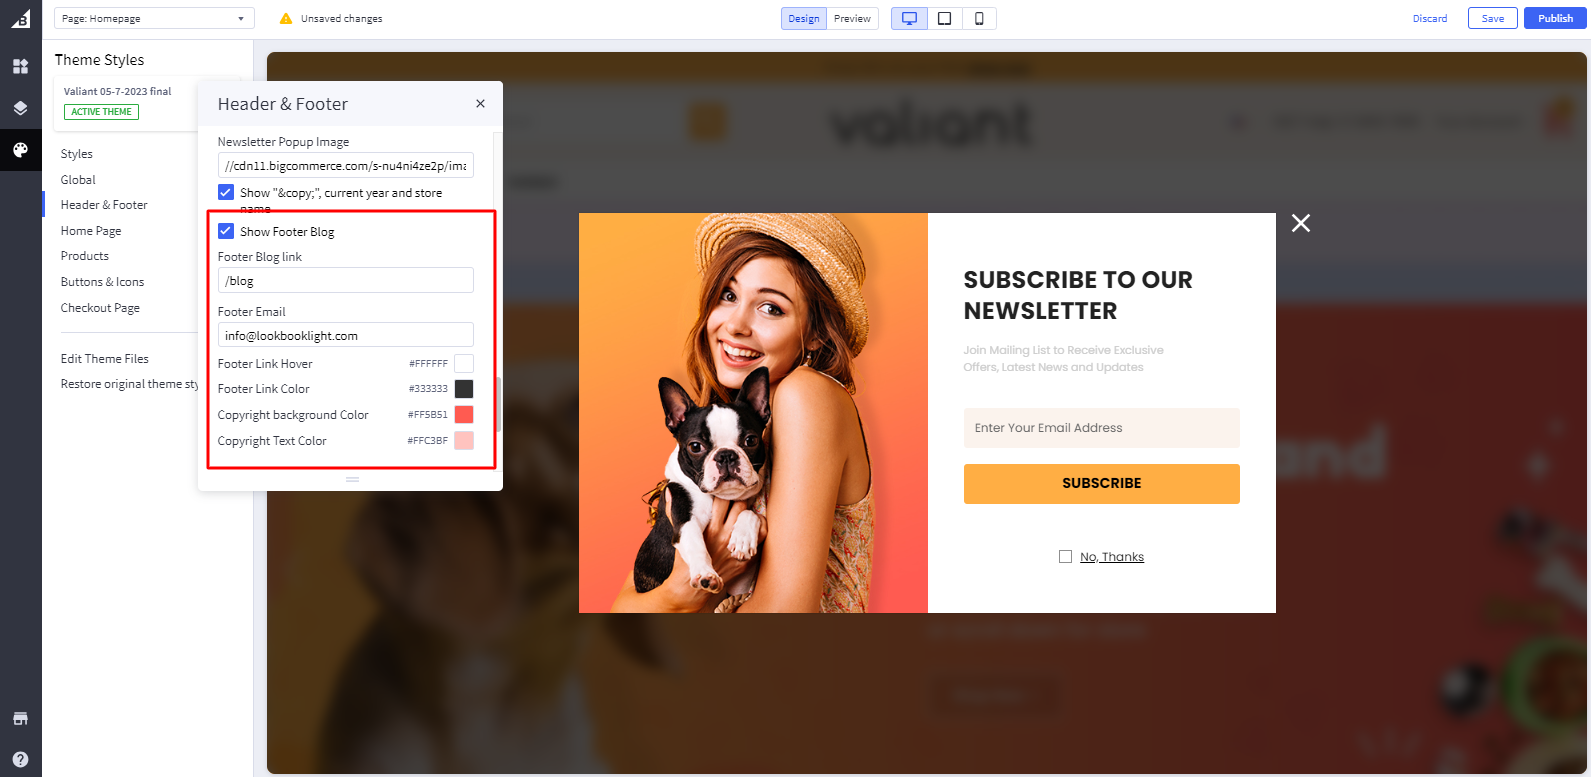
Show Footer Blog: Toggles the visibility of Show Blog Link in footer.
Footer Blog link: Add Blog Link, it will be visible in footer.
Footer Email: Add email address, it will be visible in footer.
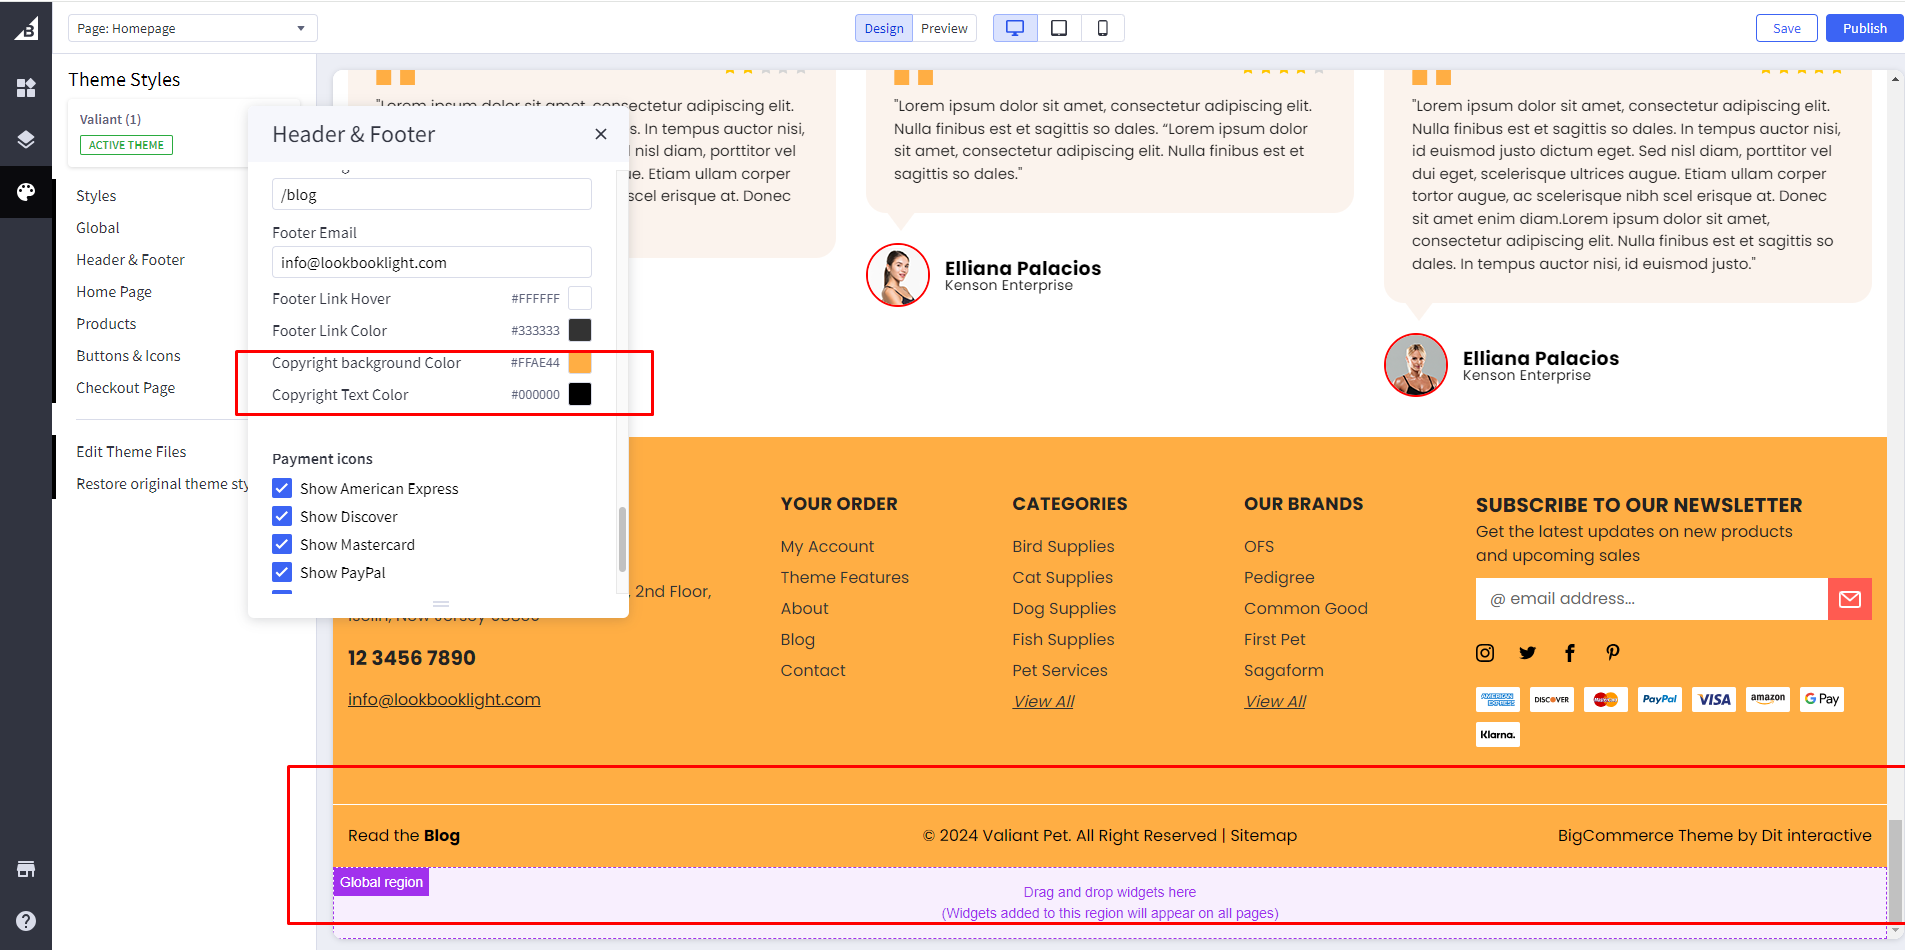
Footer Link Hover: Add footer link hover color.
Footer Link Color: Add footer Link color.
Pet
GYM
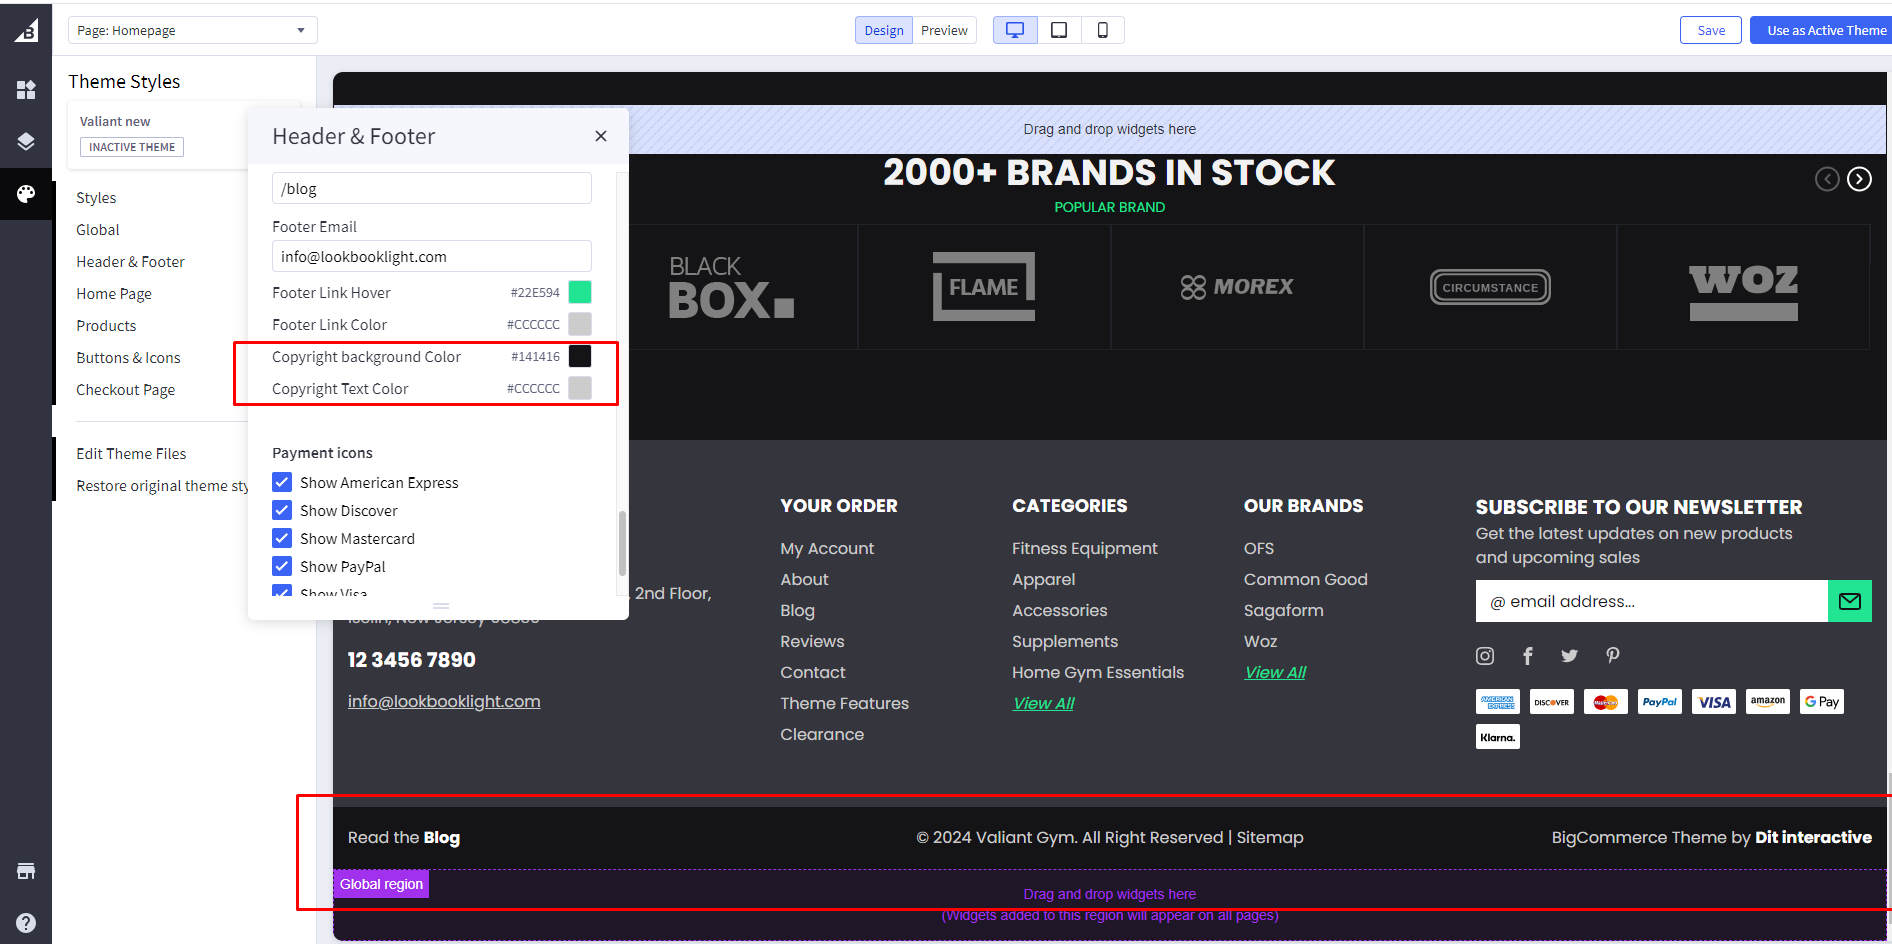
CBD
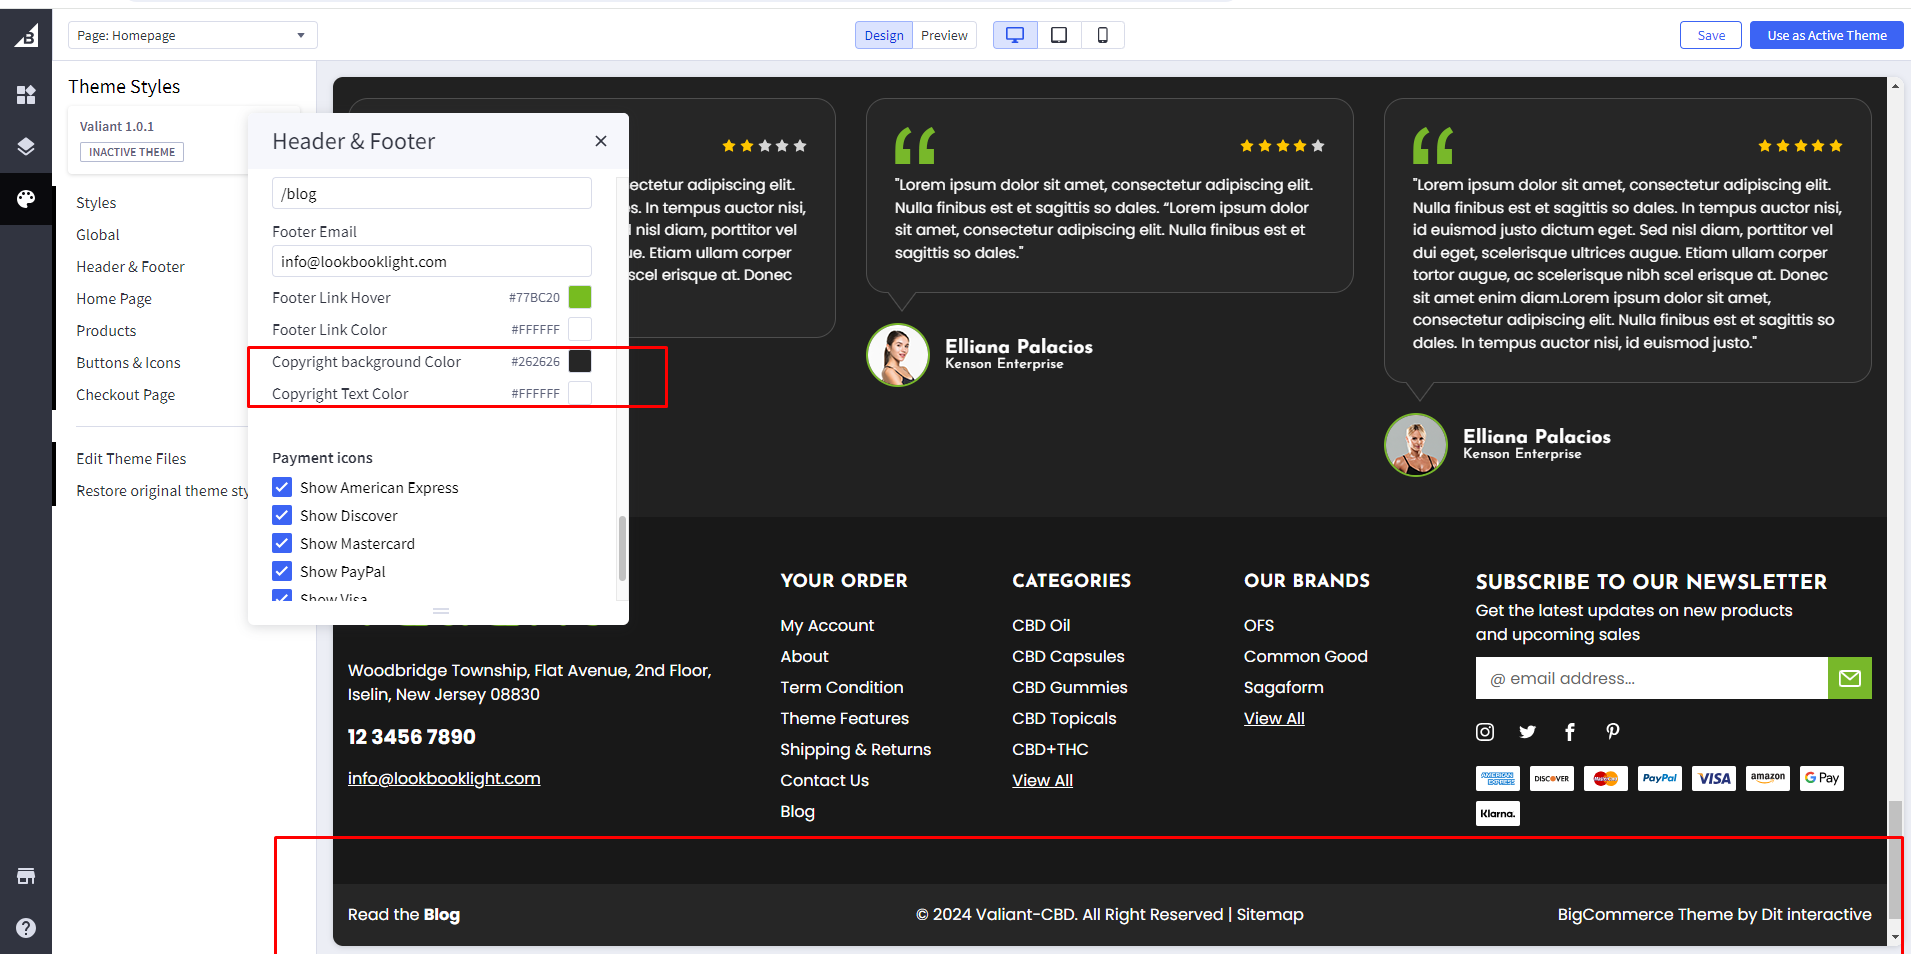
Copyright Background Color: Add copyright background color.
Copyright Text Color: Add copyright text color.
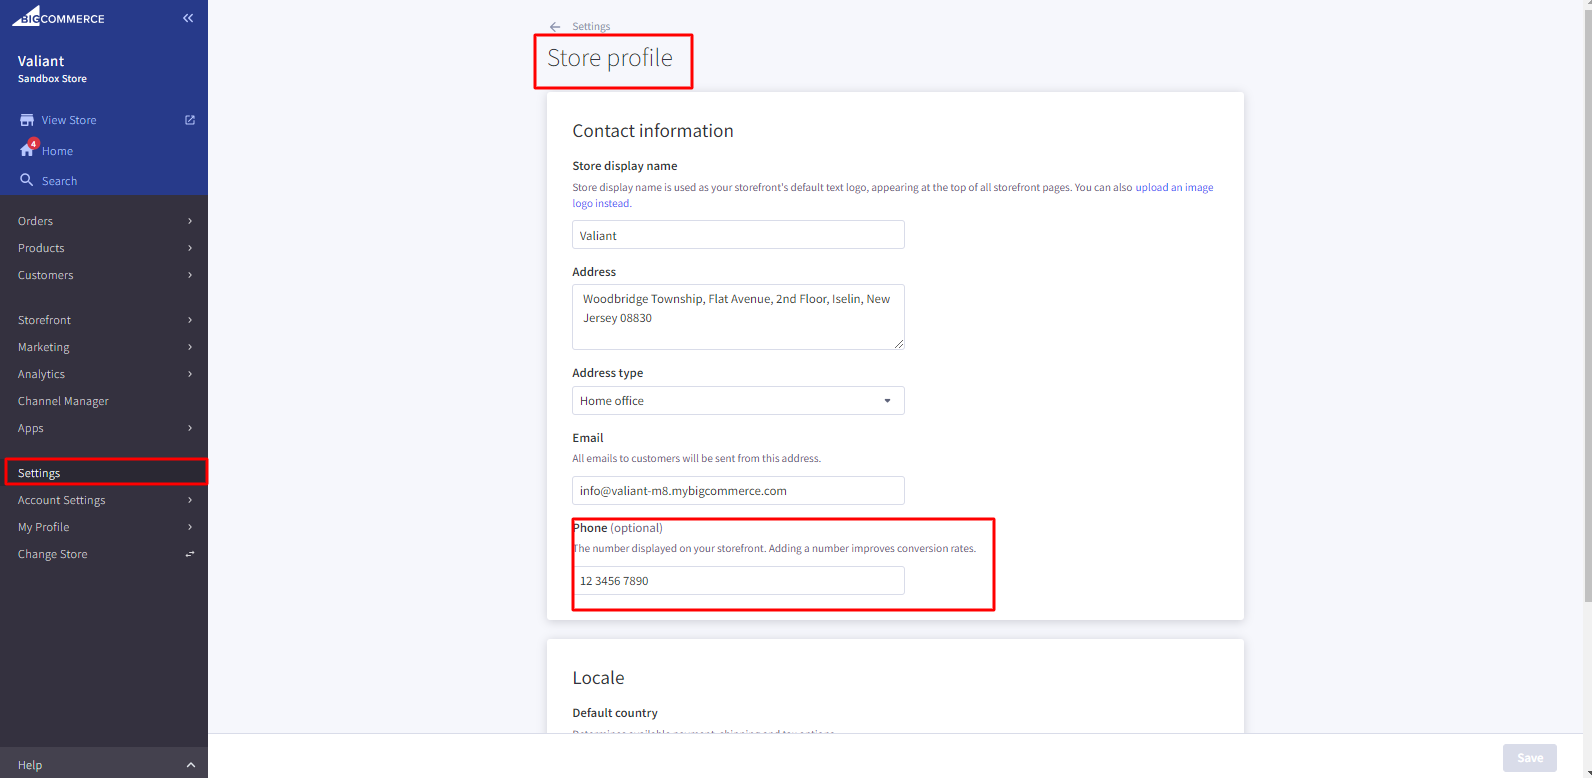
Phone Number: Add phone number in Admin Panel settings > store profile.
Home Page
In your control panel, go to Storefront > My Themes, and click the blue "Customize" button to launch Theme Editor.
In the left hand column of the Theme Editor, click the panel labelled 'Home Page'.
Hero Carousel Section

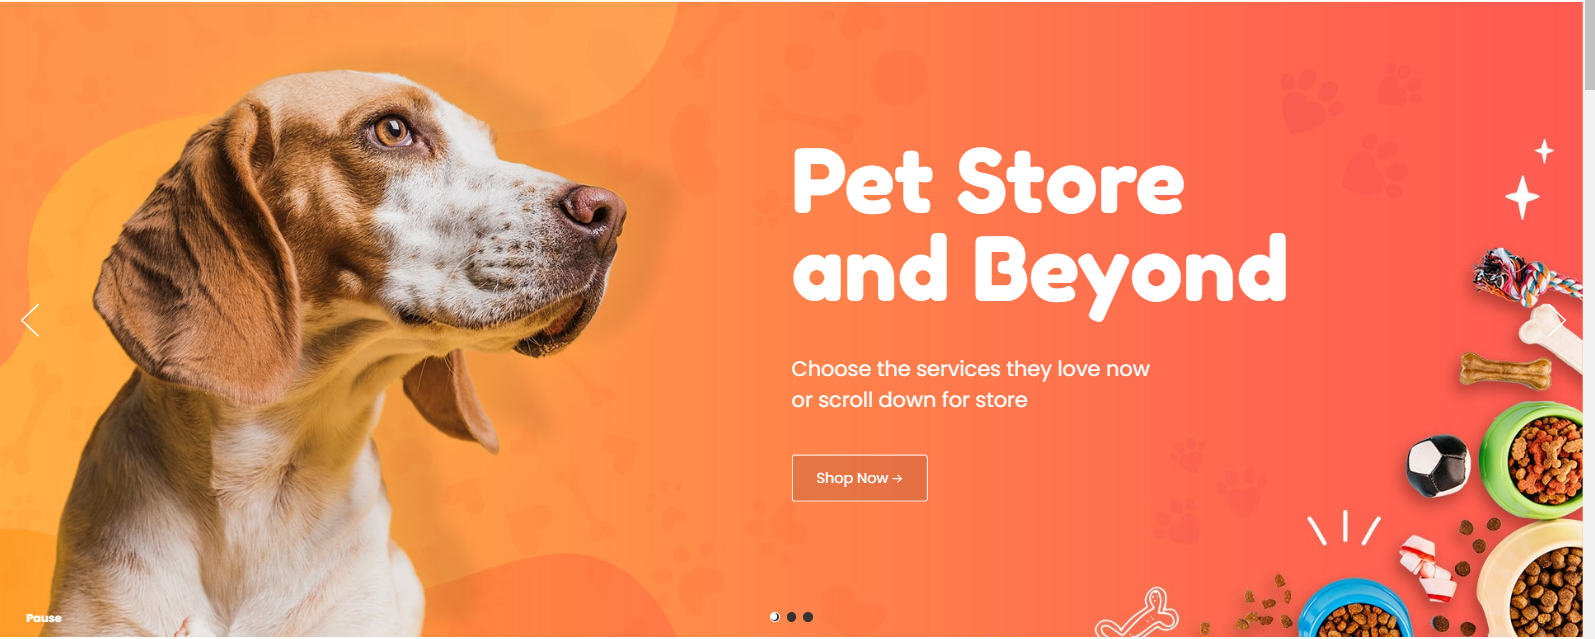
For PET:
Upload an image as image object on the left side. So, image content will appear clearly. i.e.
For GYM:
Upload an image as image object on the left side. So, image content will appear clearly. i.e.

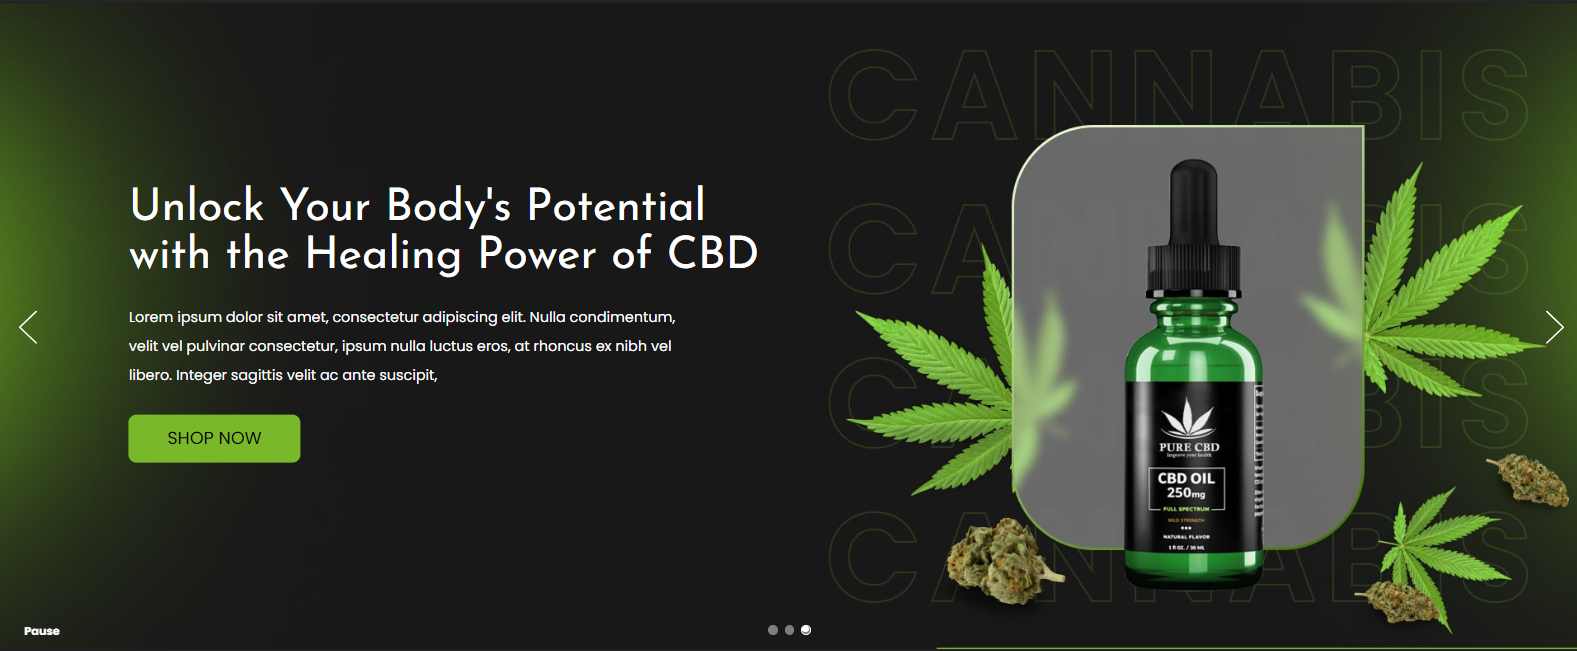
For CBD:
Upload an image as image object on the right side. So, image content will appear clearly. i.e.
Category Section
Pet

GYM
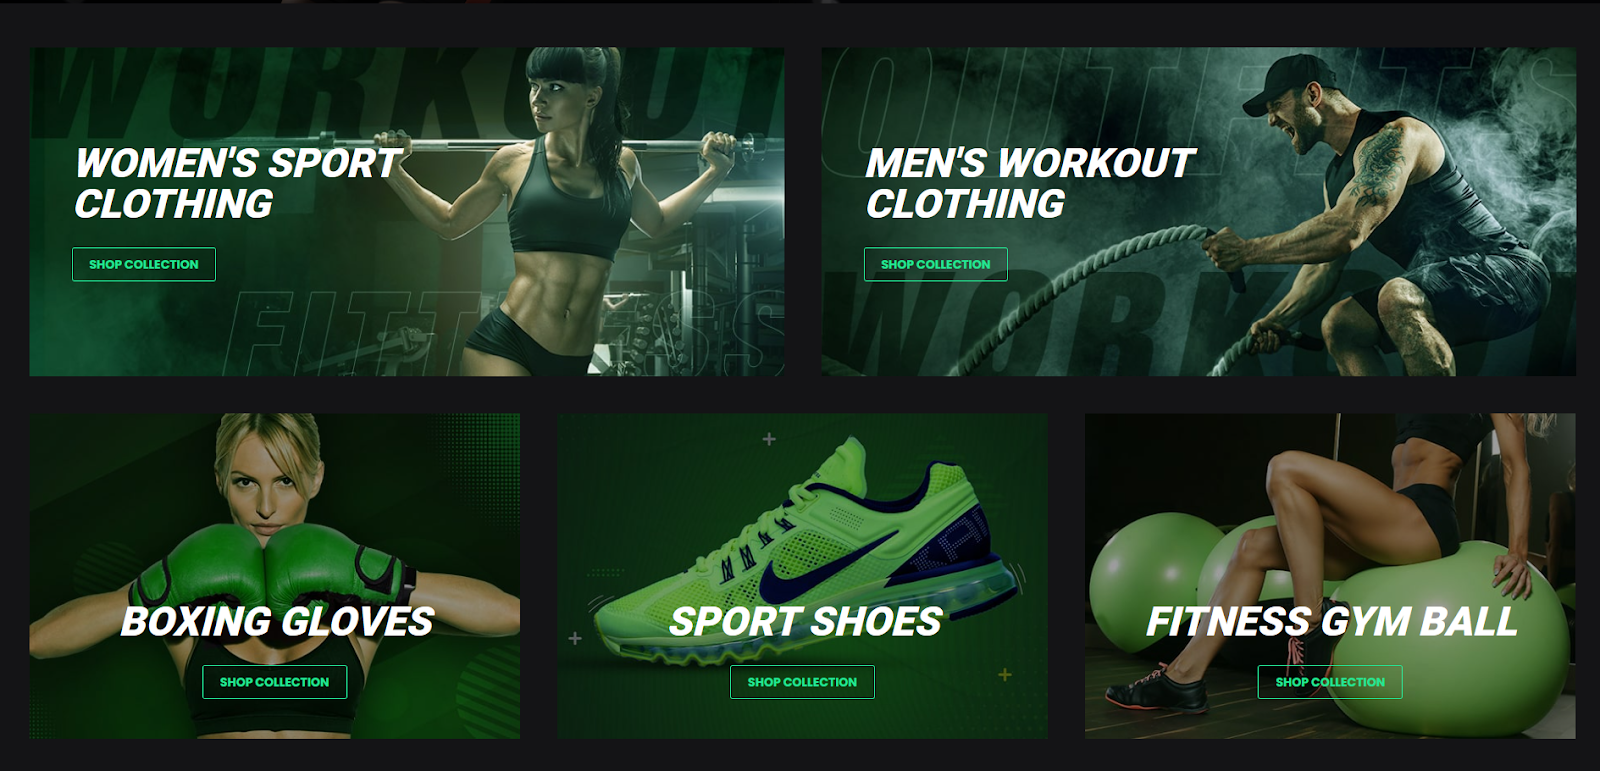
CBD
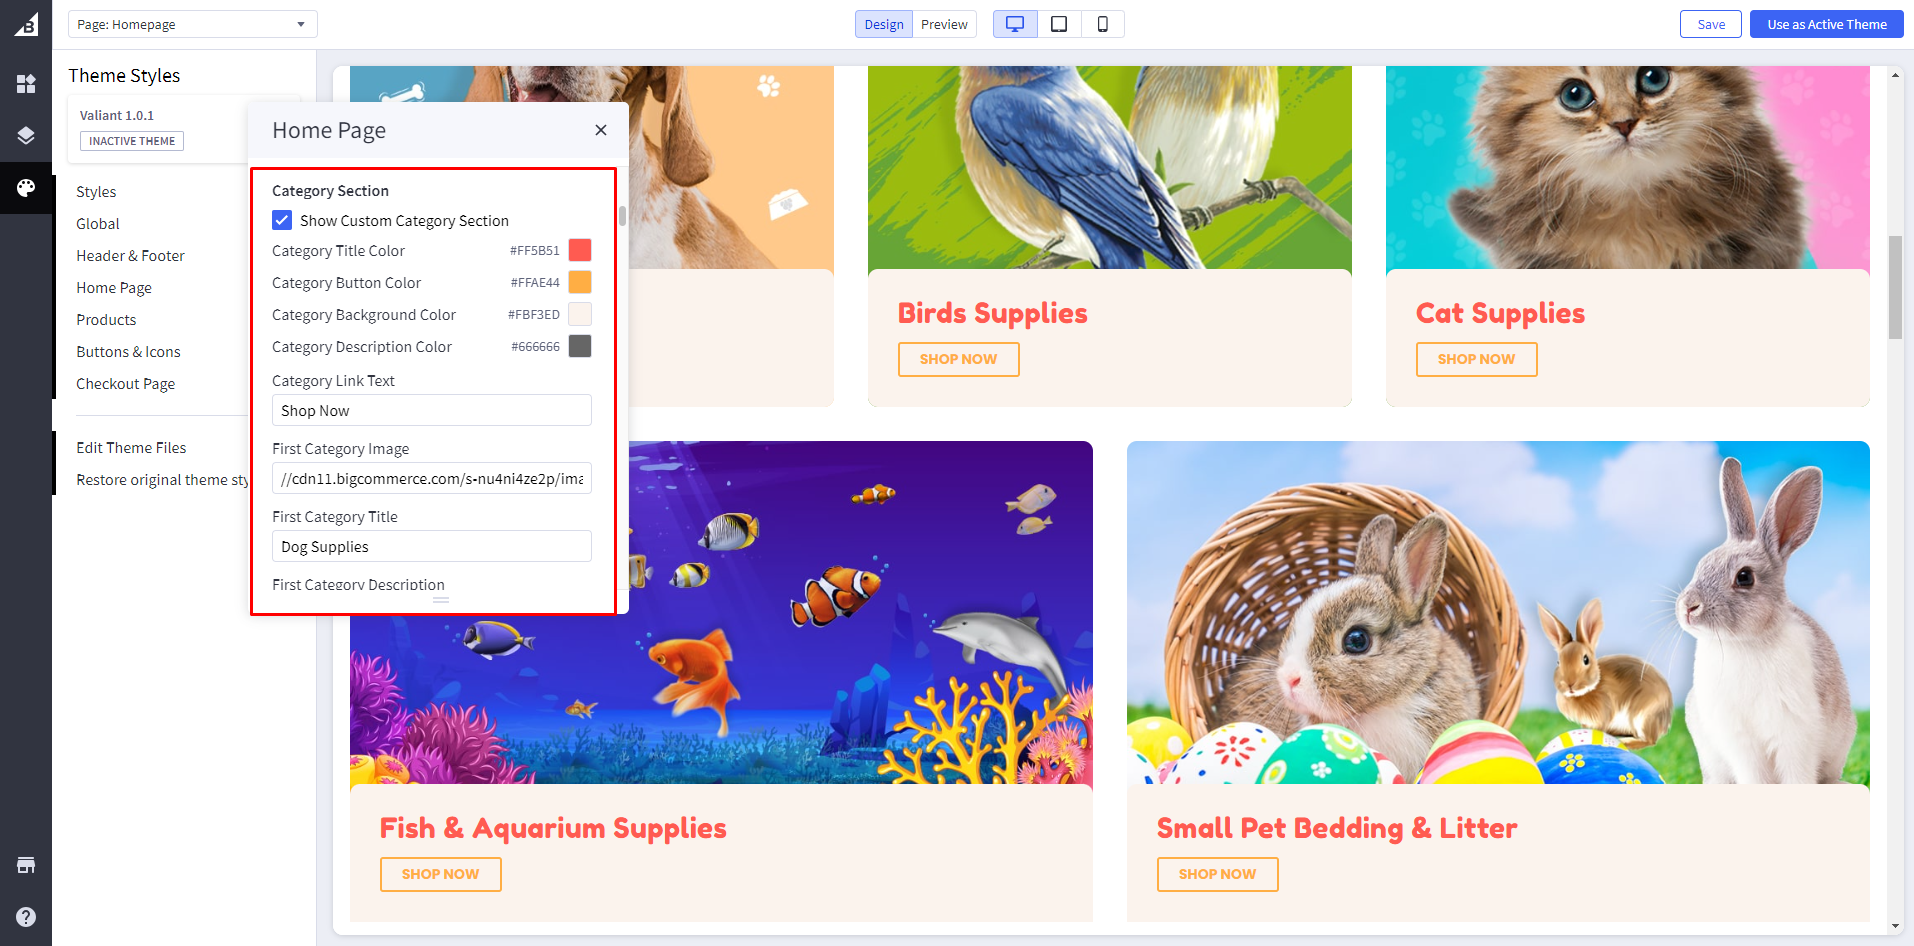
- Show Custom Category Section: Toggles the visibility of Show Custom category section.
- Category Title Color: Add category Title Color.
- Category Button Color Add category Button Color.
- Category Background Color Add category Background Color.
- Category Description Color Add category Description Color.
- Button Text: Add Button Text in Category Link Text i.e. “Shop Now”.
- Category Image: Add image path in Category Image. (please check image related details at the last of this documents)
- Category Title: Add category Title in Category Title.
- Category Description: Add category Description in Category Description.
- Category Link: Add category Link in Category Link.
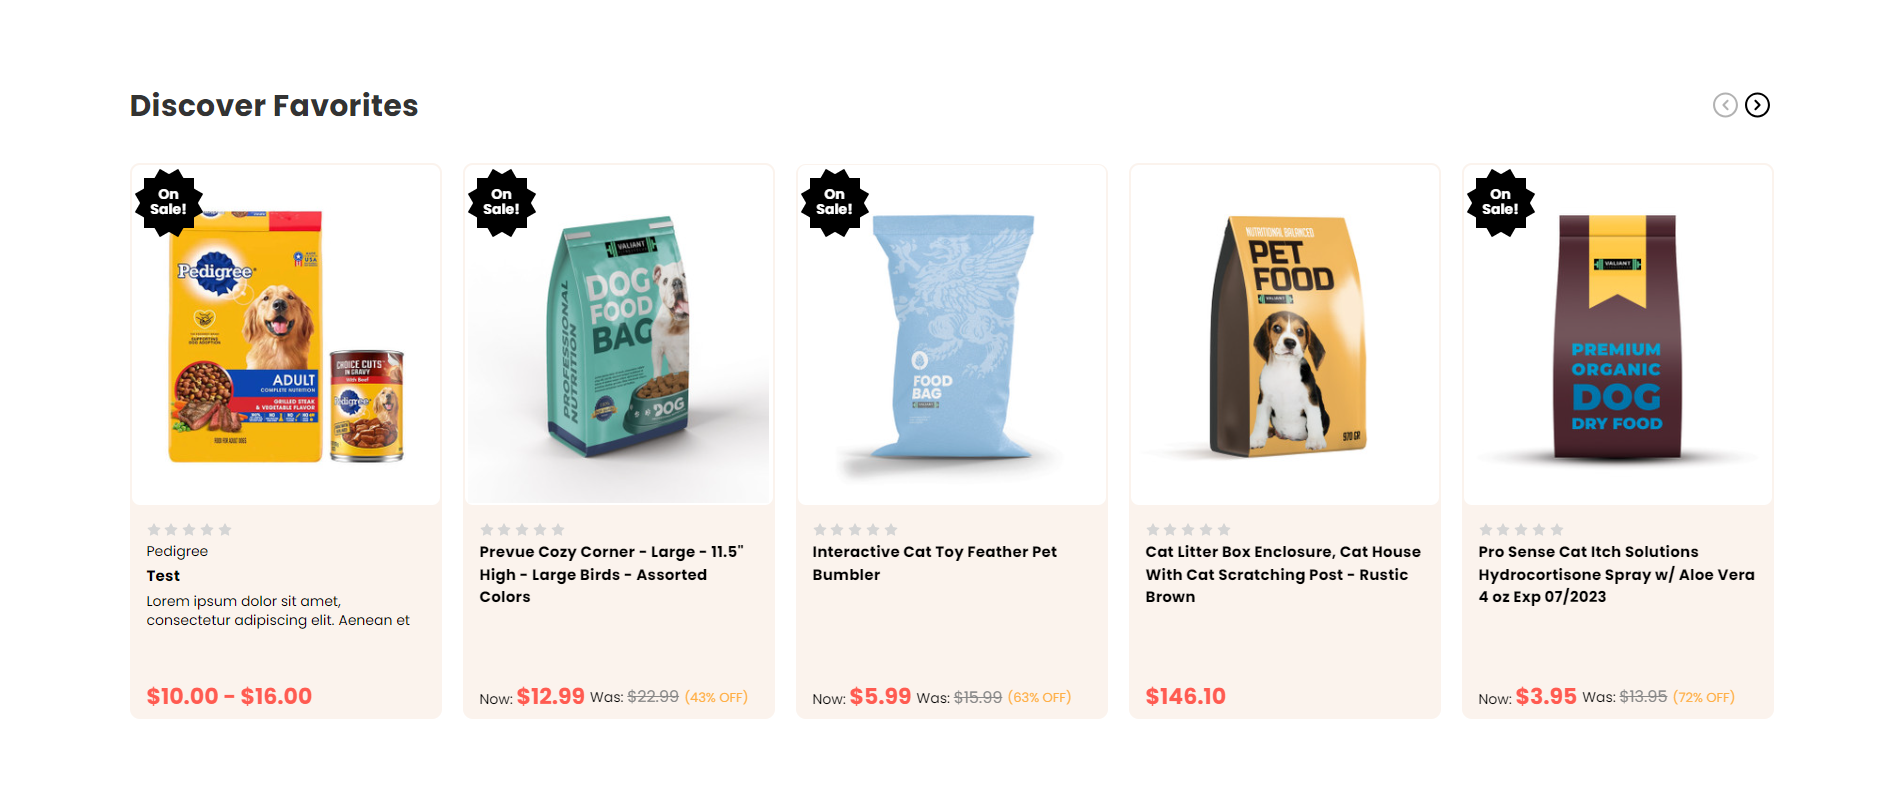
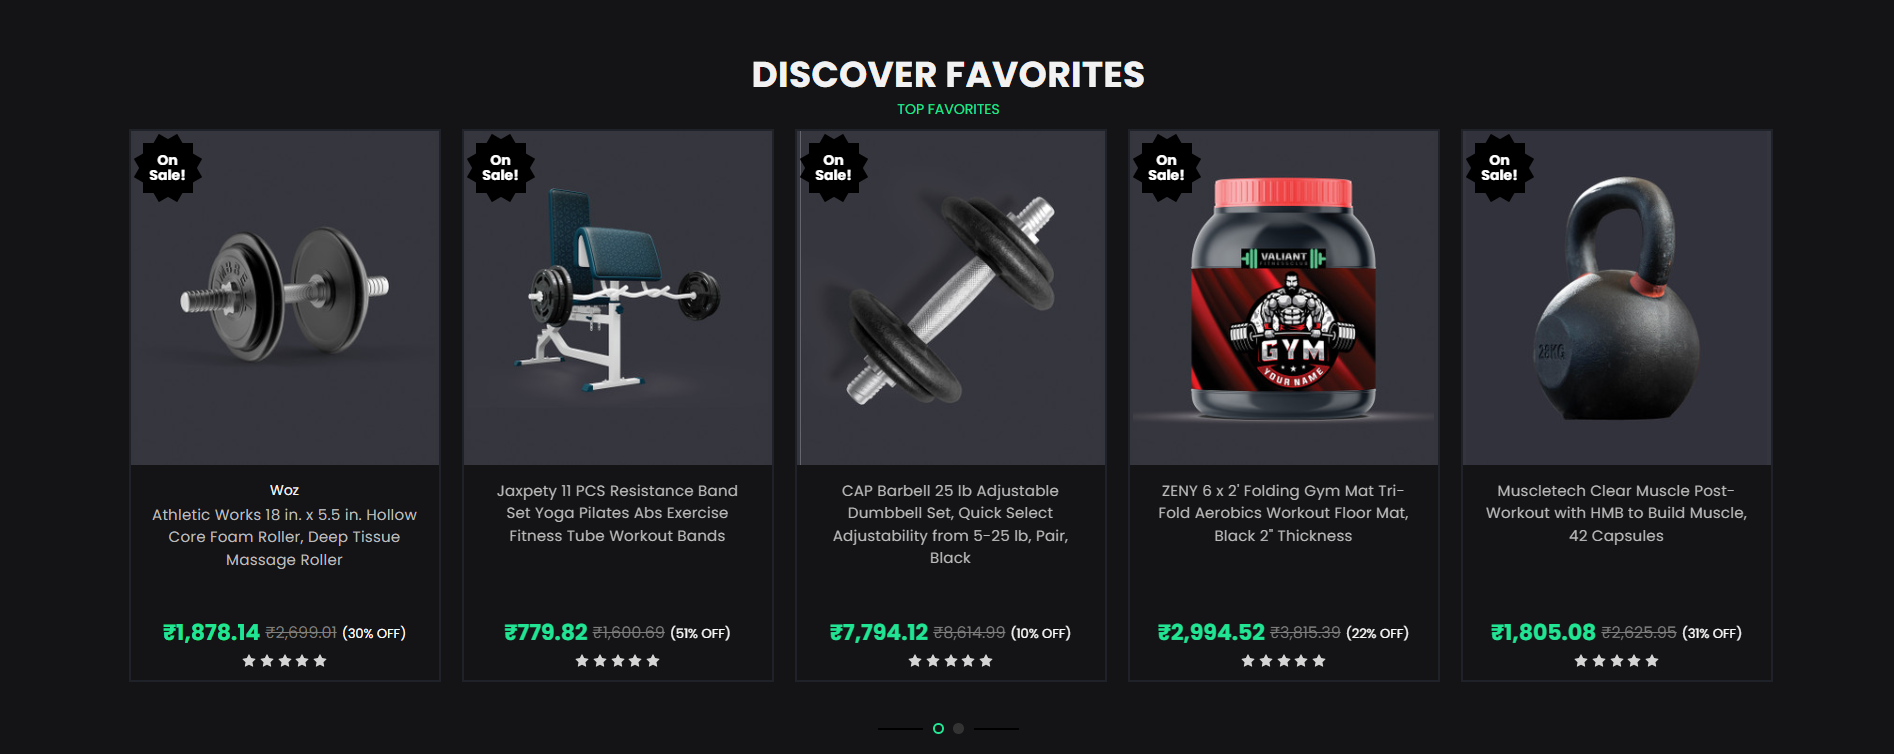
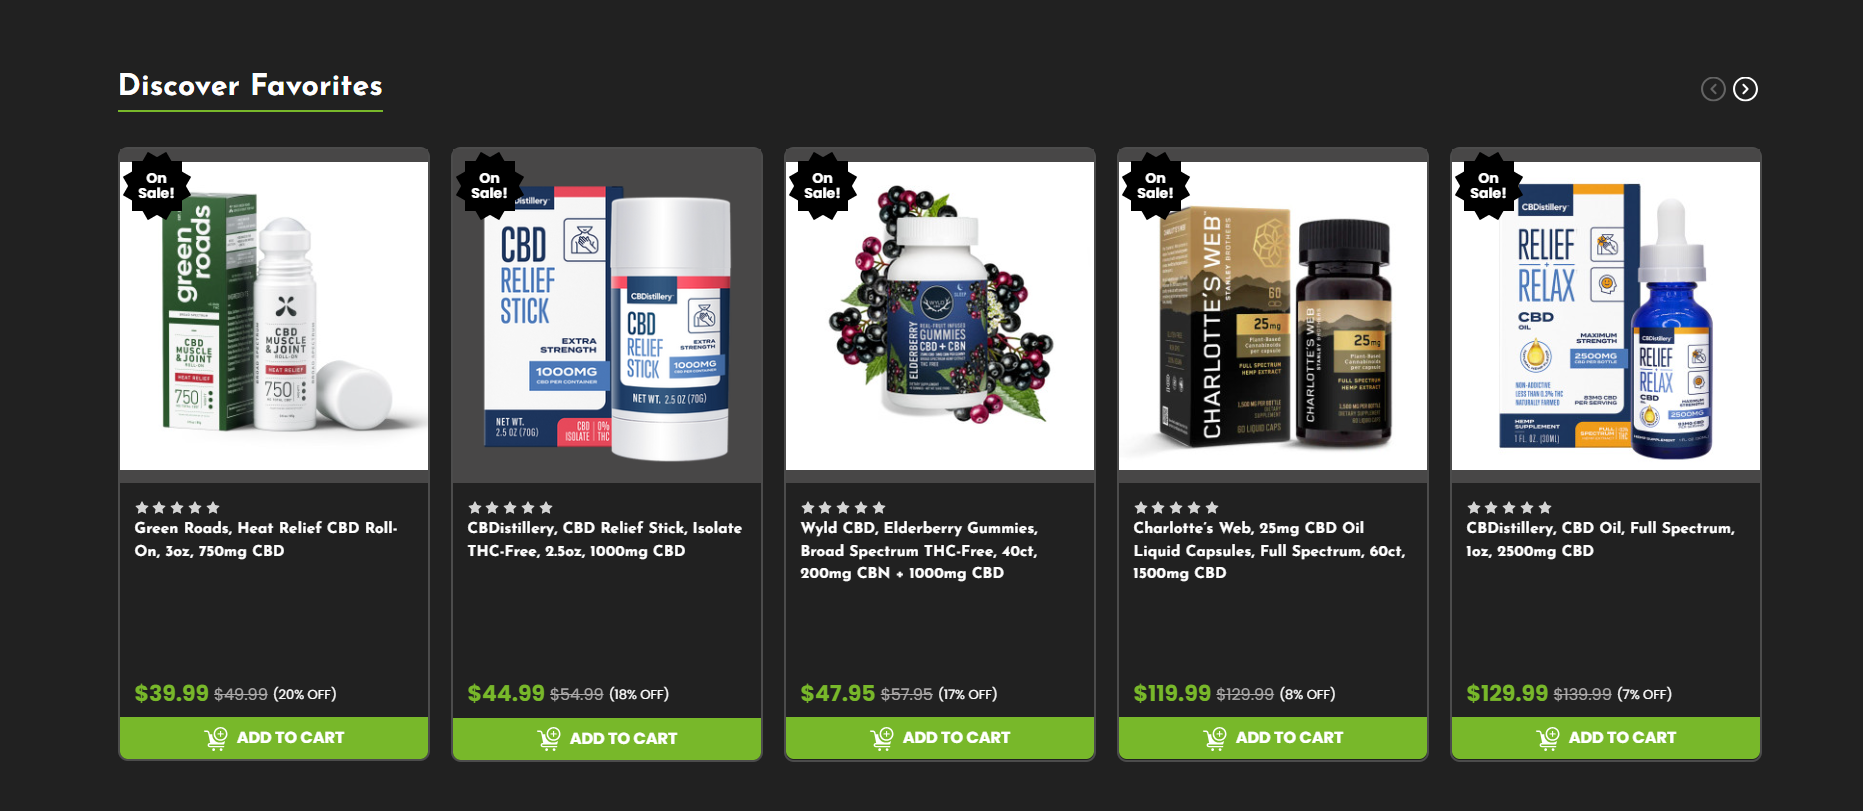
Discover Favorites
Pet
GYM
CBD
You can add featured products in the discover favorites section as per default bigcommerce feature.
Steps to Generate and Add Code to Theme Files:
Generate Code on CodePen:
Begin by entering values in the Featured Section and Featured Section Subheading fields displayed in the CodePen editor.
Customize the input fields to match your featured section content as required.
Preview the Final Output:
On the right-hand side, under "Final Output," you will see how the generated code behaves based on the values you've entered.
Copy the Code:
Once you are satisfied with the output, click the "Copy Code" button to copy the generated code to your clipboard.
Add Code to Theme Files:
Navigate to your theme's files by going to Channels > Themes > Advanced > Edit Theme Files.
Find the appropriate language file, for example, en.json for text changes.
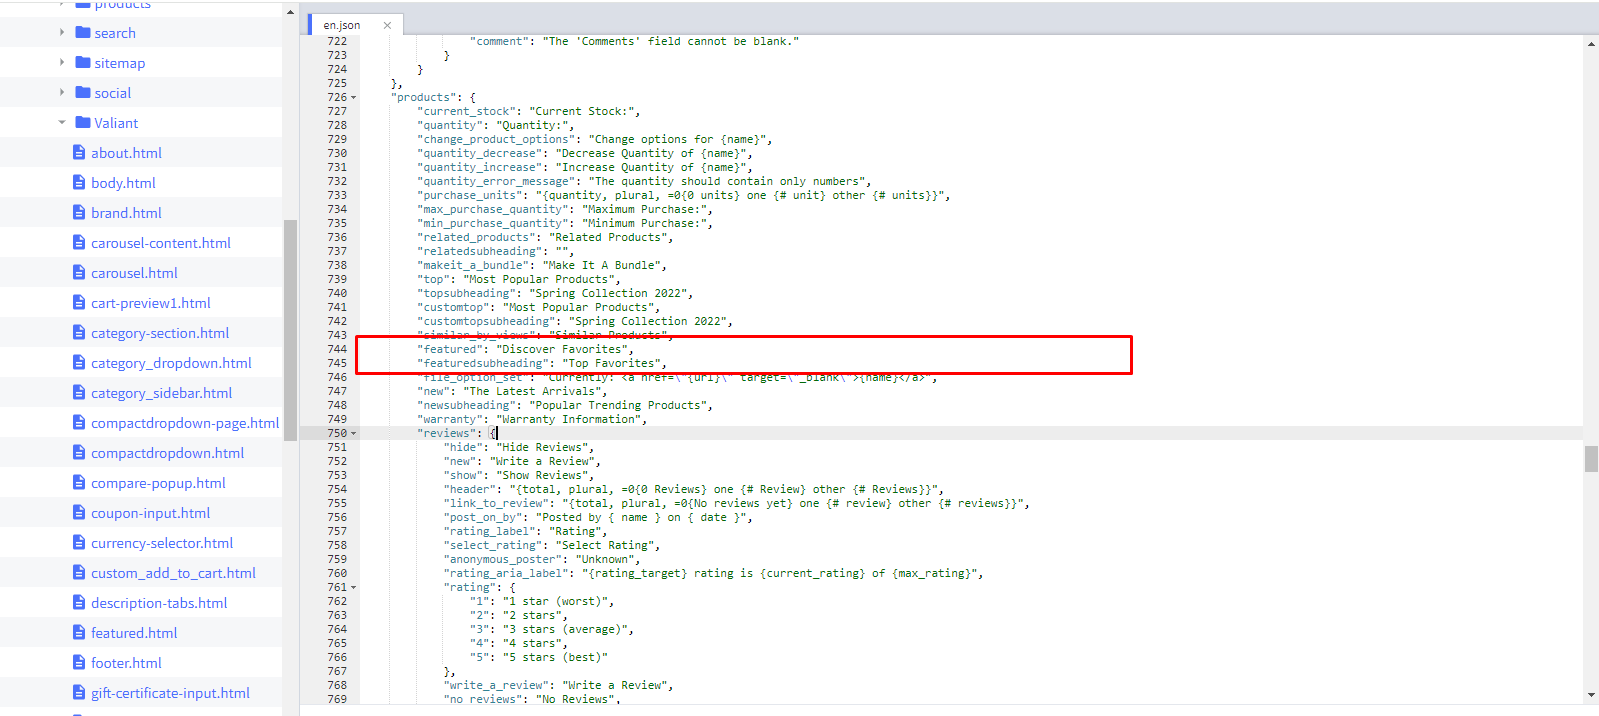
Paste the copied code in the relevant section of the file, ensuring you add the content under the correct keys, such as featured-section or featured-subheading.
Save and Apply:
Once the code is added to the respective files, save your changes.
Reload your theme or site to verify that the featured section and subheading have been updated and display as expected.
See the Pen Featured Section - Code Generator by bigcommerce_ditindia (@bigcommerce_ditindia) on CodePen.
Discover Favorites Heading: Update heading in products > featured.
Discover Favorites Sub Heading(only for GYM): Update sub heading in products >
featuredsubheading.
Most Popular Products
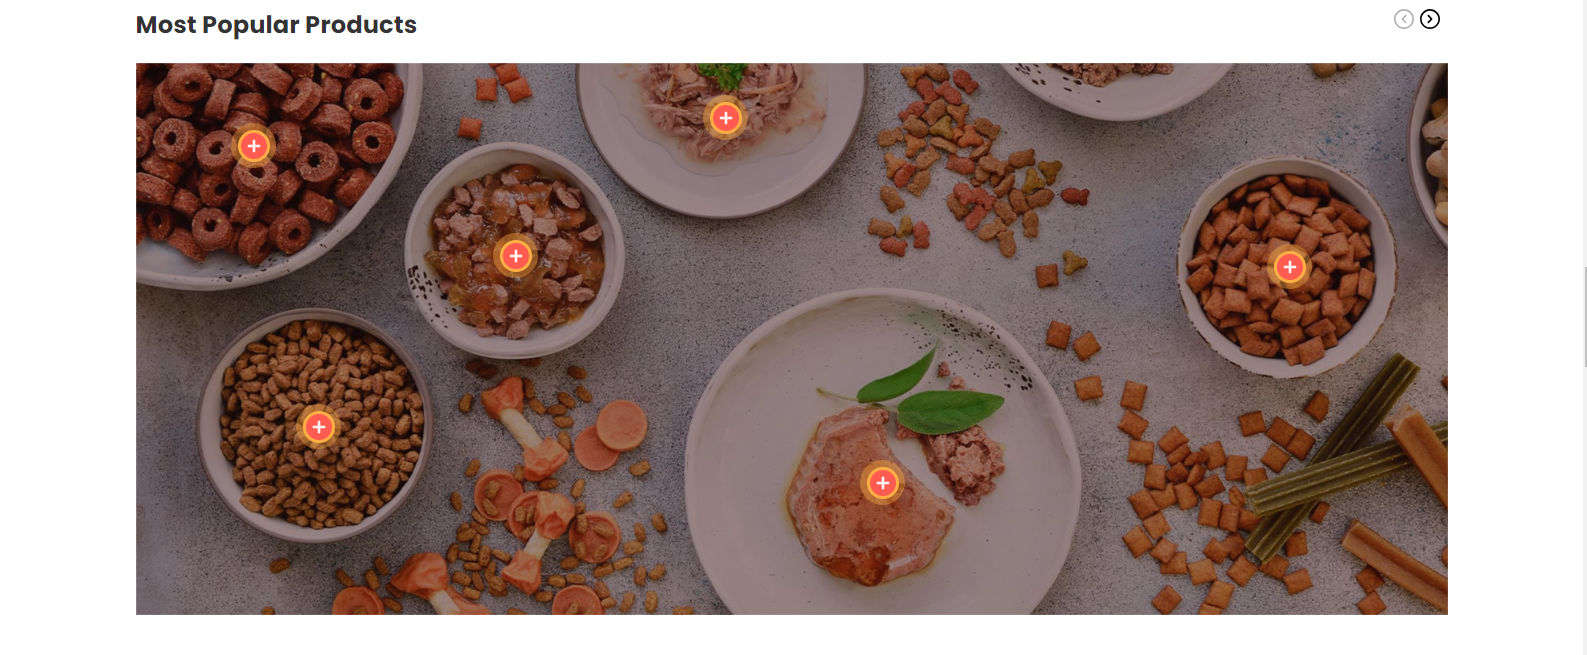
Pet
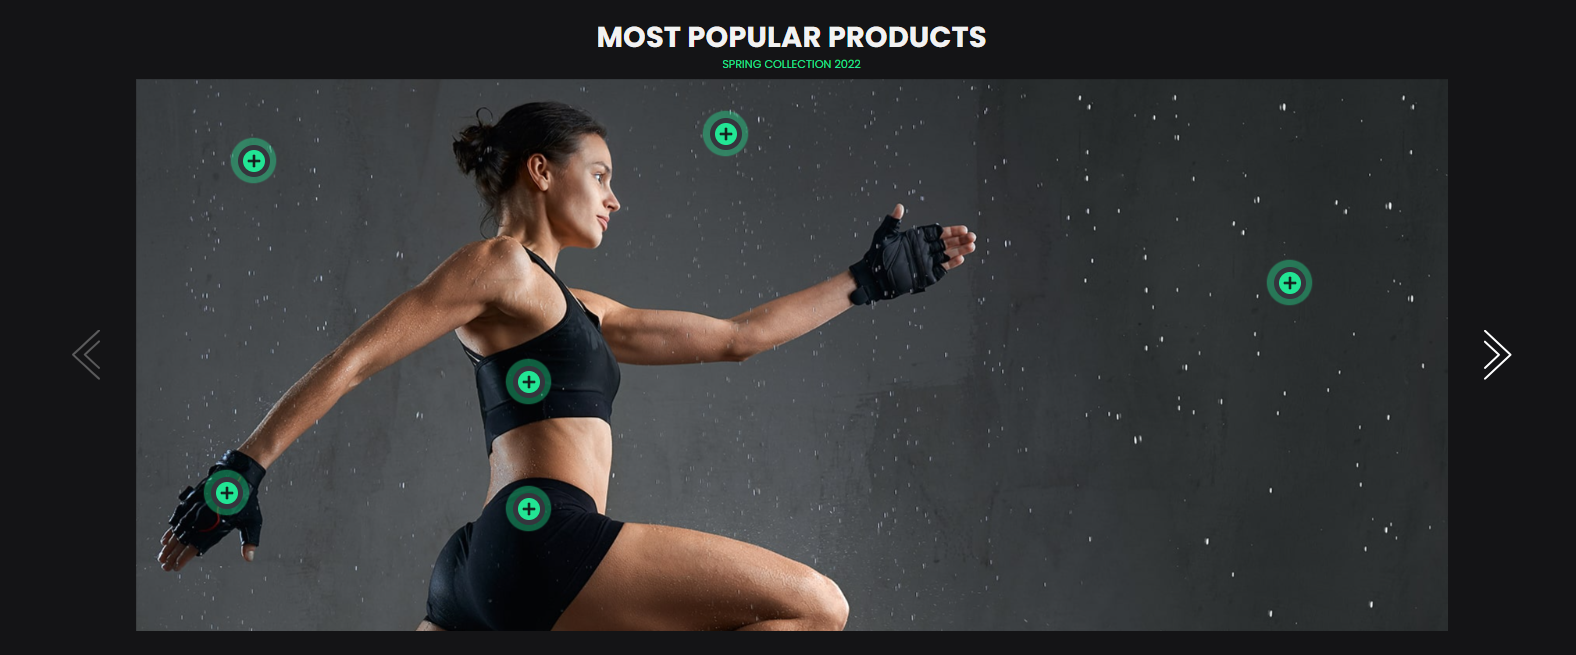
GYM
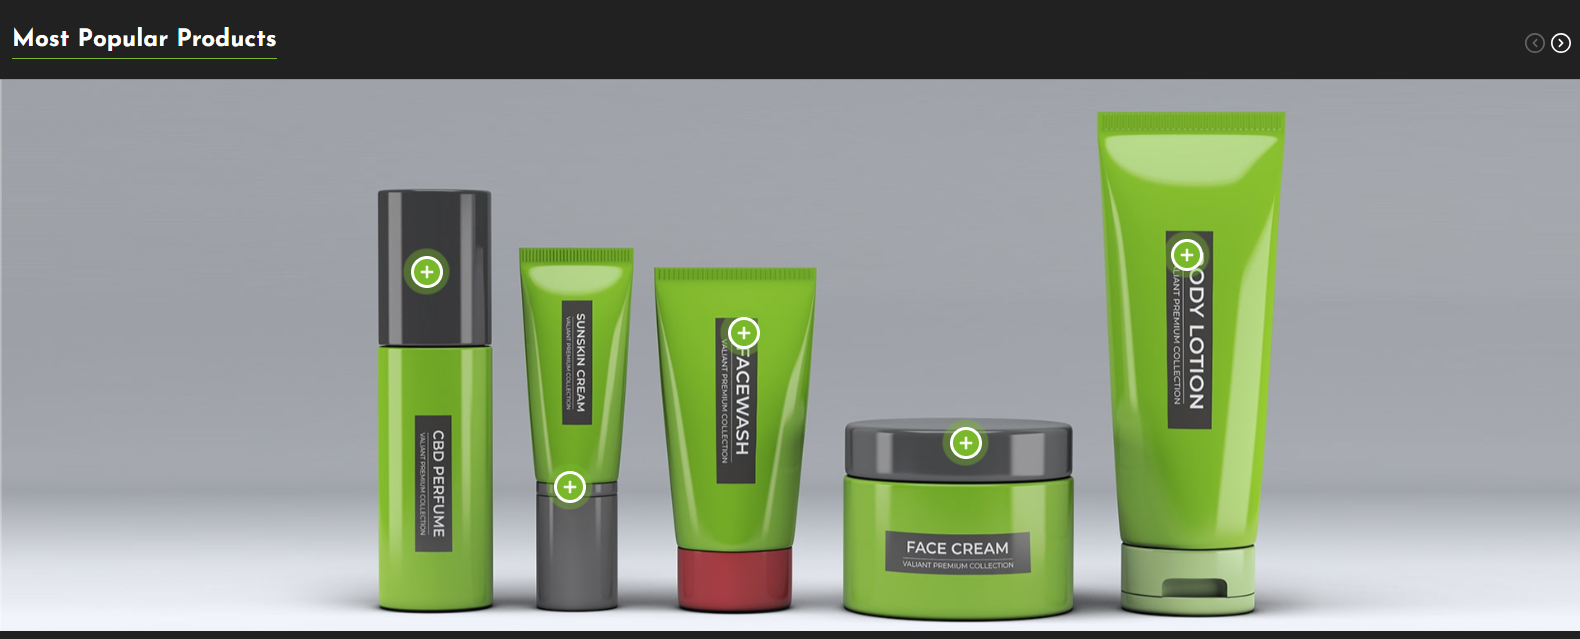
CBD
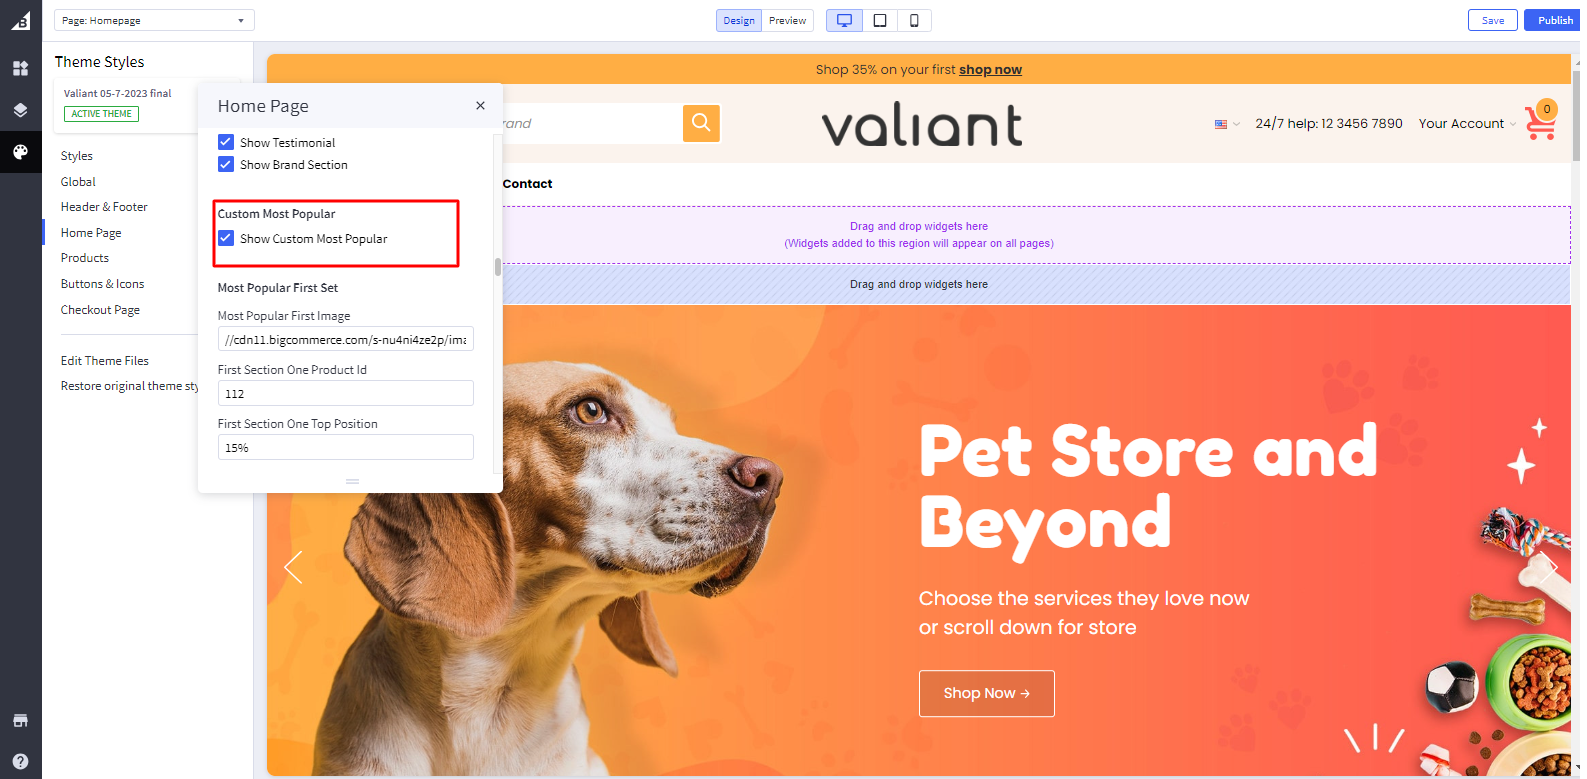
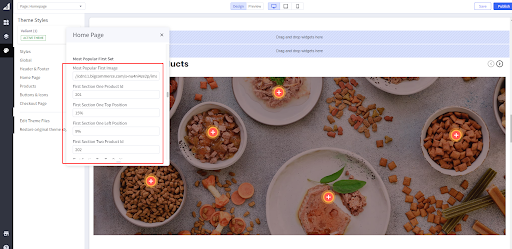
- Show Custom Most Popular Products: Toggles the visibility of Show Custom Most Popular.
- Most Popular Images: Add image path in Most Popular First Image And Most Popular Second image.
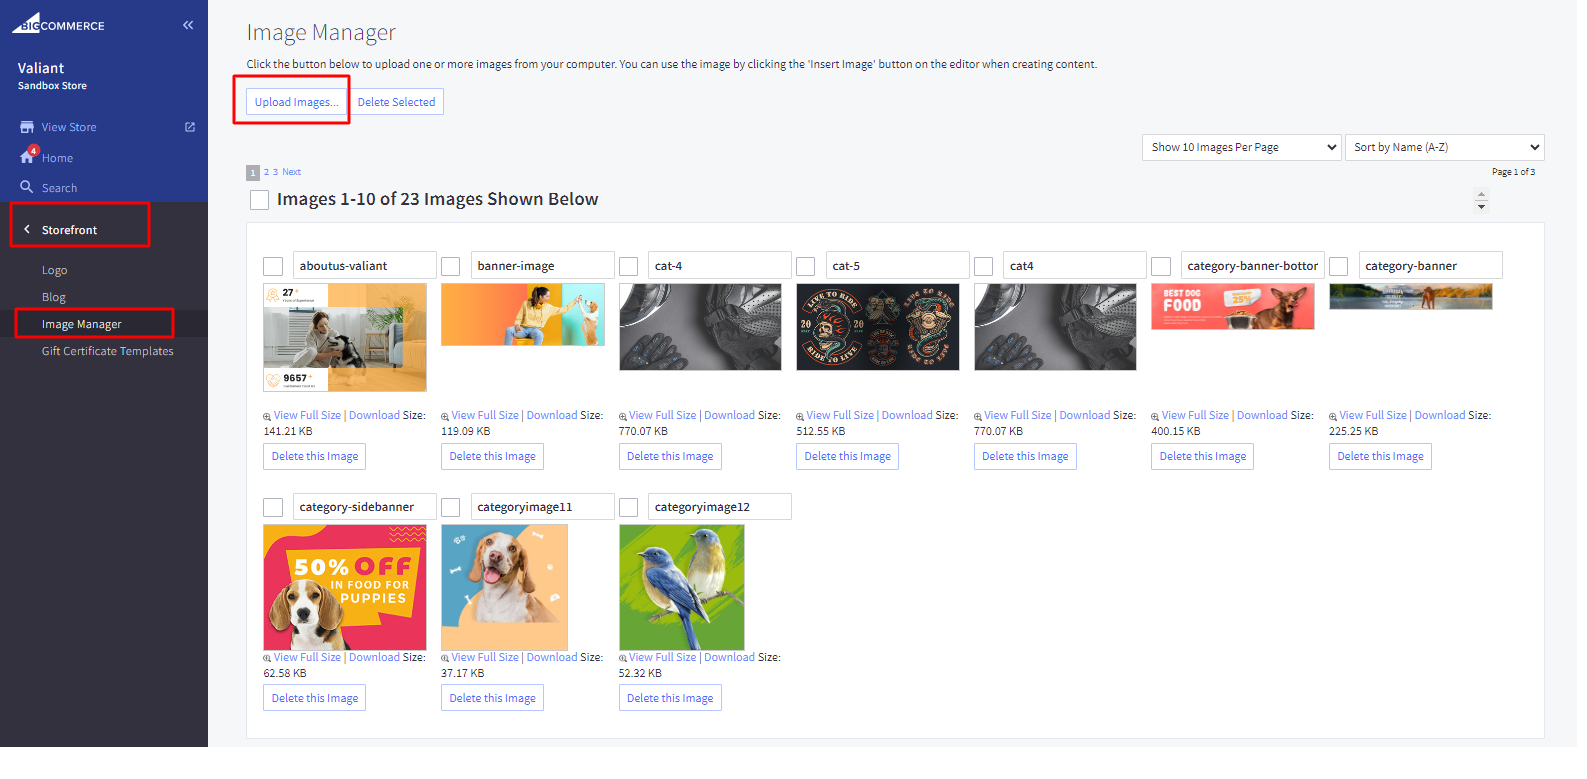
- First, you need to head over to "Storefront > Image Manager" and then upload your images here
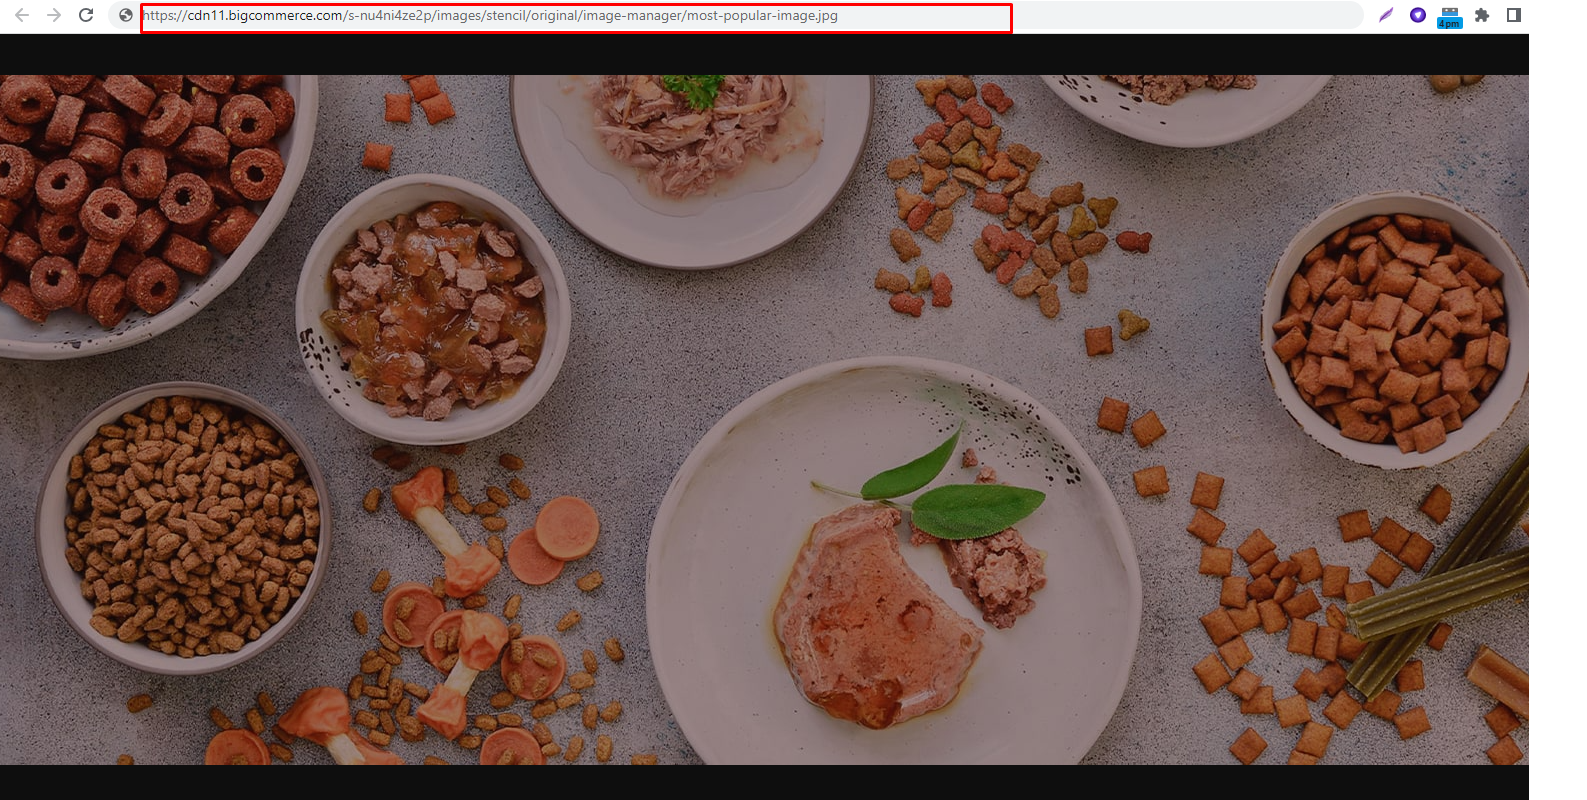
- Then once uploaded, click "View Full Size" to open the image in a new tab and copy the path to that image url.
- Add Products: Add product Id in product id.
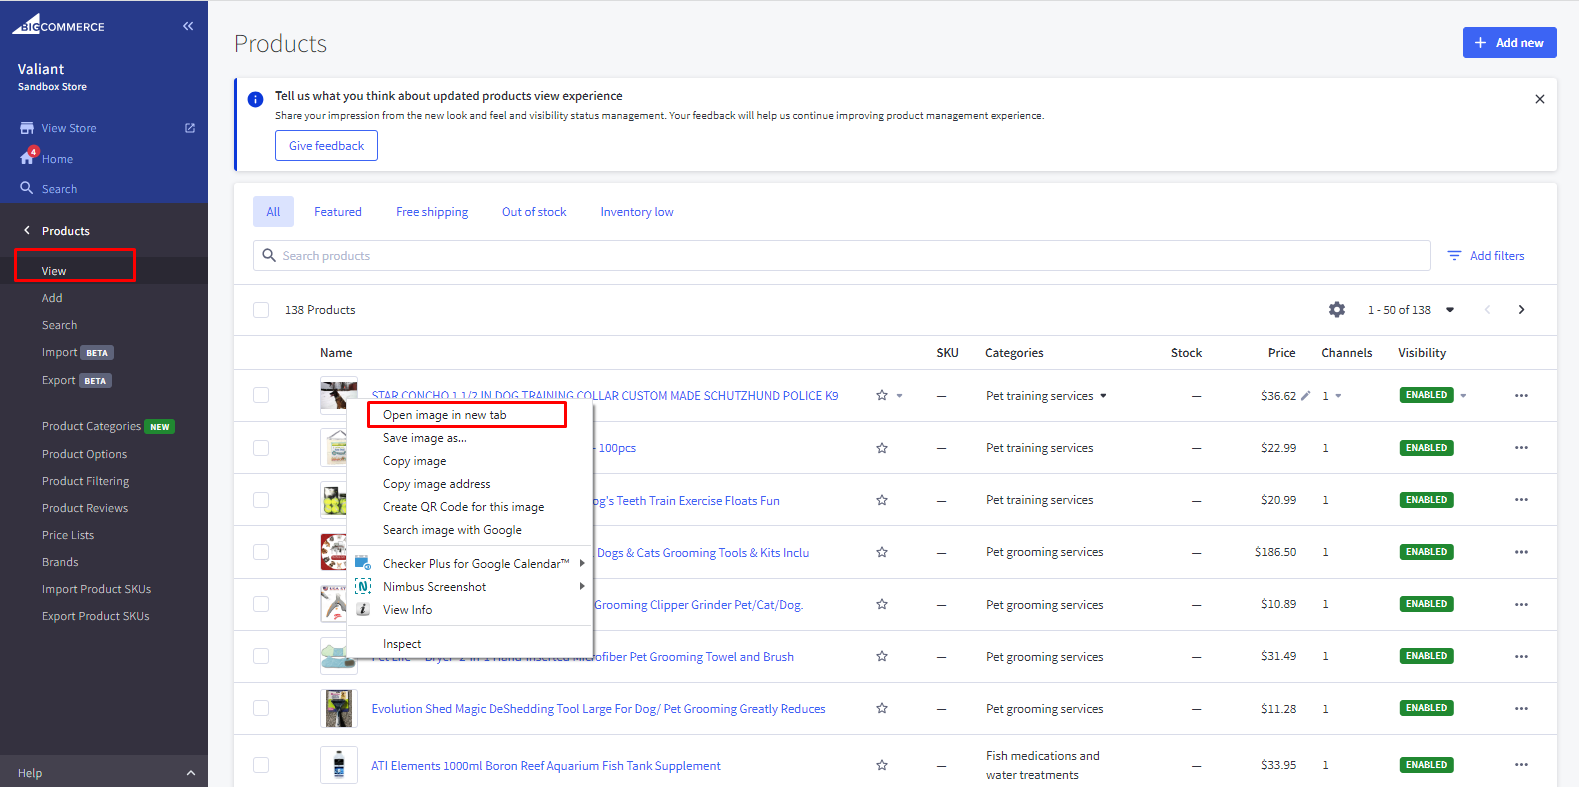
- Right click on the product image of a particular product you want to show in the section and open it in a new tab:
- That image will open in a new tab. Find product ID right after "/products/" in the image URL.
- Add Product Position: Add position of product from Top and Left side in top position and left position. Note: Same settings for each image.
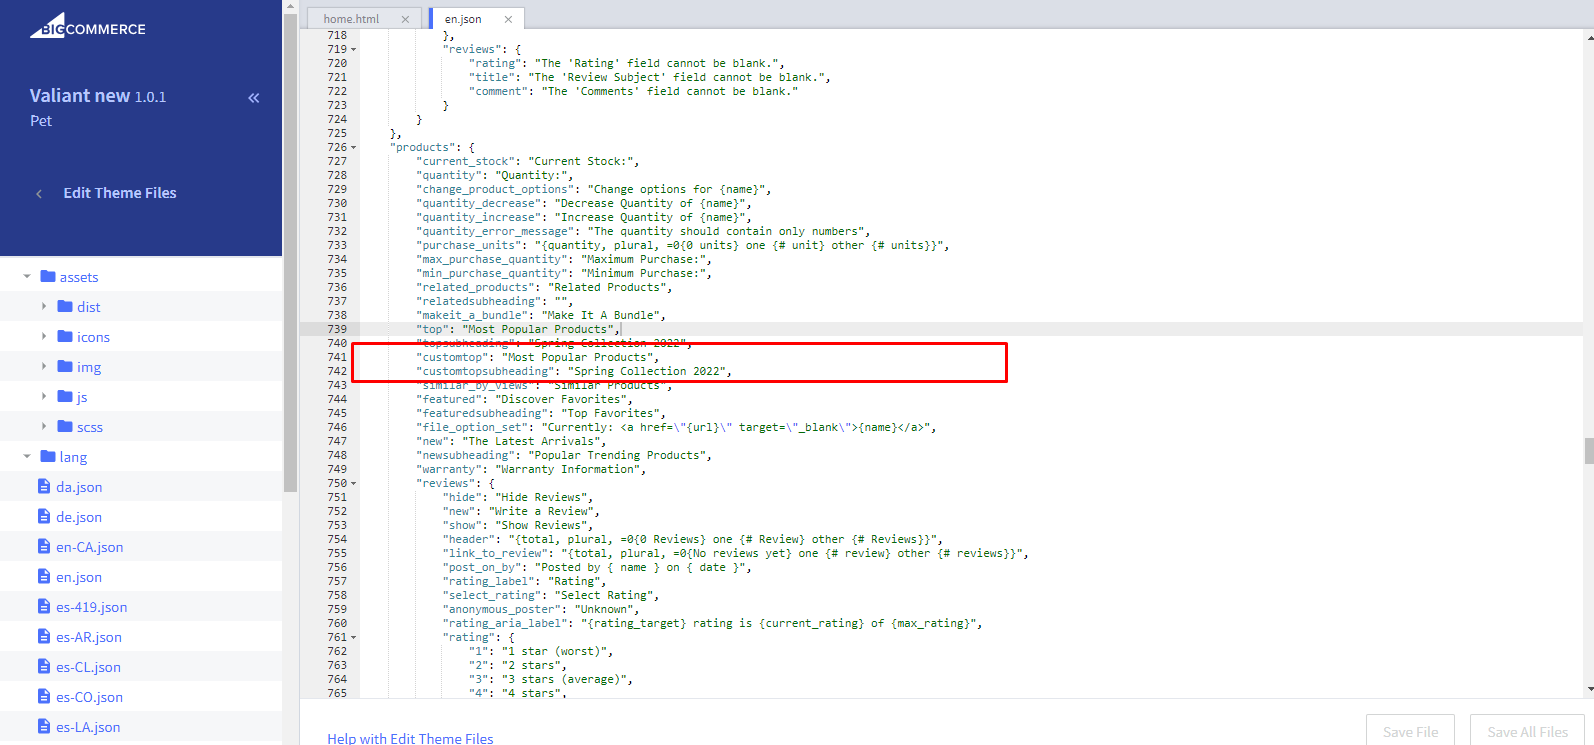
- Most Popular Products Heading: Update heading in products > customtop.
- Most Popular Products Sub Heading(only for GYM): Update sub heading in products >
customtopsubheading.

Steps to Generate and Add Code to Theme Files:
Generate Code on CodePen:
Begin by entering values in the Custom Top Section and Custom Top Section Subheading fields displayed in the CodePen editor.
Customize the input fields to match your featured section content as required.
Preview the Final Output:
On the right-hand side, under "Final Output," you will see how the generated code behaves based on the values you've entered.
Copy the Code:
Once you are satisfied with the output, click the "Copy Code" button to copy the generated code to your clipboard.
Add Code to Theme Files:
Navigate to your theme's files by going to Channels > Themes > Advanced > Edit Theme Files.
Find the appropriate language file, for example, en.json for text changes.
Paste the copied code in the relevant section of the file, ensuring you add the content under the correct keys, such as customtop or customtopsubheading.
Save and Apply:
Once the code is added to the respective files, save your changes.
Reload your theme or site to verify that the Custom Top Section and Custom Top Section Subheading have been updated and display as expected.
See the Pen Custom Top Section - Code Generator by bigcommerce_ditindia (@bigcommerce_ditindia) on CodePen.
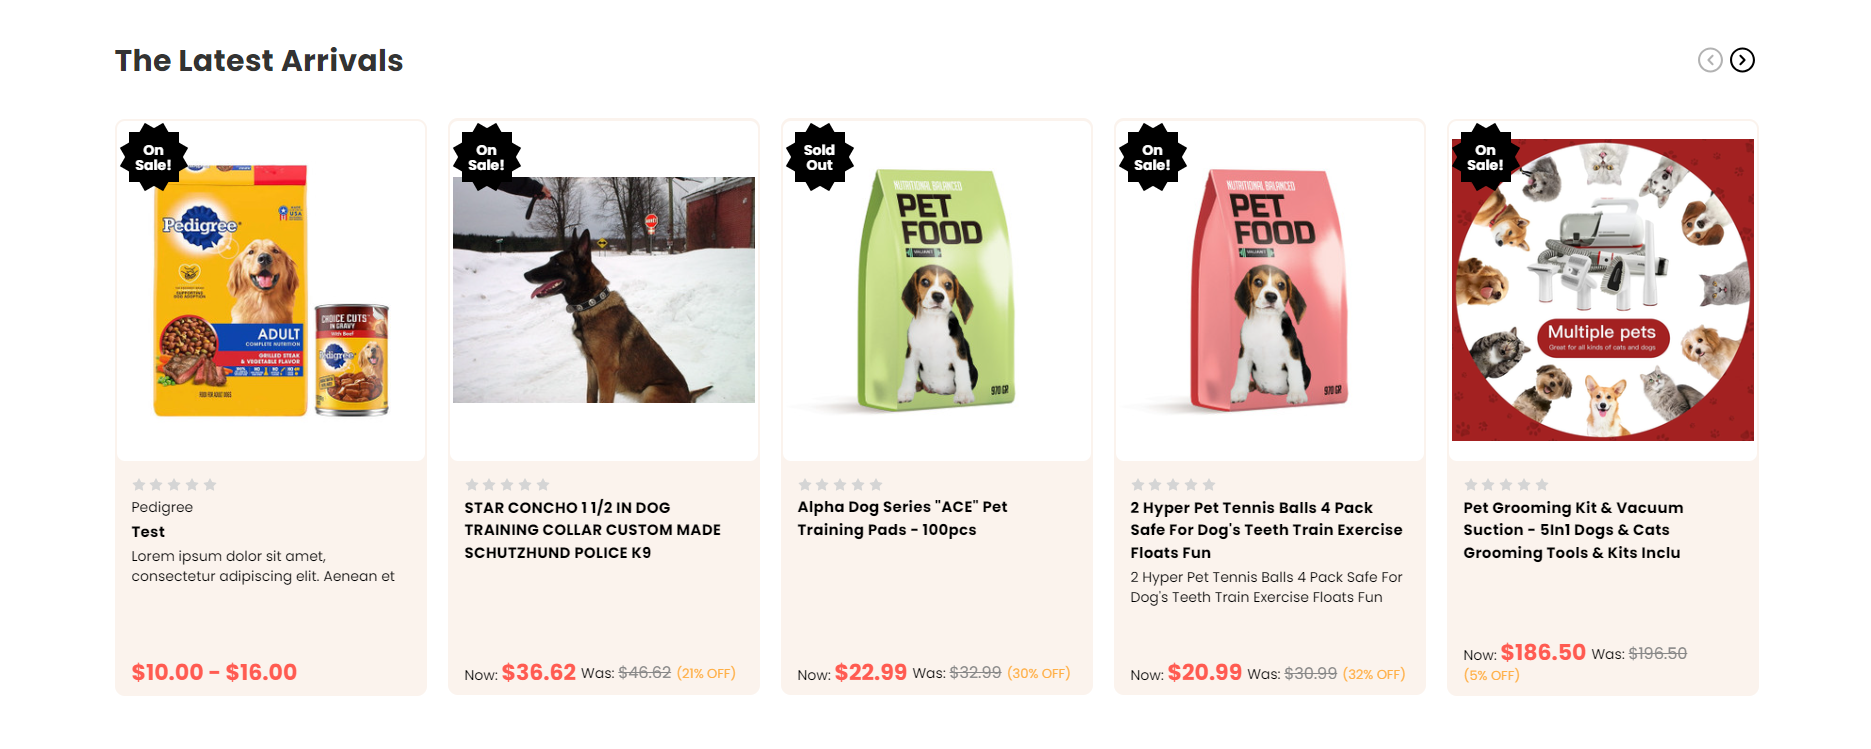
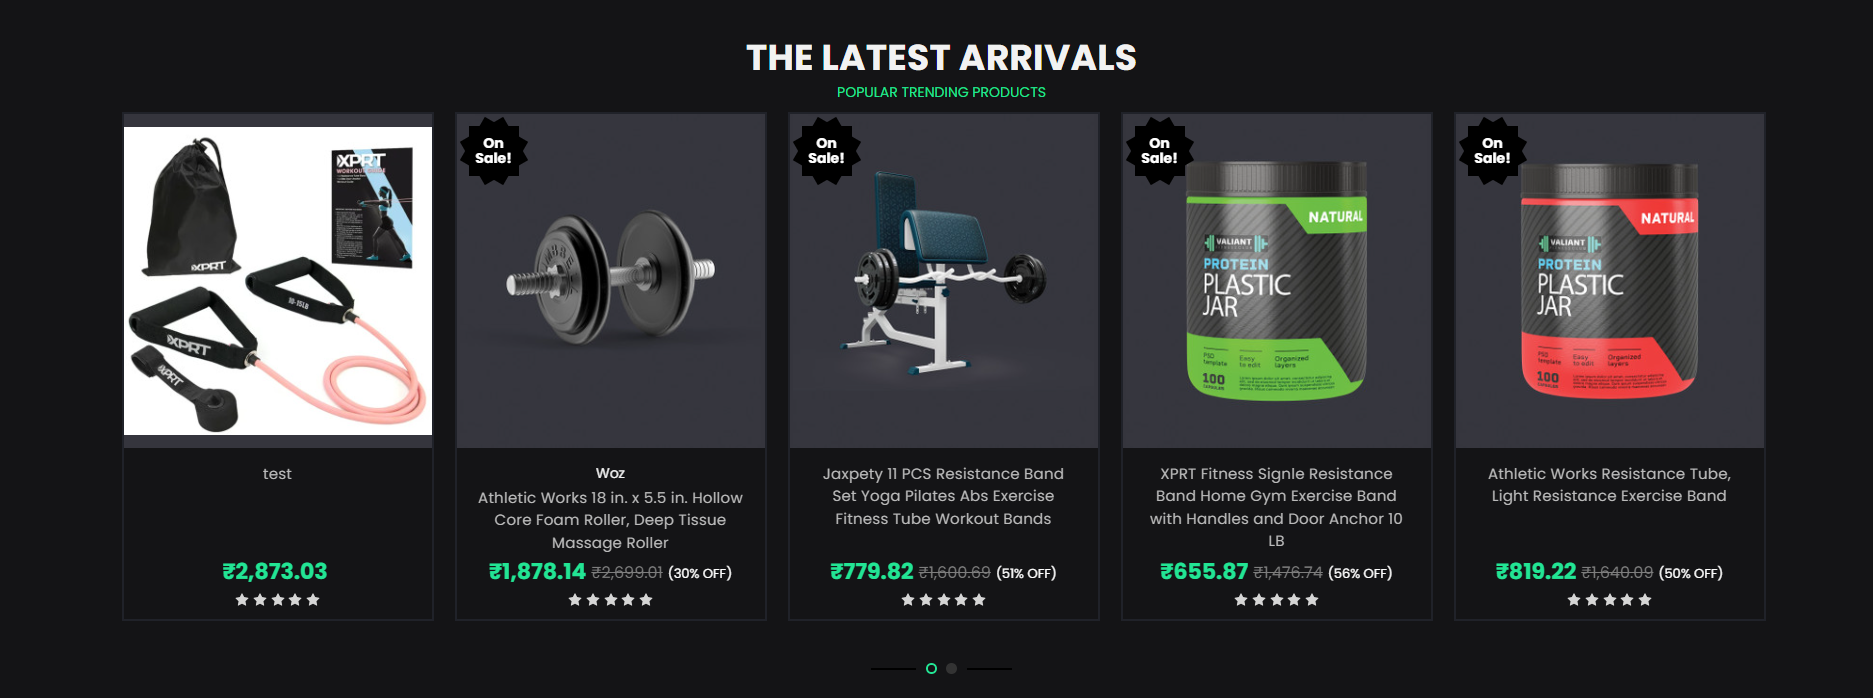
The Latest Arrivals
Pet
GYM
CBD
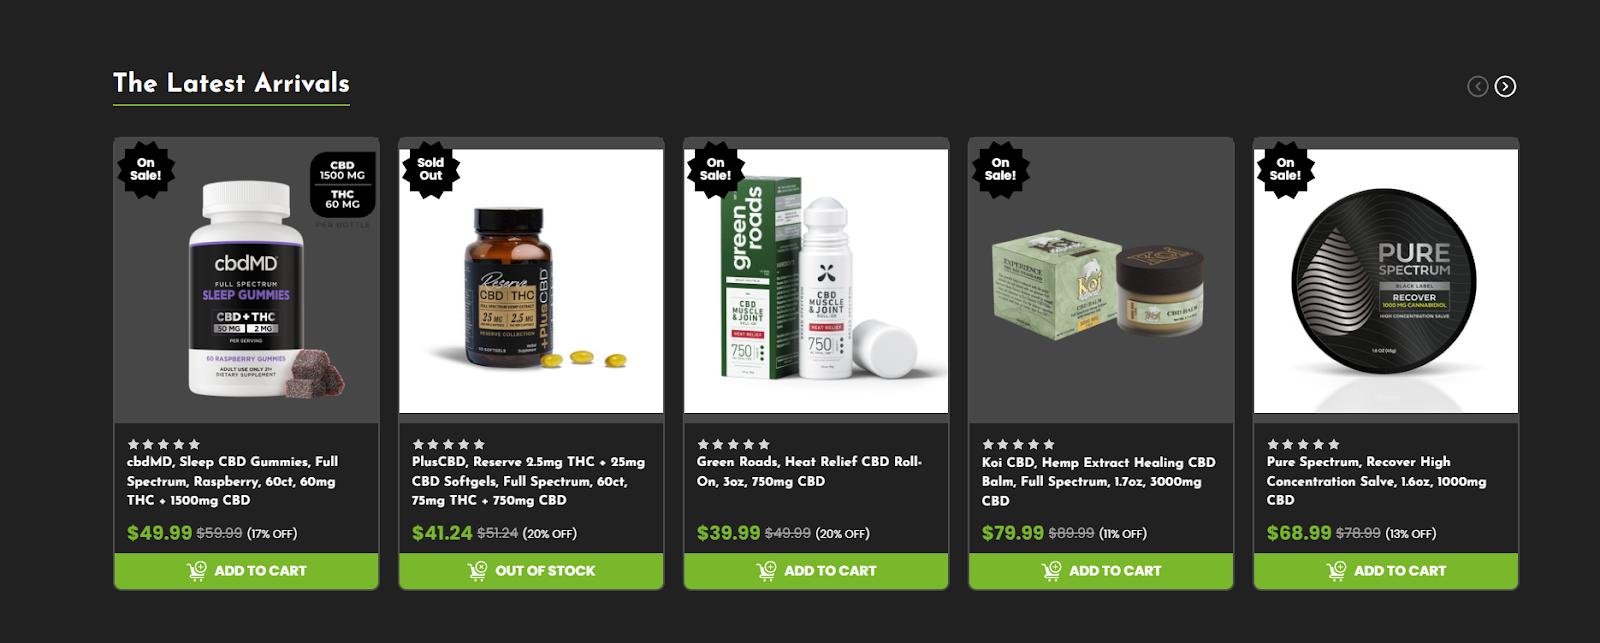
You can add New products in the latest arrivals section as per default bigcommerce feature.
2000+ Brands in Stock
Pet

GYM

CBD

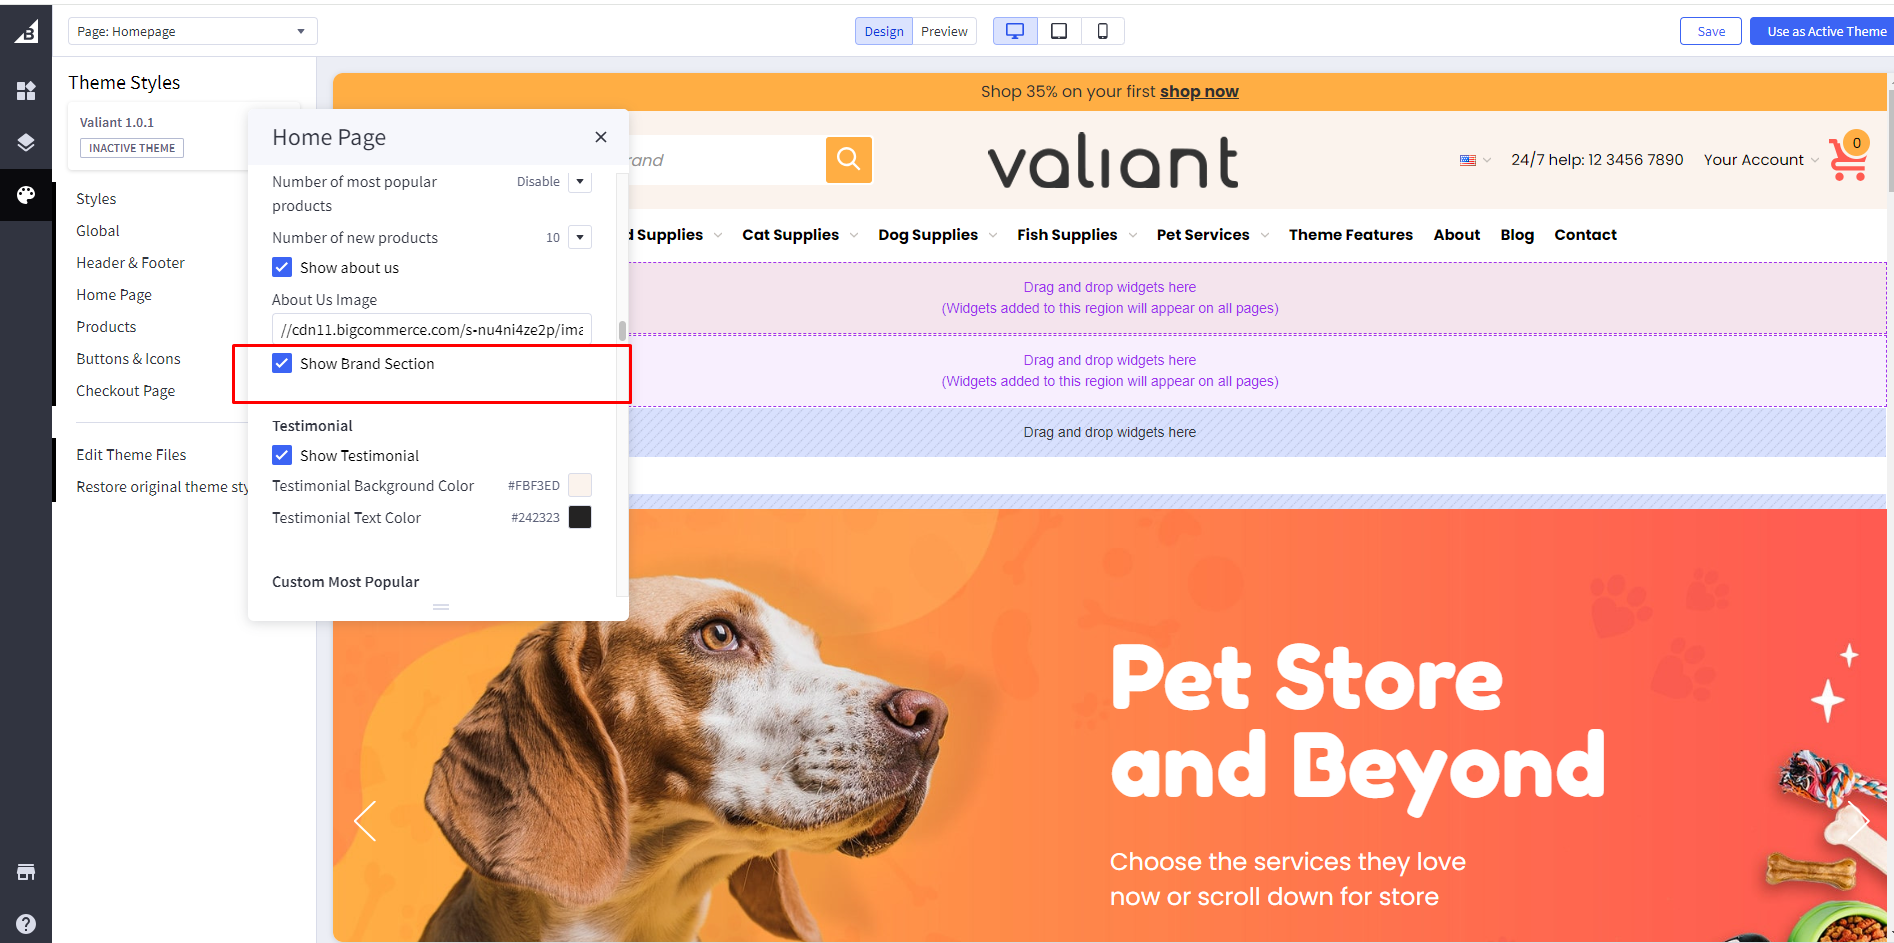
Show Brands Section: Toggles the visibility of the Show Brand Section.

Add Brand Images: First, you need to head over to "Storefront > Image Manager" and then upload your images here.
Then once uploaded, click "View Full Size" to open the image in a new tab and copy the path to that image url.
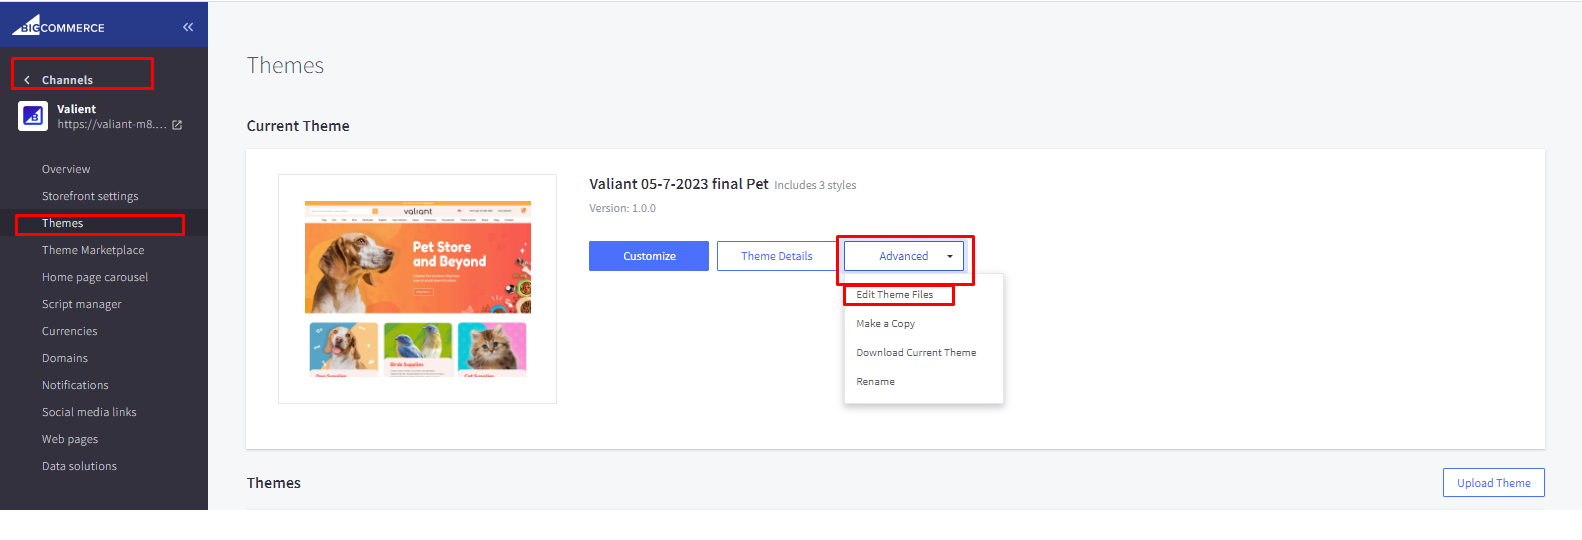
Go to channels > Themes > Advanced > Edit Theme Files > lang > en.json.
Then paste the image url in “brandsection” brandimage1 to brandimage12
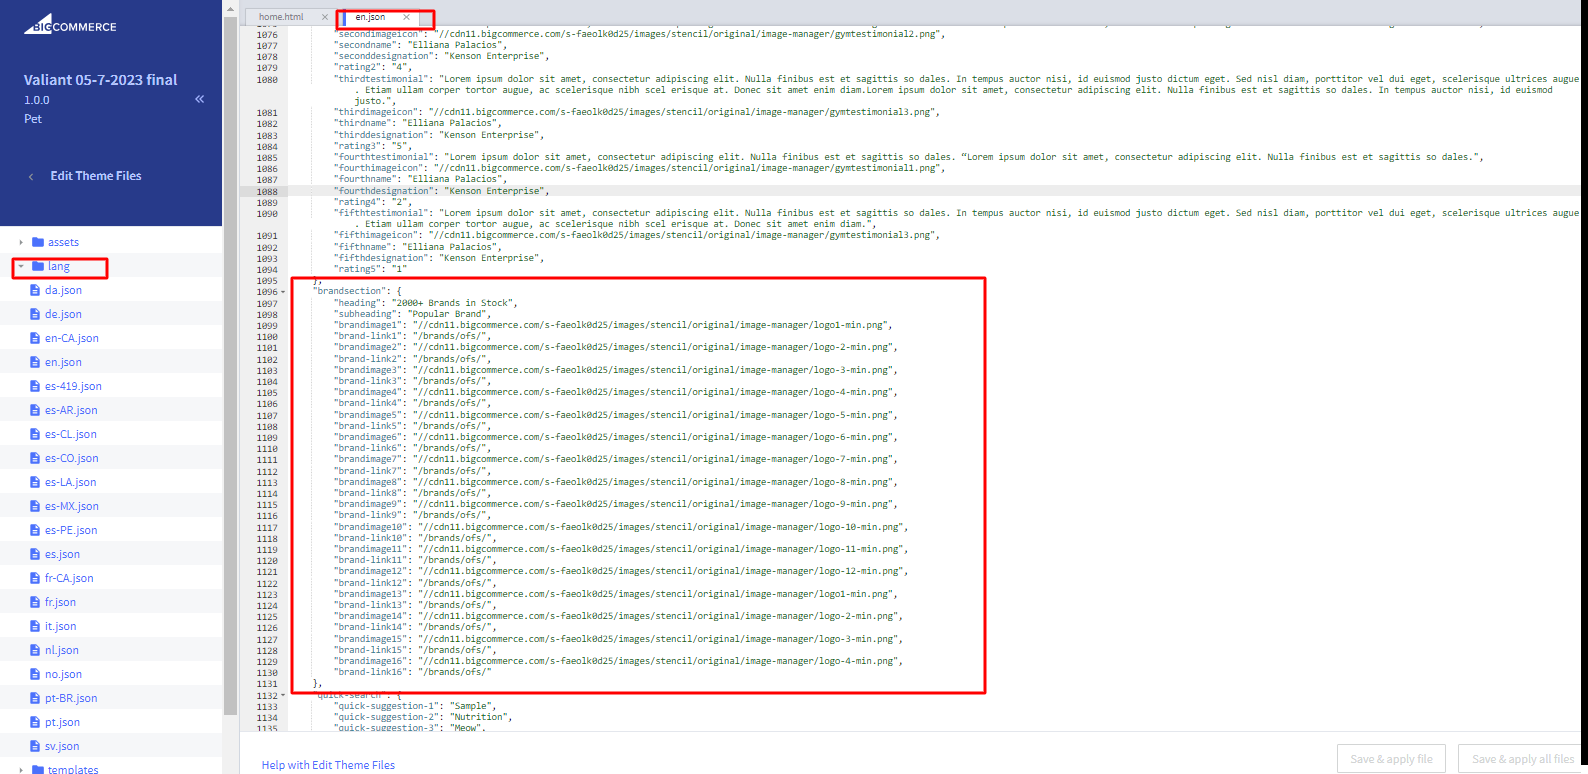
Steps to Generate and Add Code to Theme Files:
Generate Code on CodePen:
Begin by entering values in the Heading, Sub Heading and Brand Image and Link fields displayed in the CodePen editor.
Customize the input fields to match your content as required.
Preview the Final Output:
On the right-hand side, under "Final Output," you will see how the generated code behaves based on the values you've entered.
Copy the Code:
Once you are satisfied with the output, click the "Copy Code" button to copy the generated code to your clipboard.
Add Code to Theme Files:
Navigate to your theme's files by going to Channels > Themes > Advanced > Edit Theme Files.
Find the appropriate language file, for example, en.json for text changes.
Paste the copied code in the relevant section of the file, ensuring you add the content under the correct keys, such as heading, subheading, brandimage1 etc.
Save and Apply:
Once the code is added to the respective files, save your changes.
Reload your theme or site to verify that the Heading, Sub Heading and Brand Image and Link Section have been updated and display as expected.
See the Pen Brand Section - Code Generator by bigcommerce_ditindia (@bigcommerce_ditindia) on CodePen.
About Us section
Pet

GYM
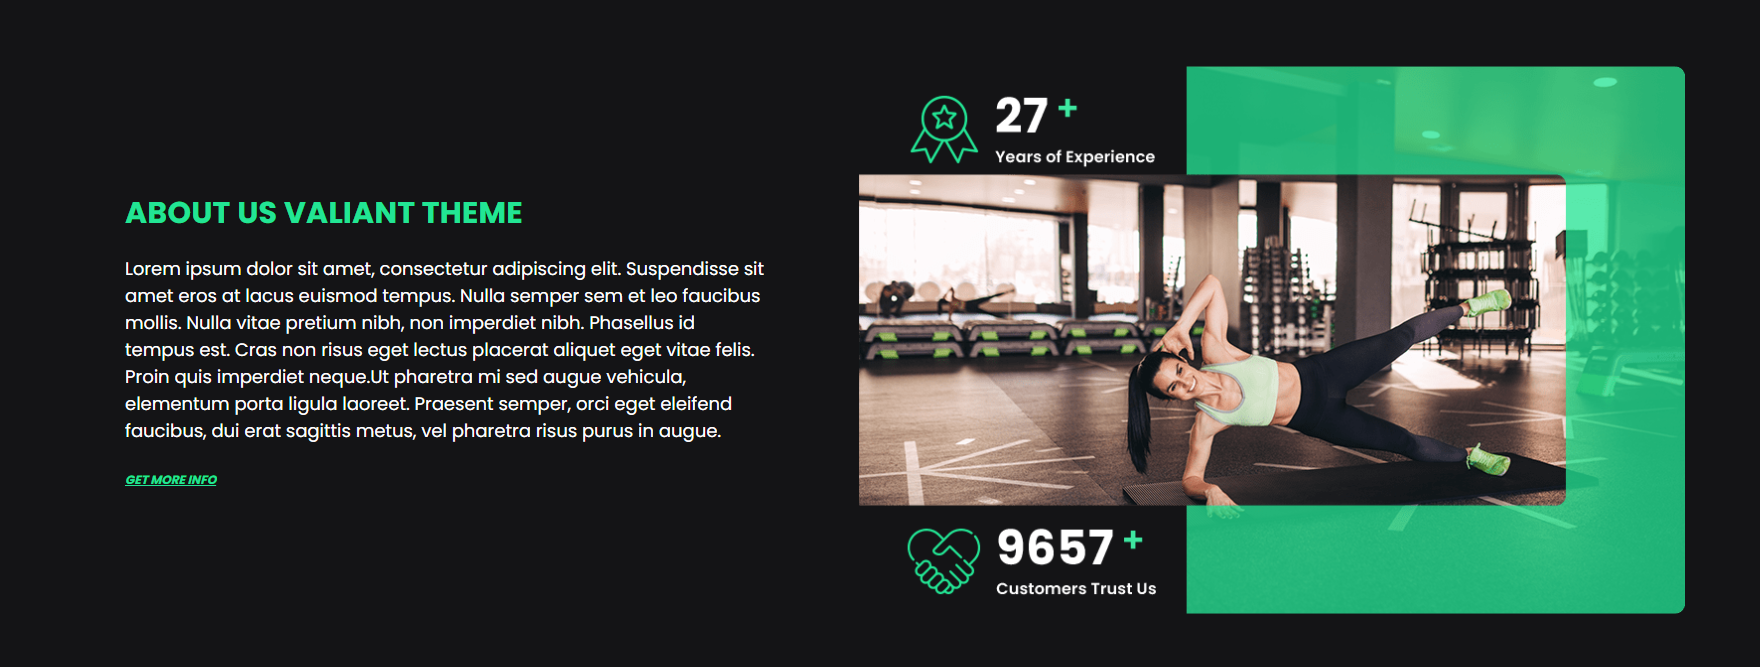
CBD
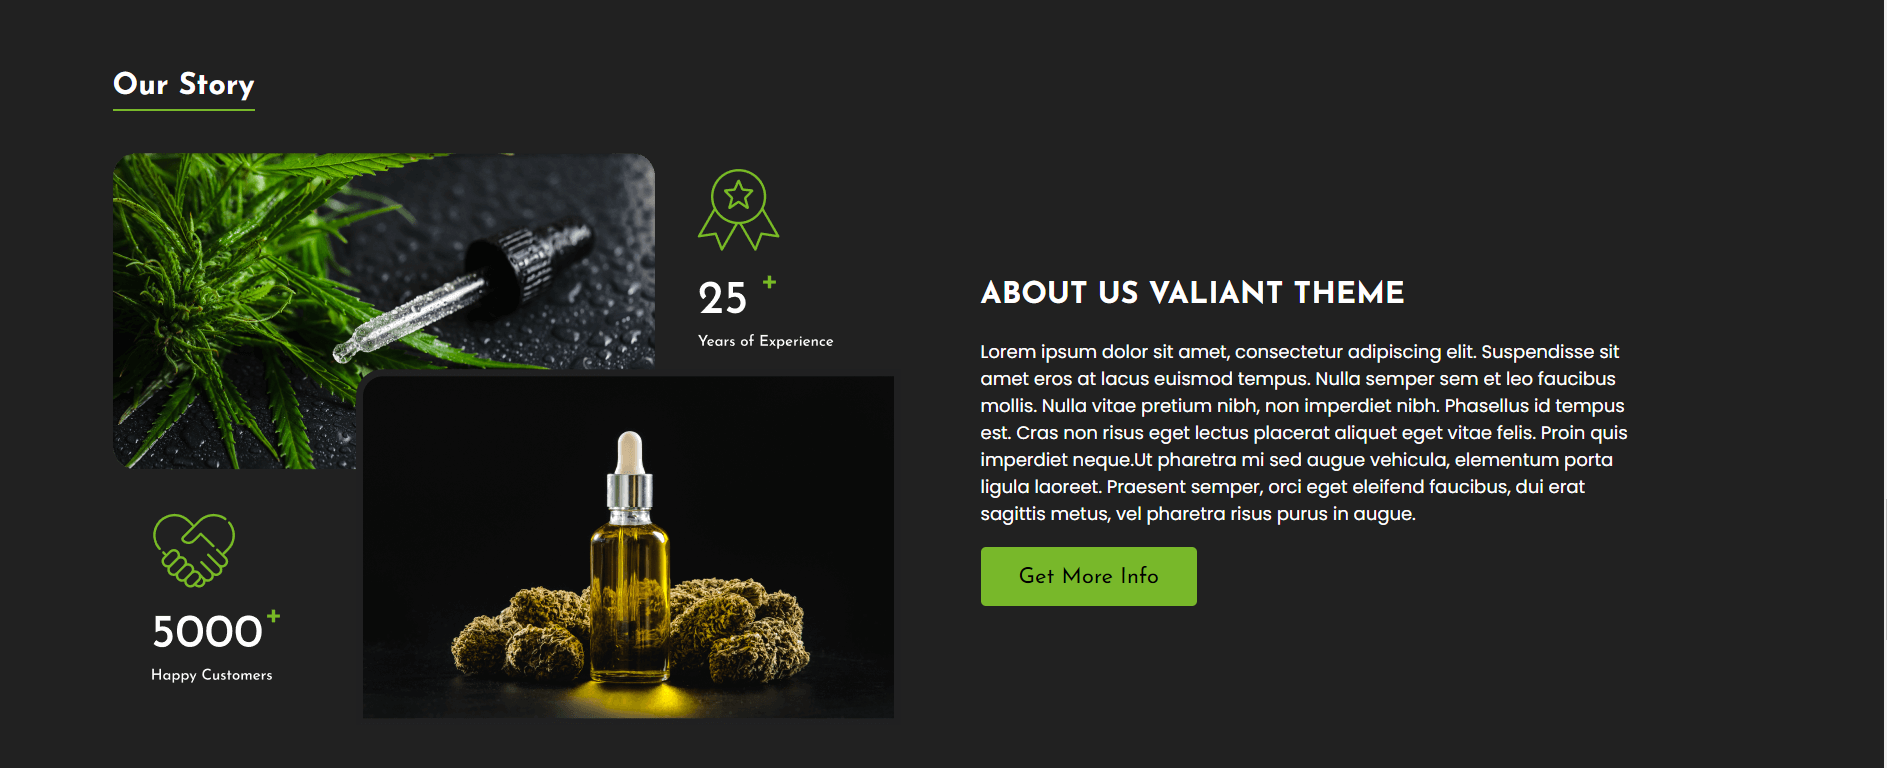
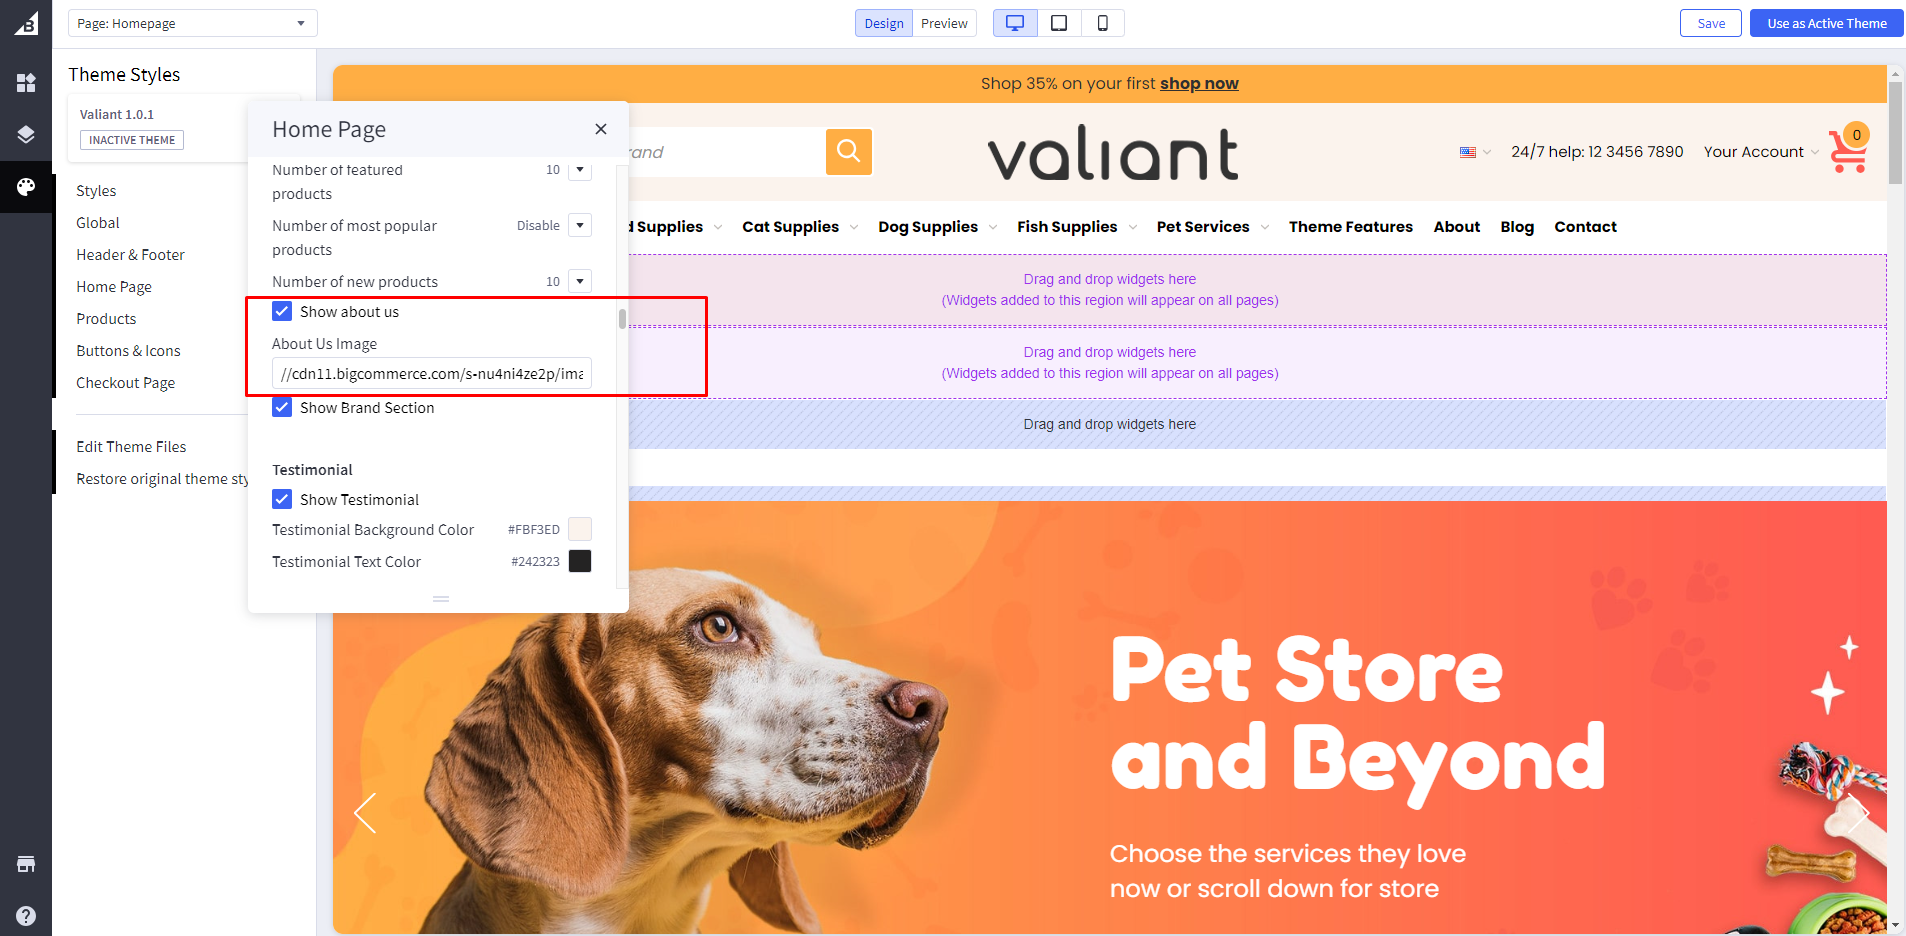
Show About Us Section: Toggles the visibility of the Show about us.
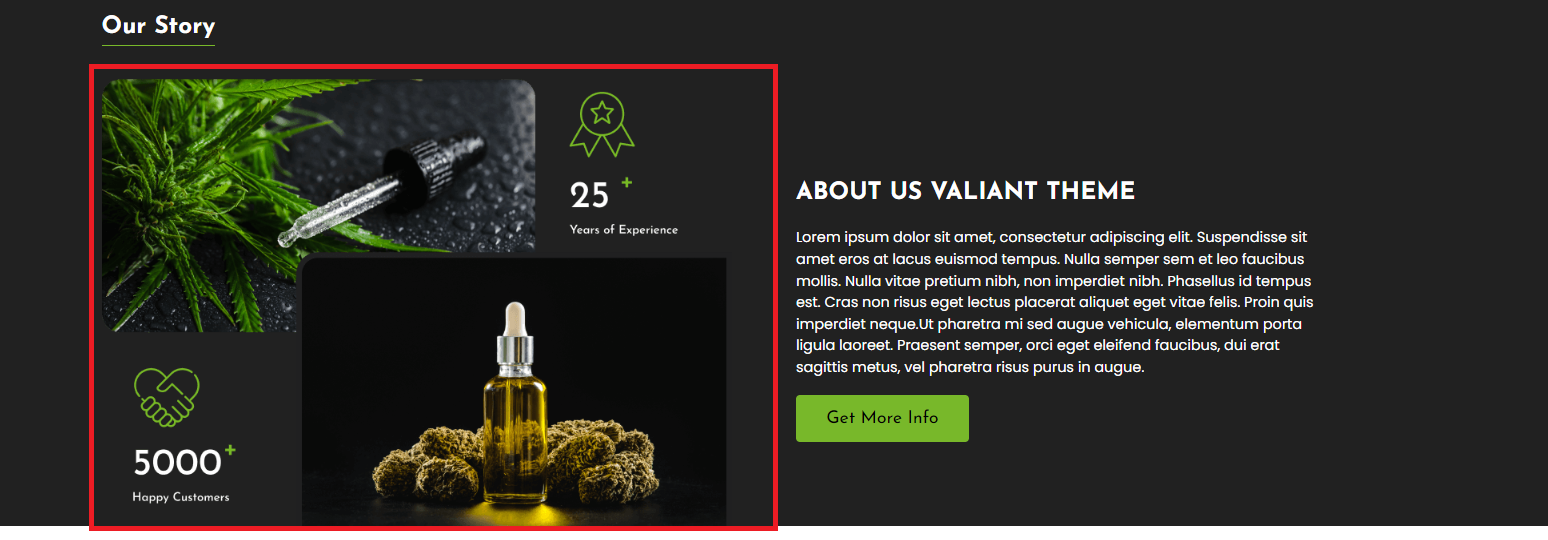
Add Image: Add image path in About Us Image. (please check image related details at the last of this documents)
For below changes Go to channels > Themes > Advanced > Edit Theme Files > lang > en.json.
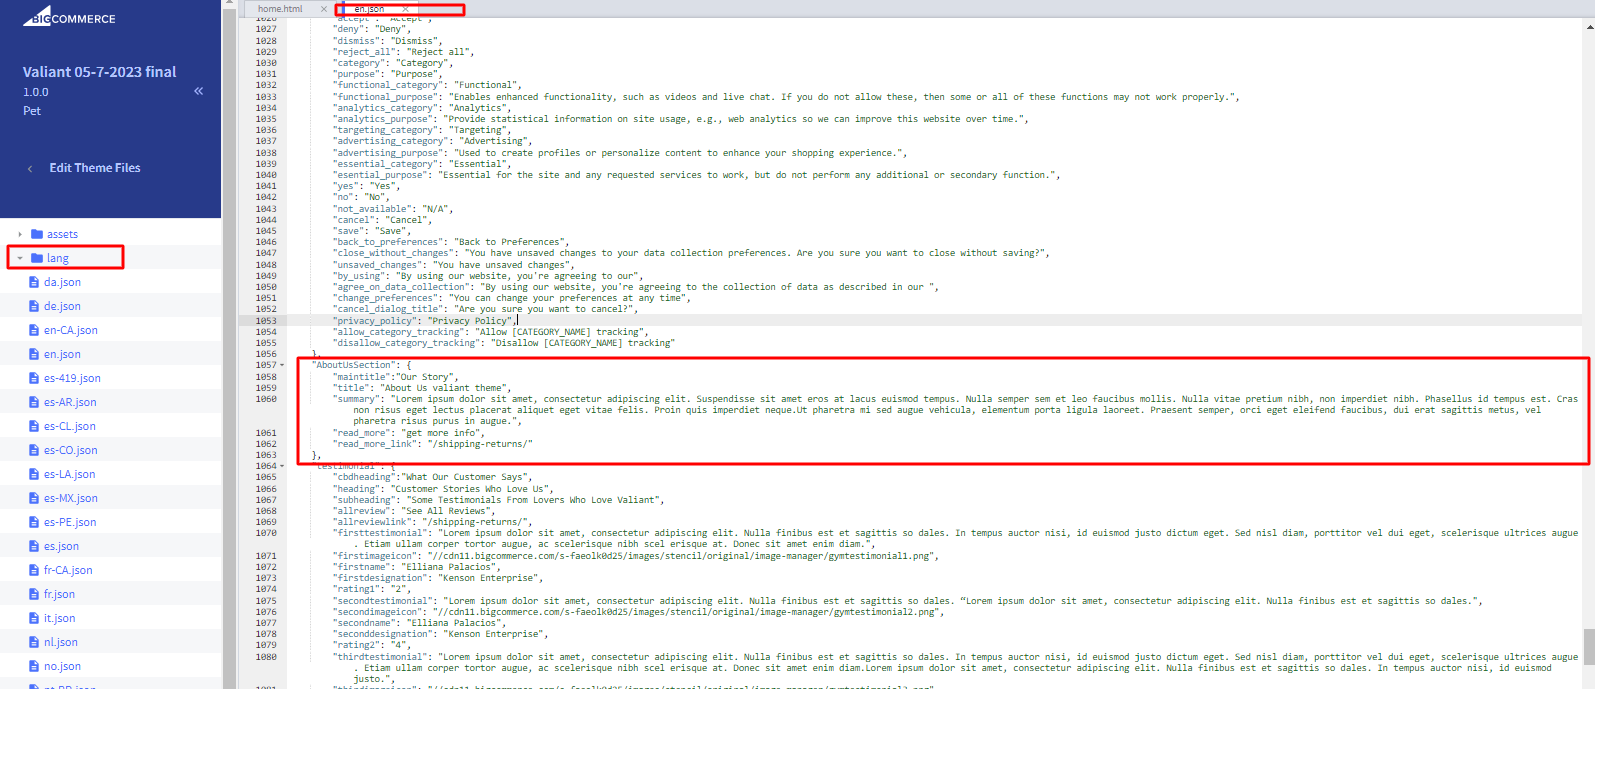
Heading: Add Heading in AboutUsSection > title.
About Us Text: Add summary in AboutUsSection > summary.
Read More Text: Add text in AboutUsSection > read_more.
Read More Text link: Add Link in AboutUsSection > read_more_link.
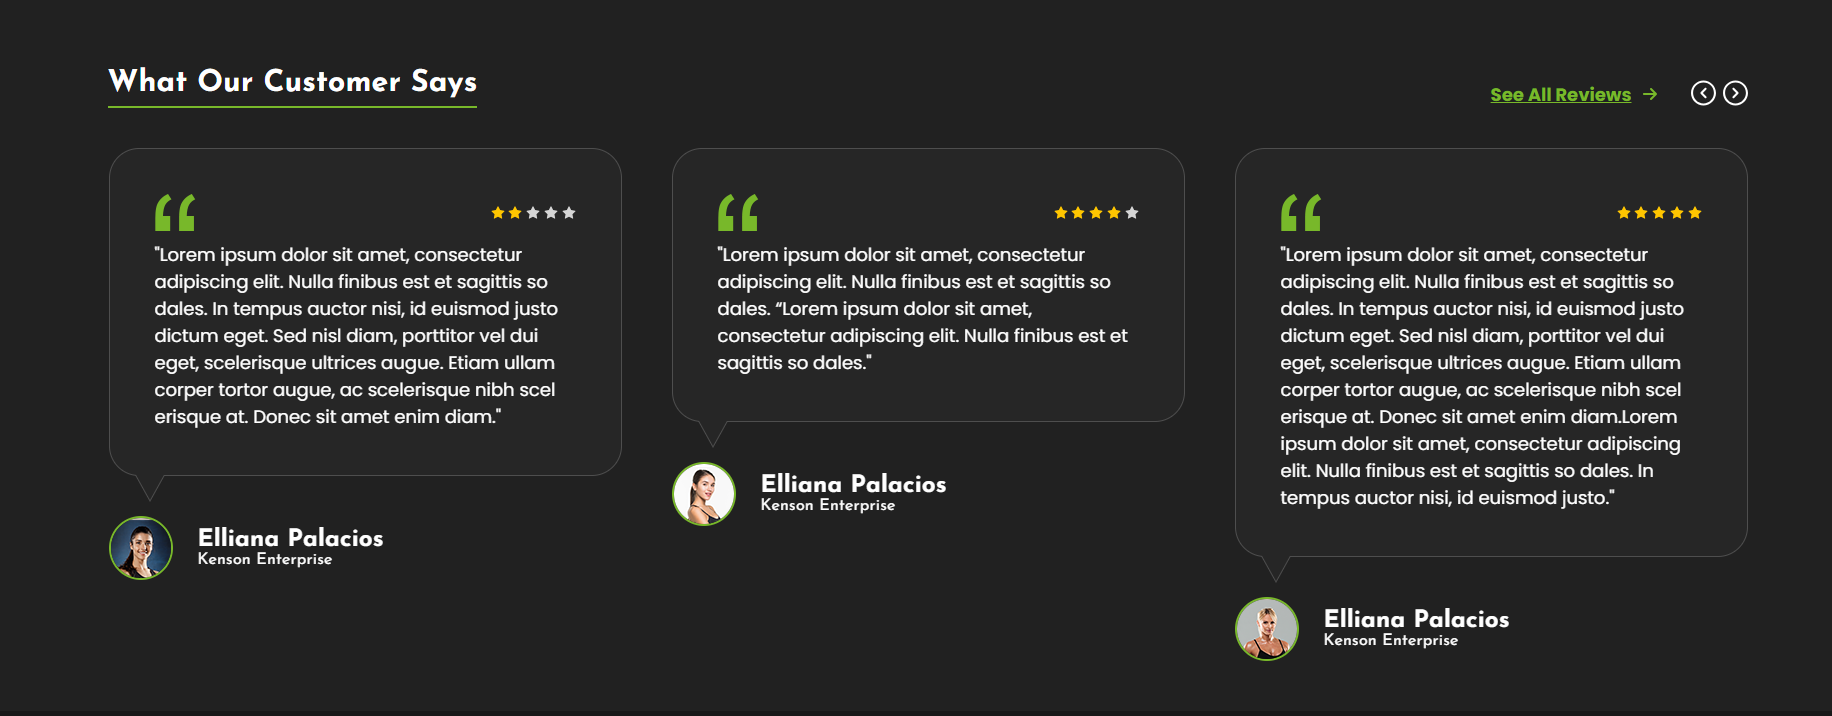
Testimonial Section
Pet
GYM
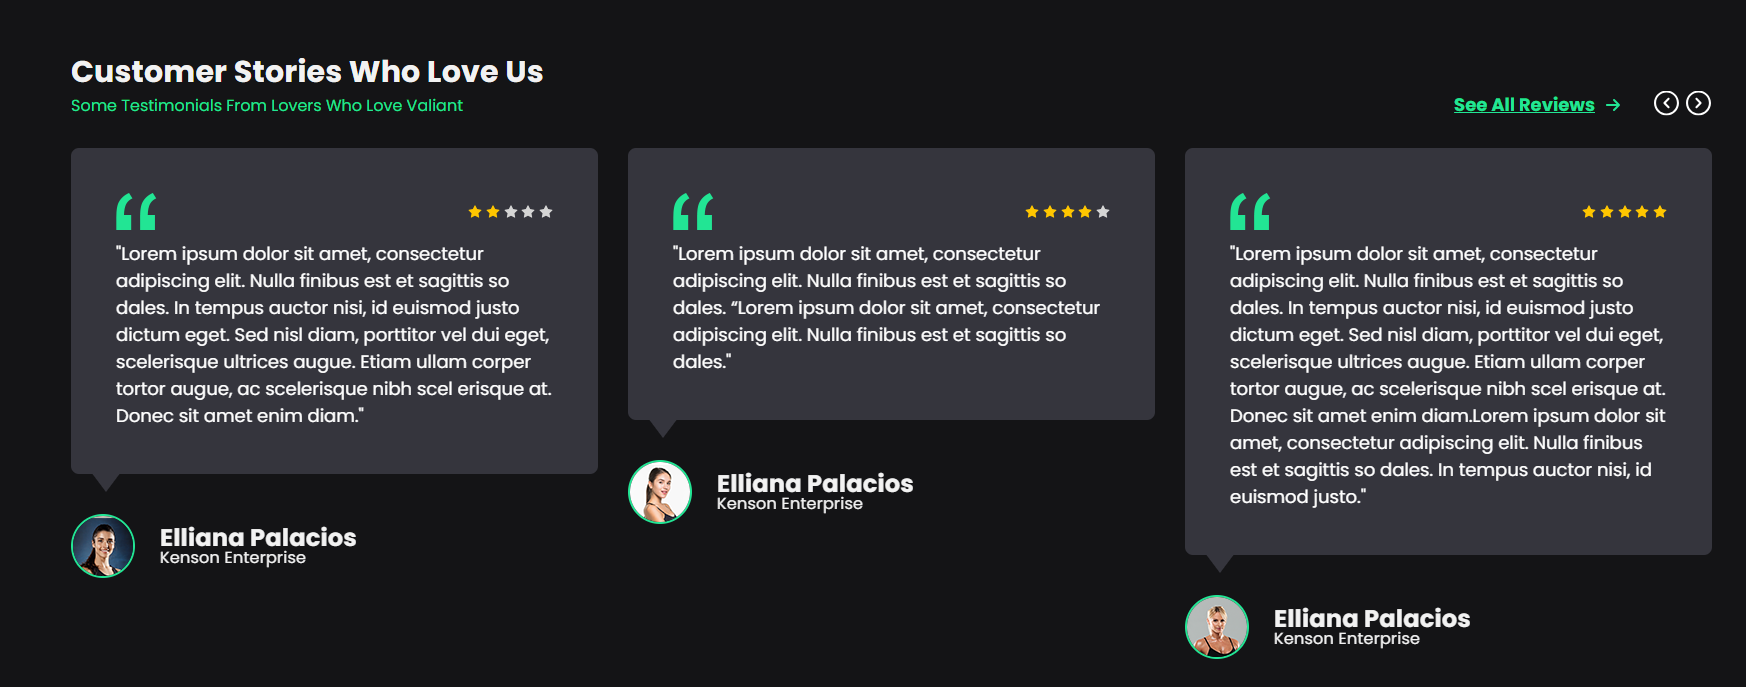
CBD
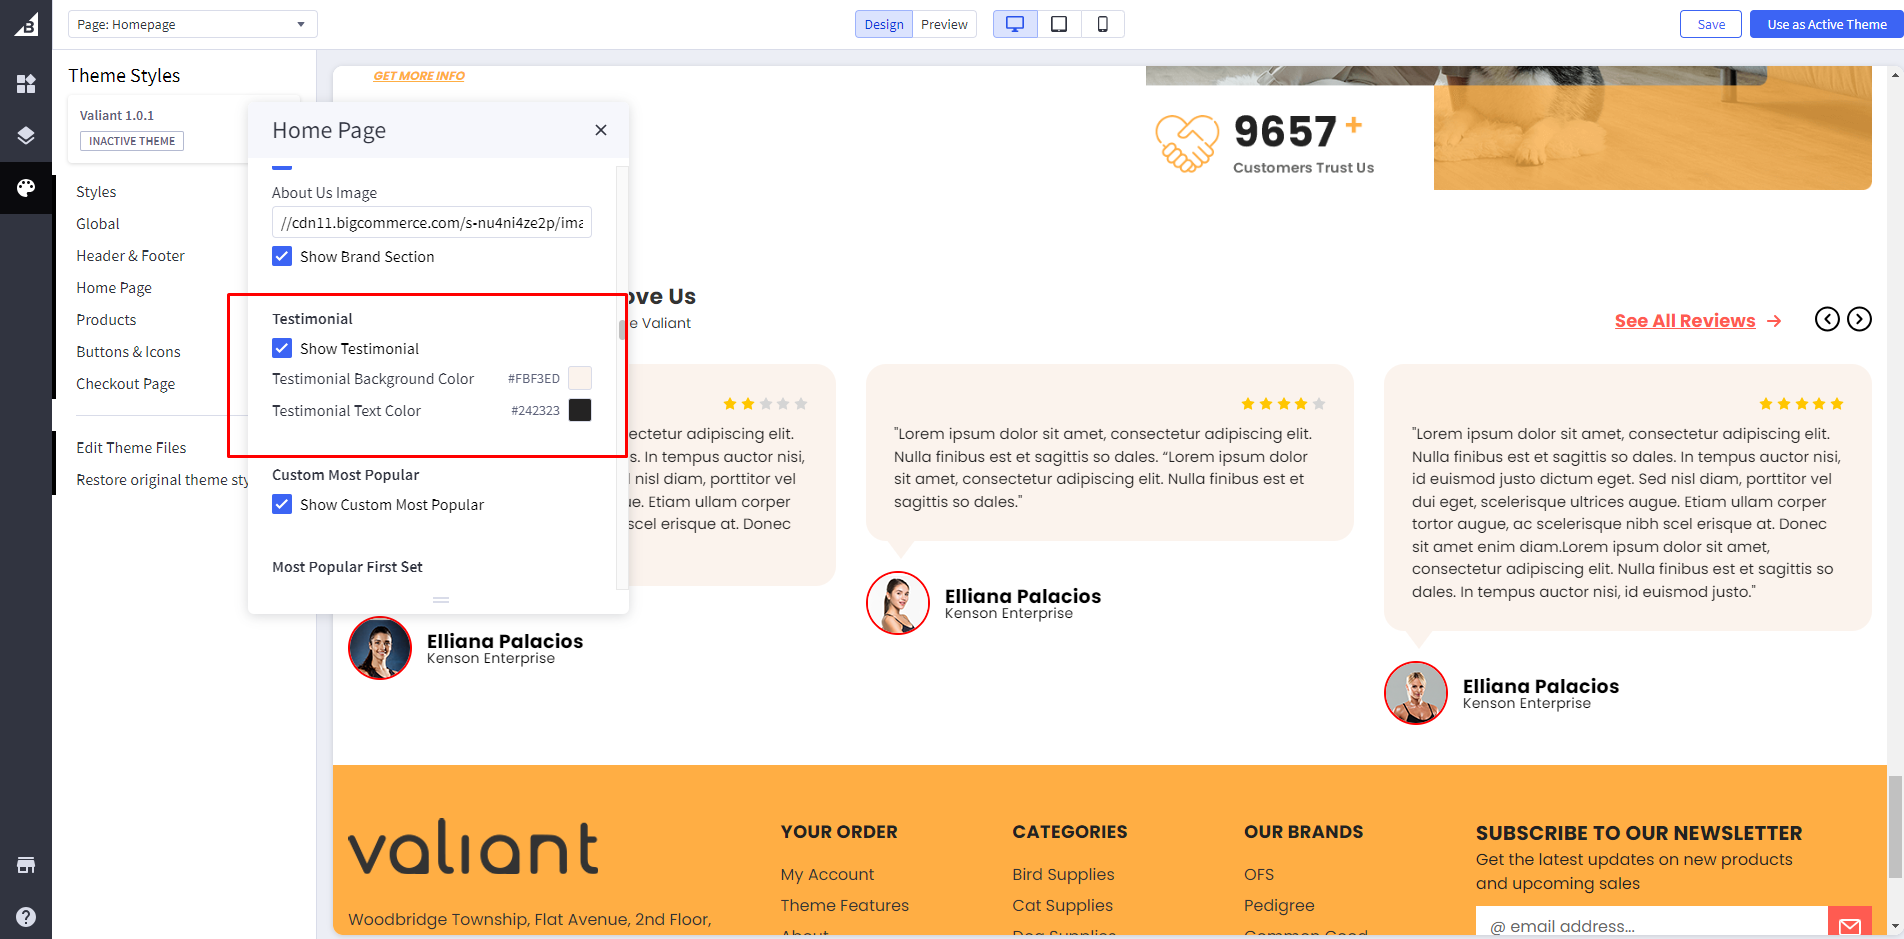
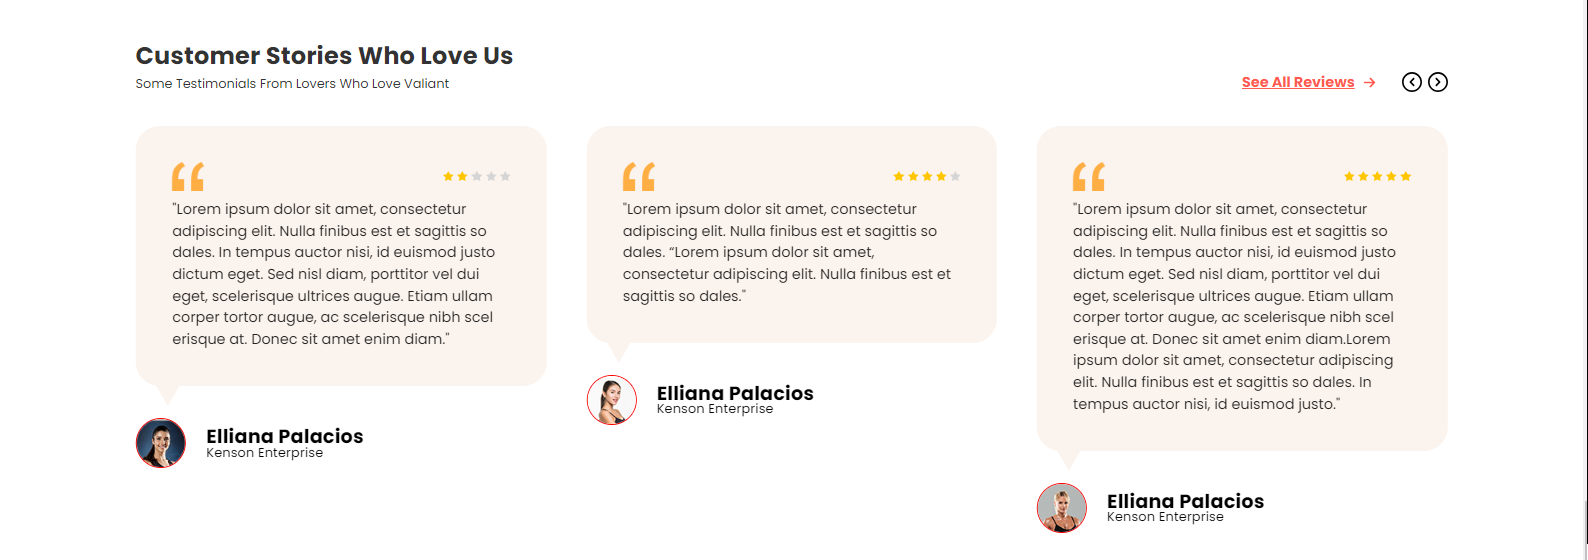
Show Testimonial Section: Toggles the visibility of the Show Testimonial.
Testimonial Background Color:Add Testimonial Background Color.
Testimonial Text Color:Add Testimonial Text Color.
For below changes Go to channels > Themes > Advanced > Edit Theme Files > lang > en.json.
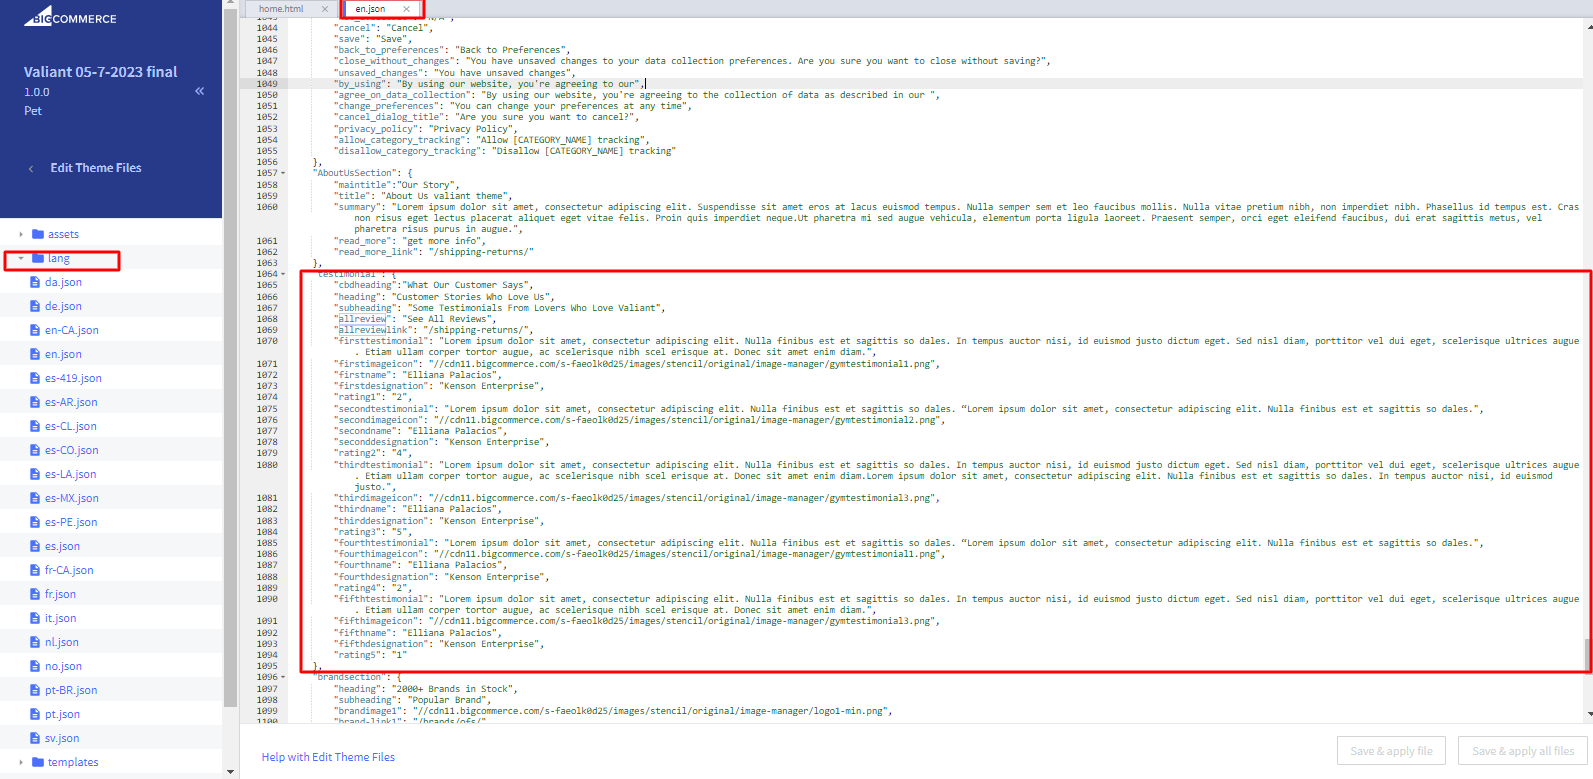
Testimonial Heading: Update heading in testimonial > heading & subheading.
For CBD Theme Update heading in “cbdheading”.
See All Review Link Text: Add Text in “allreview”.
See All Review Link: Add Link in “allreviewlink”.
Testimonial Review Text: Add Review text in firsttestimonial to fifthtestimonial.
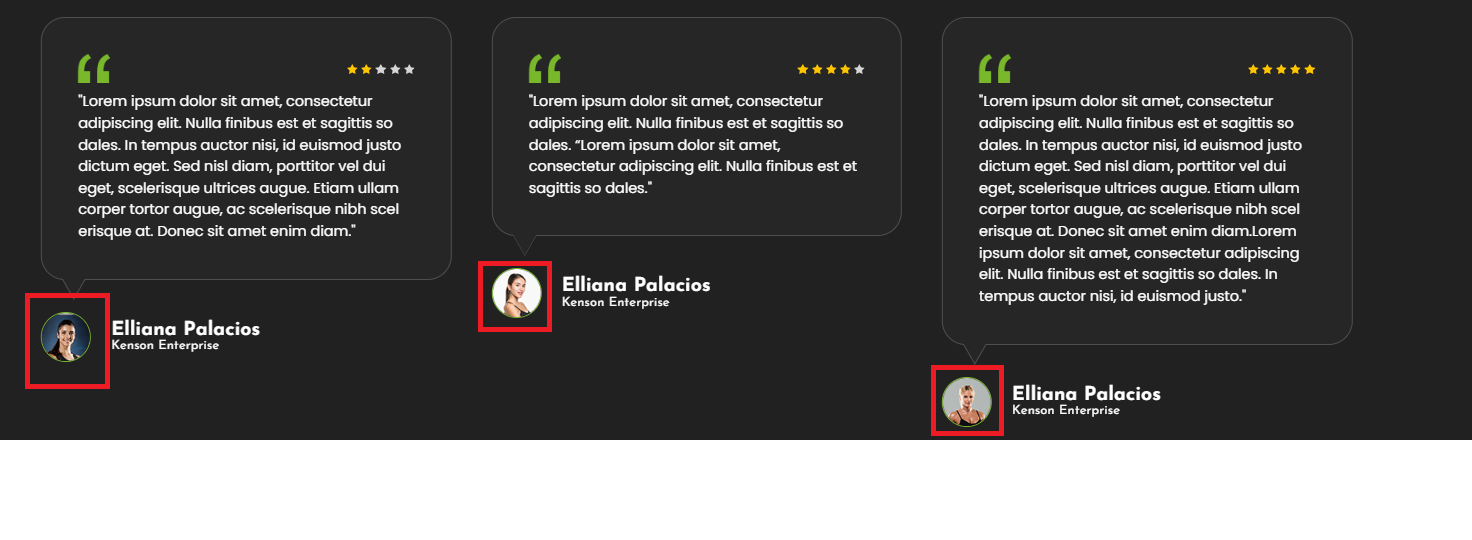
Testimonial Image: Add Image URL in firstimageicon to fifthimageicon. (please check image related details at the last of this documents)
Testimonial Author Name: Add author name in firstname to fifthname.
Testimonial Author Designation: Add author designation in firstdesignation to fifthdesignation.
Testimonial Rating: Add rating in rating1 to rating5.
Category Page
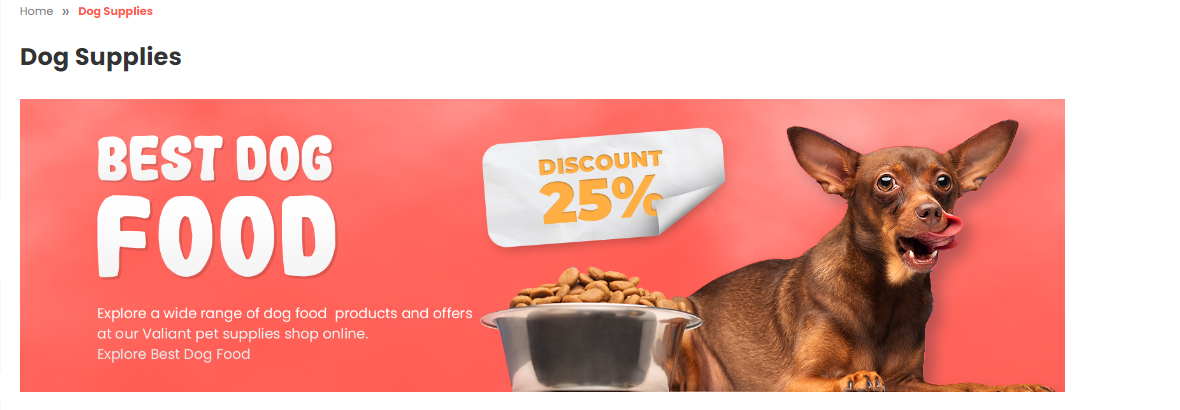
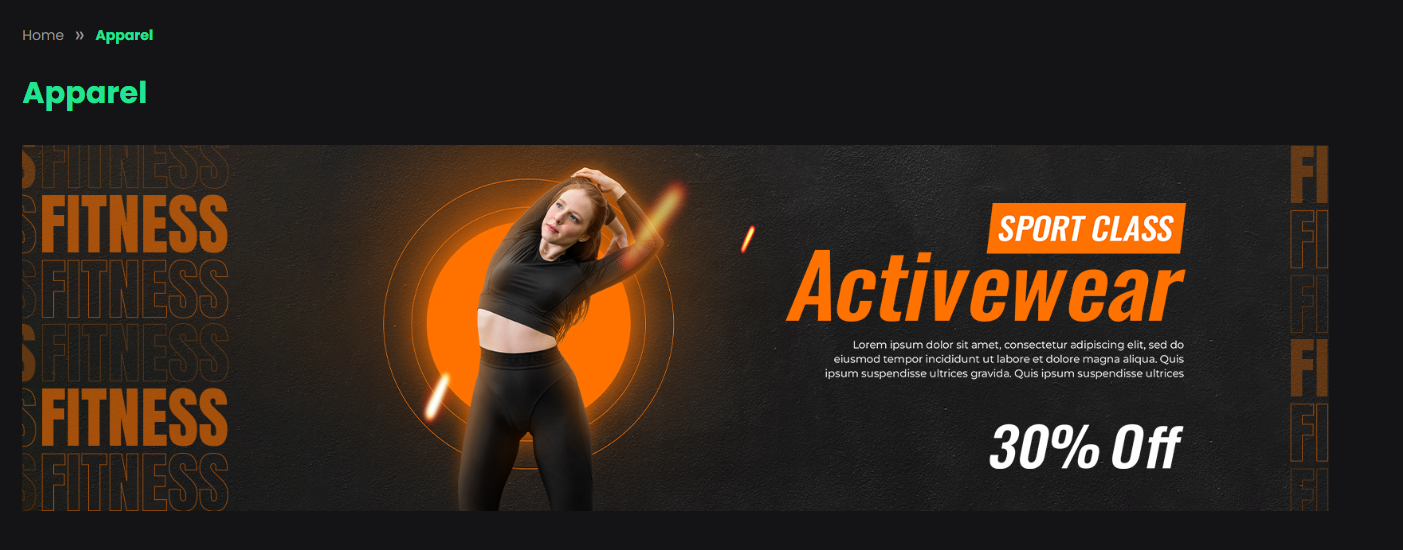
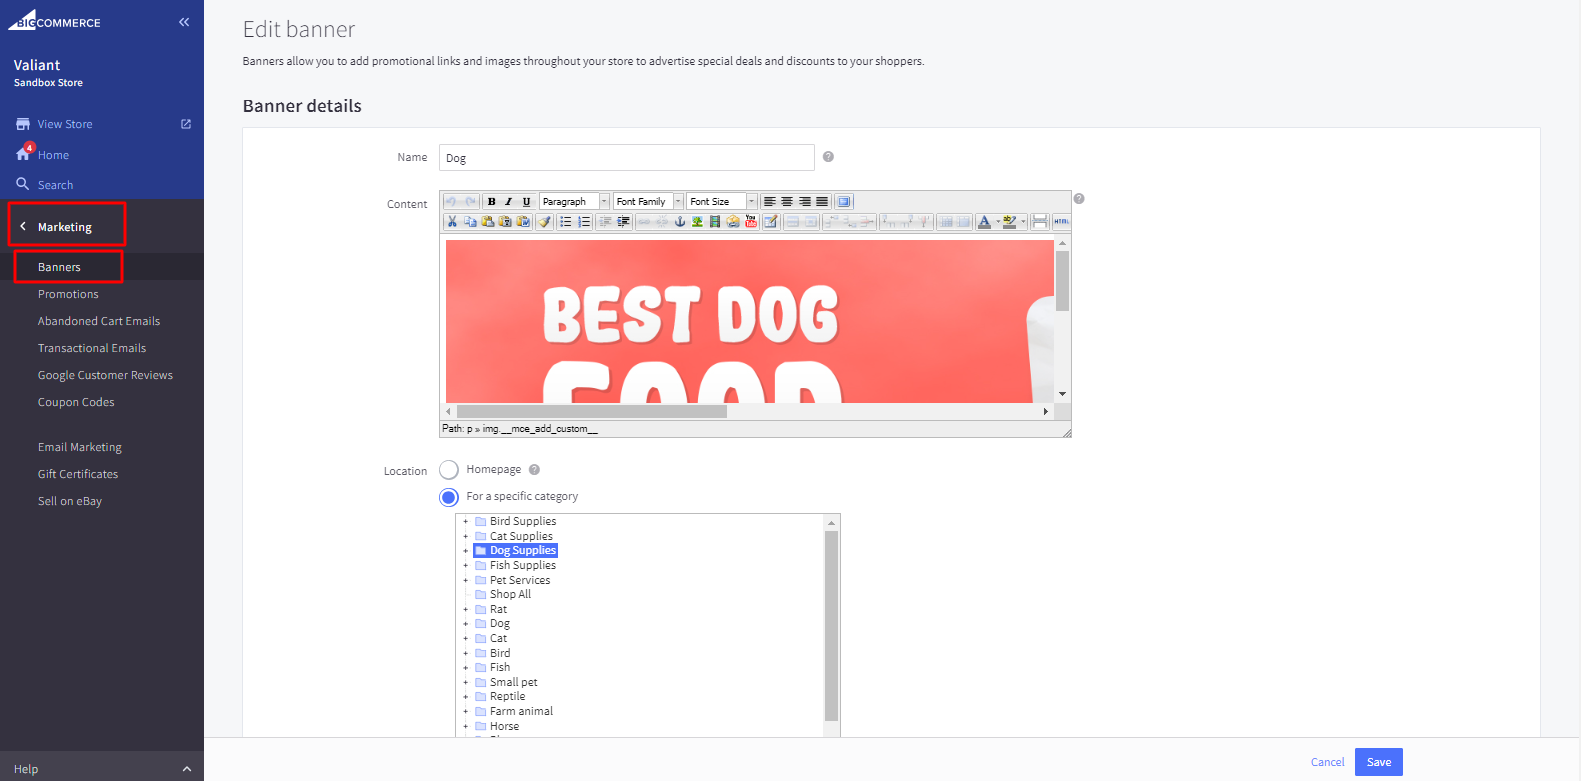
Banner on category page will come from marketing banner
Pet
GYM
CBD

You have to create a banner, add an image and assign it to a particular category in which you want to show the image.
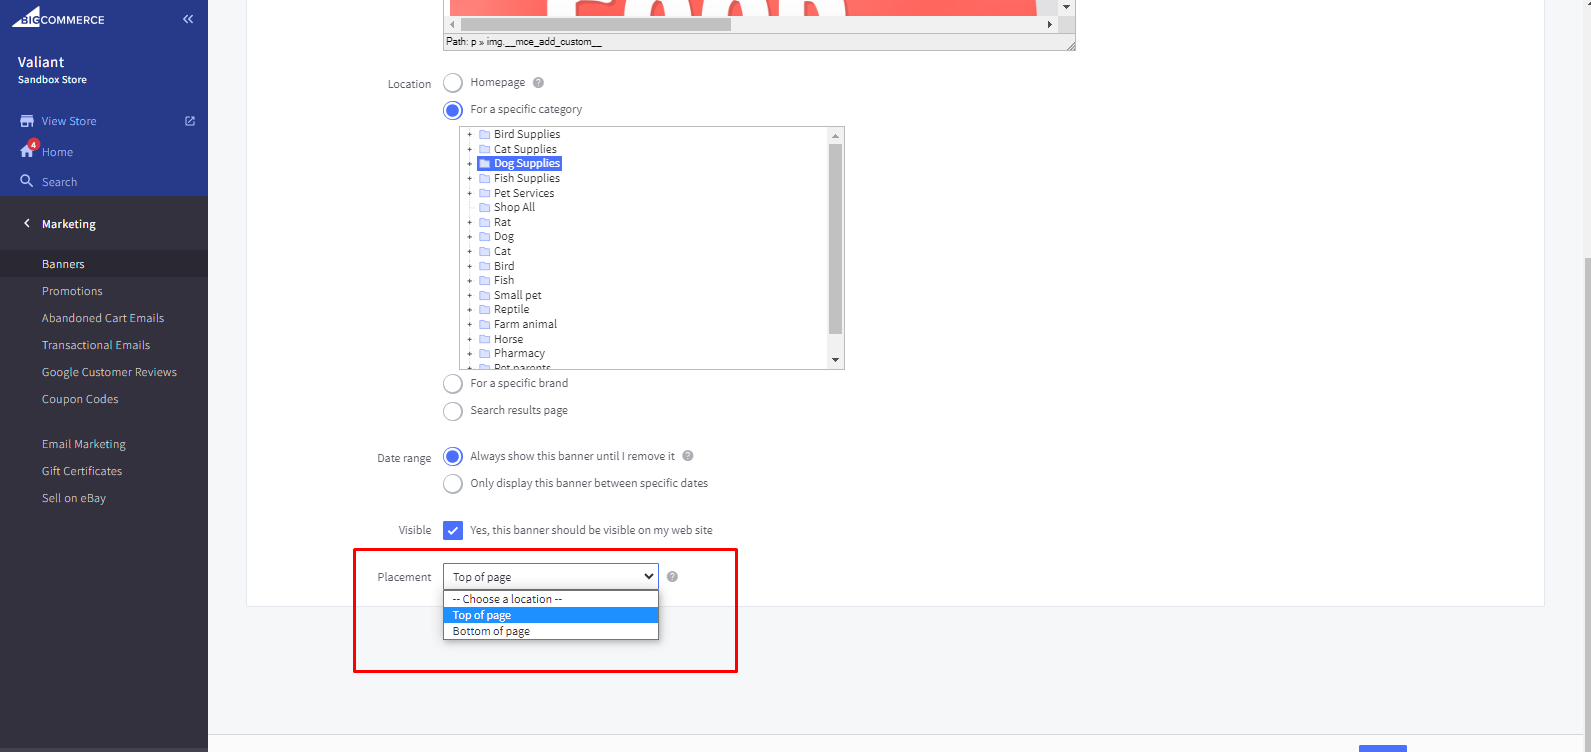
Set Position: Set Banner position in Placement DropDown.
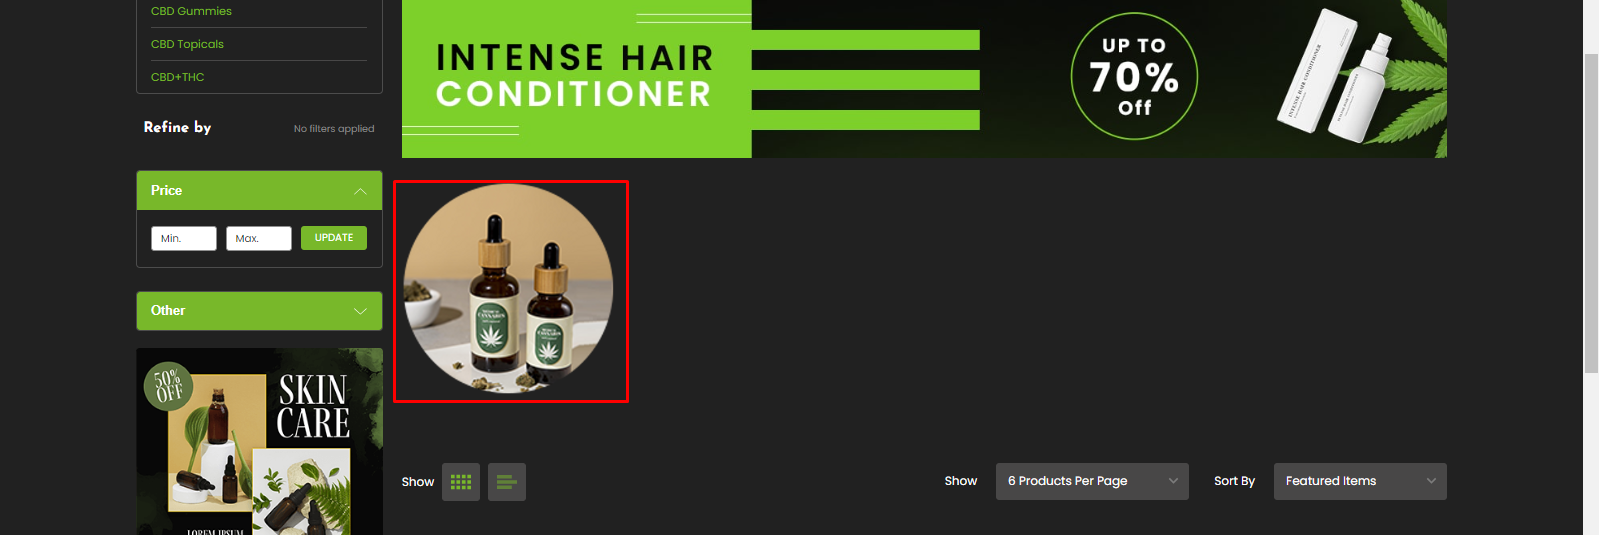
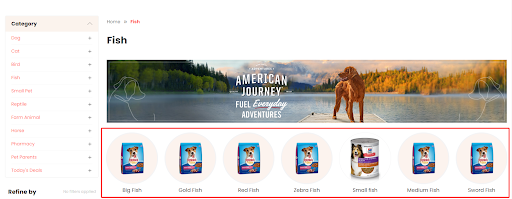
All the subcategories will be visible on it parent category page with its category image like this.
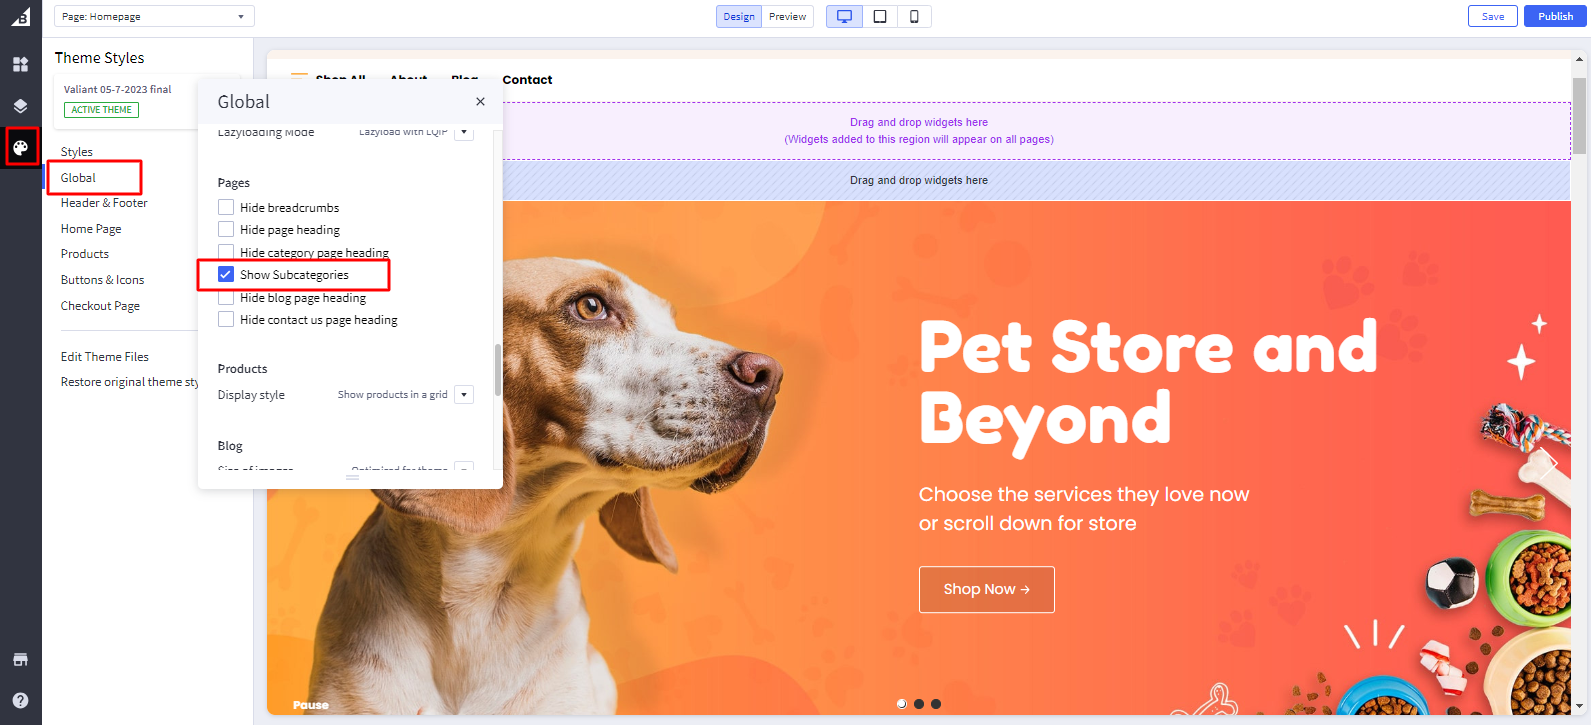
Show Subcategories: You can turn on and turn off subcategories from the theme settings.
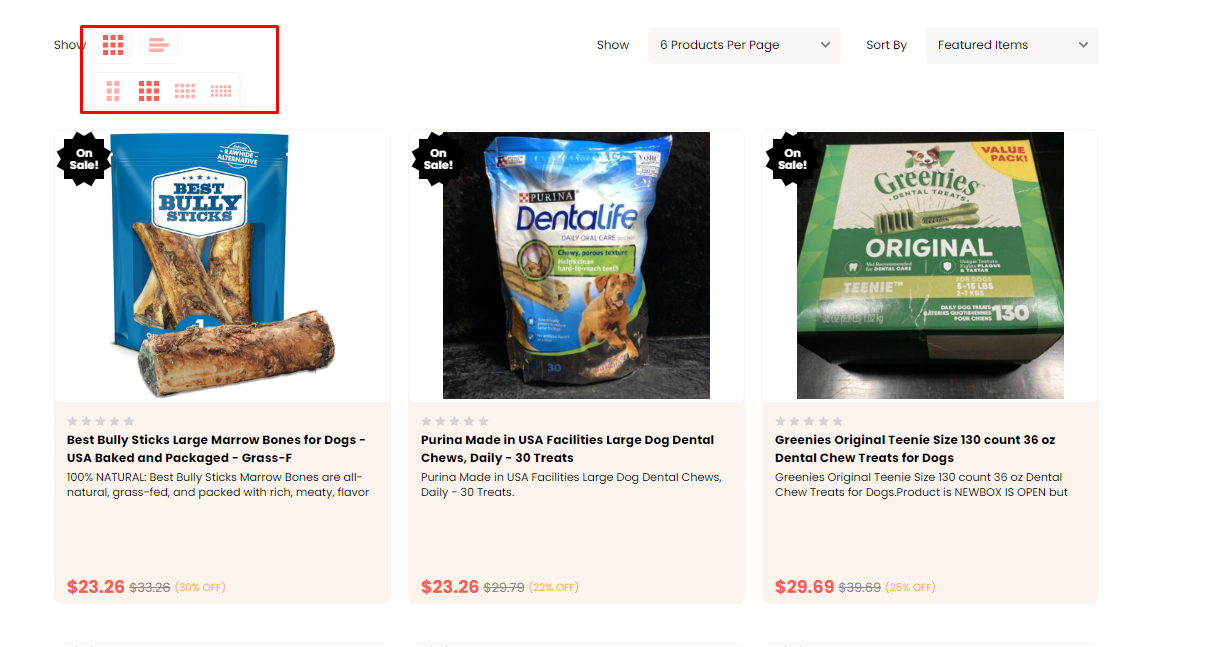
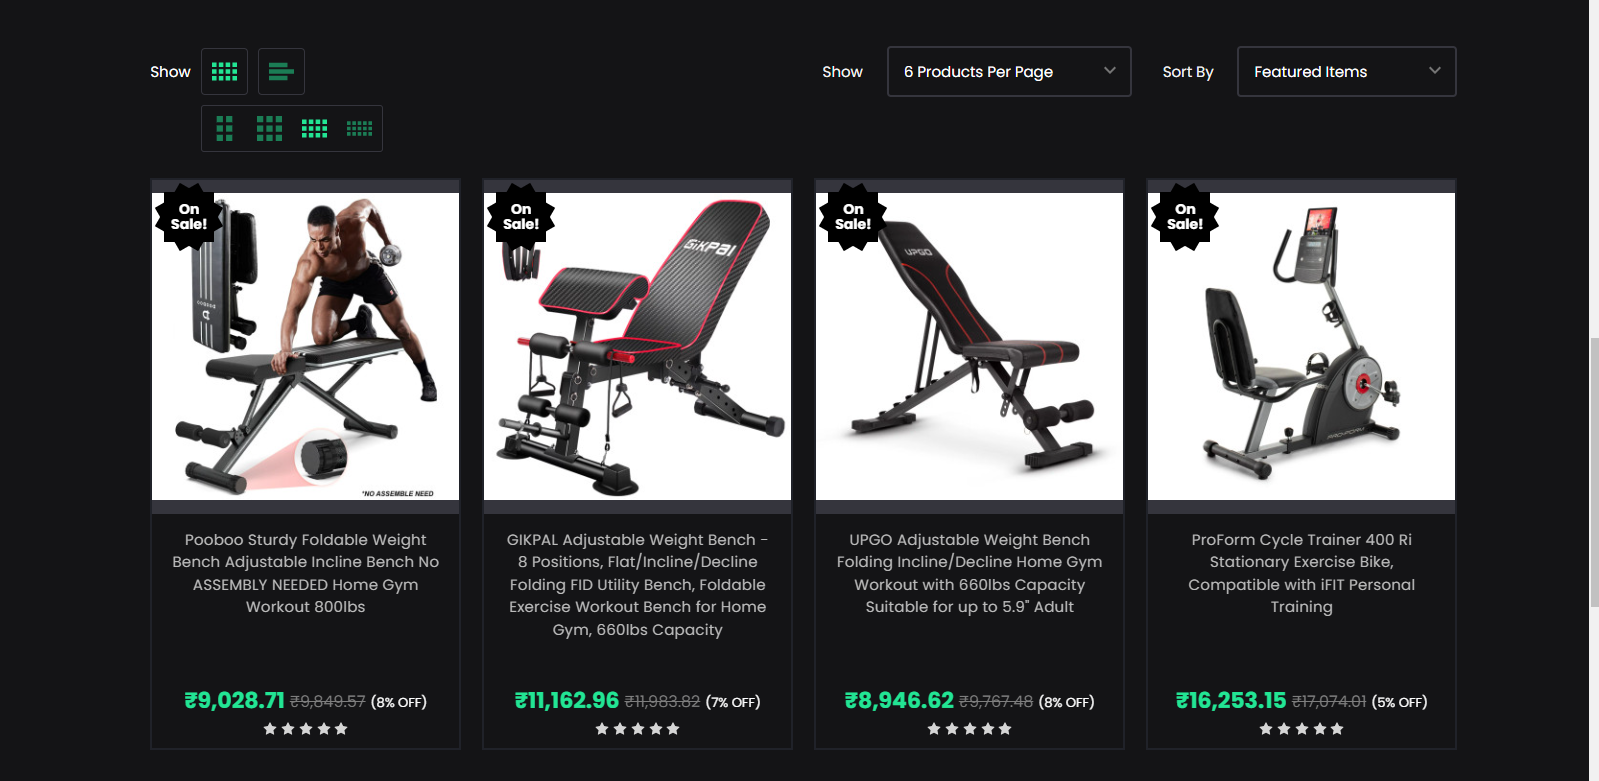
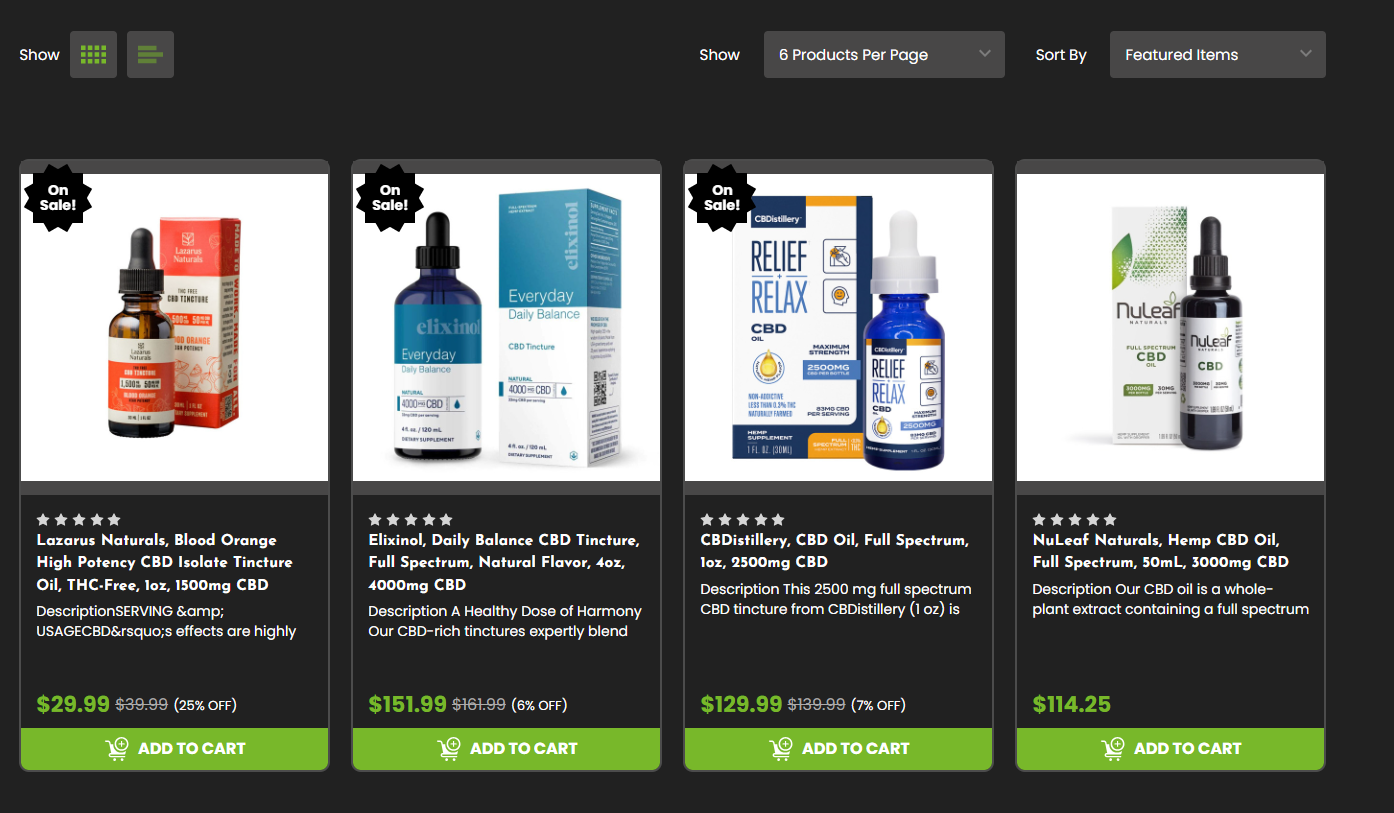
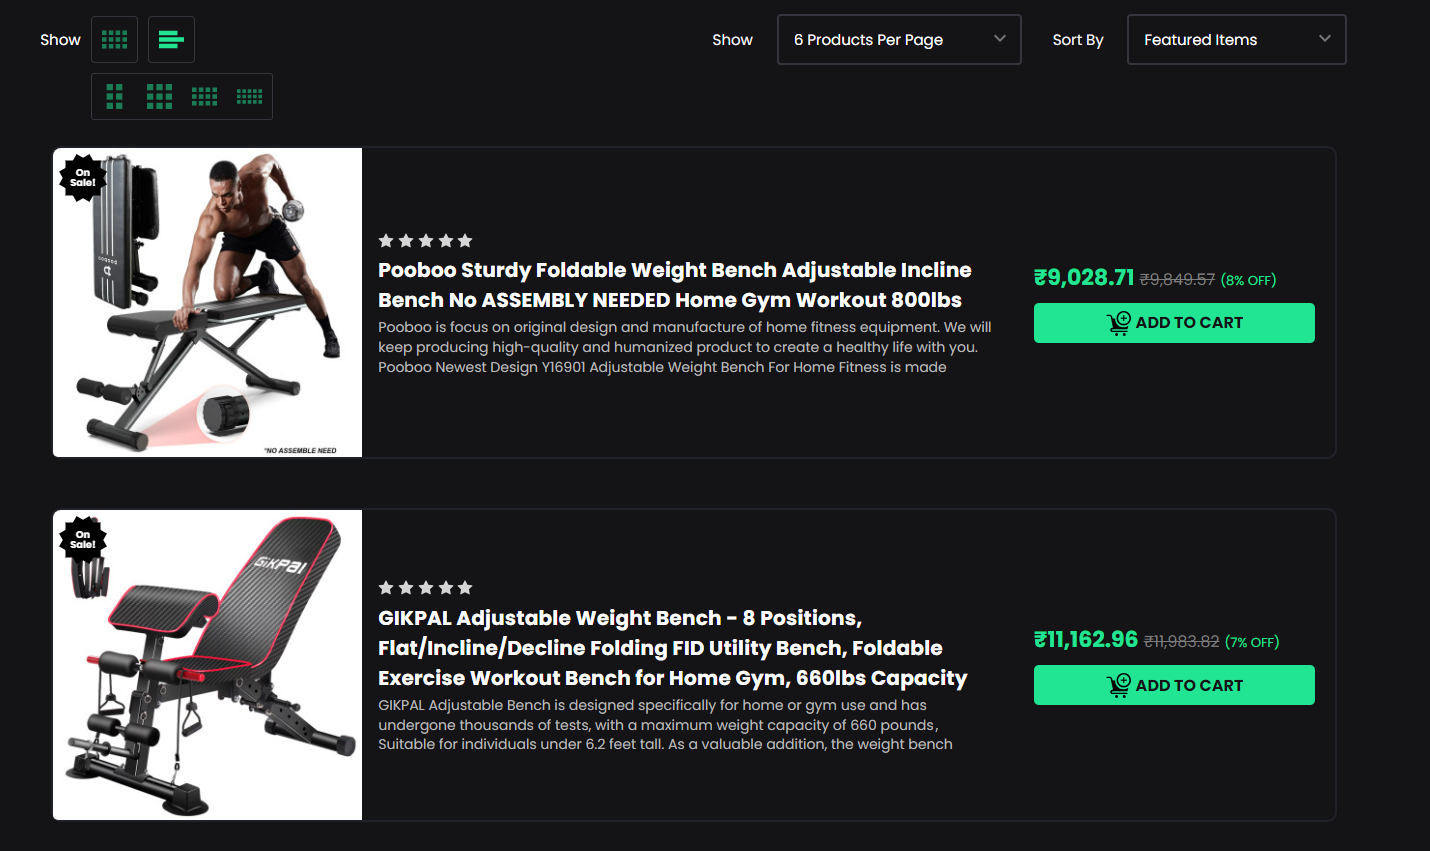
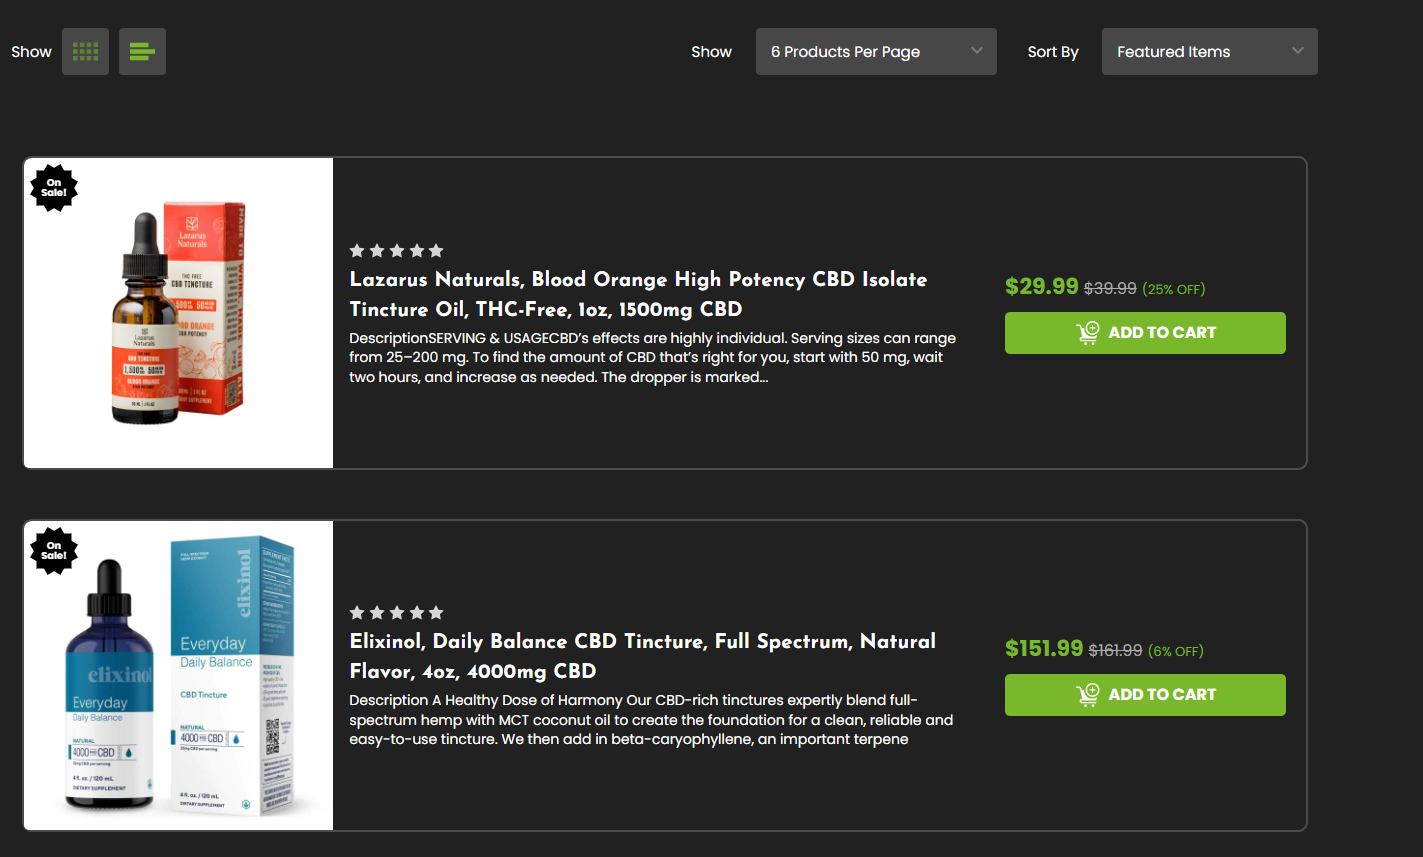
Manage List view / Grid View for category page.
Gid View
Pet

GYM
CBD
List View
Pet

GYM
CBD
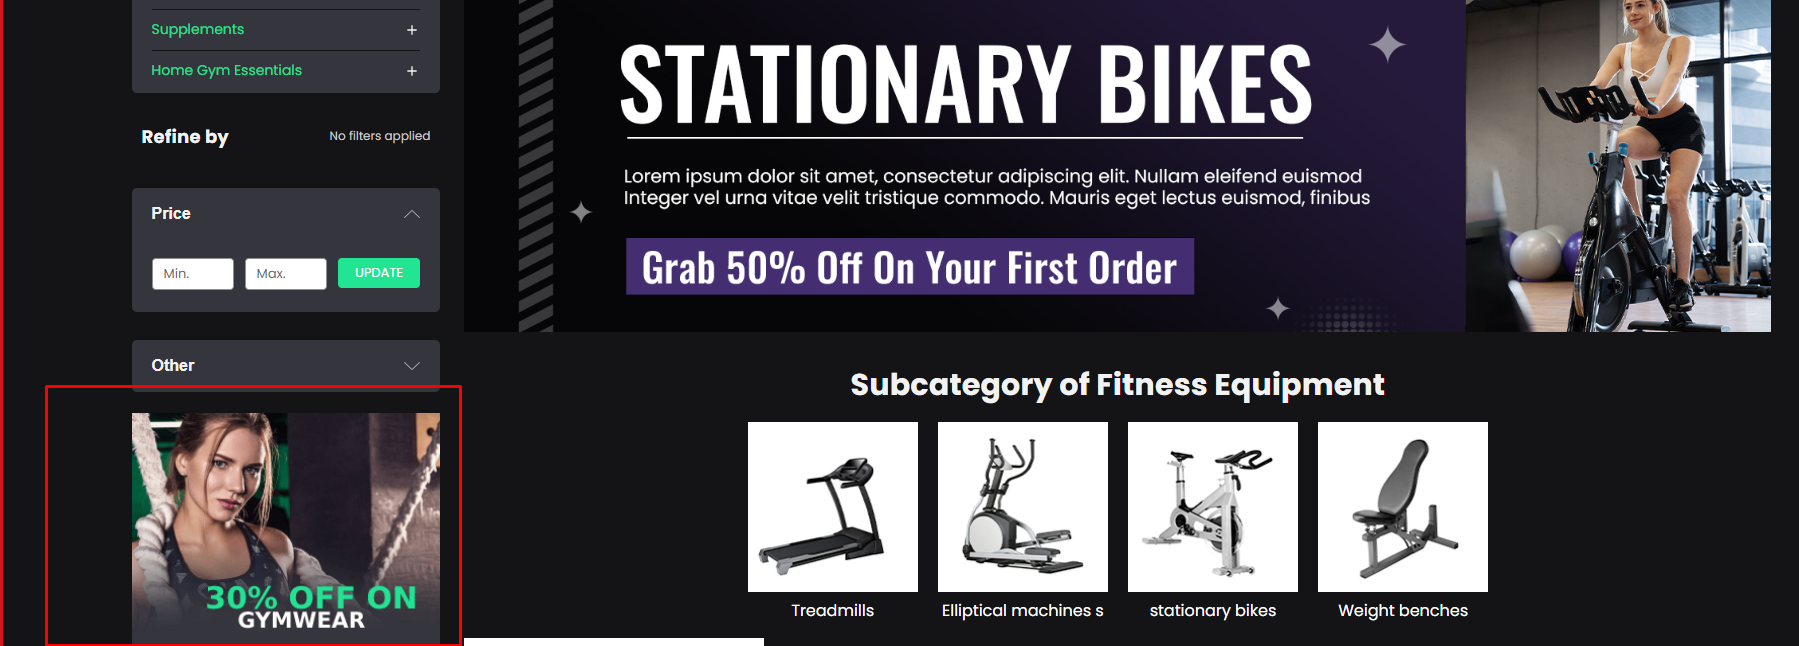
Sidebar Image
Pet

GYM
CBD
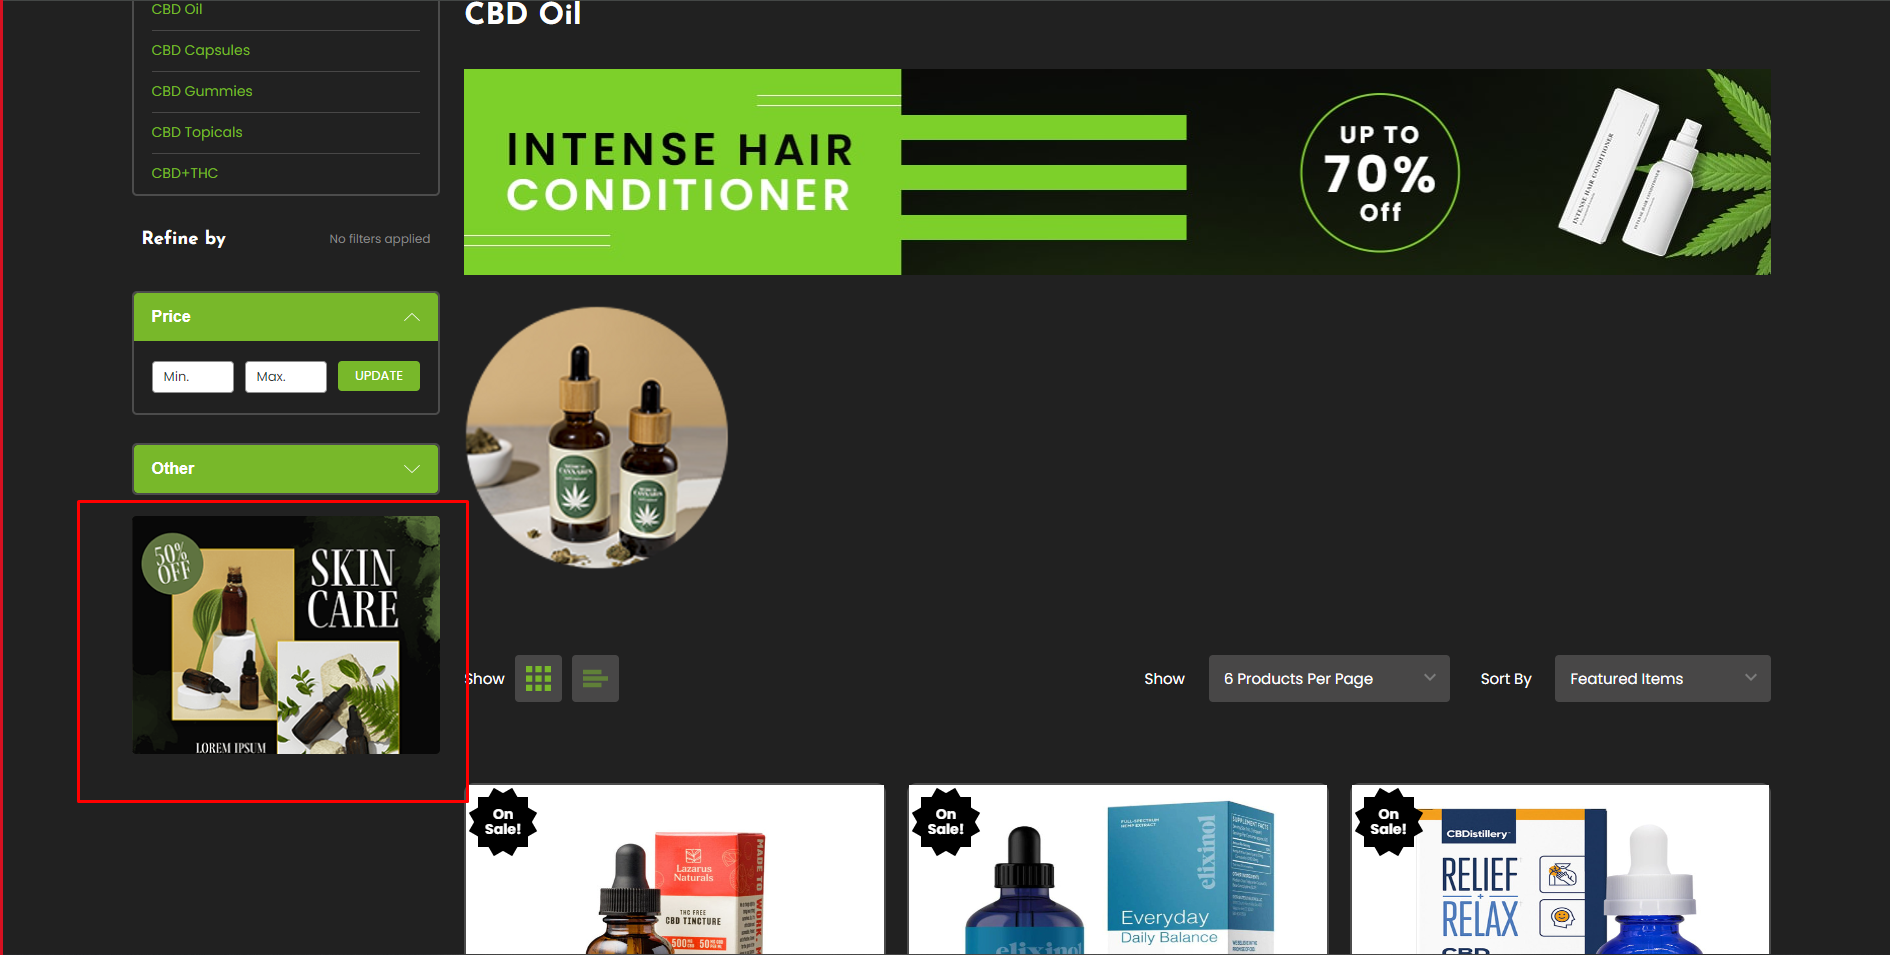
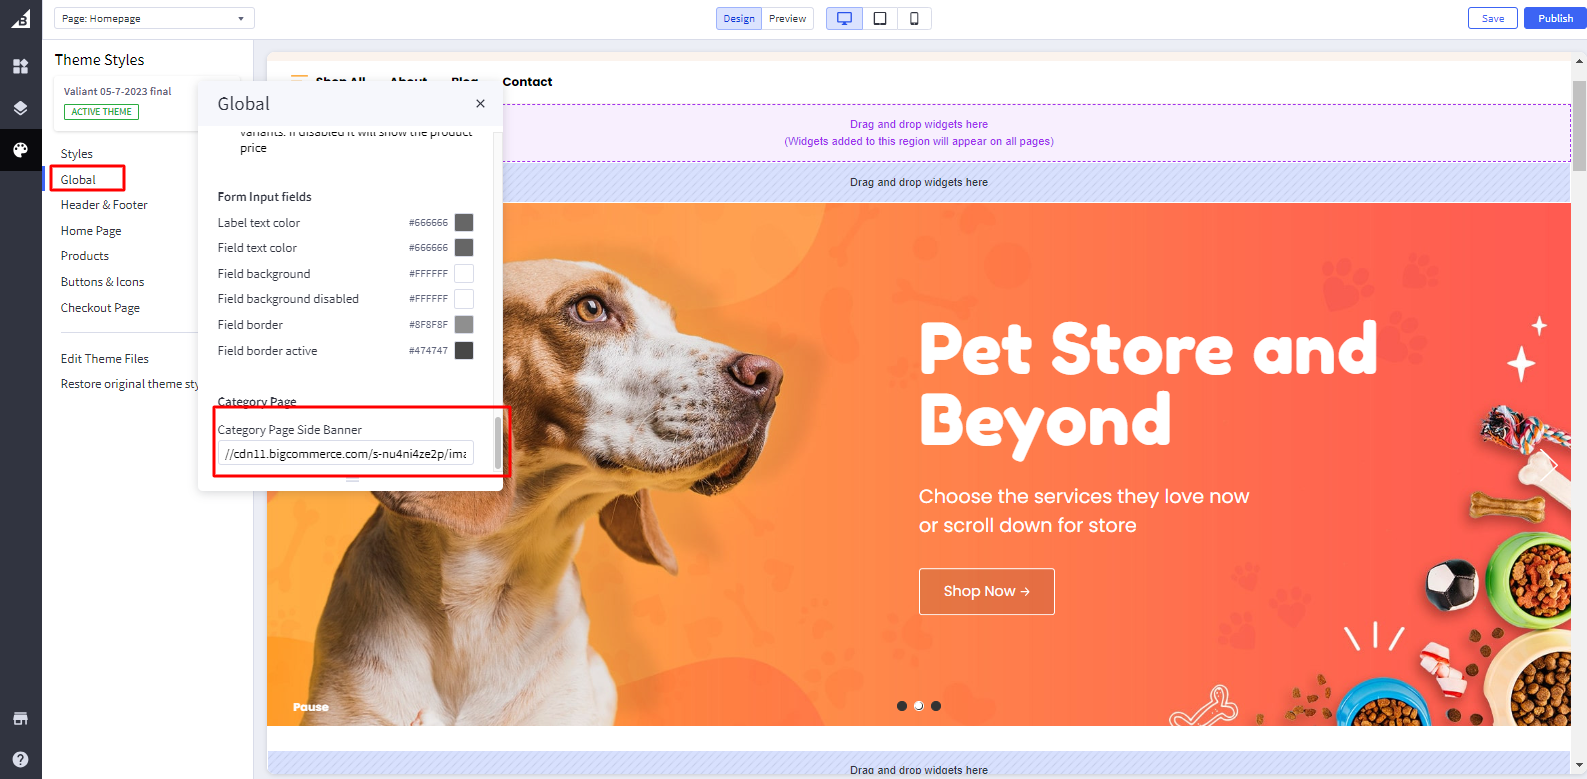
Category Page Side Banner: Add Image path in Category Page Side Banner. (please check image related details at the last of this documents)
Product Page
Offer Text
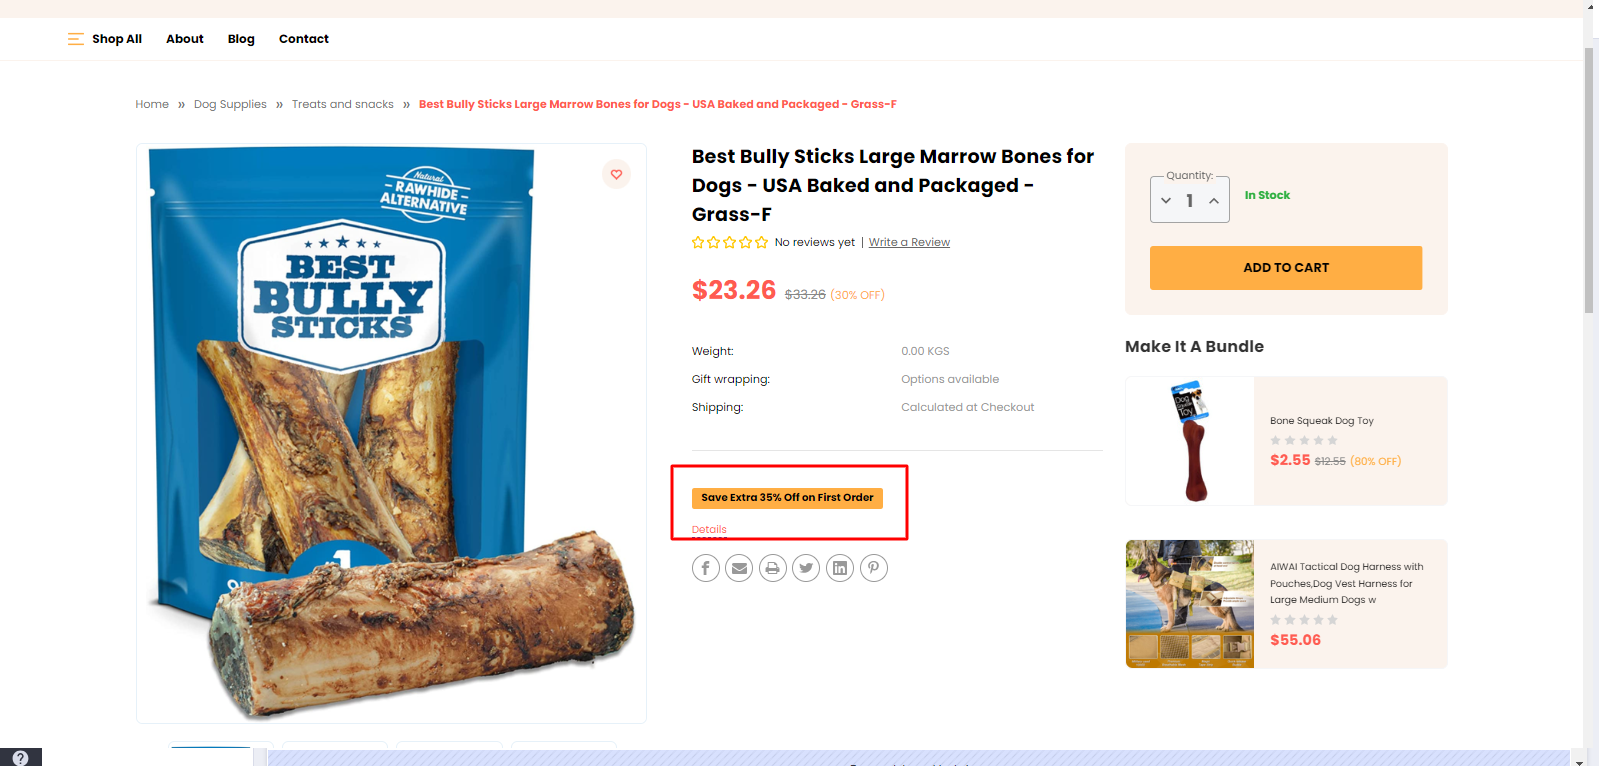

Show Offer Text: Toggles the visibility of Show Pdp Offer text.
Offer Text: Add Text in Pdp Offer text. I.e.. Save Extra 35% Off on First Order.
Offer Text Link: Add page link in Pdp Offer link.
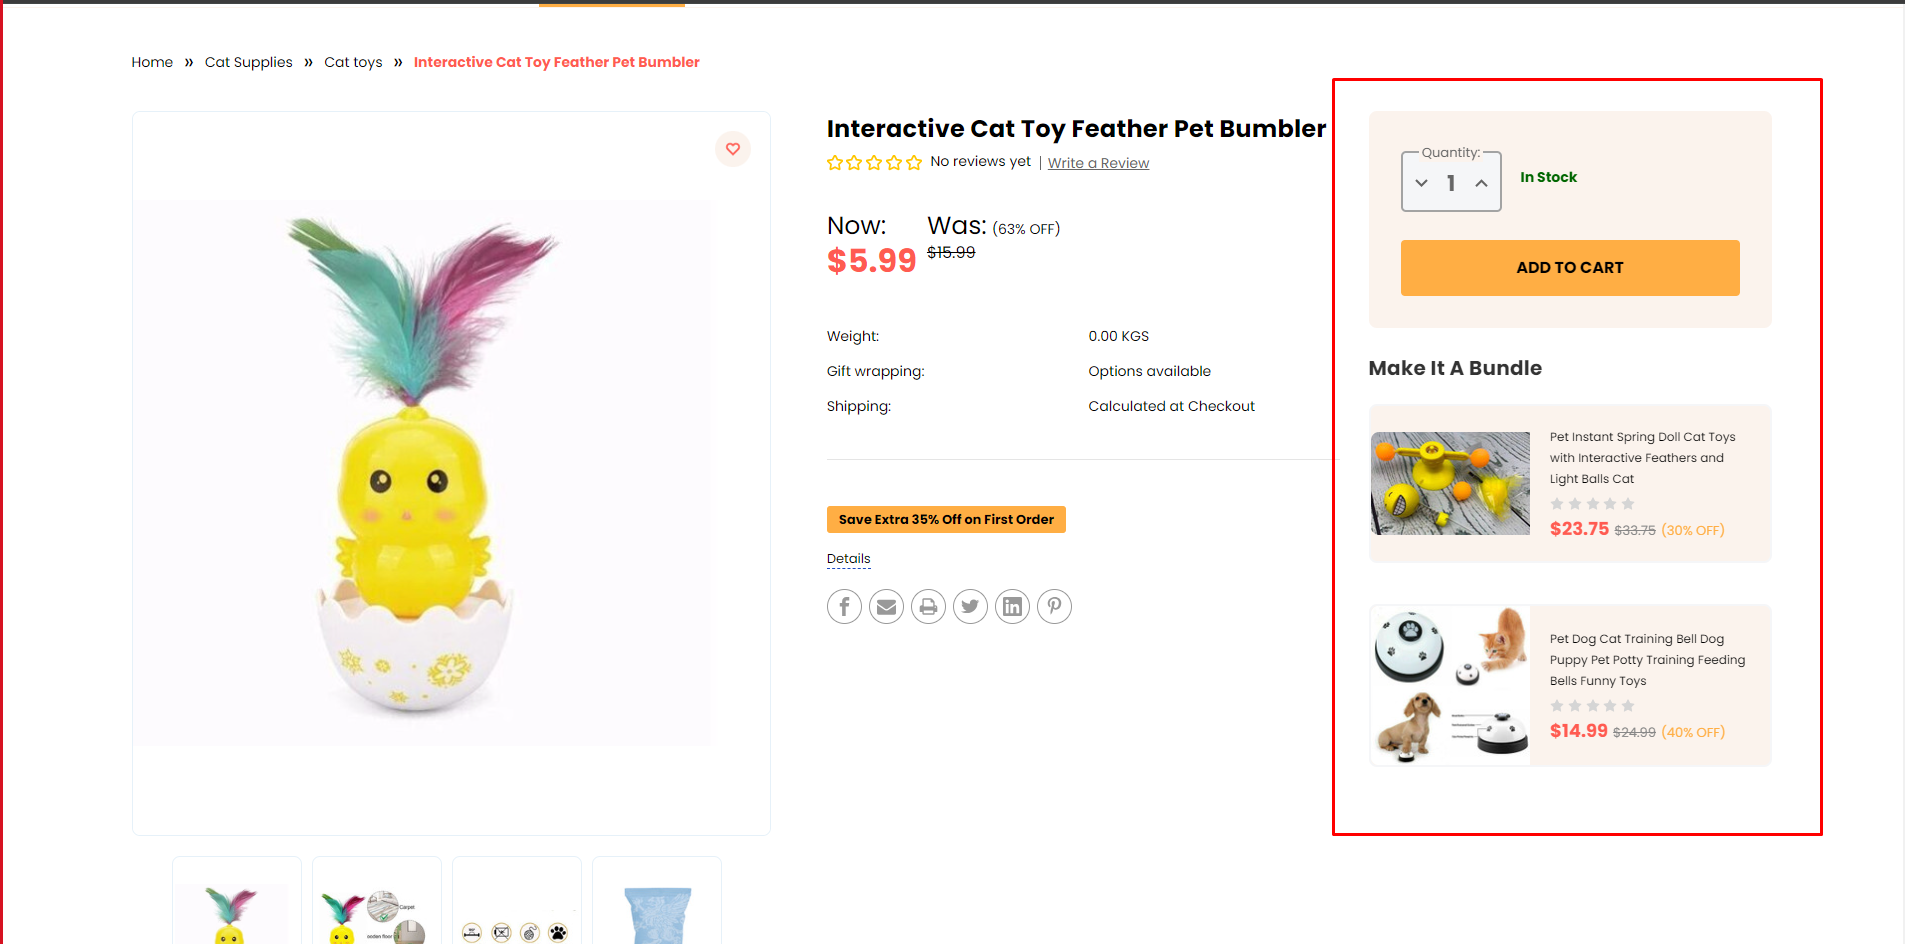
Add To Cart Style
Pet
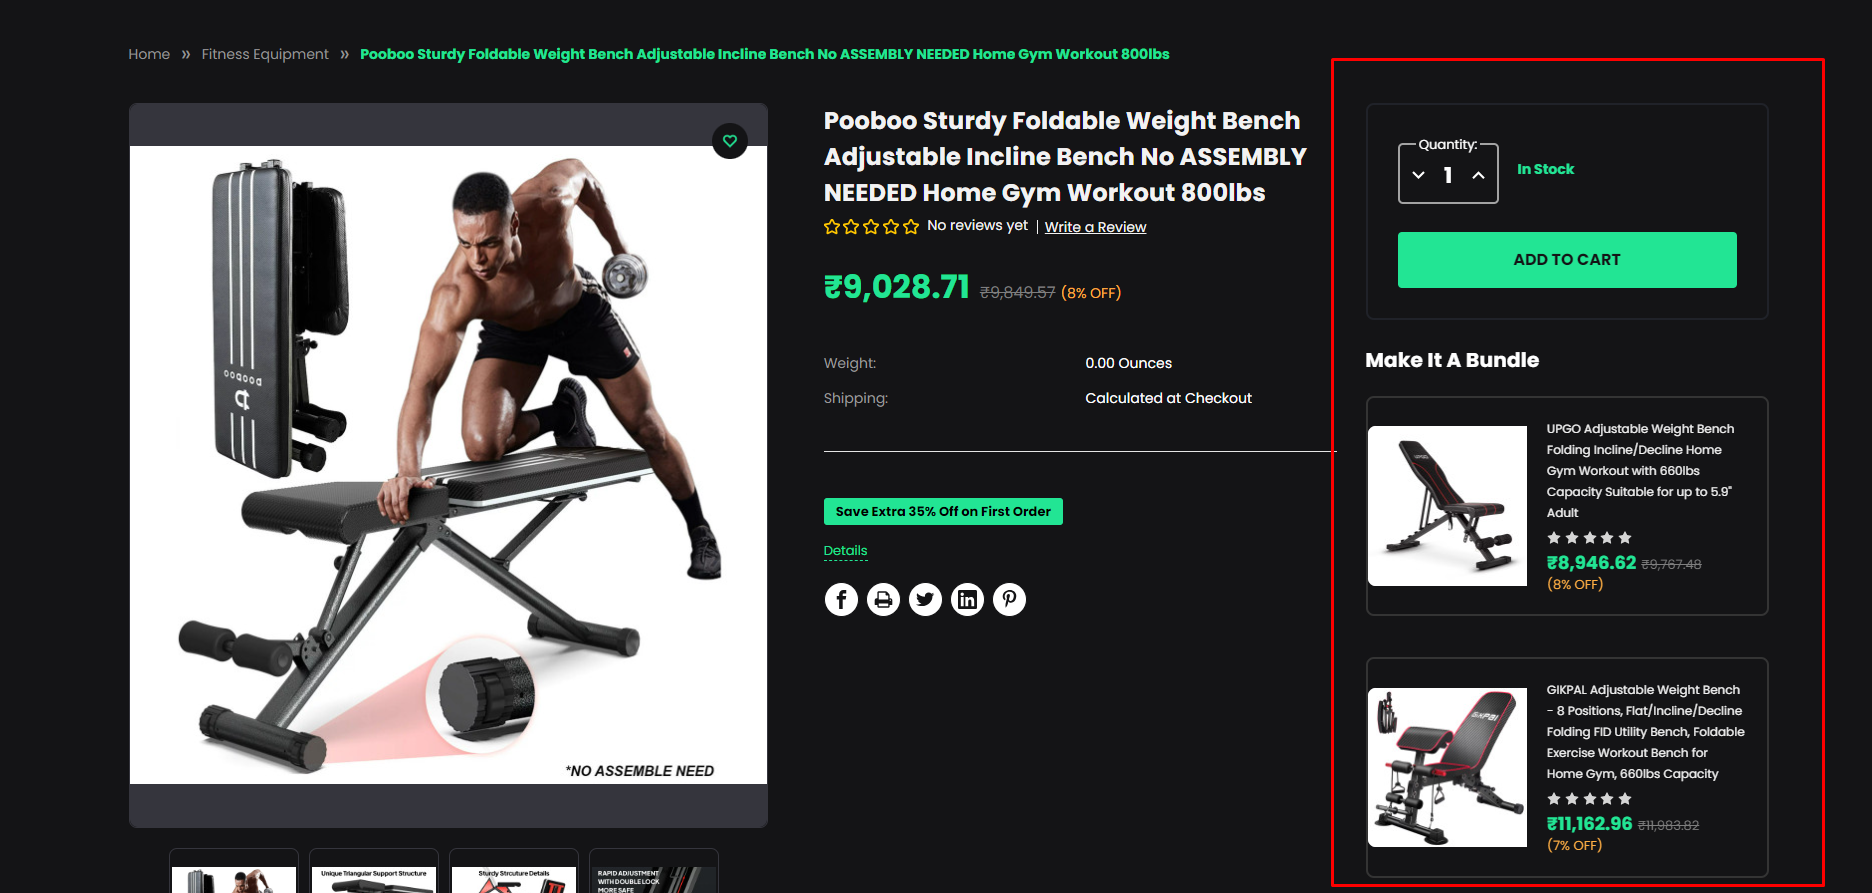
GYM
CBD
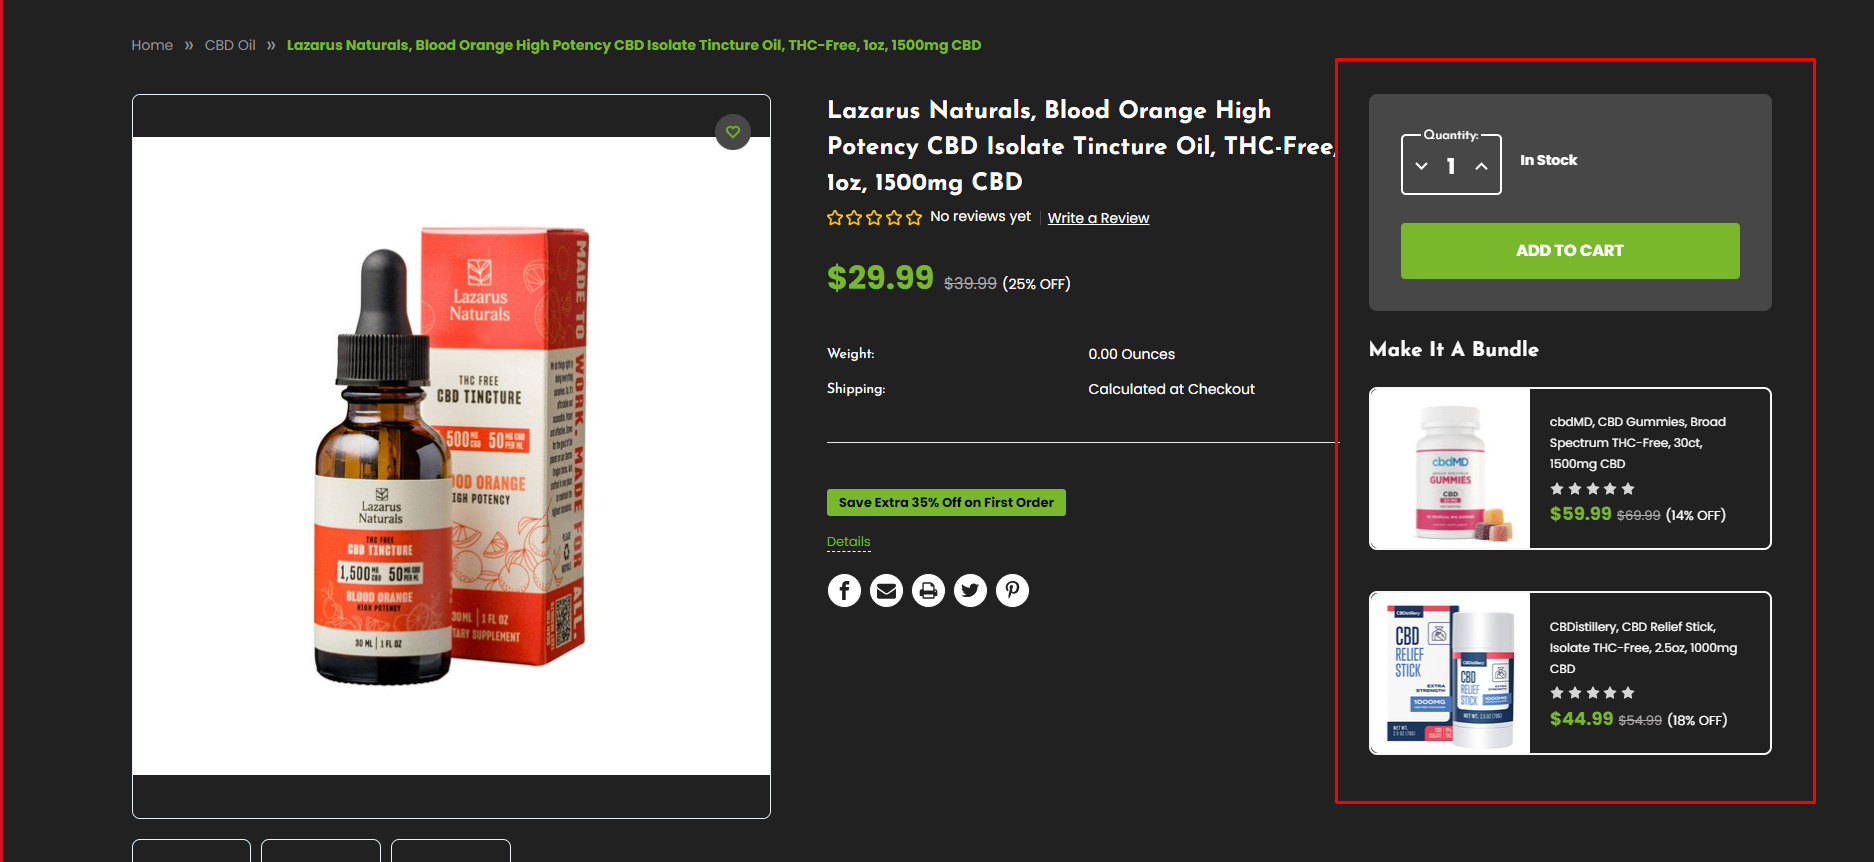
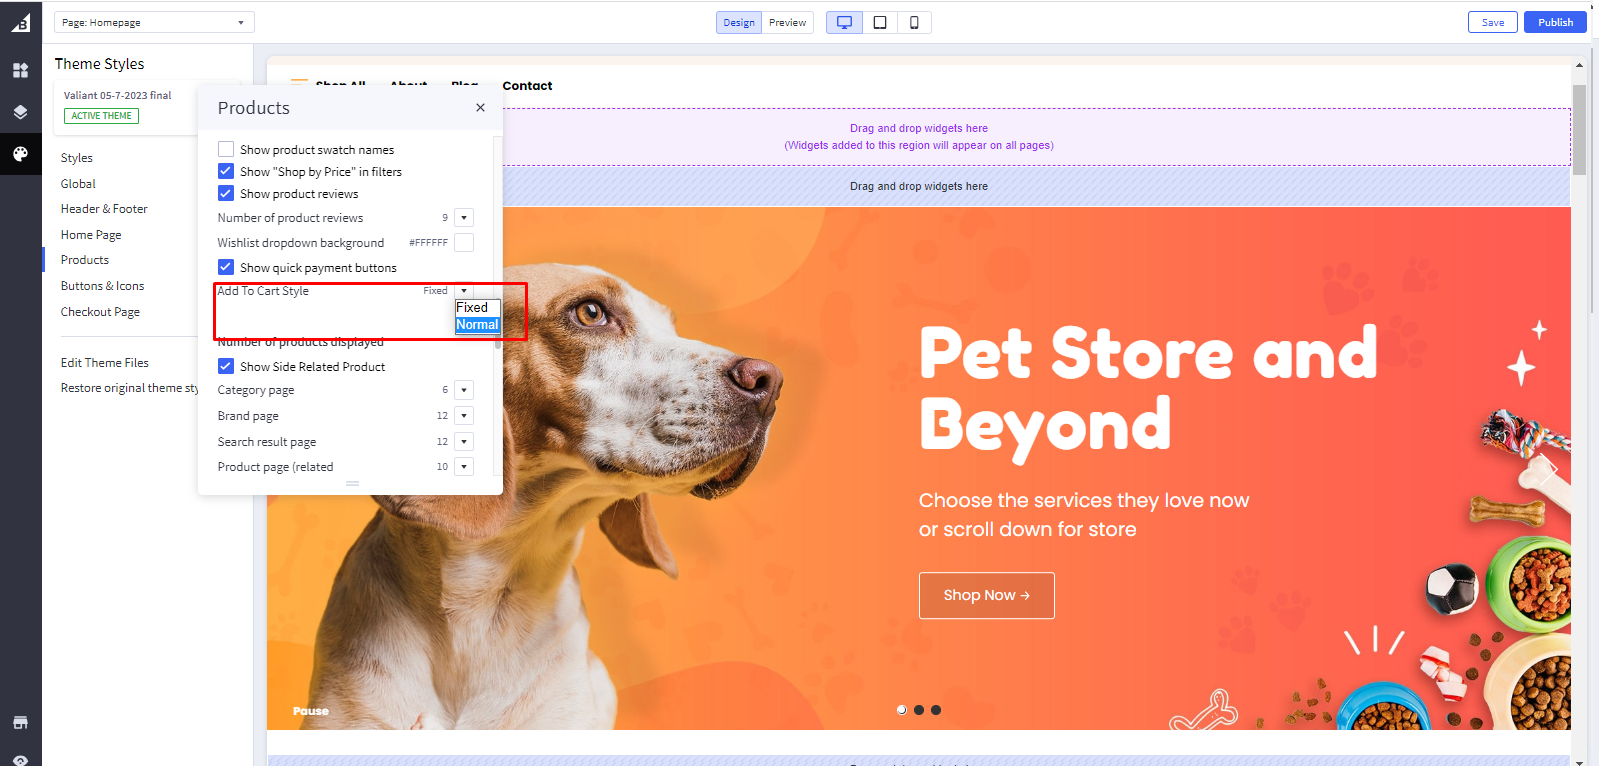
Add To Cart Style: Select style of Add to Cart button for fixed or Normal.
Custom Tab

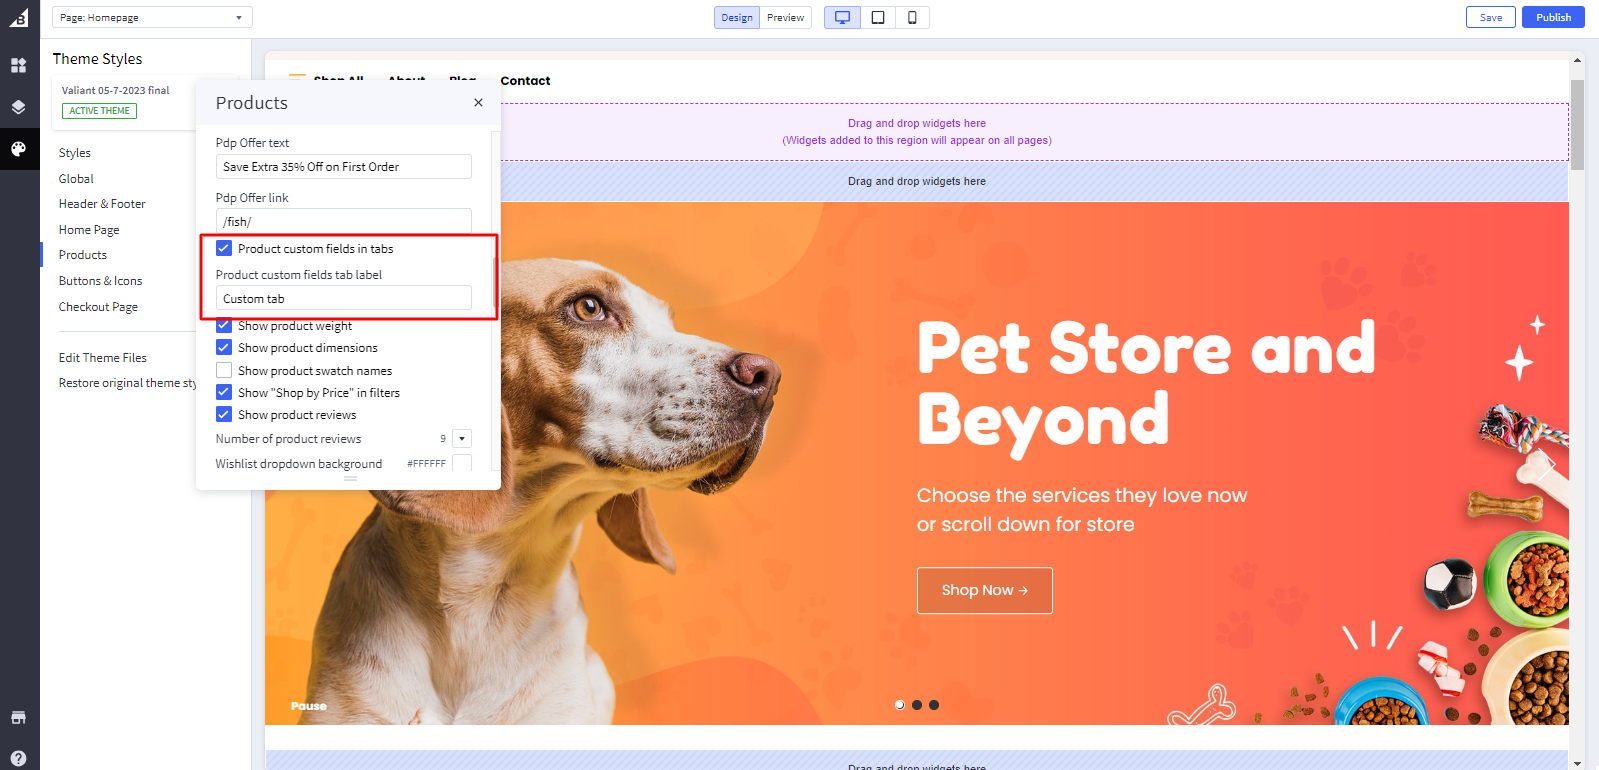
Product Custom Fields in Tabs: Toggles the visibility of Product custom fields in tabs.
Product Custom Field Tab Label: Add tab name in Product custom fields tab label.
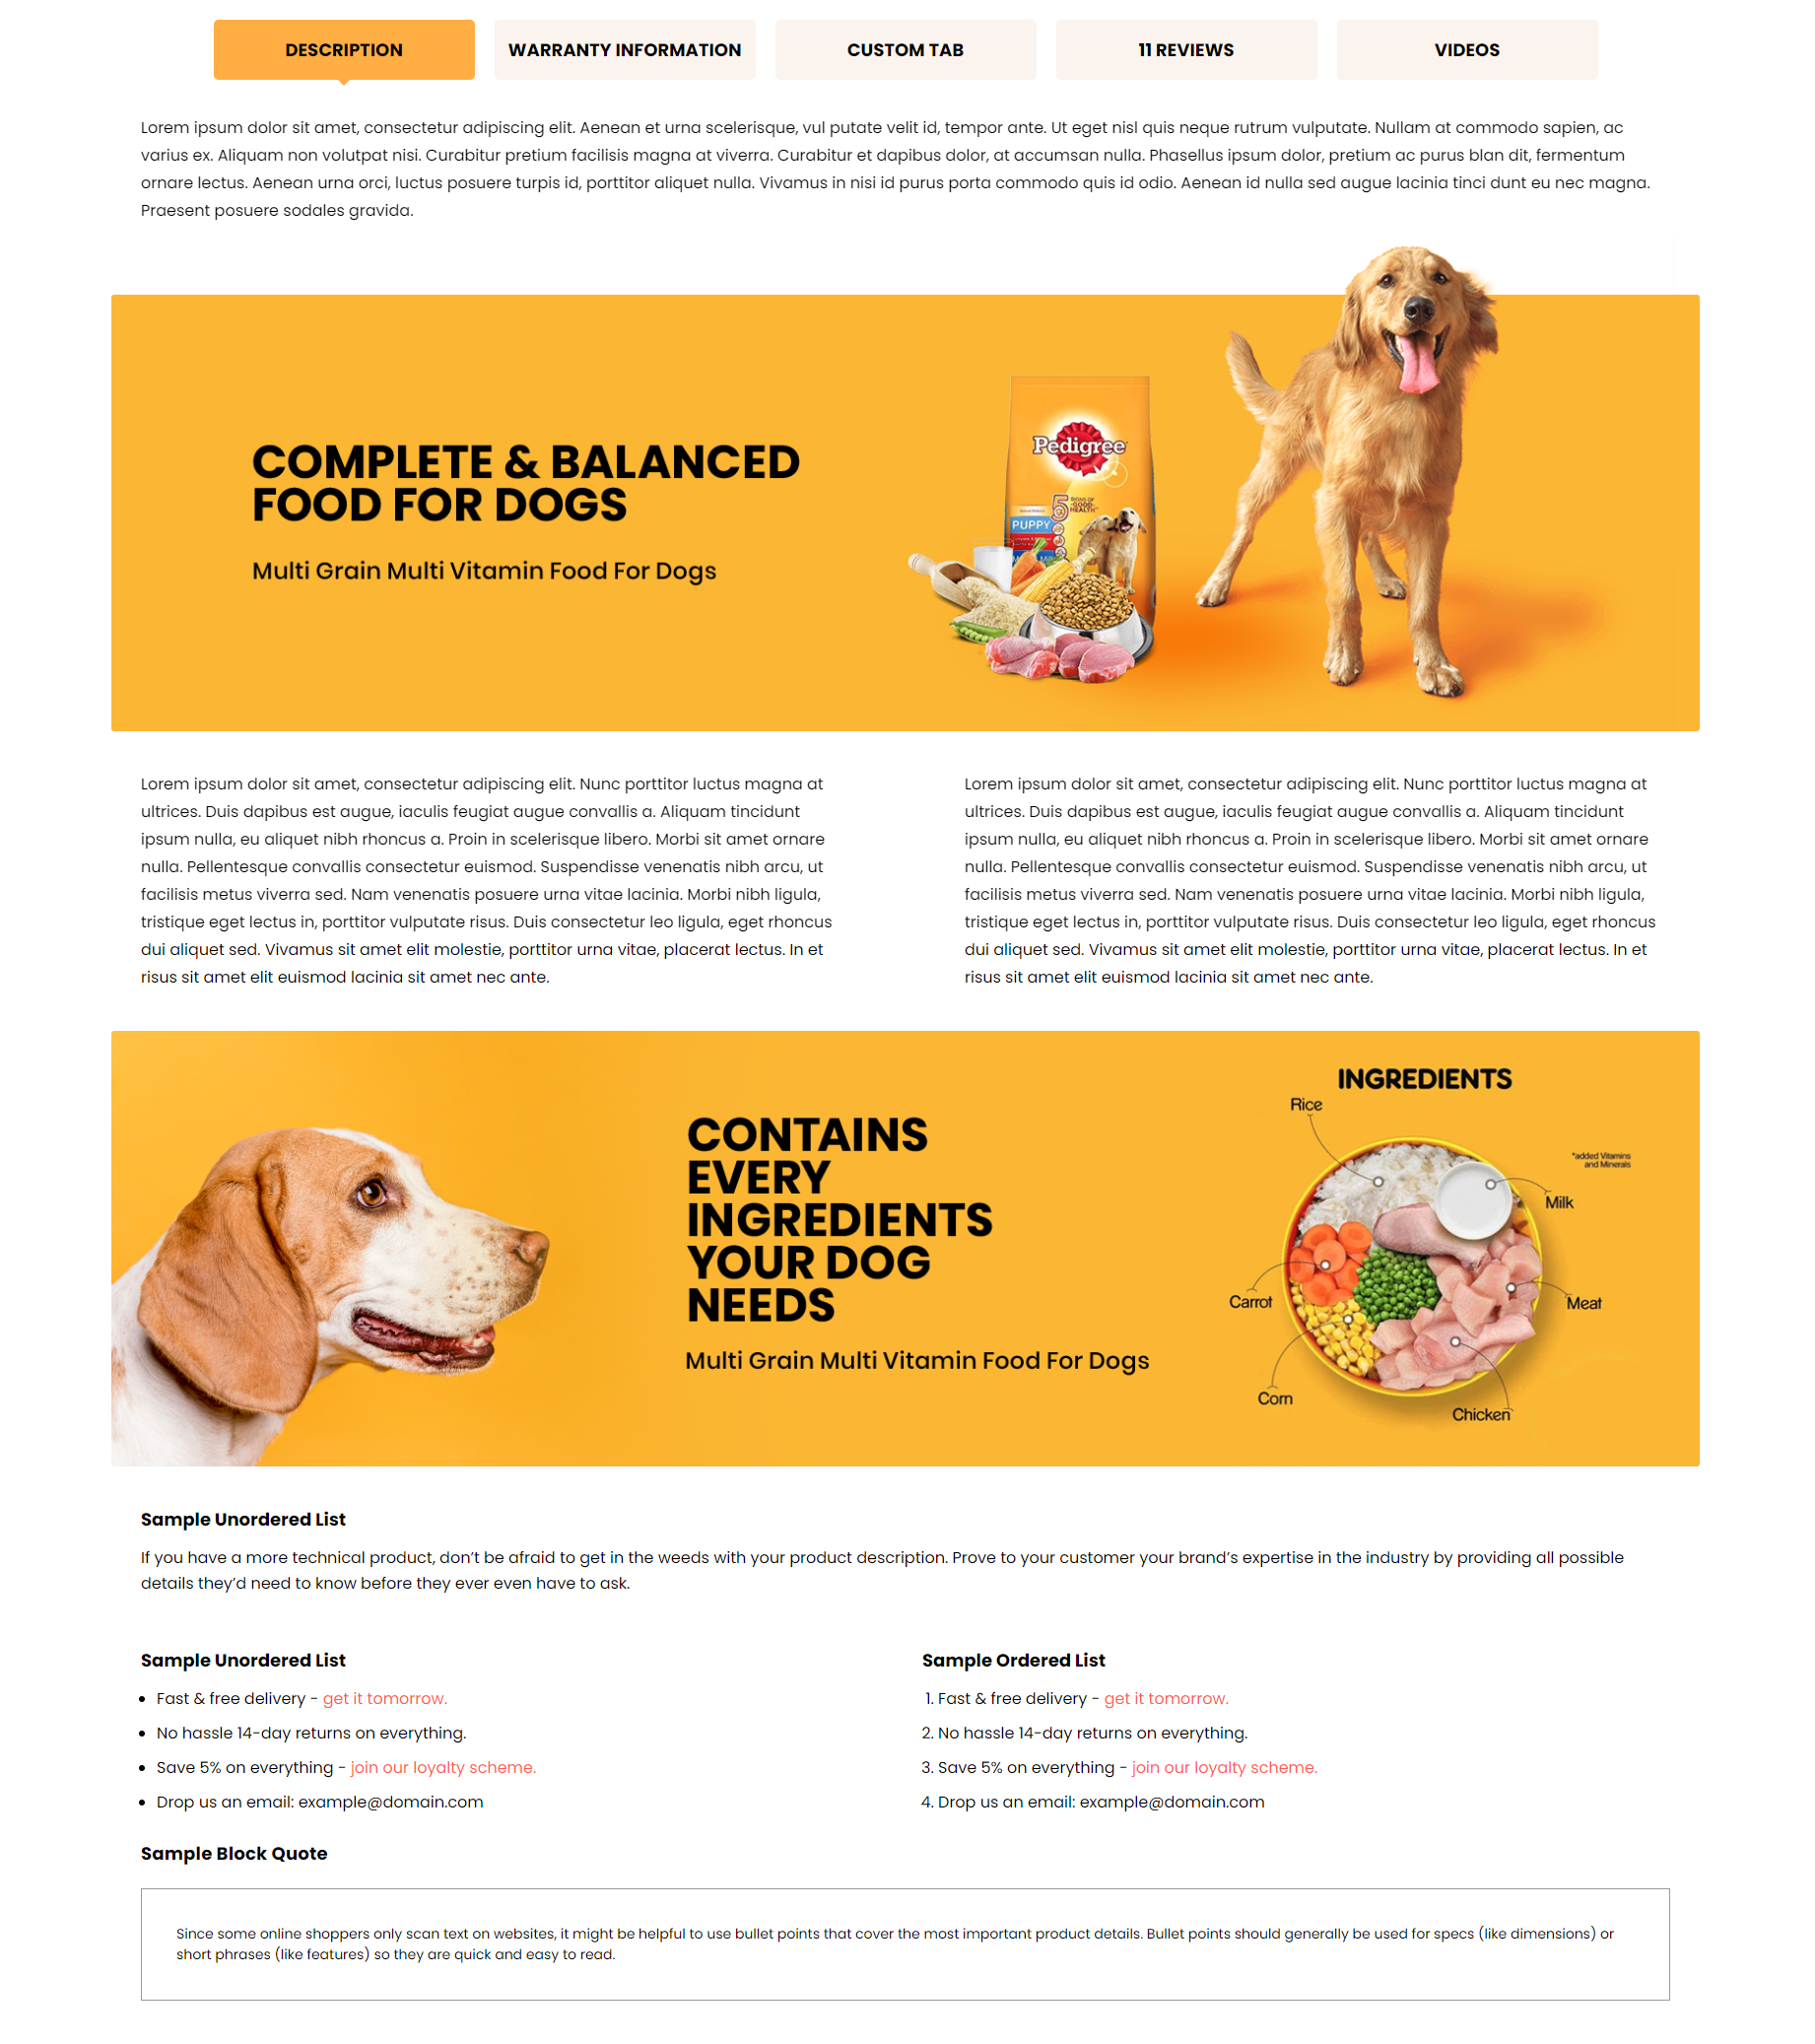
Product Description Tab: Add Description of product.
Pet
GYM

CBD
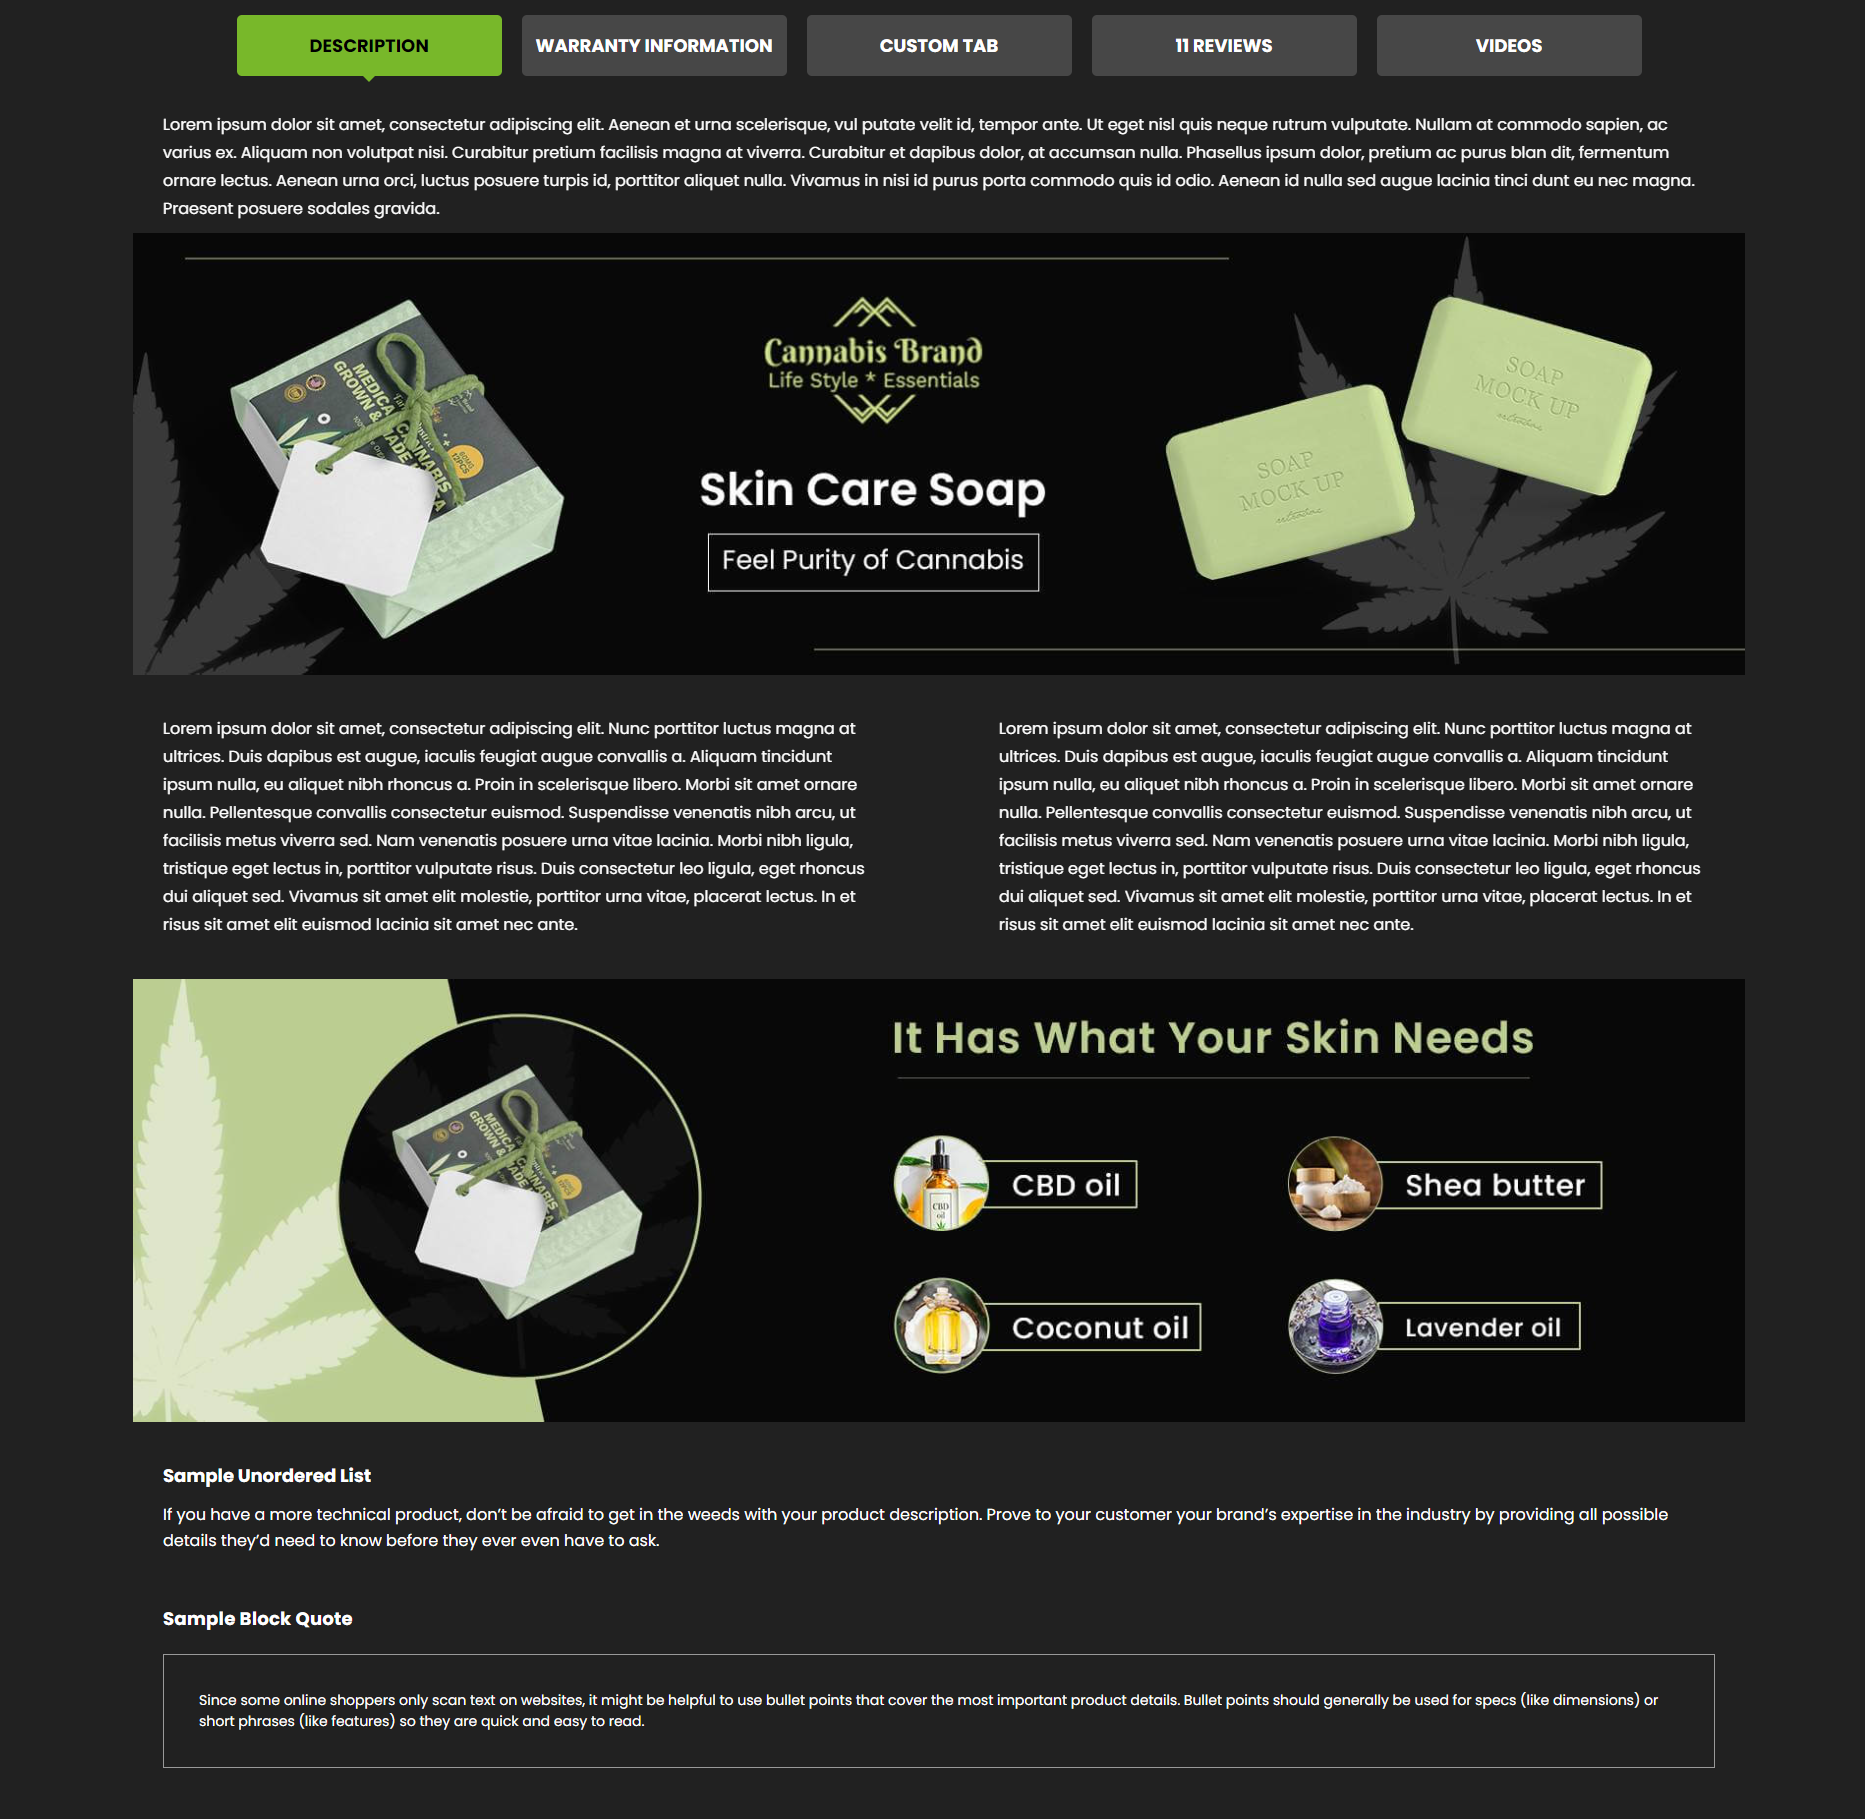
To add description in the same style then add Below HTML structure in description
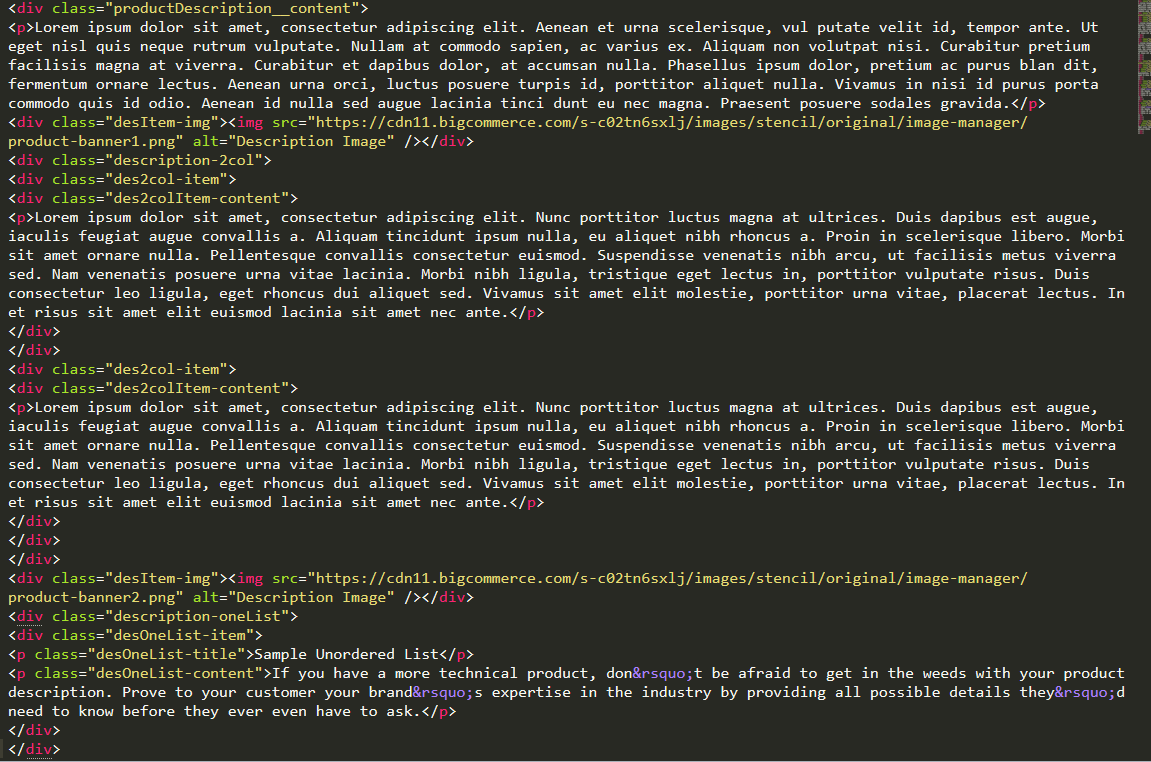
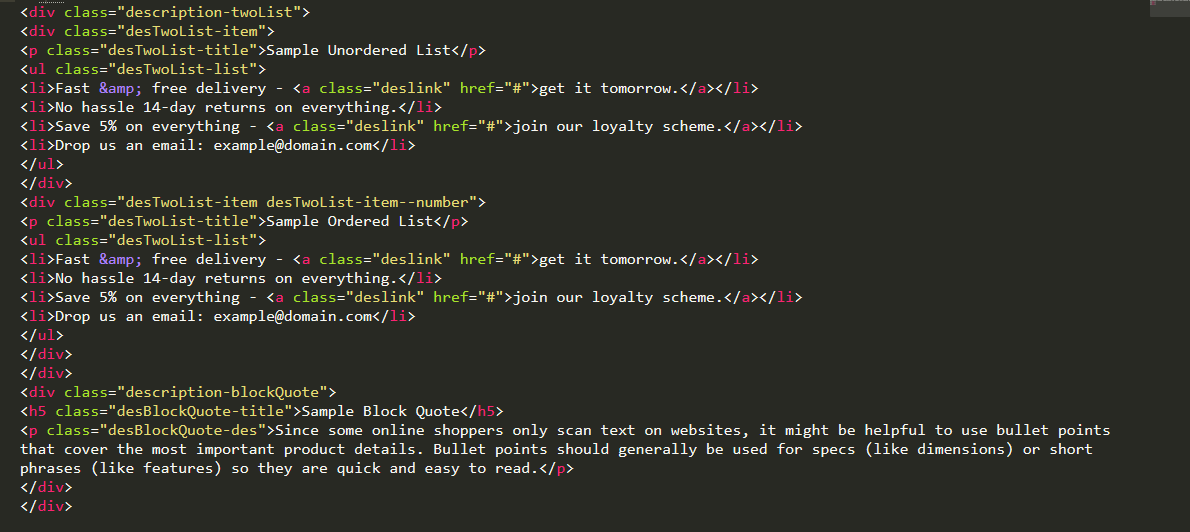
Don't change any HTML tags or remove any class. You can edit Description, Image and Link.
Make It Bundle Section
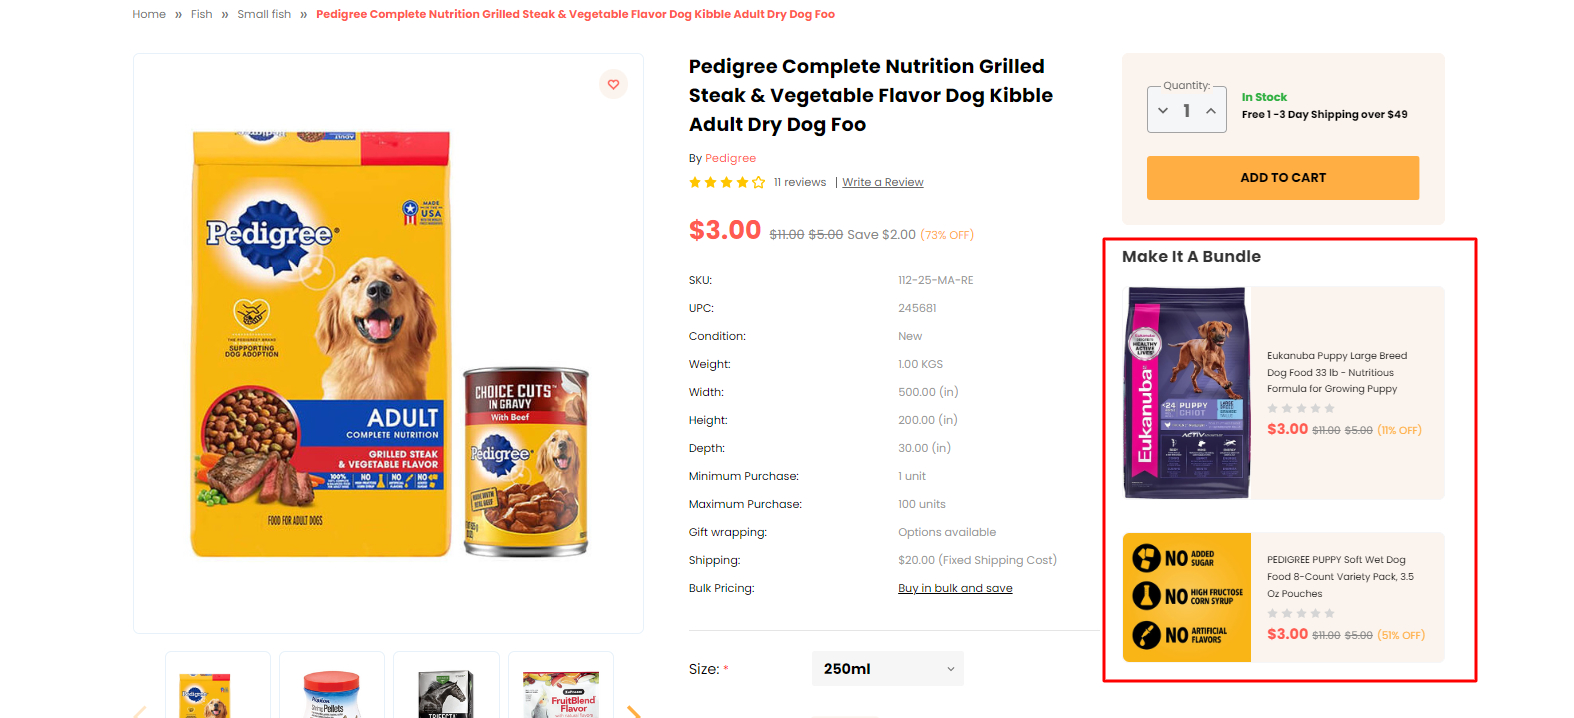
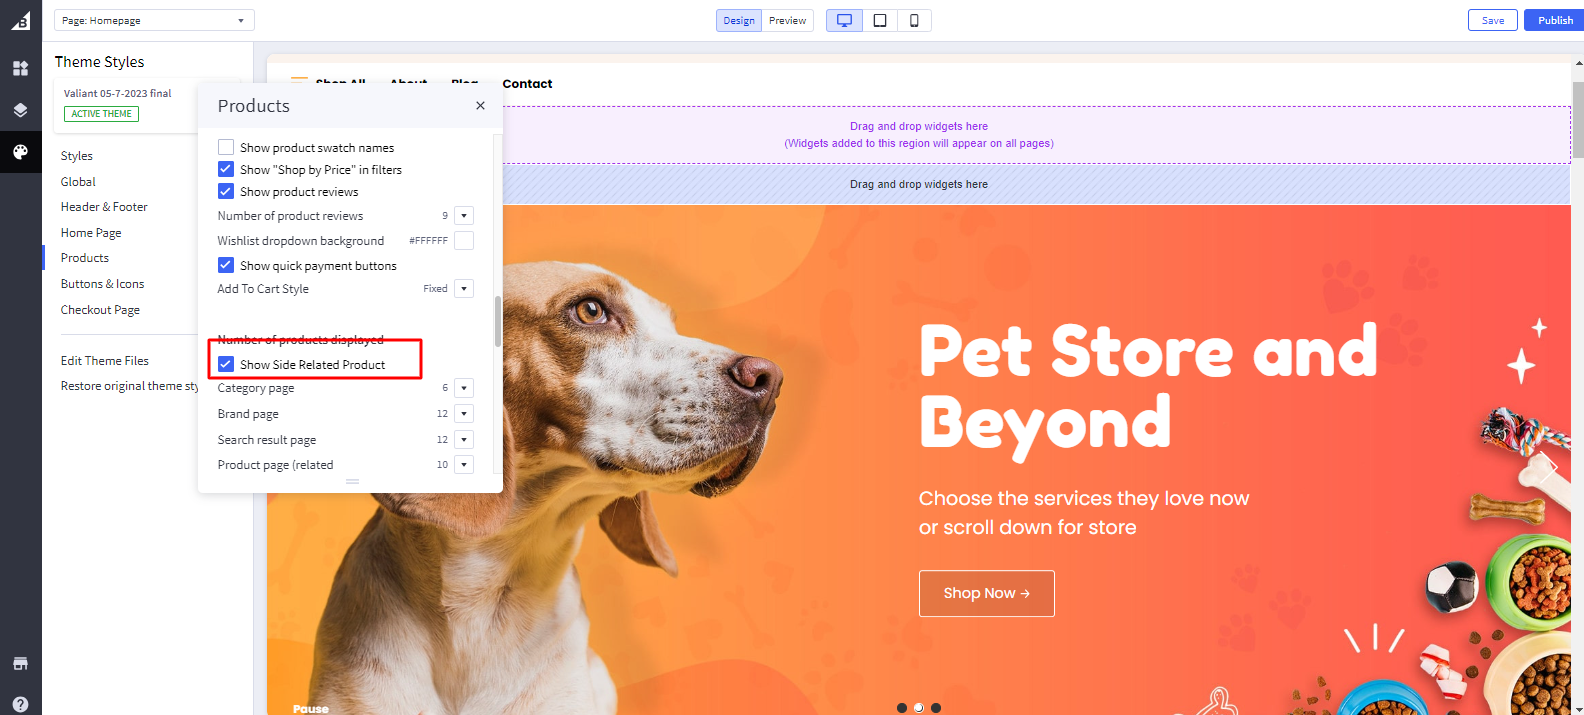
Show Side Related Product: Toggles the visibility of Show Side Related Product.
Checkout
Pet

GYM
CBD
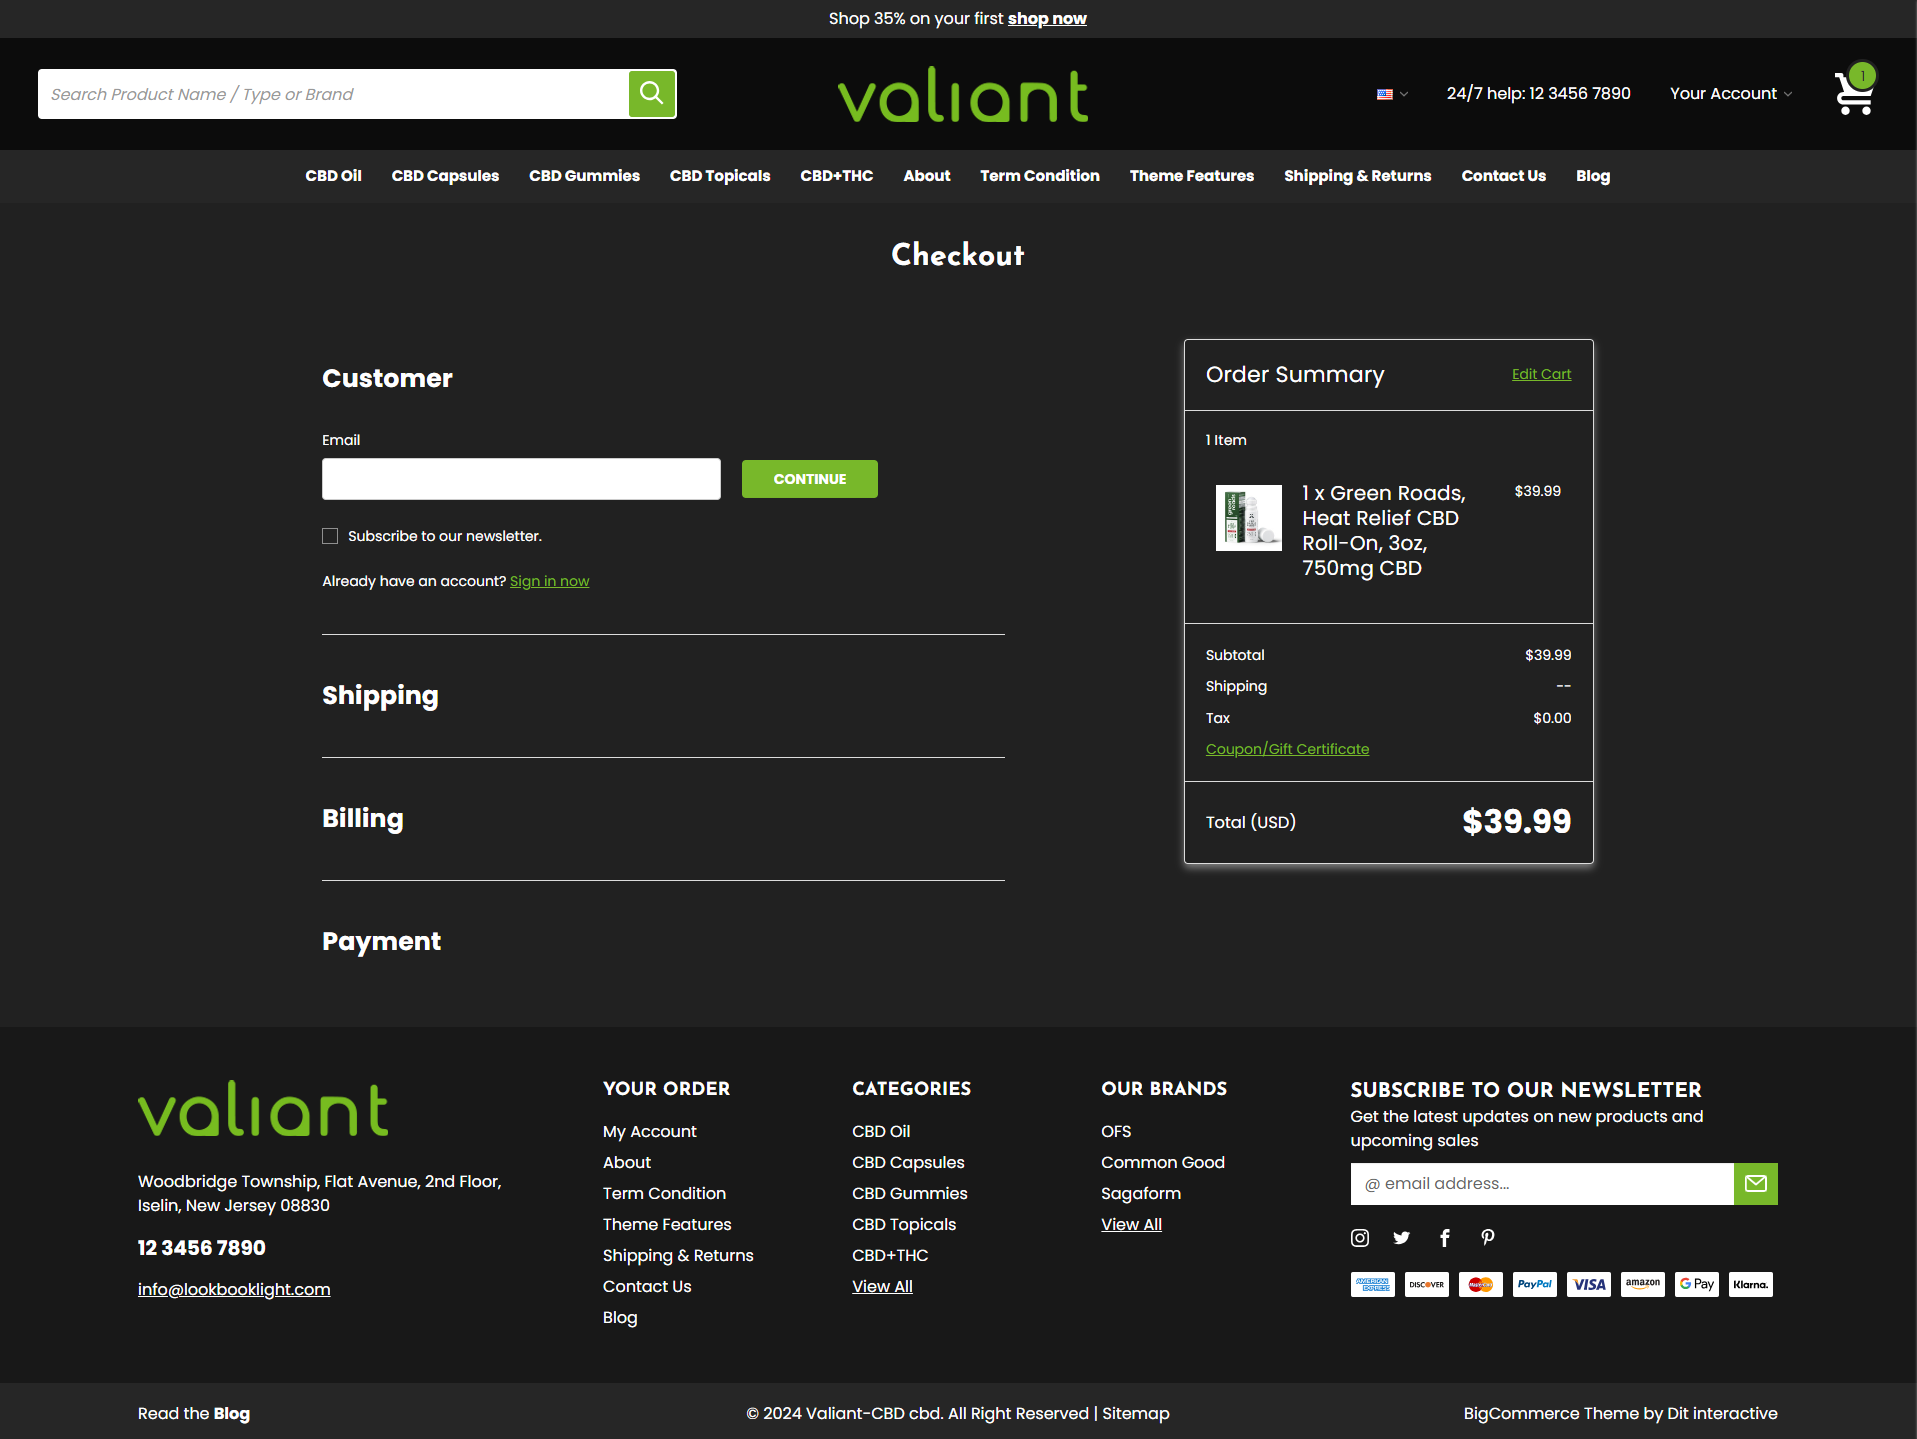
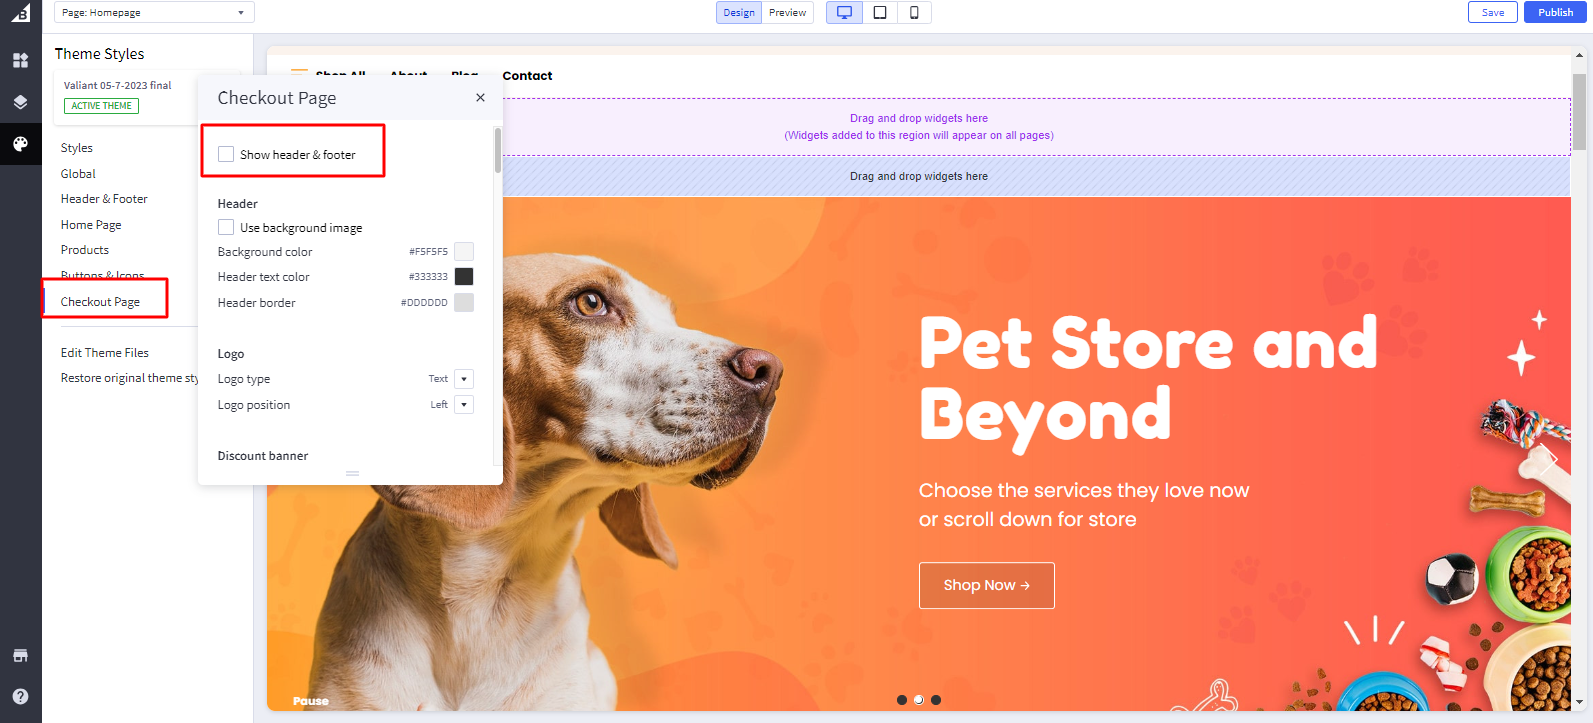
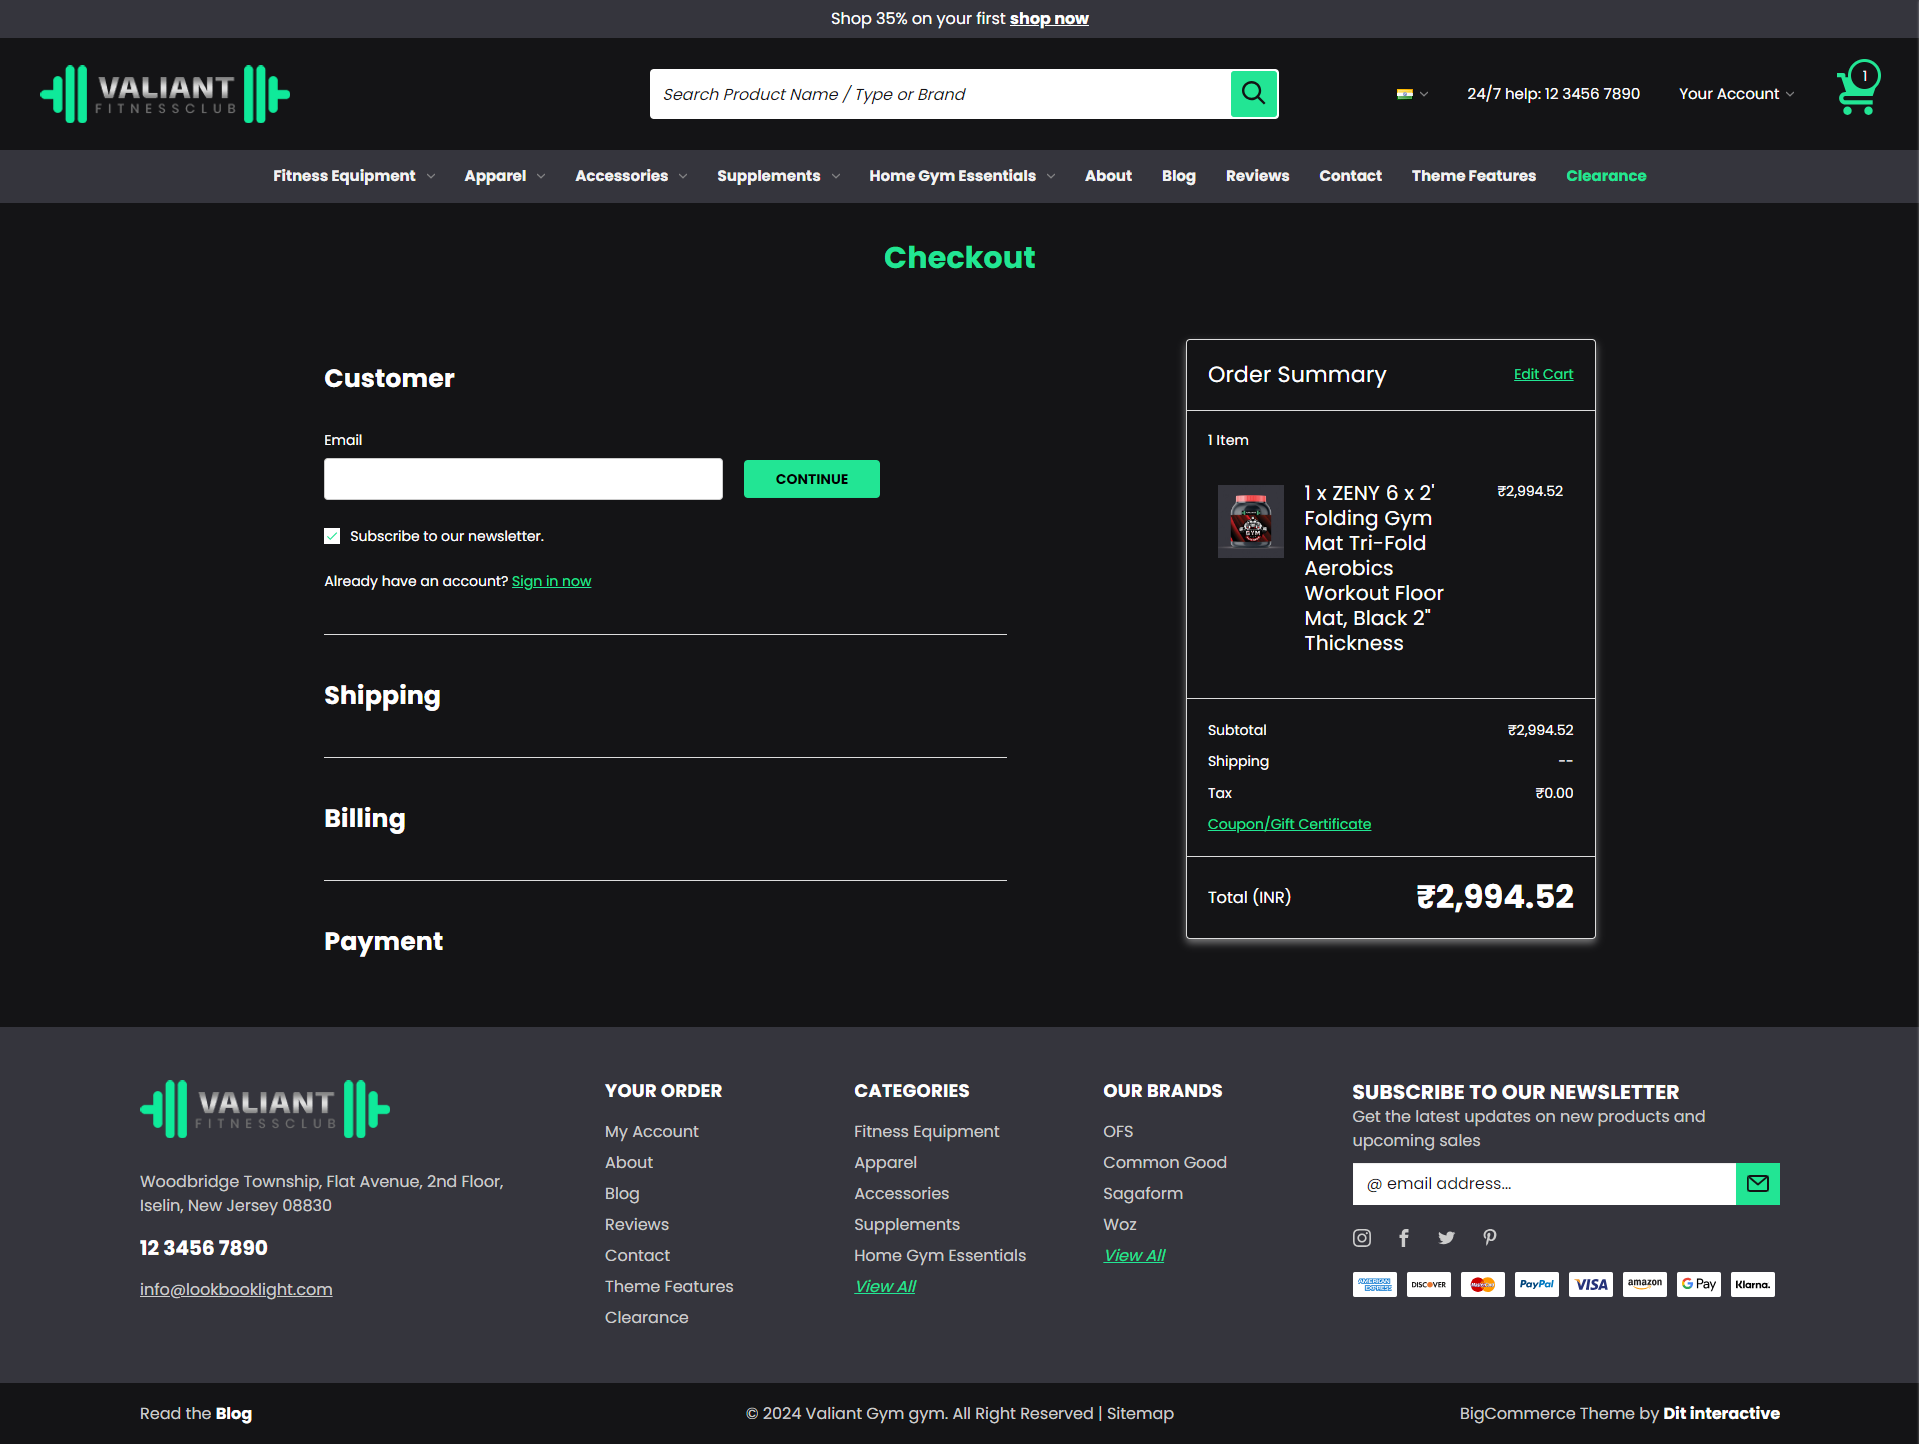
Show Header & Footer In Checkout Page Same As Site Pages: Toggles the visibility of Show header & footer.
Note:
Steps to add image in Image Manager.
- 1. Go to Storefront > Image Manager Upload image
2. Copy image path
Image Dimension
Valiant Pet Variant :
- Logo Size: 250px X 60px
- Hero Carousel Image: 1920px X 770px
- Category images:
- top 3 images 580px X 580px
- Bottom 2 images: 895px X 580px


- Most popular image: 1640px X 690px
- Brand Images: 127px X 86px
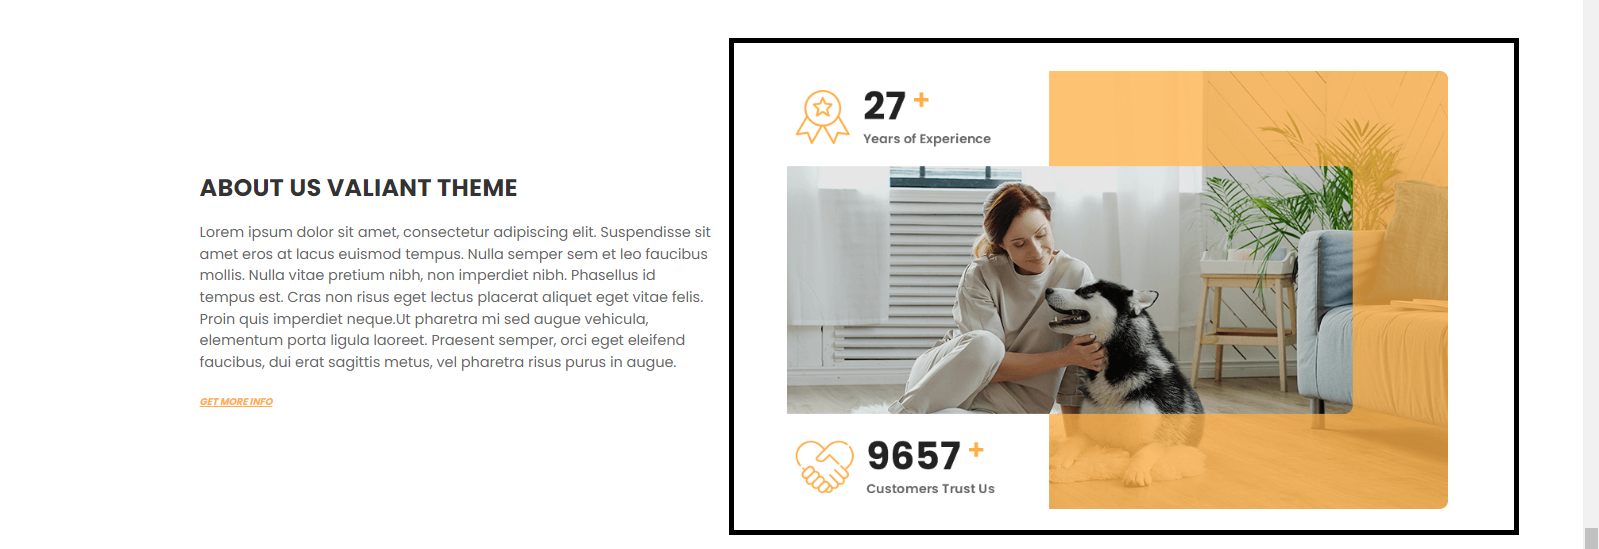
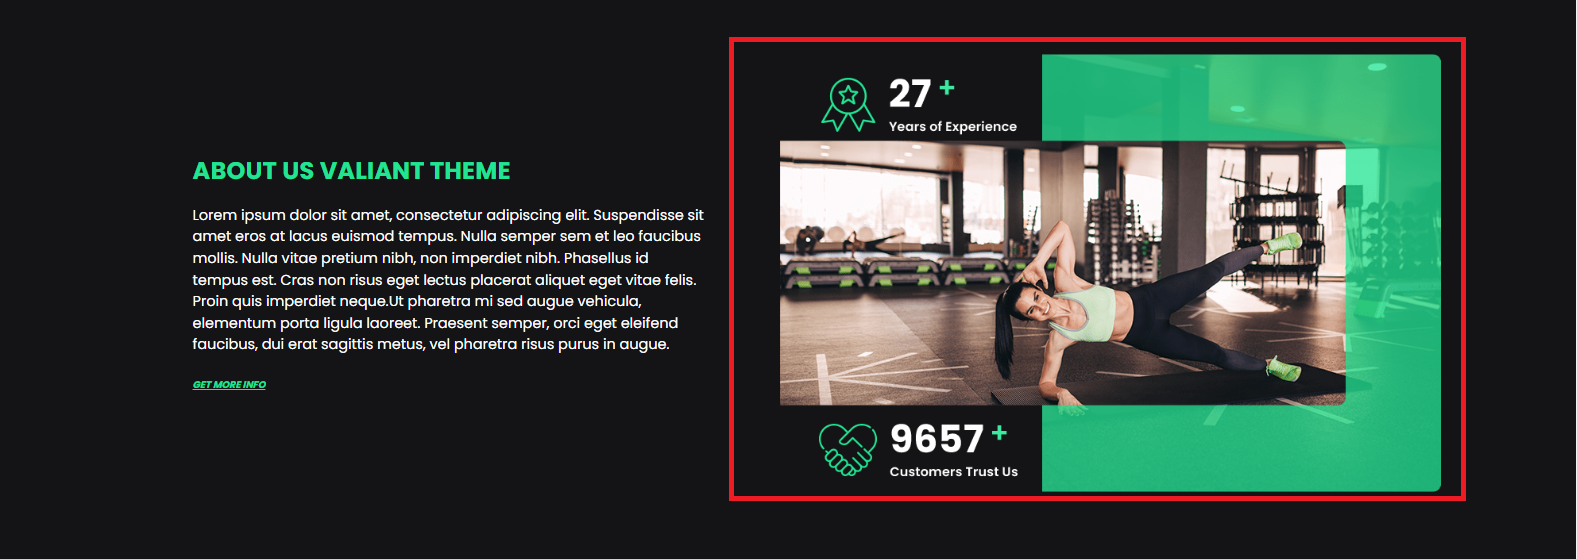
- About image: 830px X 550px
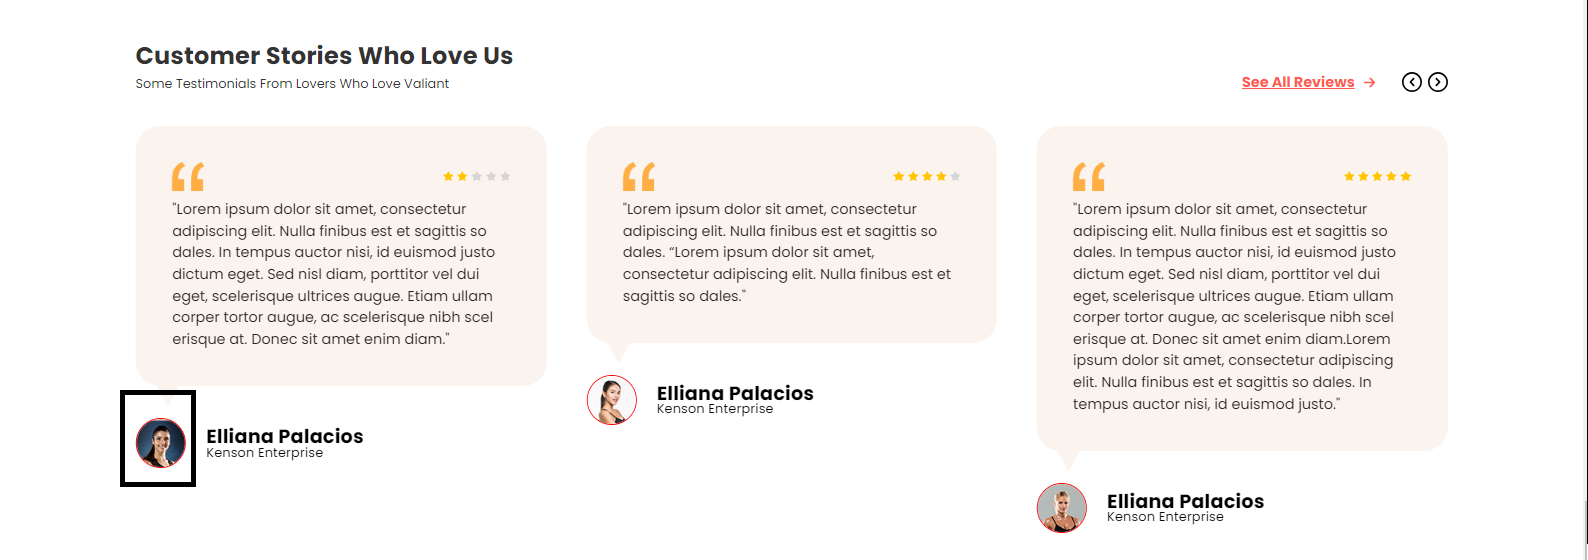
- Testimonial images: 60px X 60px
- Subcategory image: 166px X 166px
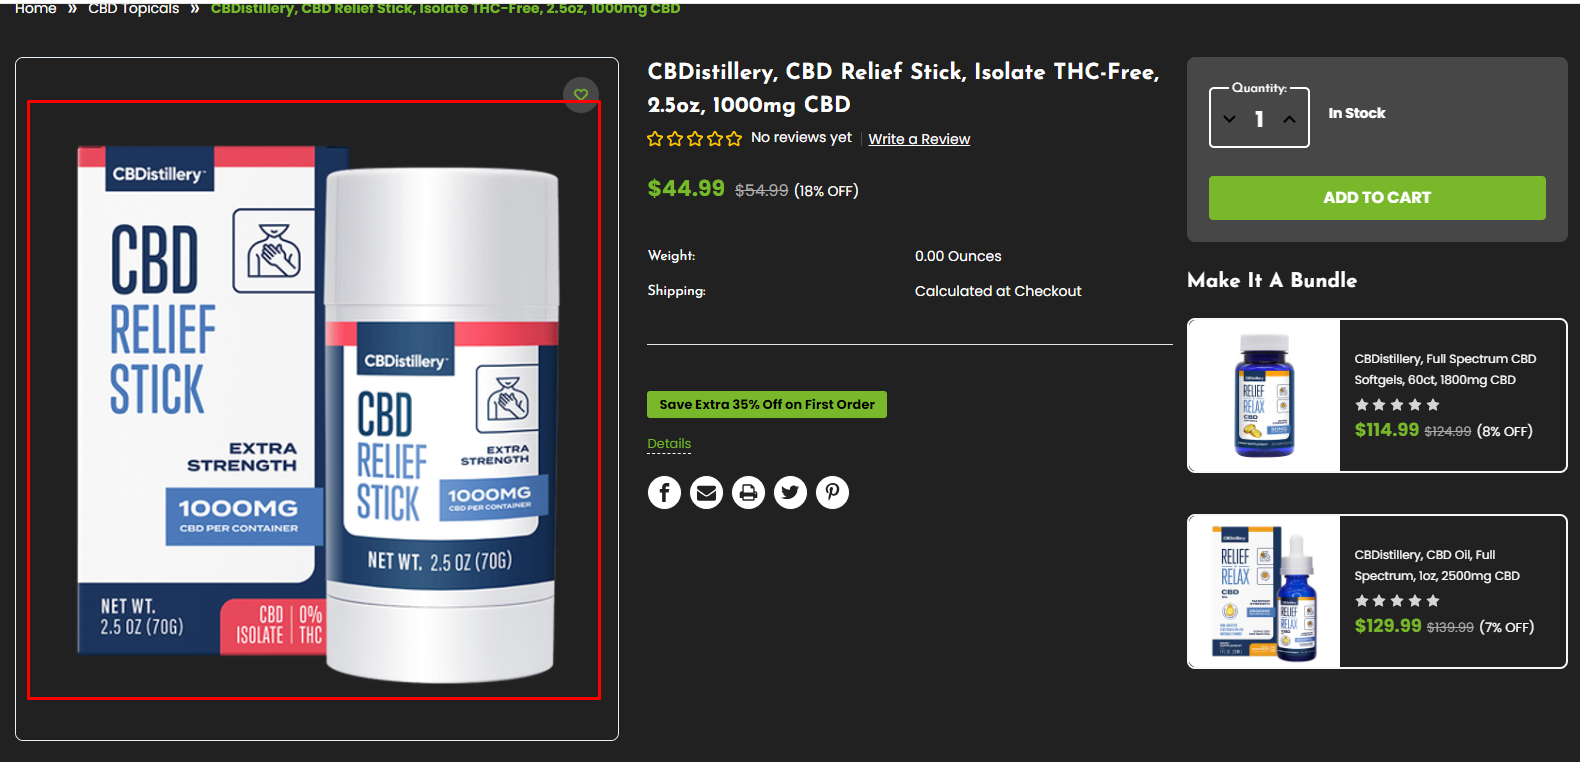
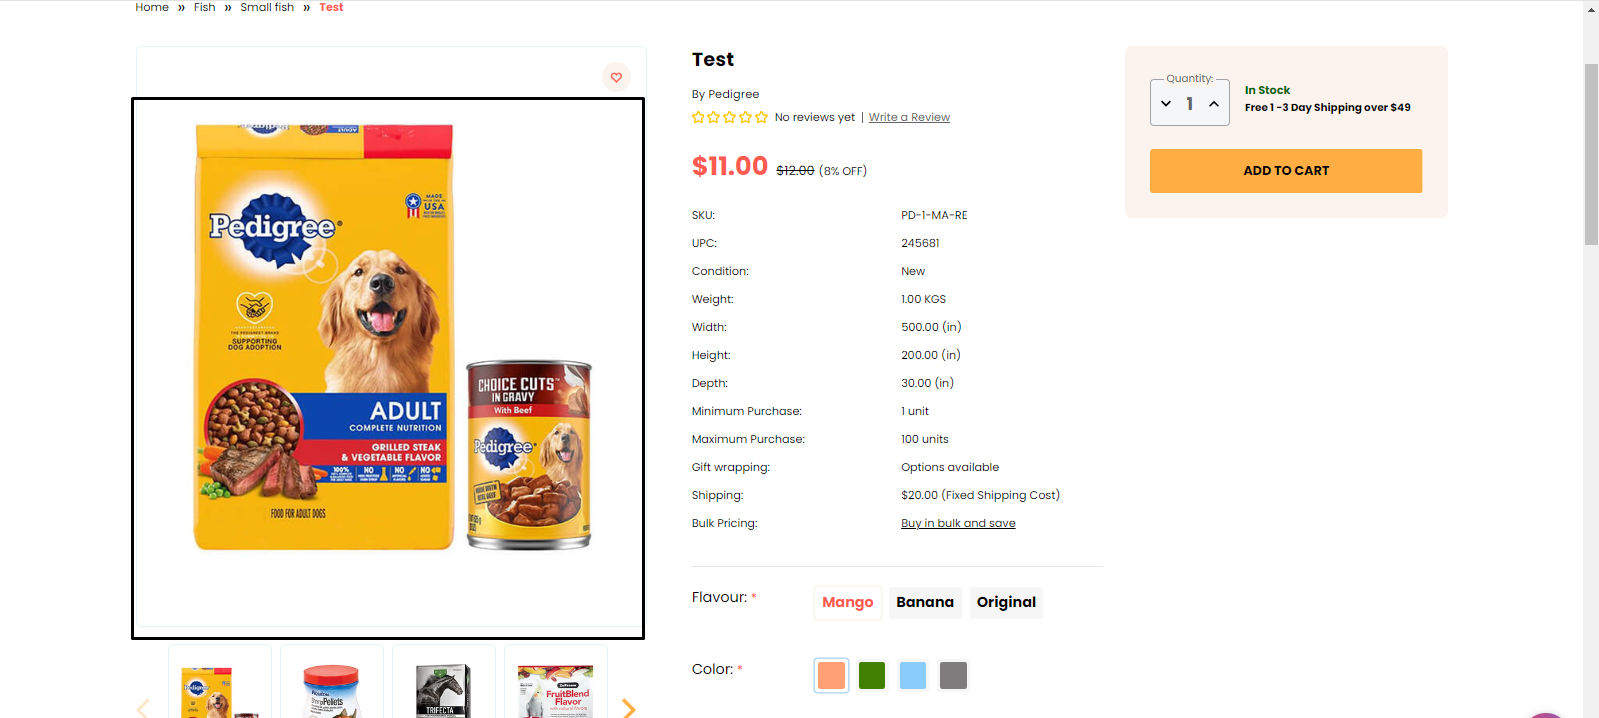
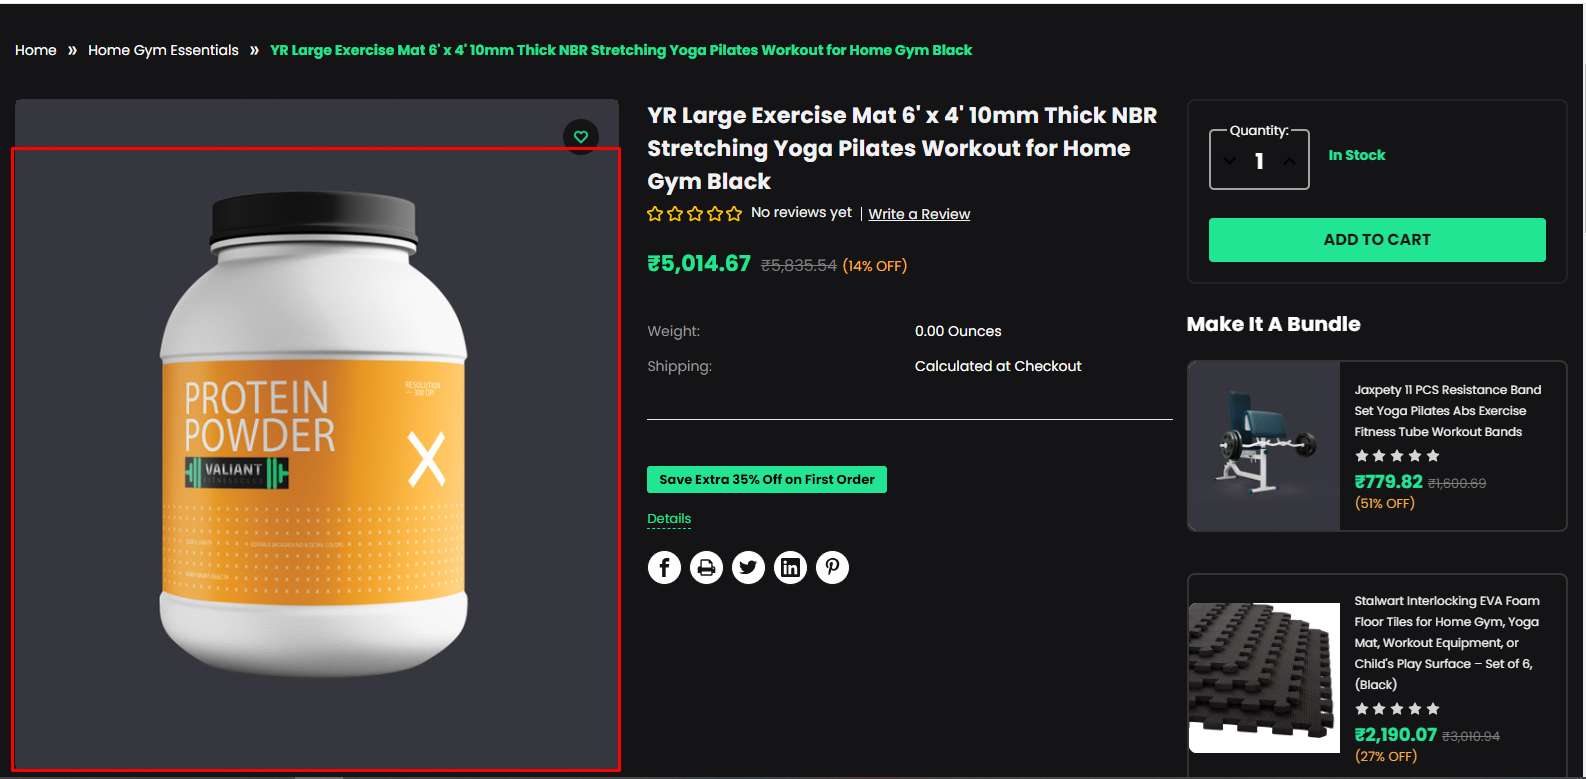
- Product images (standard dimensions): 1280px X 1280px



Valiant GYM Variant :
- Logo Size: 250px X 60px
- Hero Carousel Image: 1920px X 470px
- Category images:
- top 2 images 900px X 390px
- Bottom 3 images: 885px X 390px


- Most popular image: 1640px X 690px
- Brand Images: 127px X 86px
- About image: 830px X 550px
- Testimonial images: 60px X 60px
- Subcategory image: 171px X 171px
- Product images (standard dimensions): 1280px X 1280px




Valiant CBD Variant :
- Logo Size: 250px X 60px
- Hero Carousel Image: 1920px X 780px
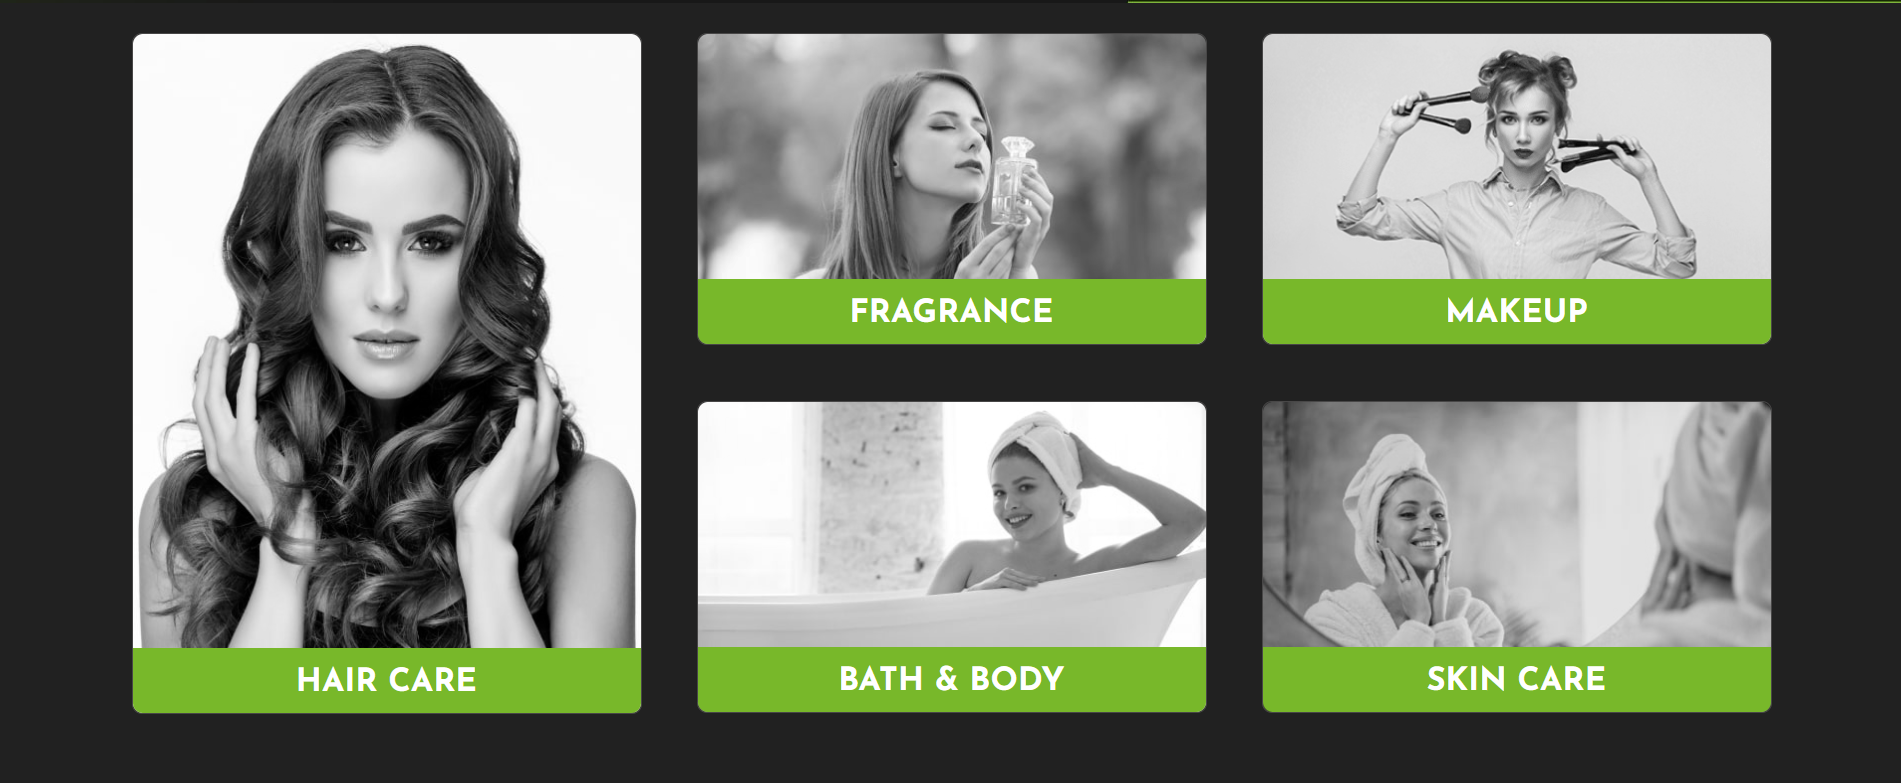
- Category images:
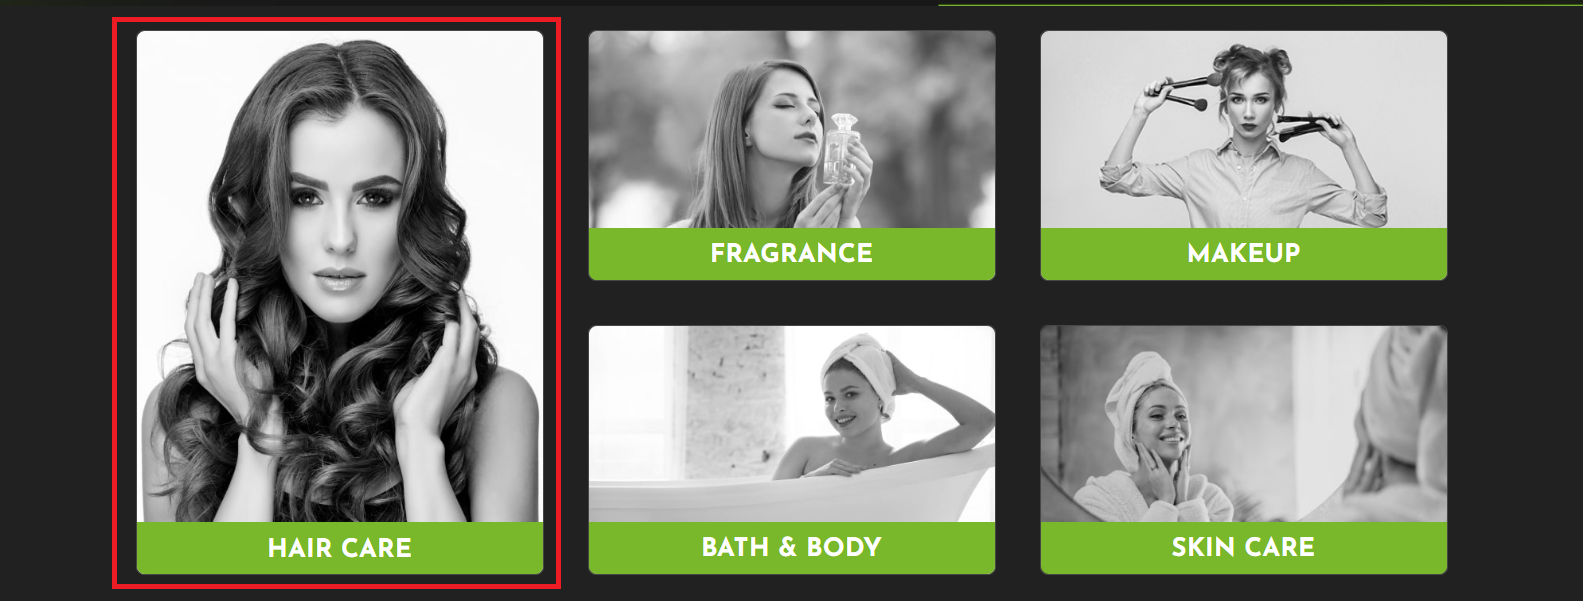
- Left image 510px X 680px
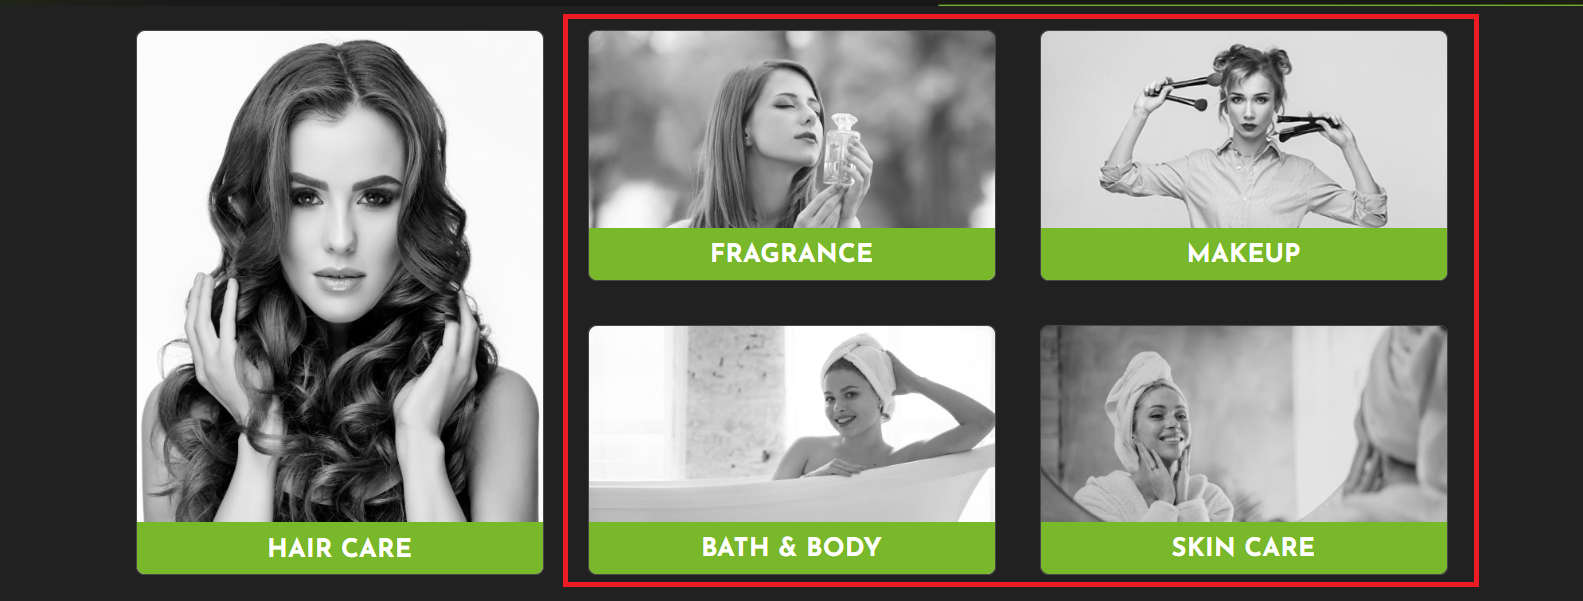
- Right 4 images: 510px X 310px
- Most popular image: 1920px X 690px
- Brand Images: 127px X 86px
- About image: 788x X 573px
- Testimonial images: 60px X 60px
- Subcategory image: 168px X 190px
- Product images (standard dimensions): 1280px X 1280px


