Viva Bigcommerce Theme Manual
The Viva theme series is a modern, user-focused design solution tailored for multiple industries. While each theme is customized for a specific niche, they all share powerful features like responsive design, mega menus, quick view, and quick add-to-cart for enhanced user experience. In addition, all themes are built with SEO, speed optimization, and mobile-friendliness in mind, making them powerful platforms for online shopping.
Viva Grocery, Viva Automotive, and Viva Gifts — each theme is uniquely crafted for its respective industry, yet they all include common features such as promotional homepage sliders, newsletter popups, wishlist functionality, blog integration, and elegant typography with soft color schemes. These shared elements bring all three themes to a universal standard, offering customers a smooth and seamless shopping experience across all devices
Features Viva Themes
- Recipe Page Integration
- Recently Viewed Popup
- Purchase (Sales Notification) Popup
- Share Icon Popup
- Sticky Add to Cart Popup
- Newsletter Popup Modal
- Mega menu with image support
- Product Labels (Custom Badges)
- Product Tabs Customization
- Custom Filters / Faceted Search Enhancements
- Store Locator Integration
- Custom Product Bundles / Build-a-Box
- Testimonial / Review Section on Homepage
- Homepage promotional banners
- Discount popup
- Bulk order page
Header & Footer
Go to Storefront > My Themes in your control panel and click the blue "Customize" button to launch Theme Editor.
In the left-hand column of the Theme Editor, click the panel labeled 'Header & Footer'.
Pencil Banner

Hide Pencil Banner : If checked, it will hide a pencil banner, i,e.Shop 35% on your first.
Pencil Banner Text : pencil banner text that will be visible in all pages. Here, Shop 35% on your first.
Hide Pencil Banner Email : If checked, it will hide a pencil banner Email
Logo
Logo position : aligns the logo left, center or right. Applicable for both image and header content.
Logo Left View :
Grocery variant

Automotive variant

Gifts variant

Logo Center View :
Grocery variant

Automotive variant

Gifts variant

Logo Right View :
Grocery variant

Automotive variant

Gifts variant

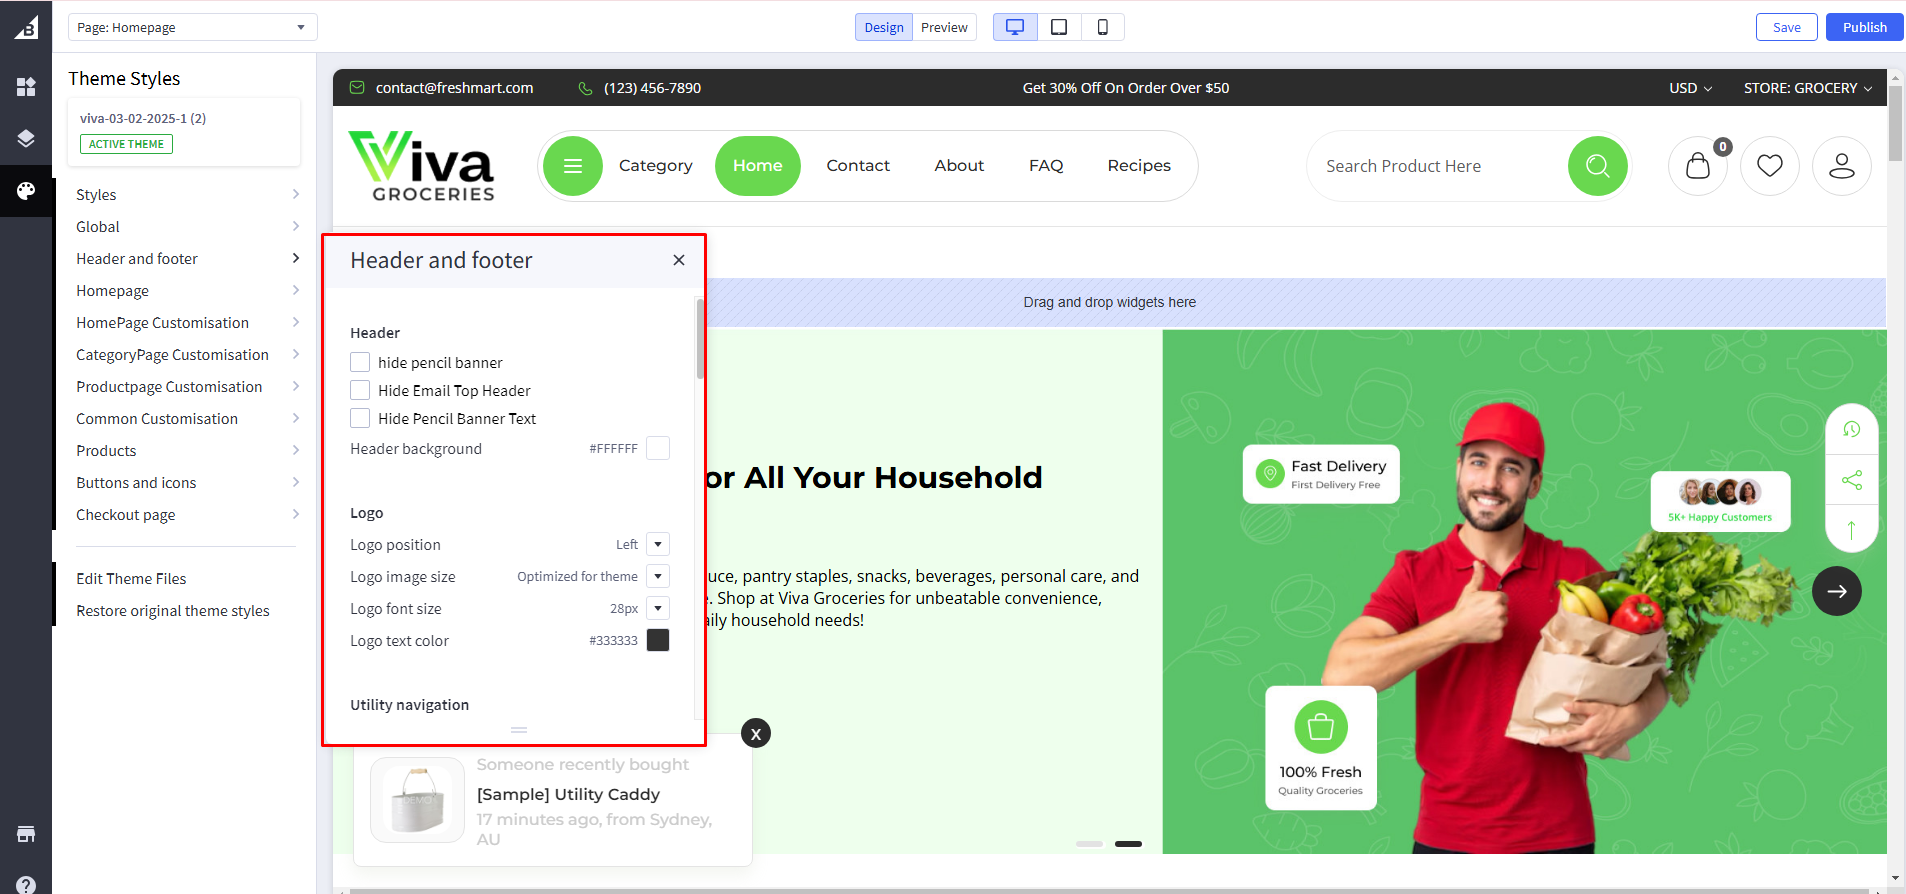
Header
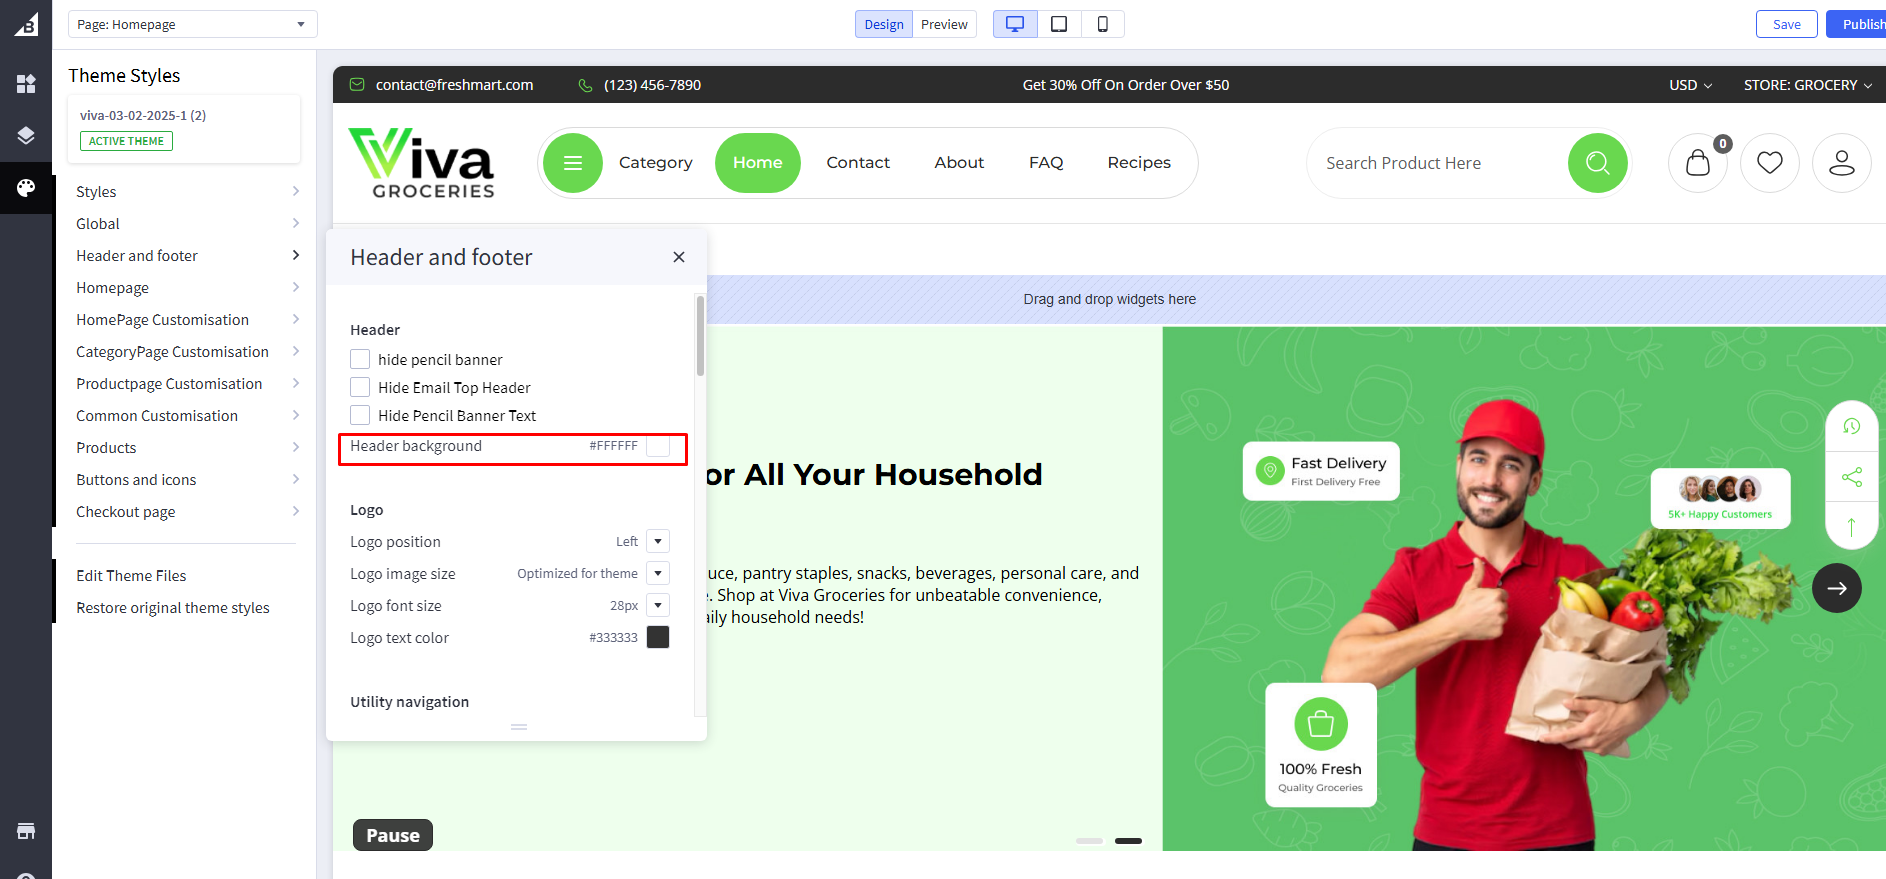
Header Background color : Set background color. It will appear behind the Logo.
Simple Design :

Alternate Design :
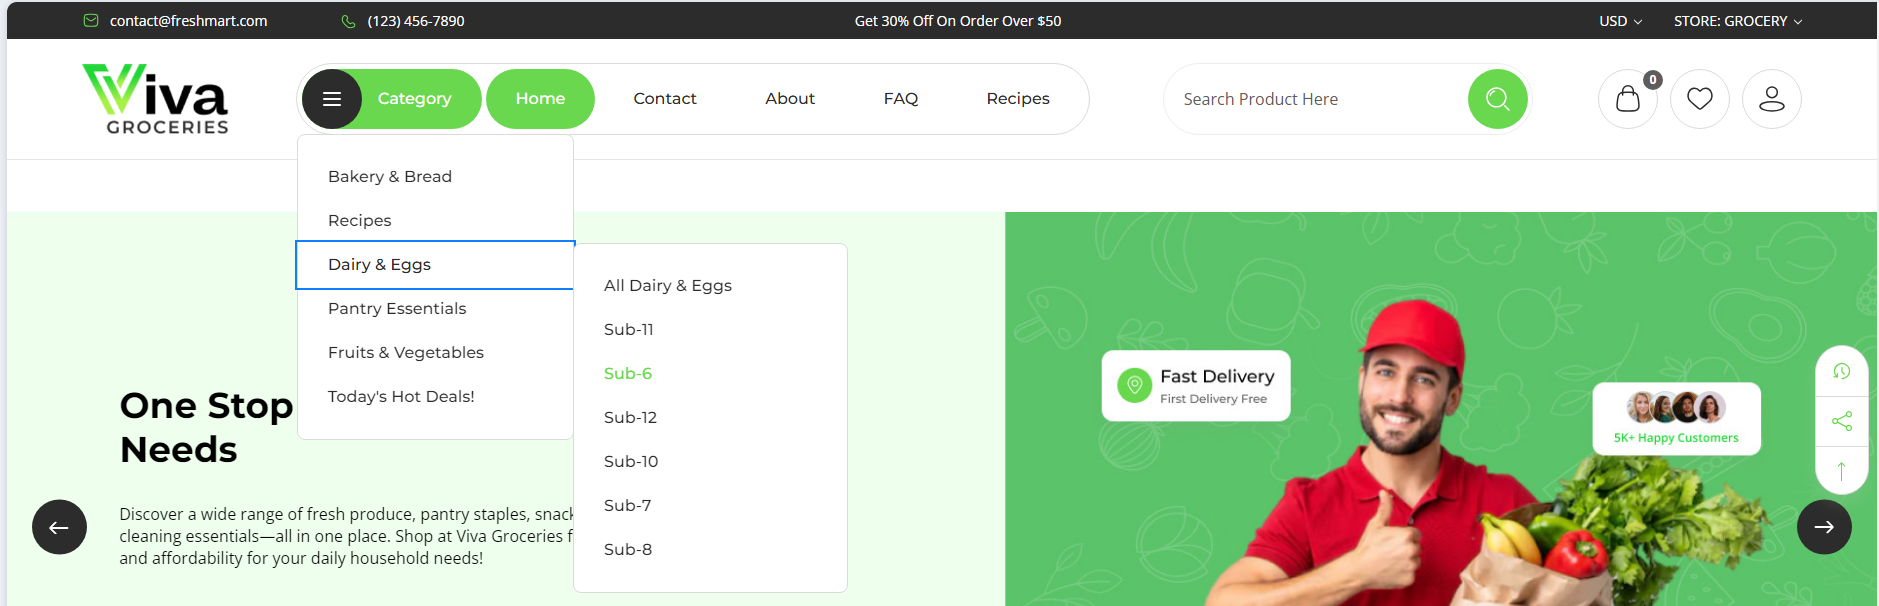
Megamenu Design :
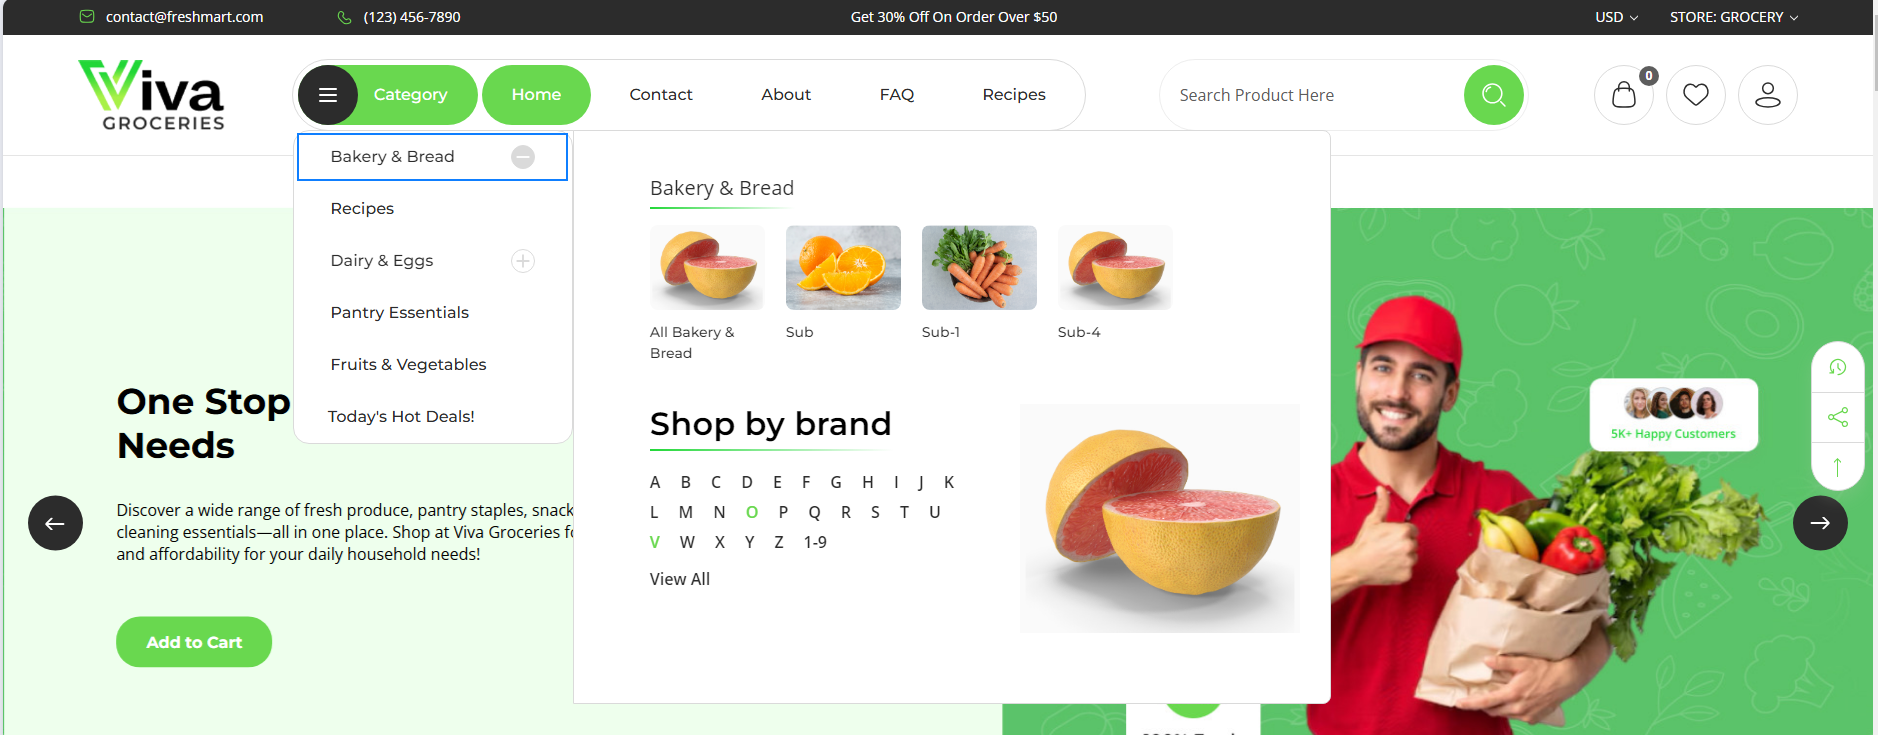
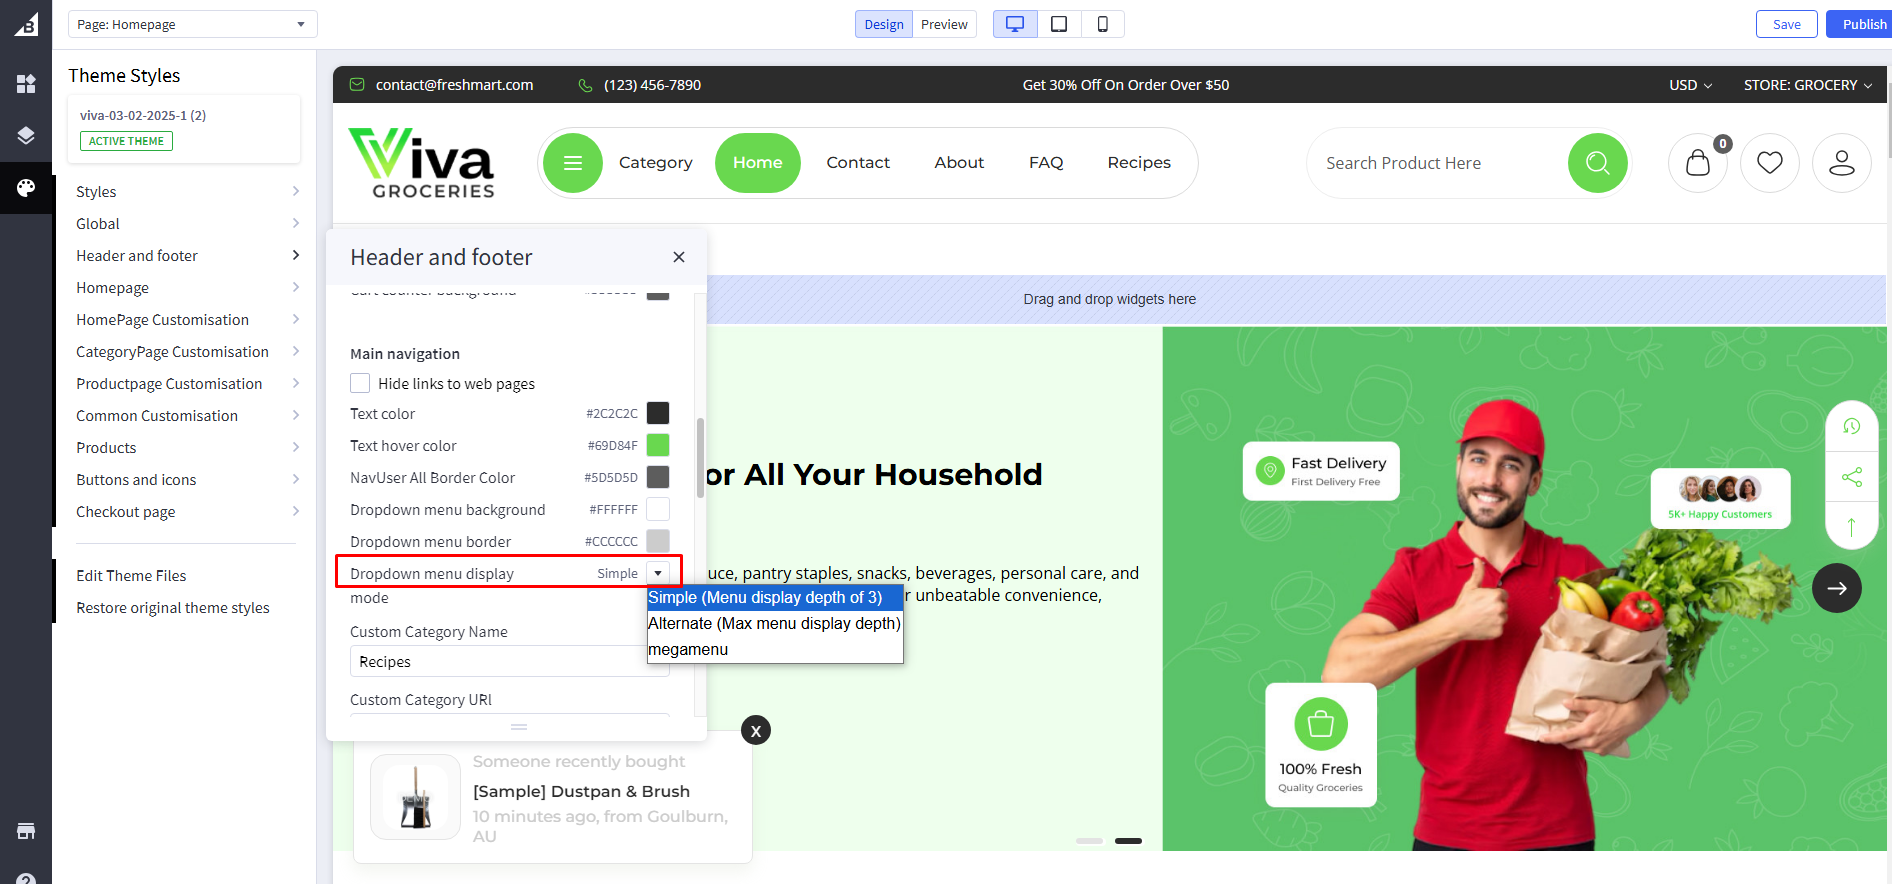
Dropdown menu display mode : Change Dropdown menu display Mode to Simple , Alternate and megamenu
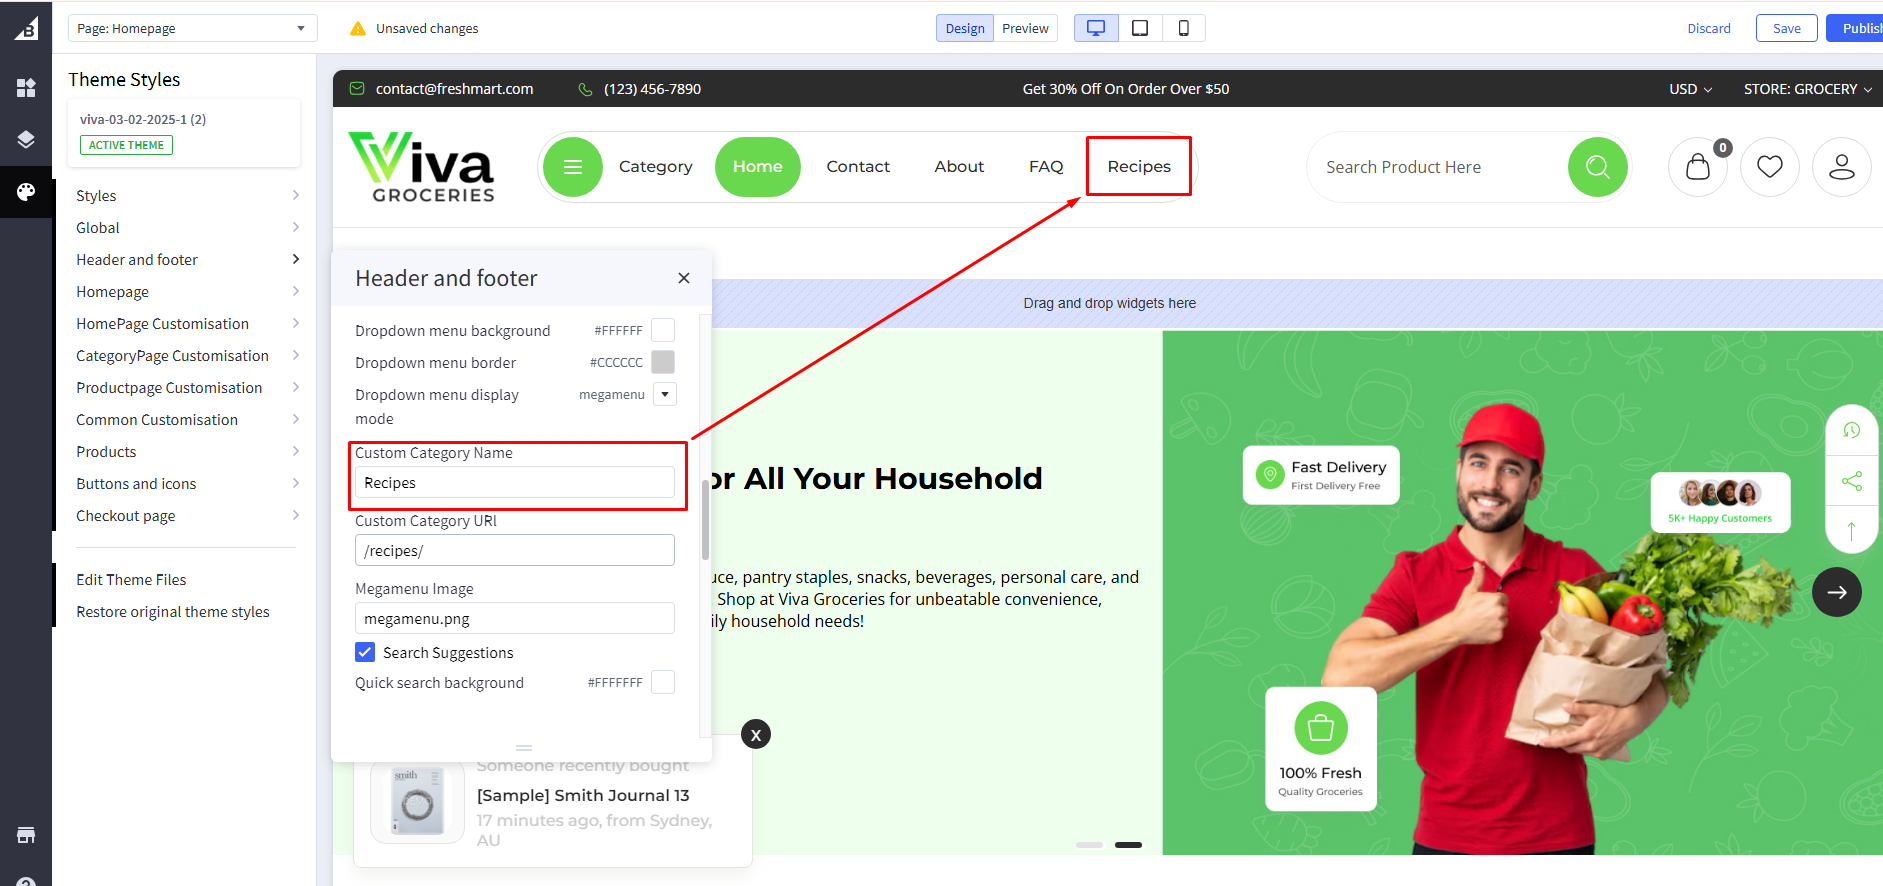
Custom Category Name : add custom category name
Custom Category URL : add custom category URL
Search Suggestions
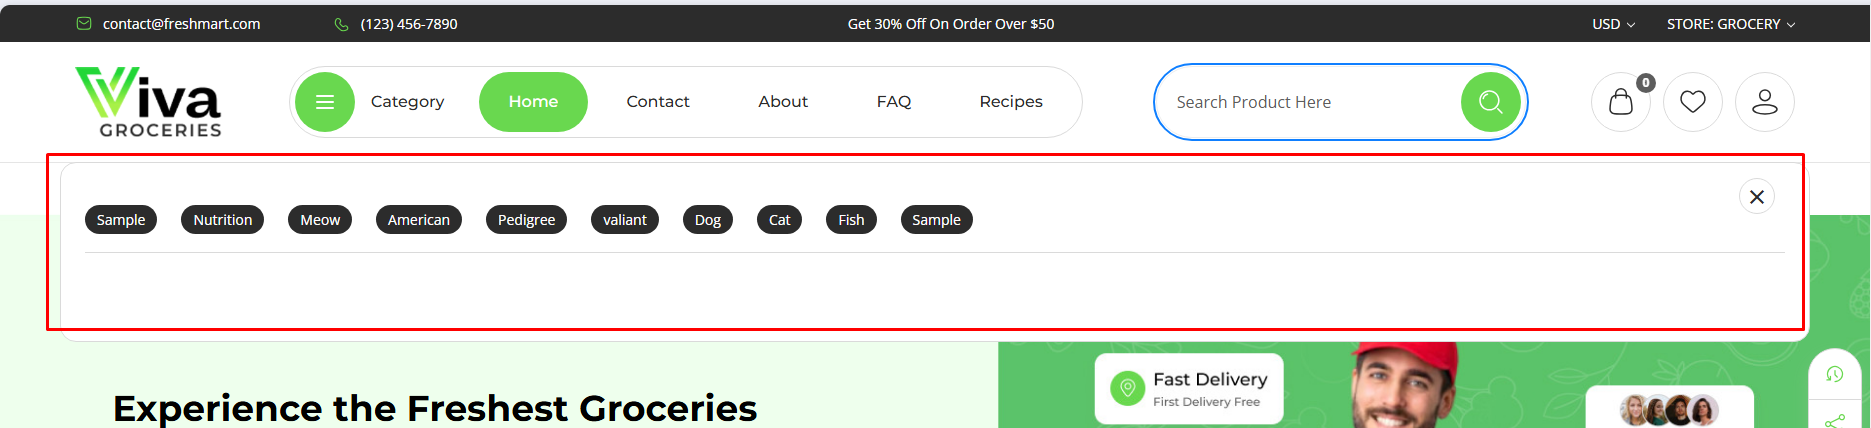
As users type in the search bar, real-time suggestions appear instantly, showing matching products, categories, and popular keywords. This enhances the user experience by helping customers find what they’re looking for faster and boosting product discovery

Manage suggestion text : For text change Go to channels > Themes > Advanced > Edit Theme Files > lang > en.json and update text in quick-suggestion-1 to quick-suggestion-10
Search Suggestions : If unchecked, it will hide a Hide Search suggestions
Search History
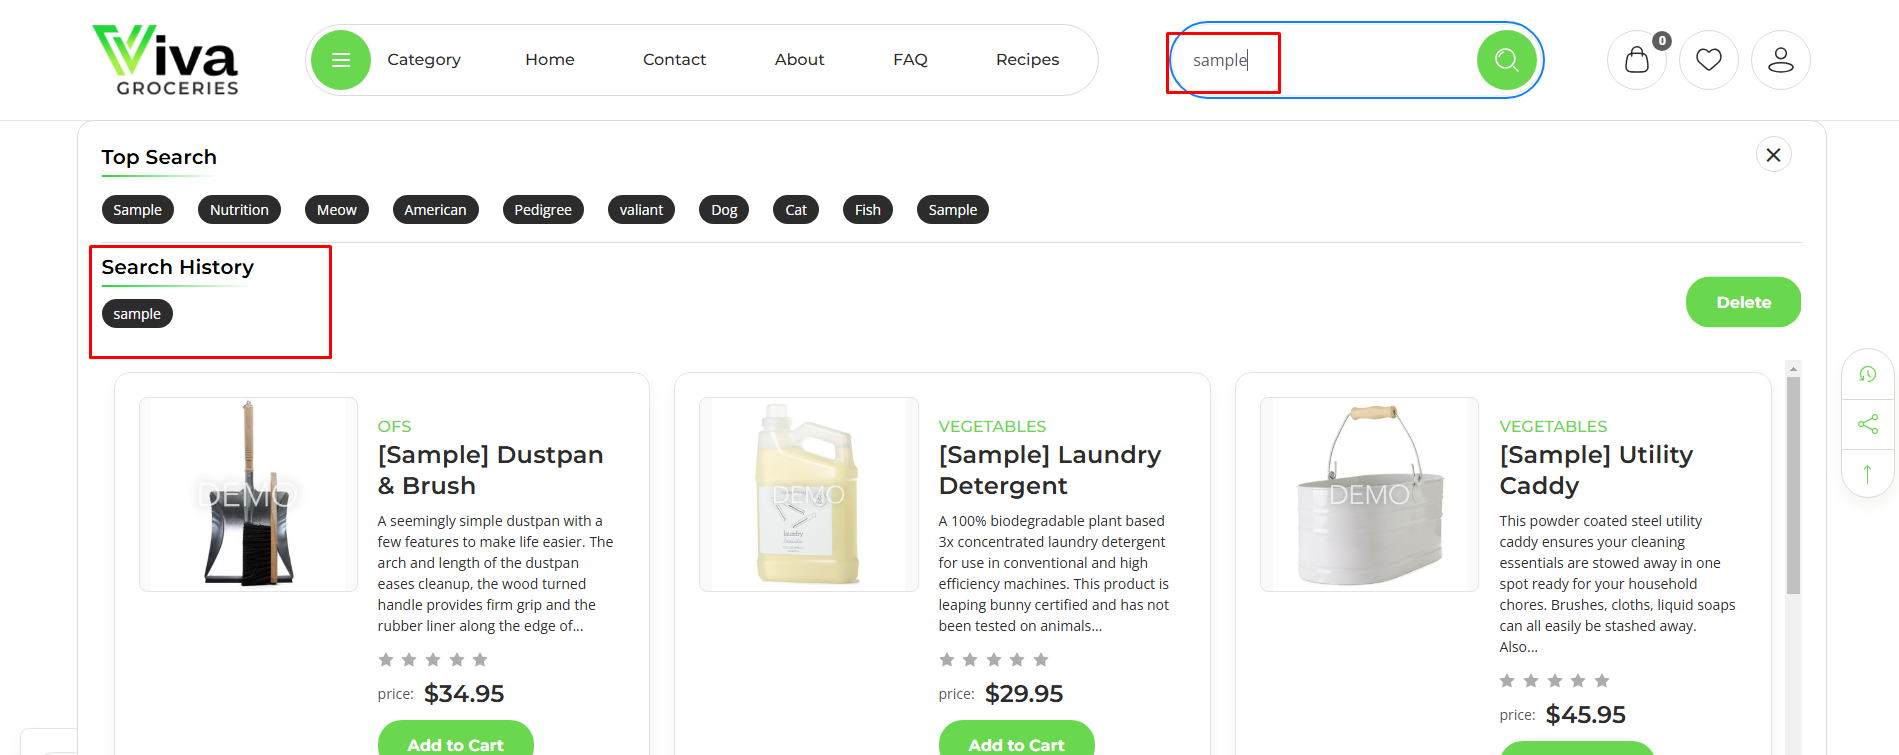
Displays a list of the user’s recent search terms directly in the search dropdown or input field. It allows returning visitors to quickly revisit previous queries, improving convenience and enhancing product exploration
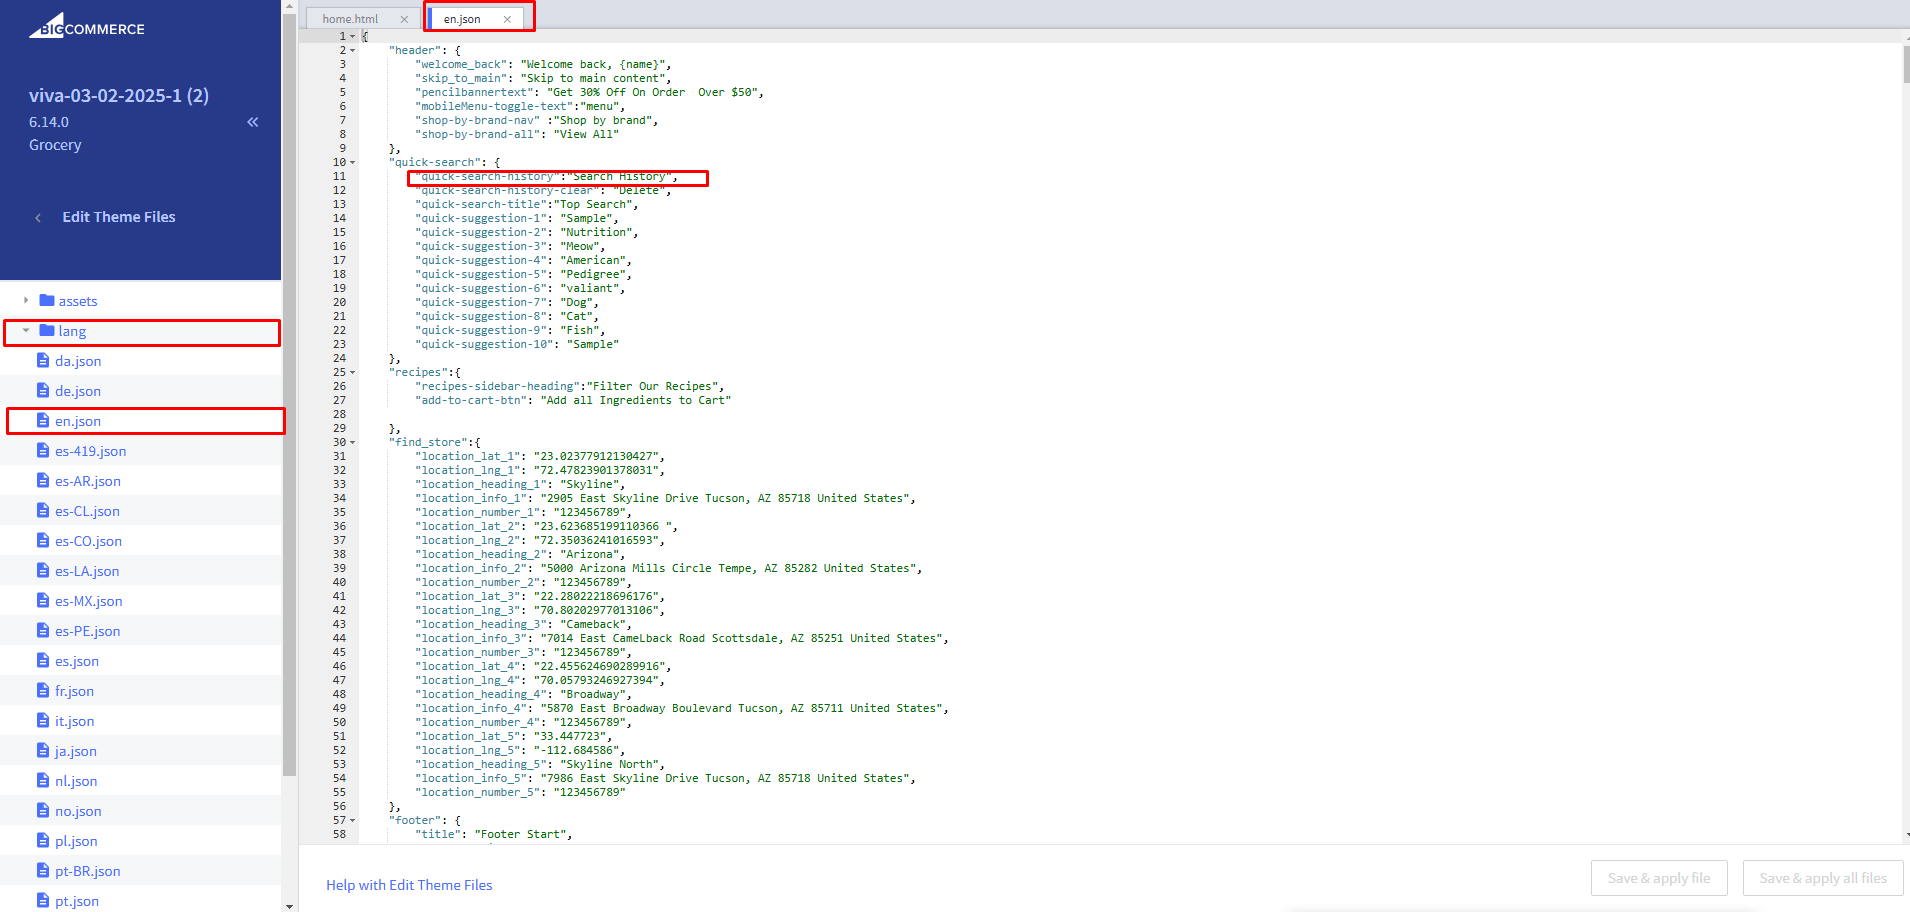
Search History : For text change Go to channels > Themes > Advanced > Edit Theme Files > lang > en.json and update text in search history title
Search Suggestions : If checked, it will hide a Hide Search history
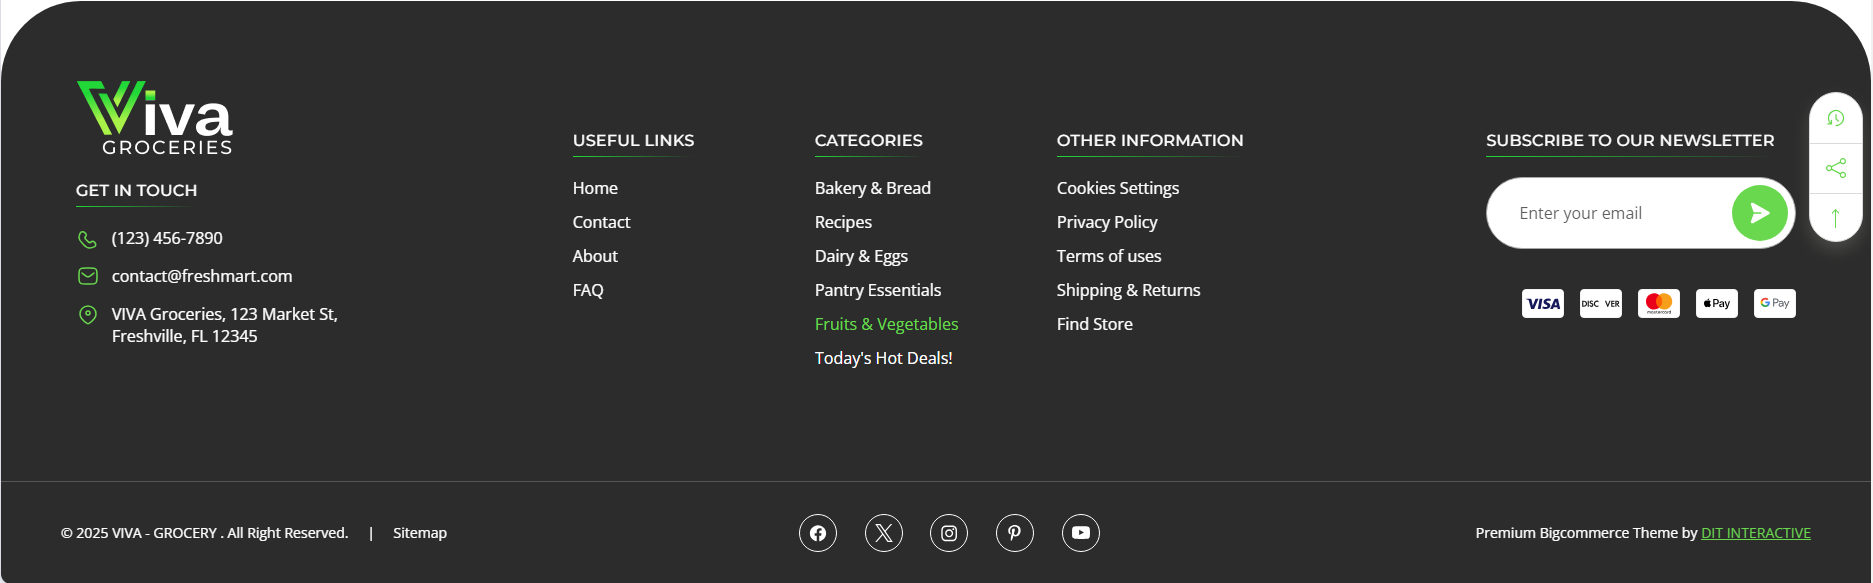
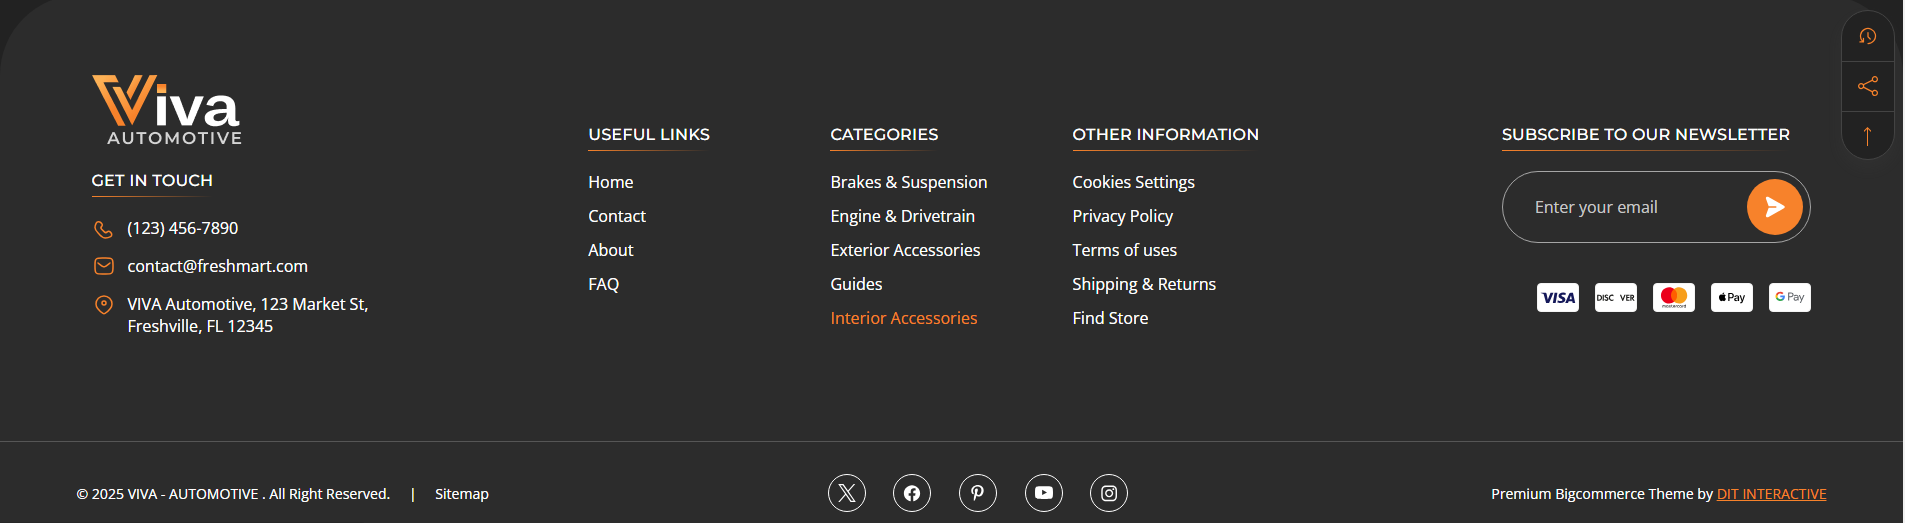
Footer
Grocery variant
Automotive variant
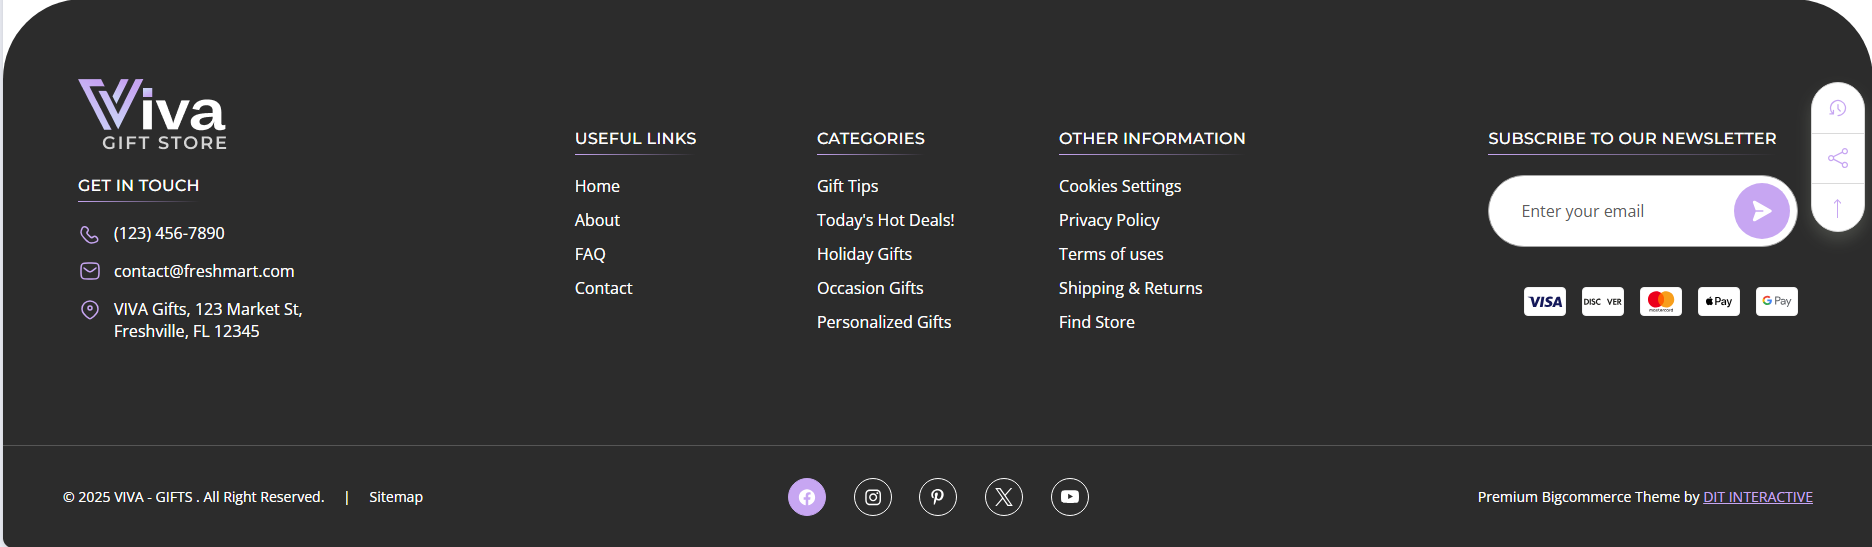
Gifts variant
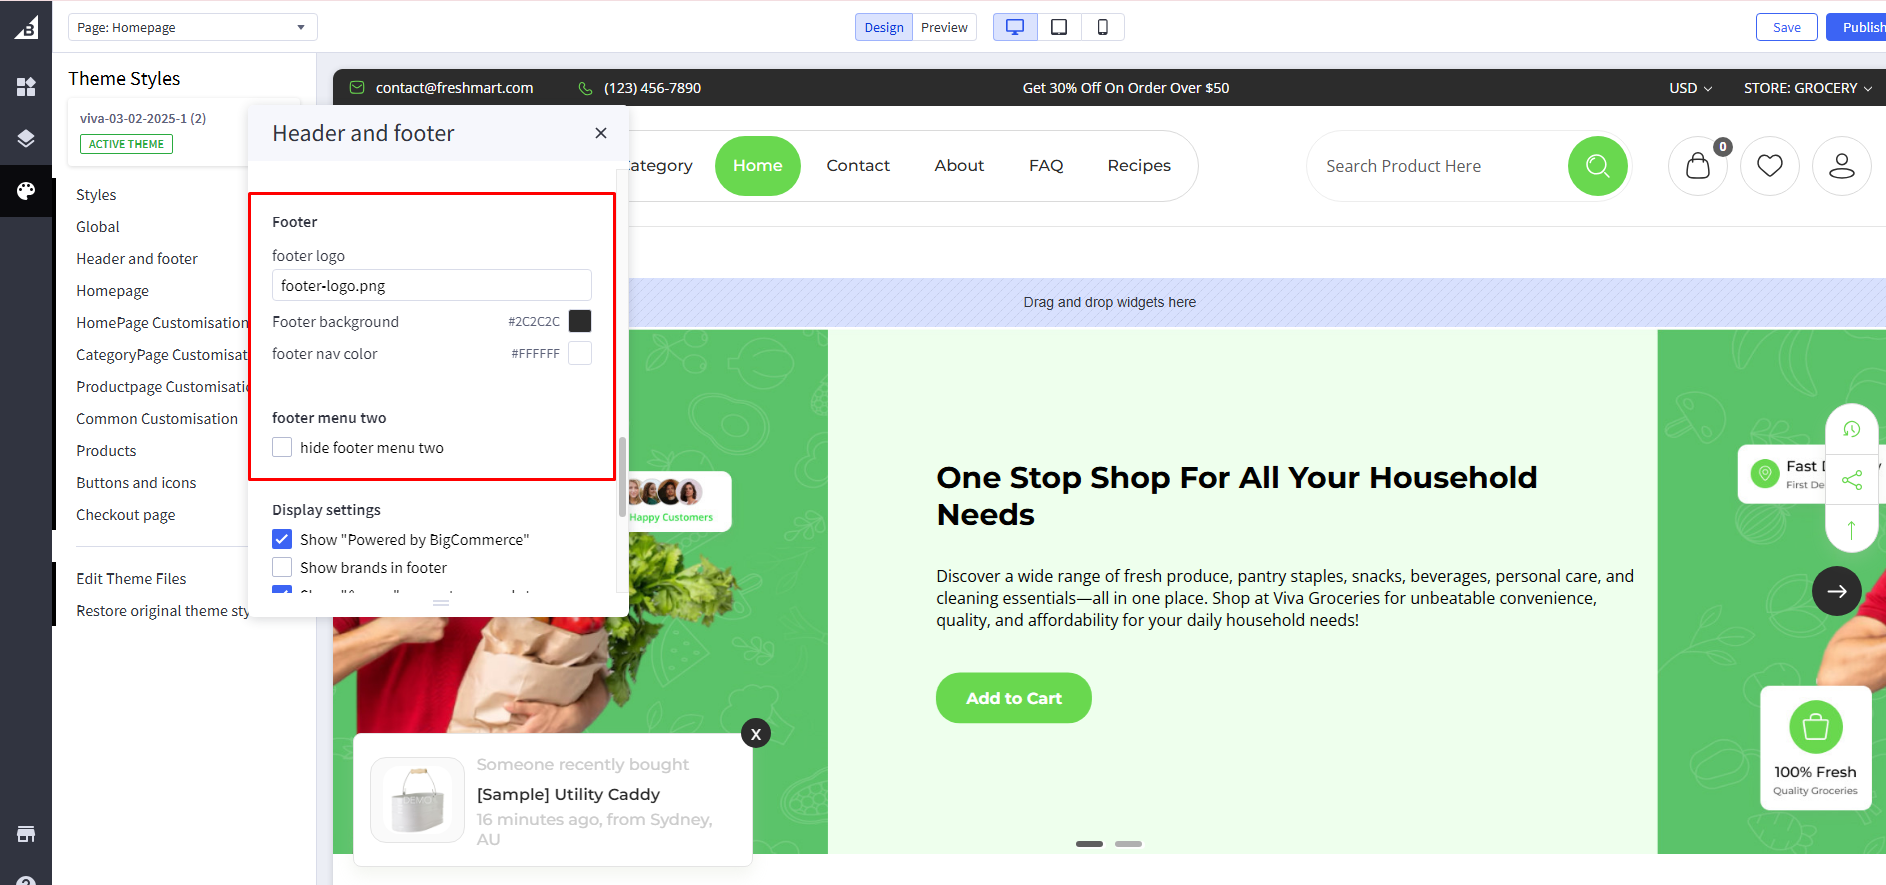
Footer Background color : Set background color
Footer Navigation color : Add navigation color on Footer
Hide navigation : If checked, it will hide a Hide navigation menu
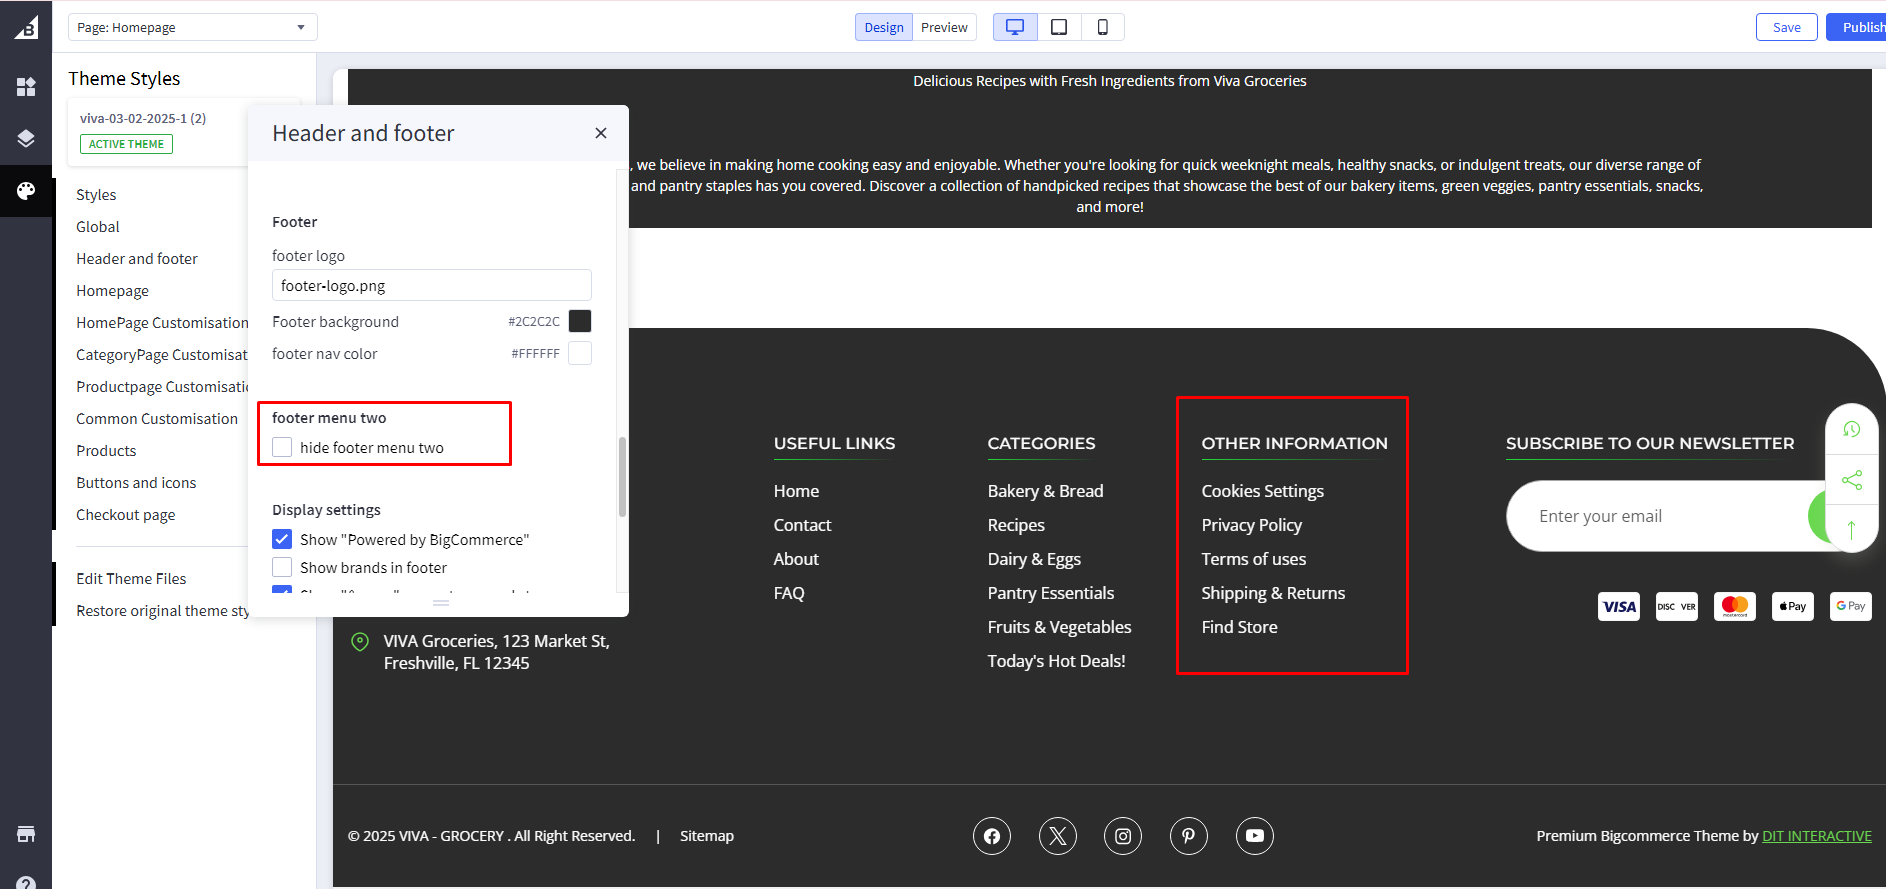
Navigation Title and URL : For text change Go to channels > Themes > Advanced > Edit Theme Files > lang > en.json and update navigation name and URL
Footer logo :
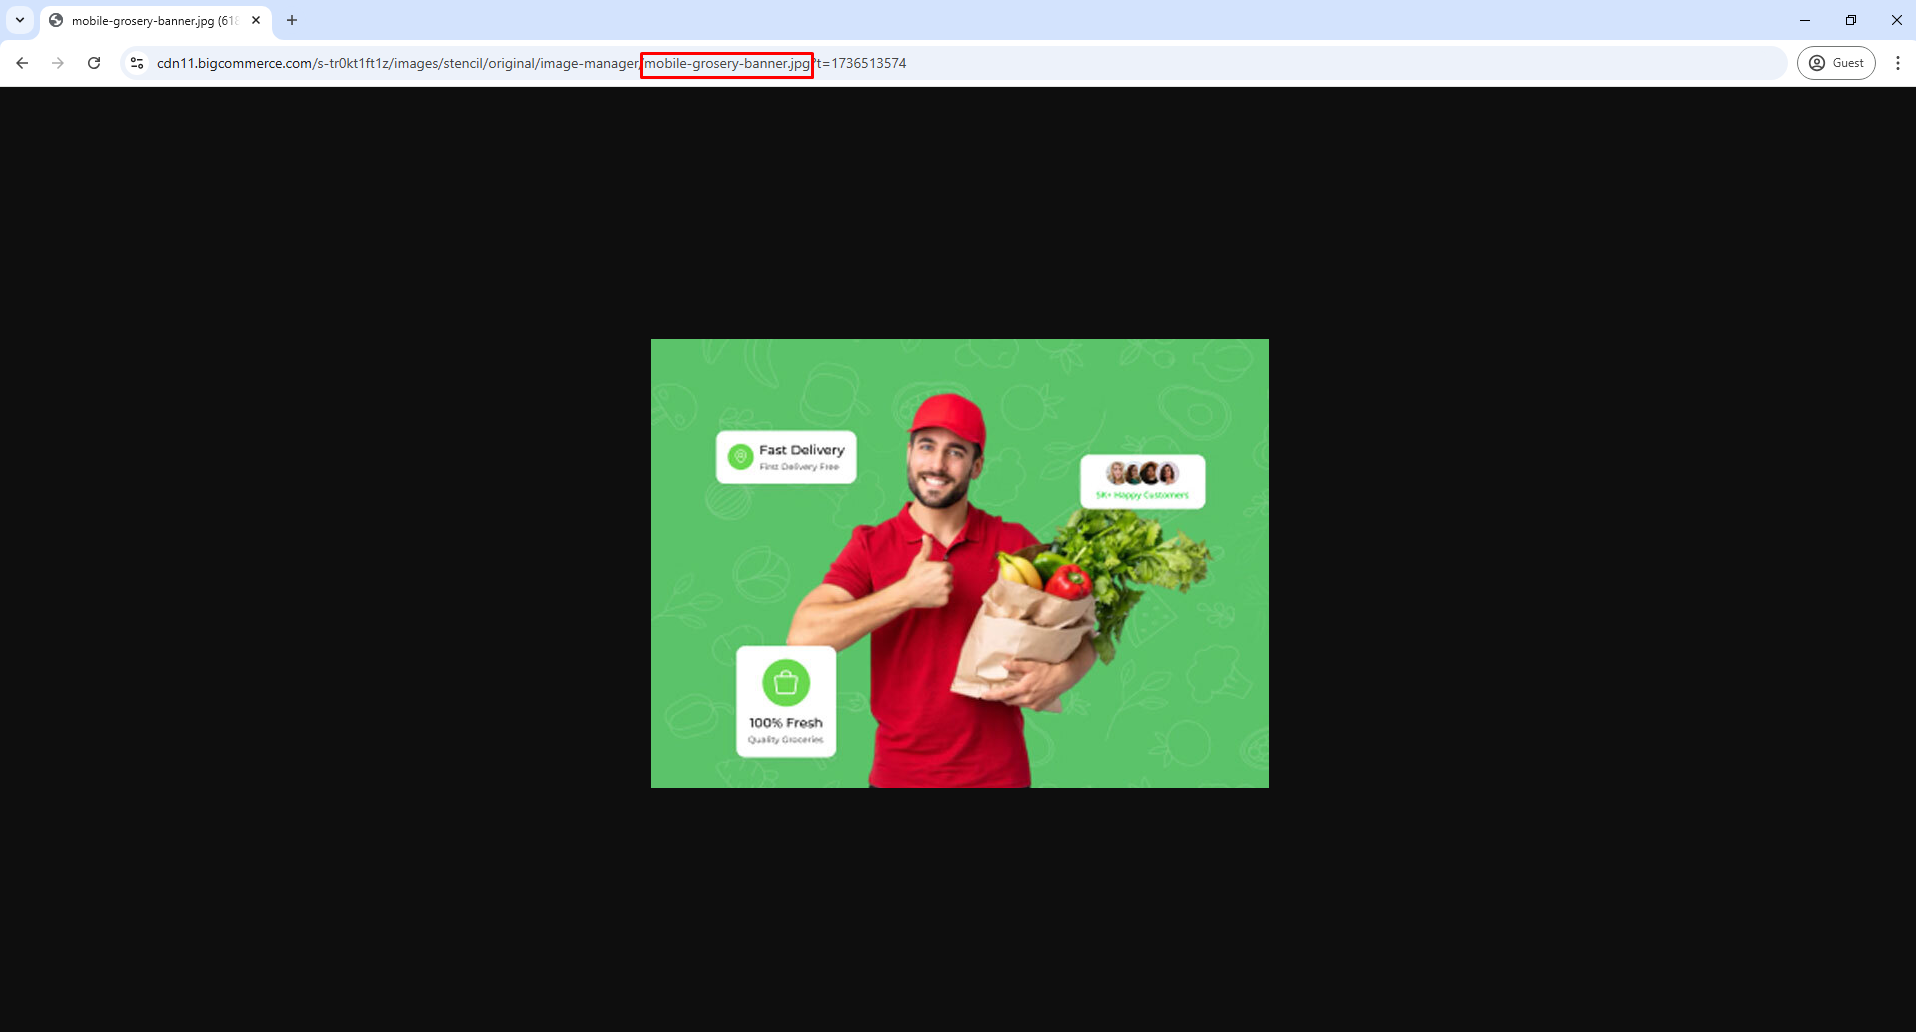
First, you need to head over to "Storefront > Image Manager" and then upload your images here.
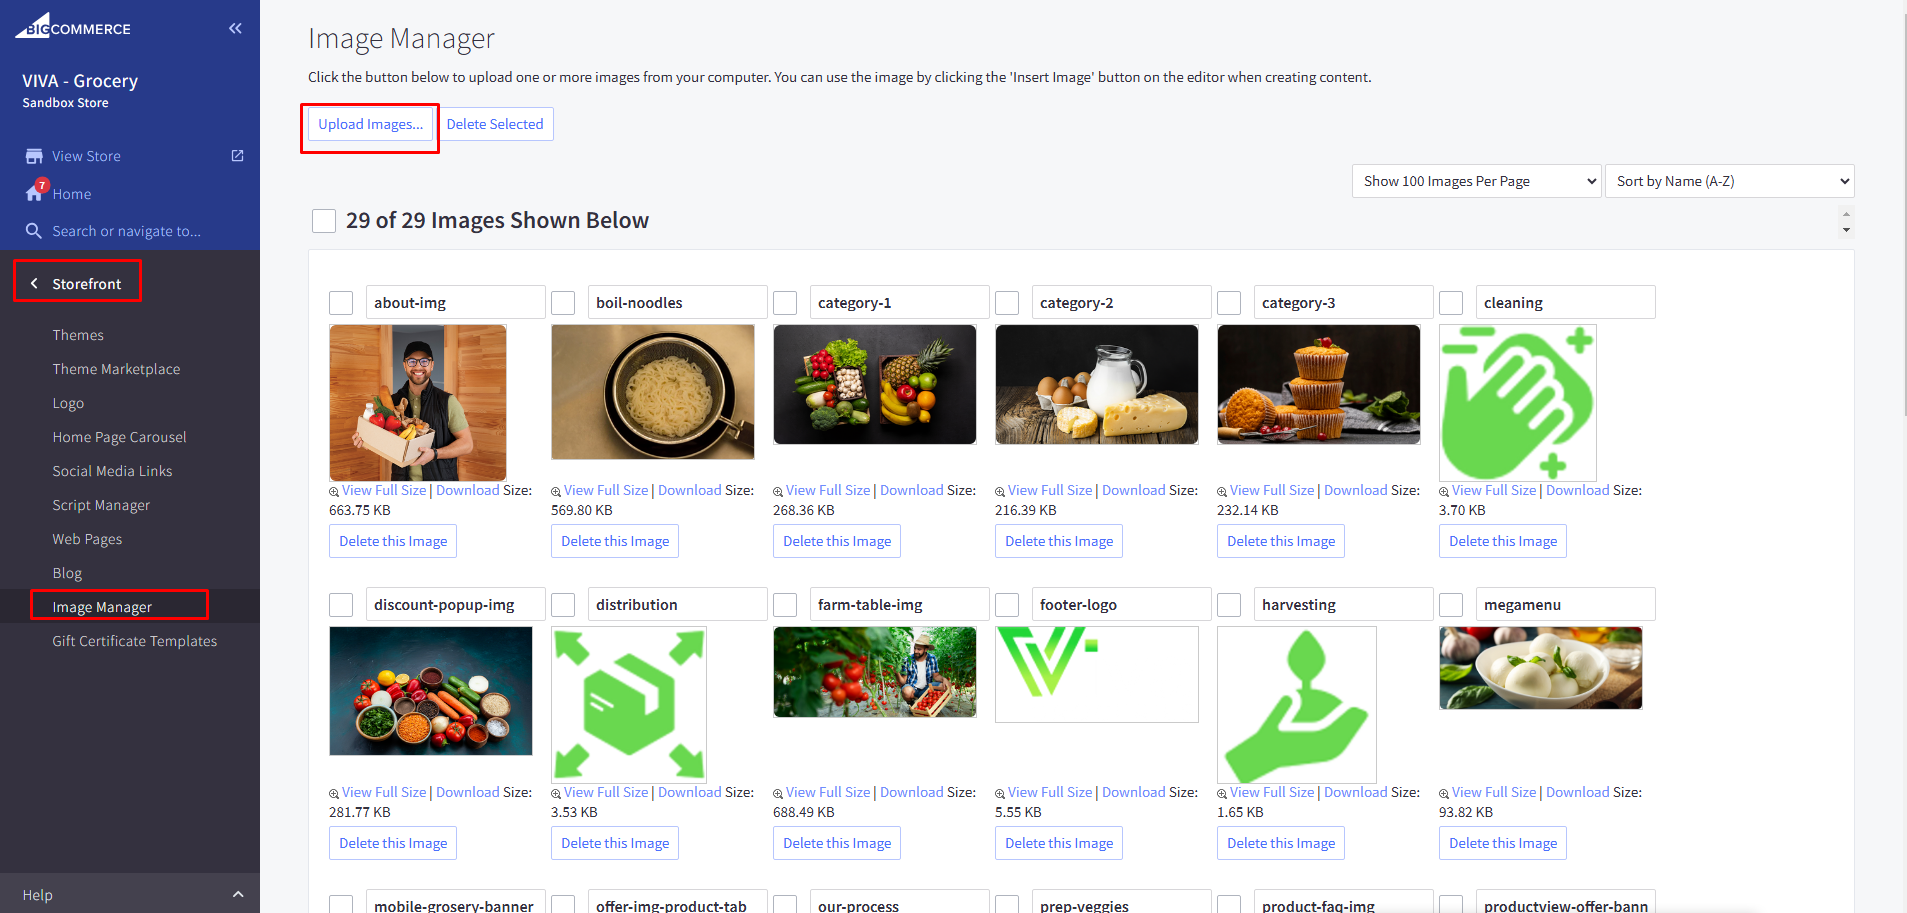
Then once uploaded, click "View Full Size" to open the image in a new tab and copy the image name to that image URL.
Change newsletter title and summary
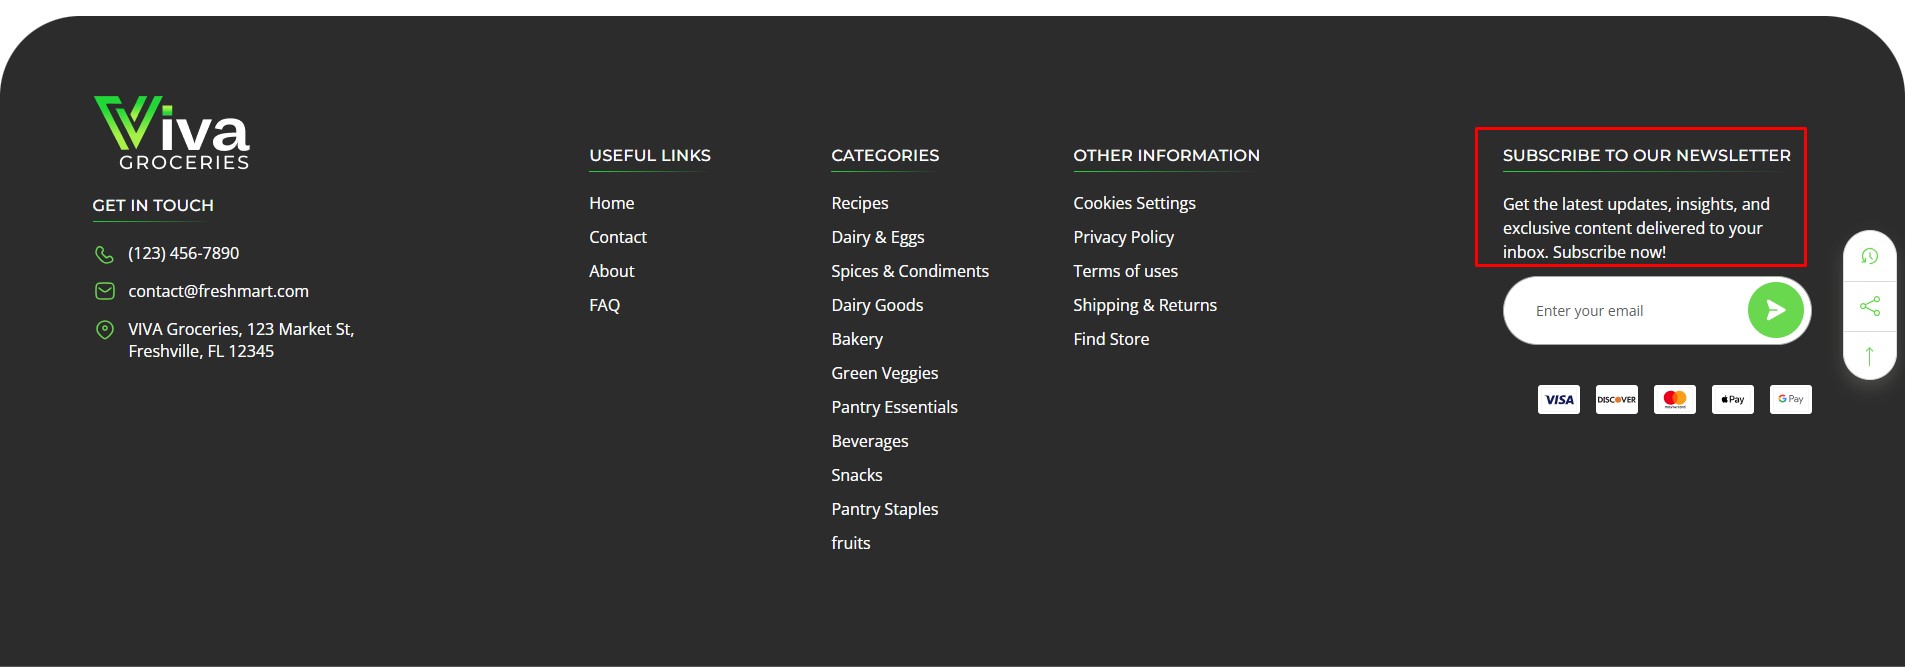
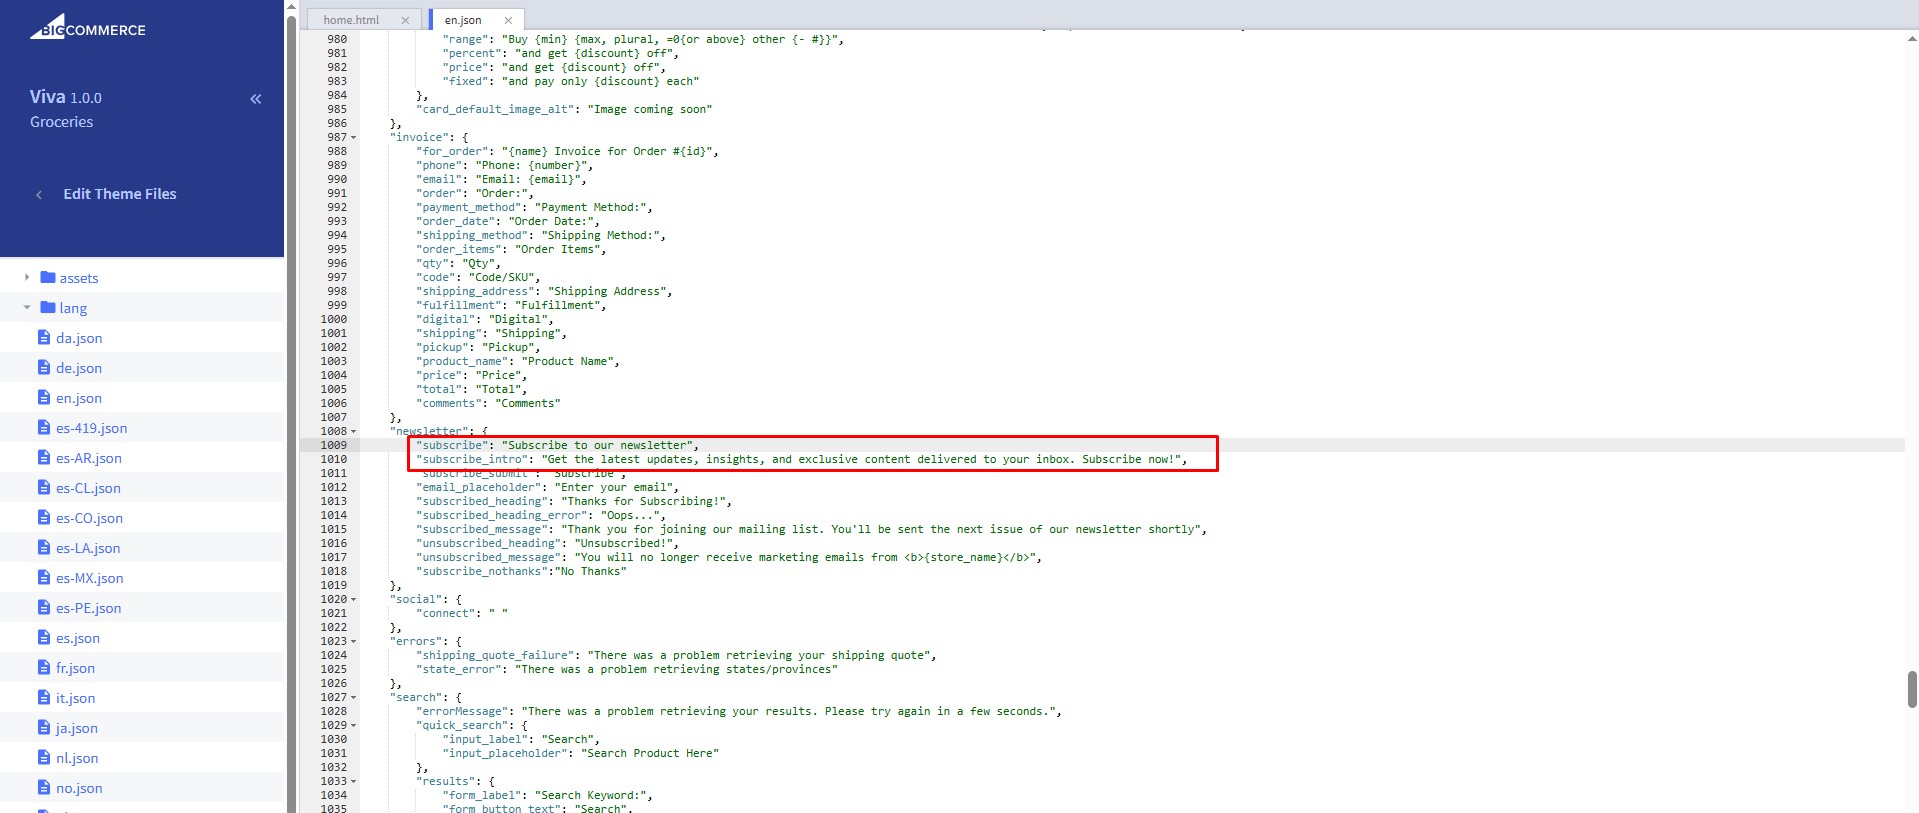
Newsletter Title and summary: For text change Go to channels > Themes > Advanced > Edit Theme Files > lang > en.json and update newsletter title and summary
Home page
Go to Storefront > My Themes in your control panel and click the blue "Customize" button to launch Theme Editor.
In the left hand column of the Theme Editor, click the panel labeled 'Home Page'.
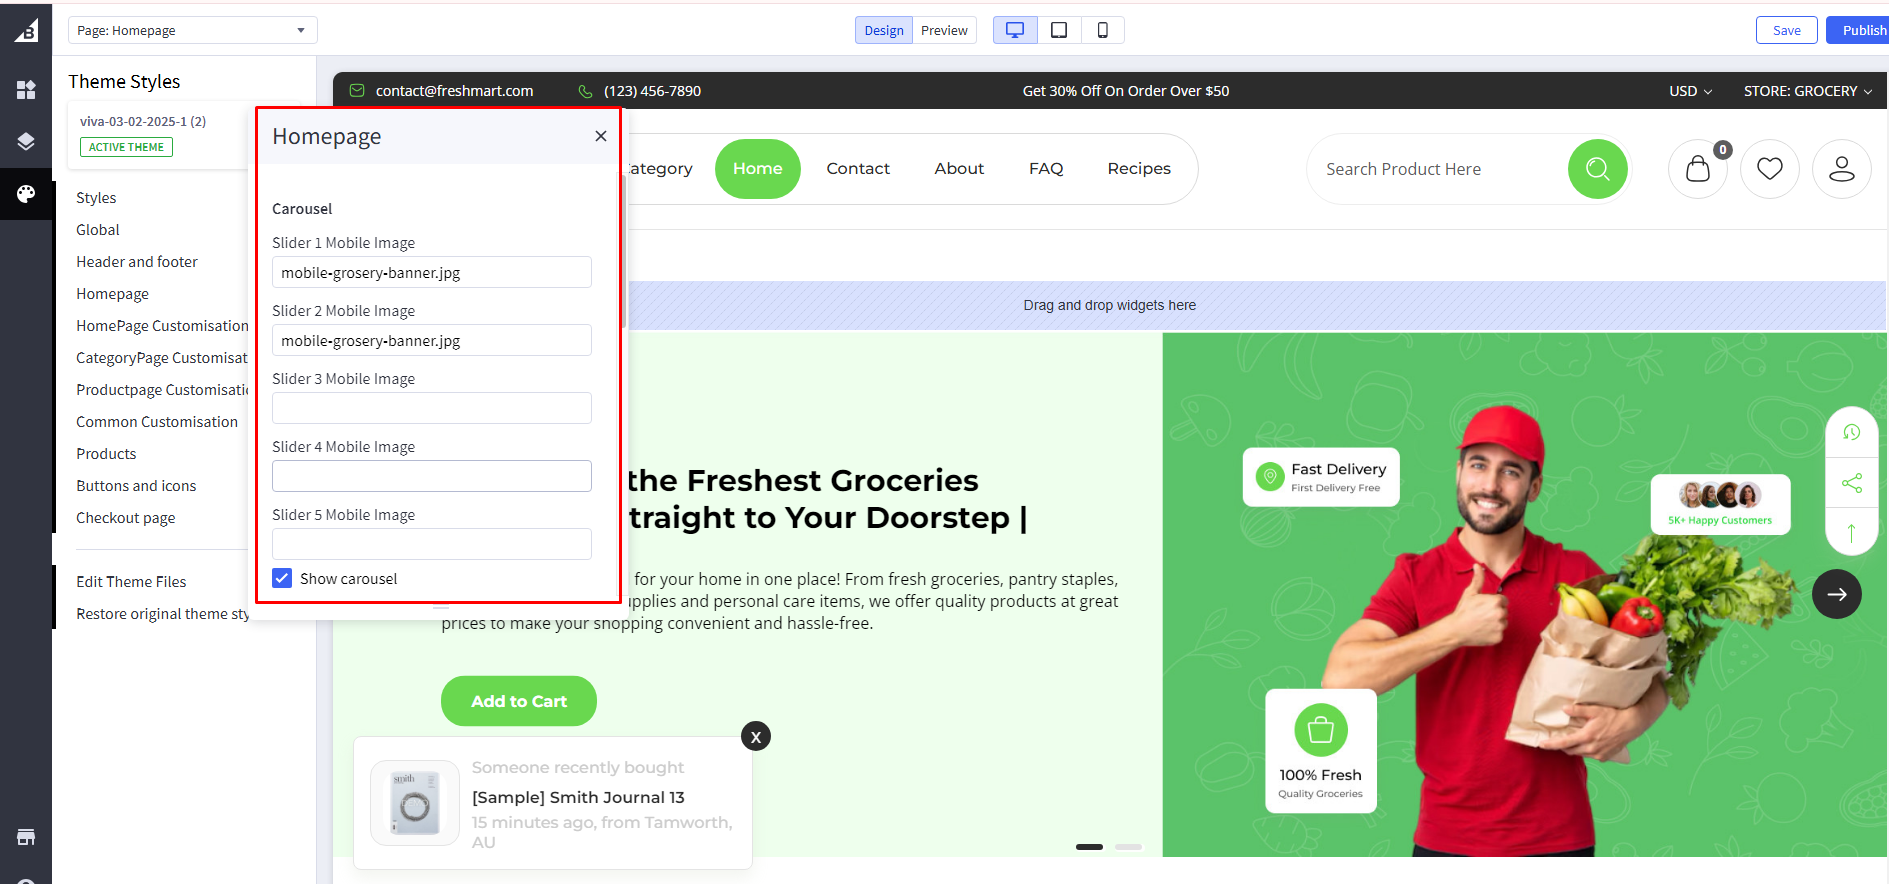
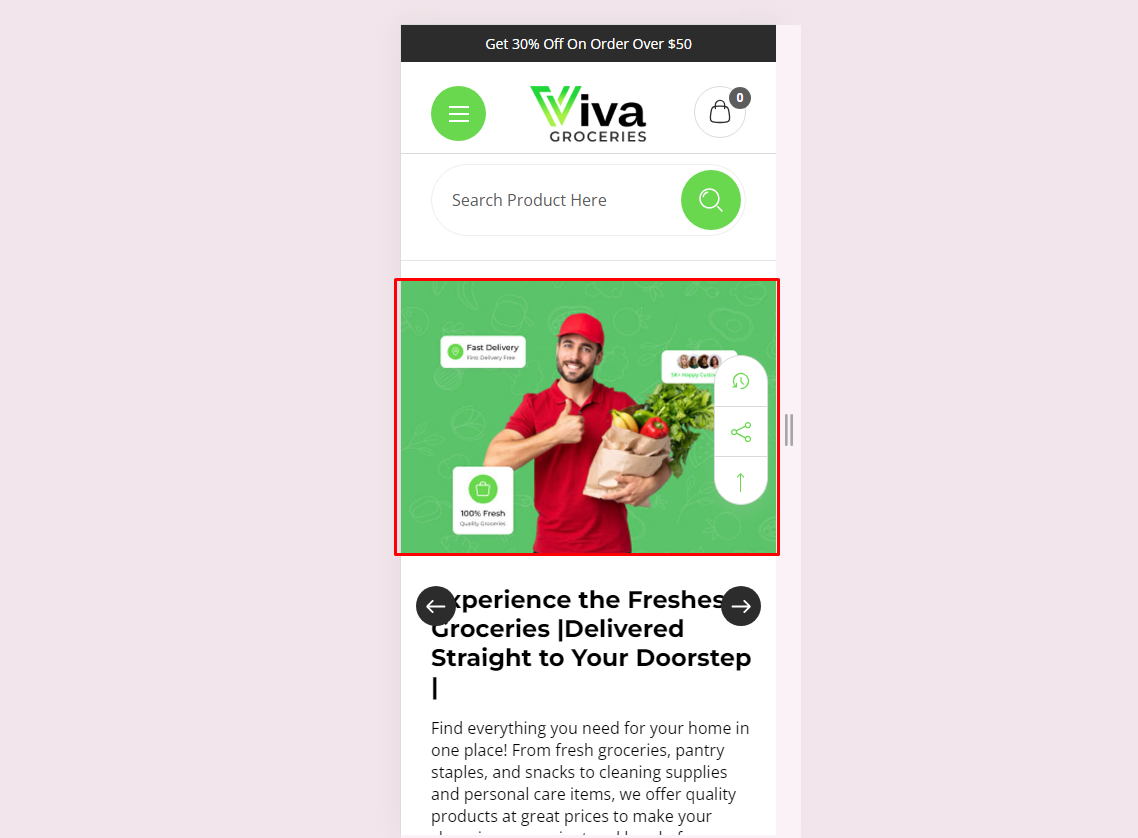
Manage Main Carousel Mobile View :
Add Mobile Image :
First, you need to head over to "Storefront > Image Manager" and then upload your images here.
Then once uploaded, click "View Full Size" to open the image in a new tab and copy the image name to that image URL.
HomePage Customisation
Go to Storefront > My Themes in your control panel and click the blue "Customize" button to launch Theme Editor.
In the left-hand column of the Theme Editor, click the panel labeled 'HomePage Customisation'.
skeleton color : Set skeleton color
All heading border Color : Set border color
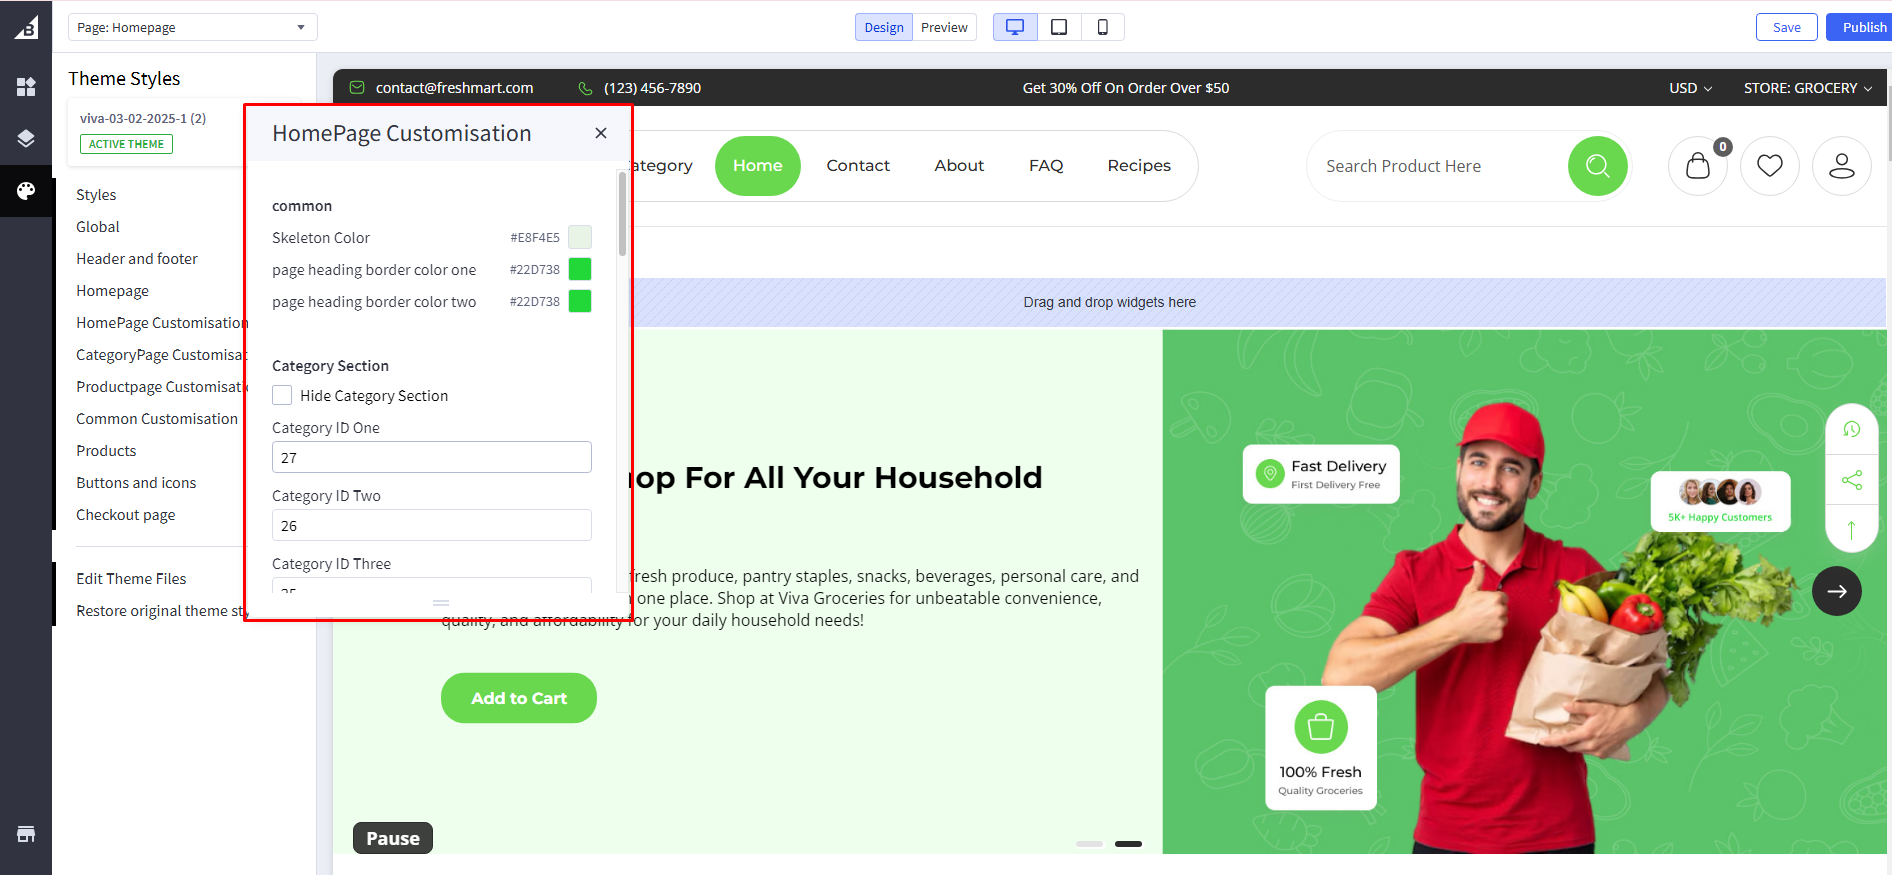
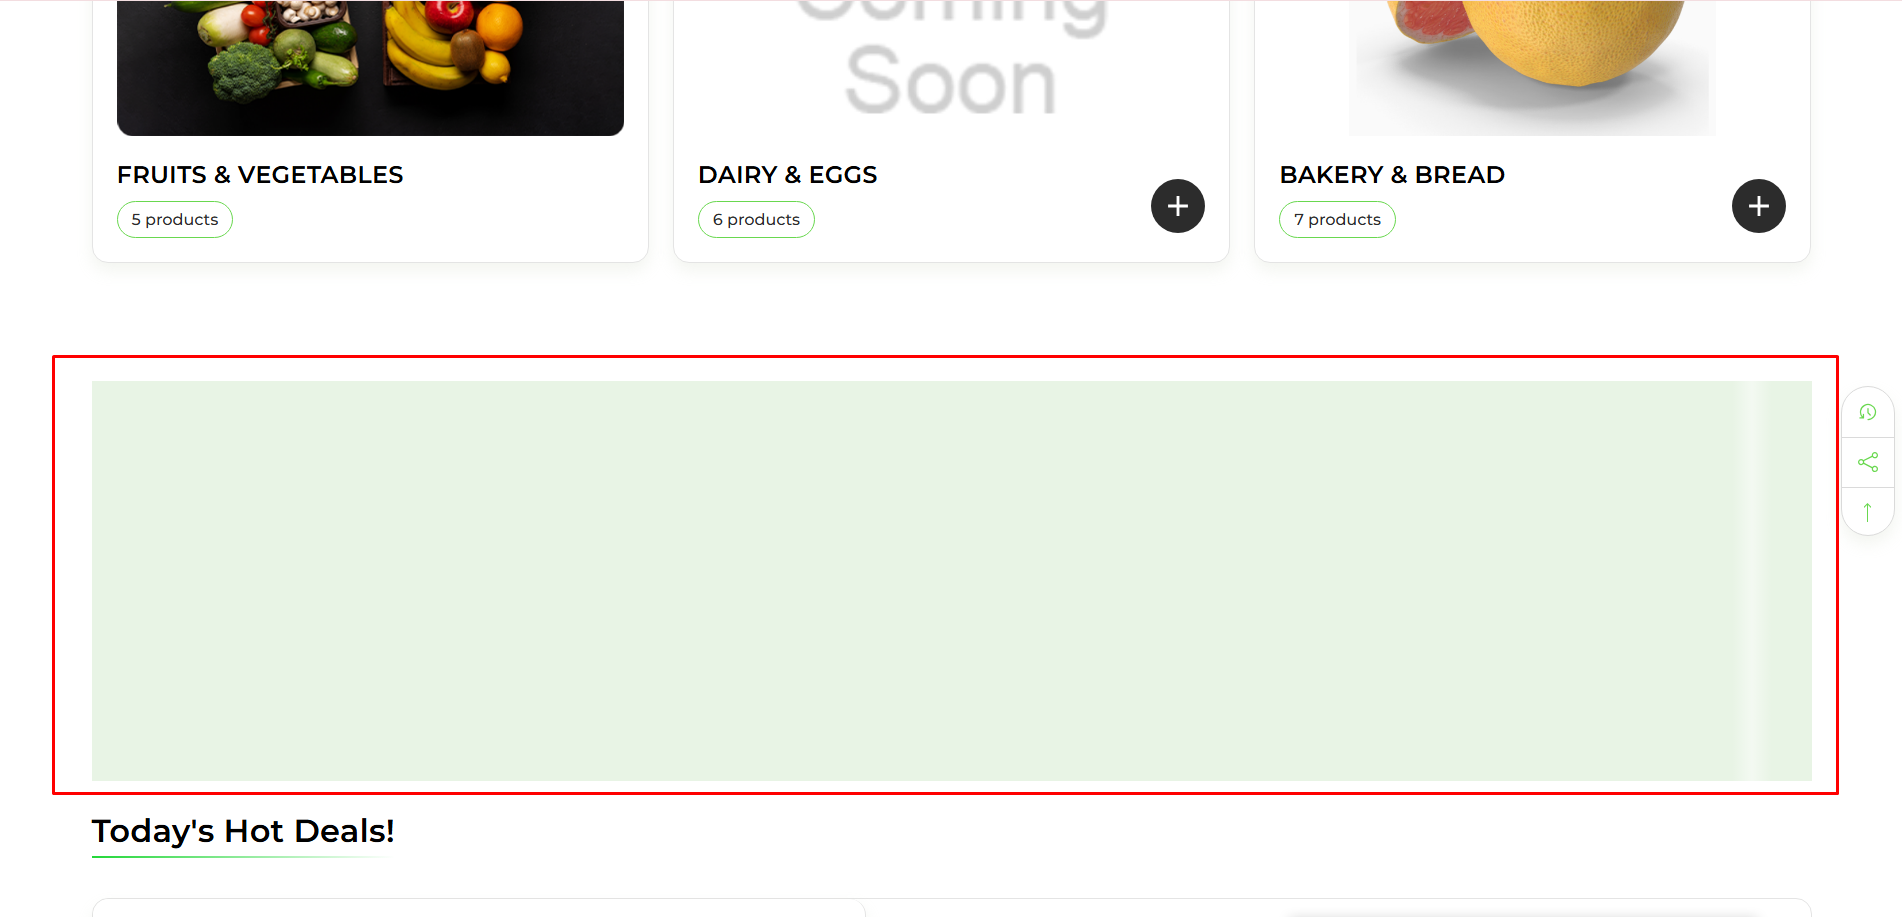
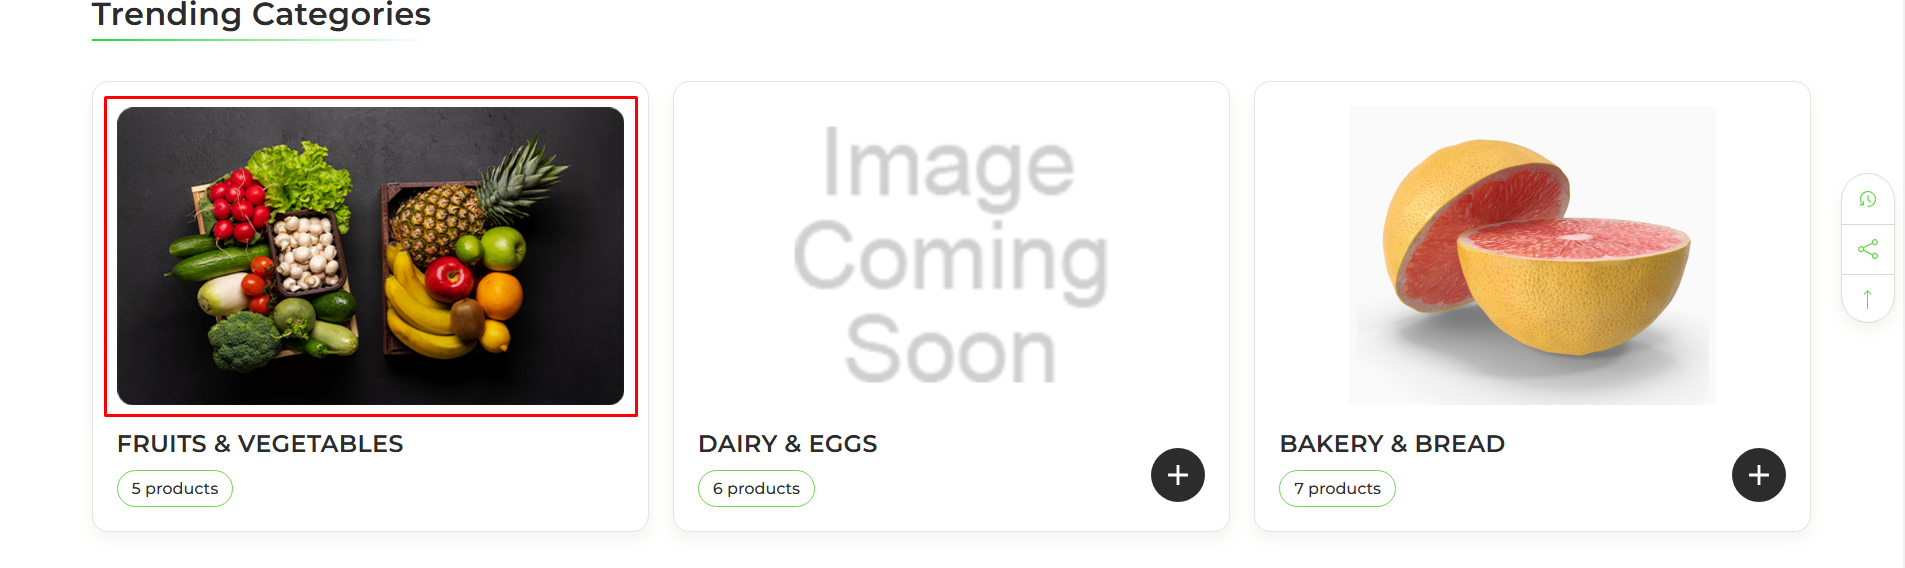
Category Section
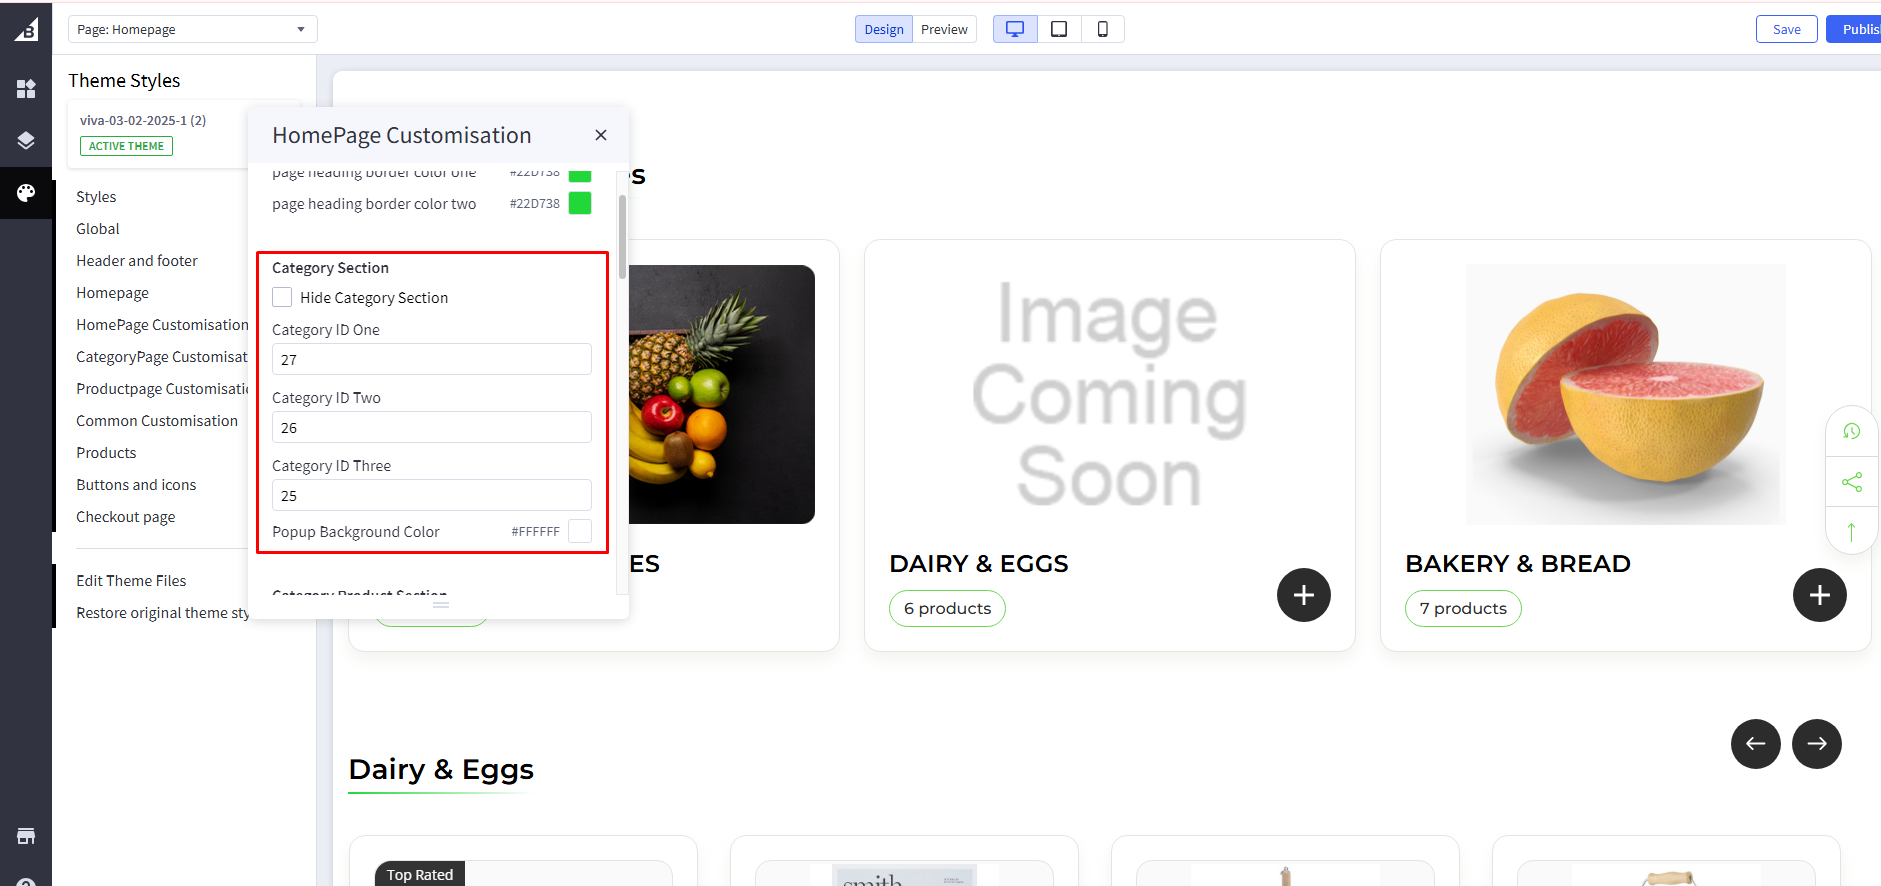
Hide Category Section : If Checked , it will hide a category section
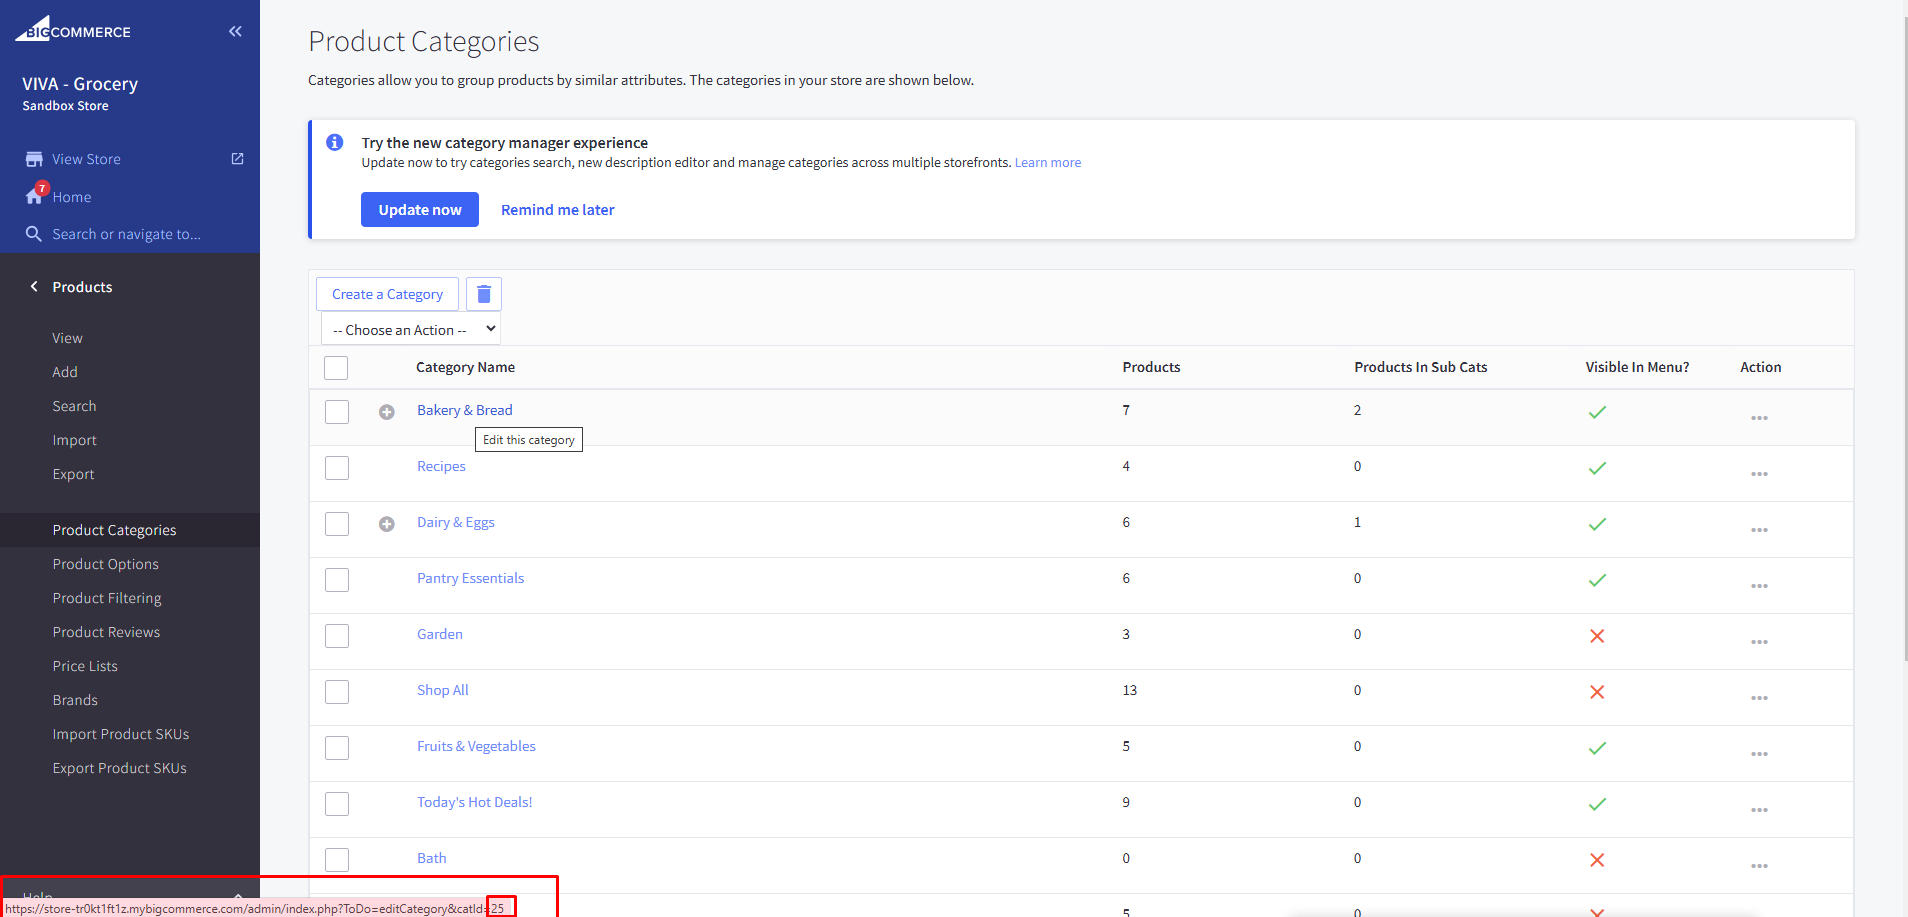
Add Category ID :
Go to Products > Product Categories then hover category name then visible in bottom on category id
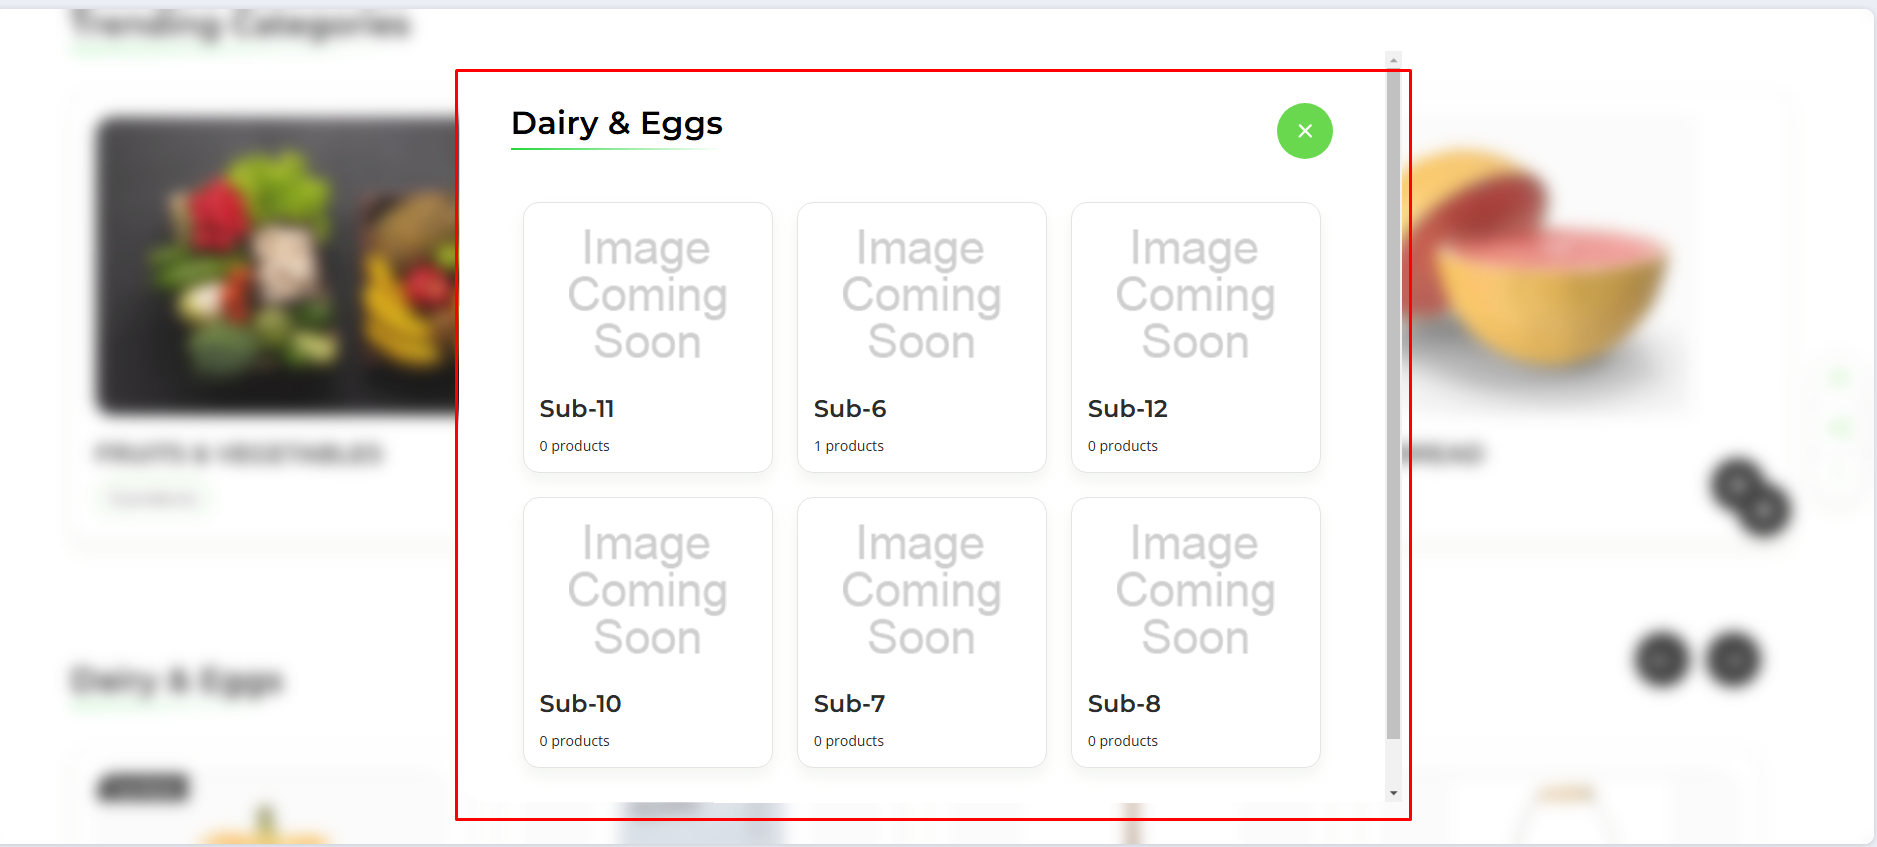
Popup background Color : Set background Color
Category Product Section
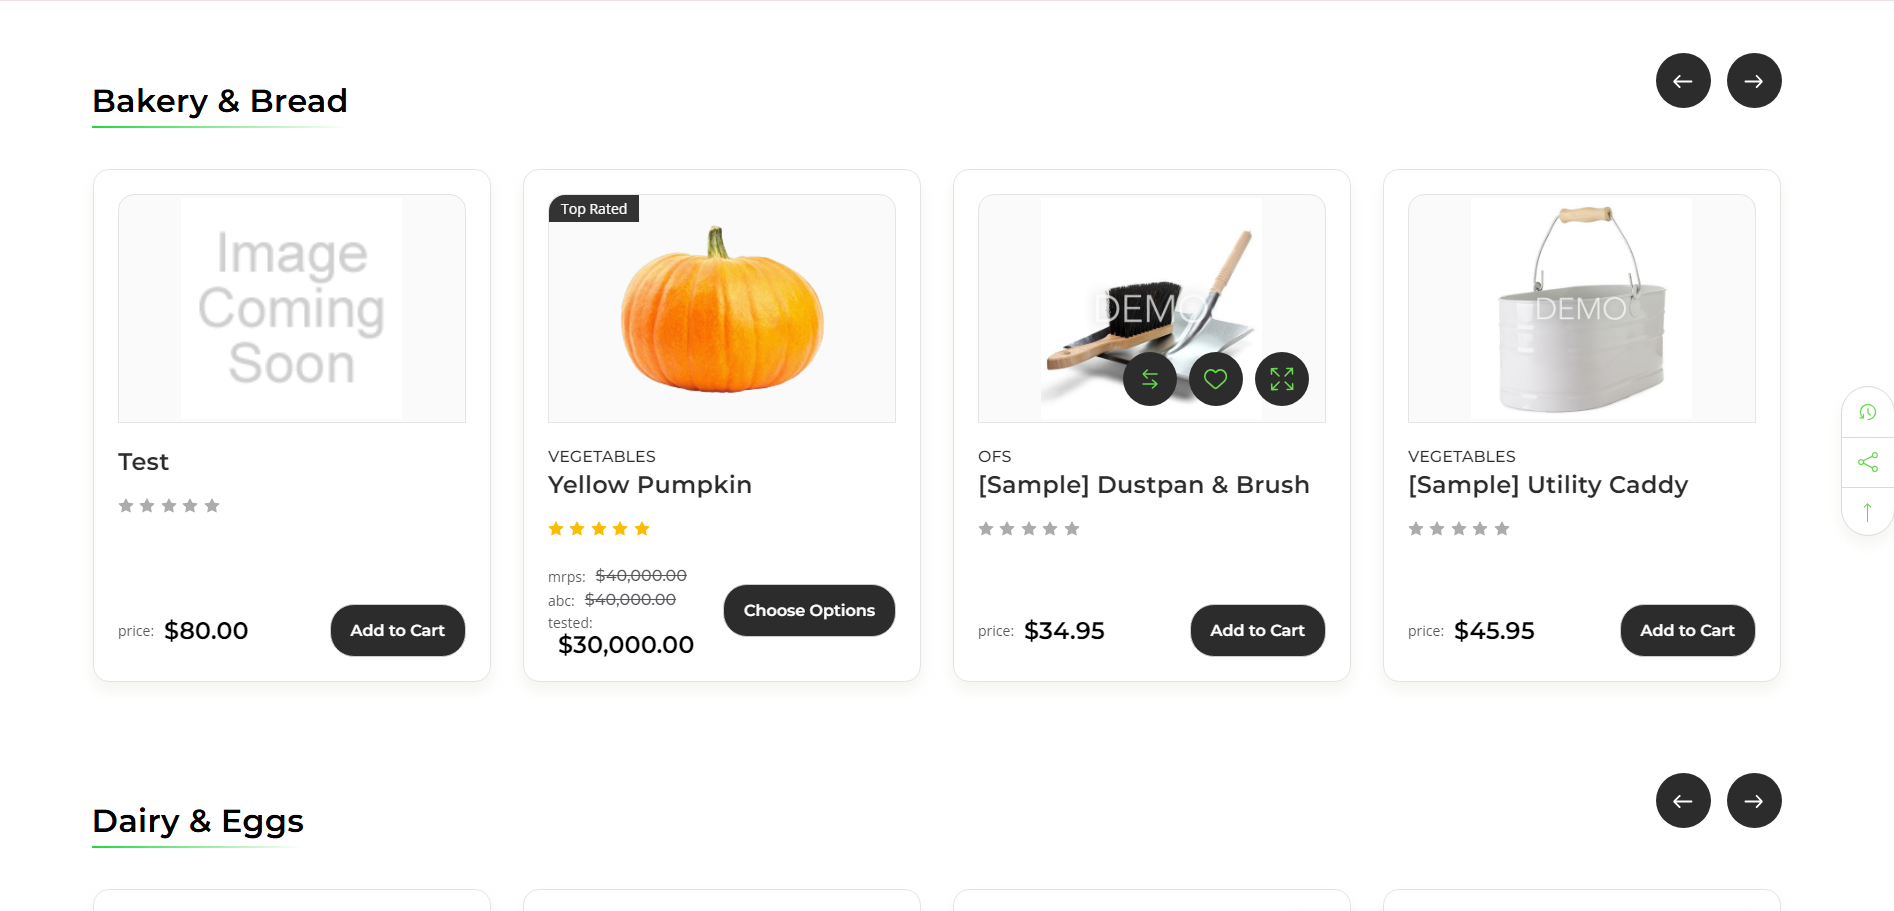
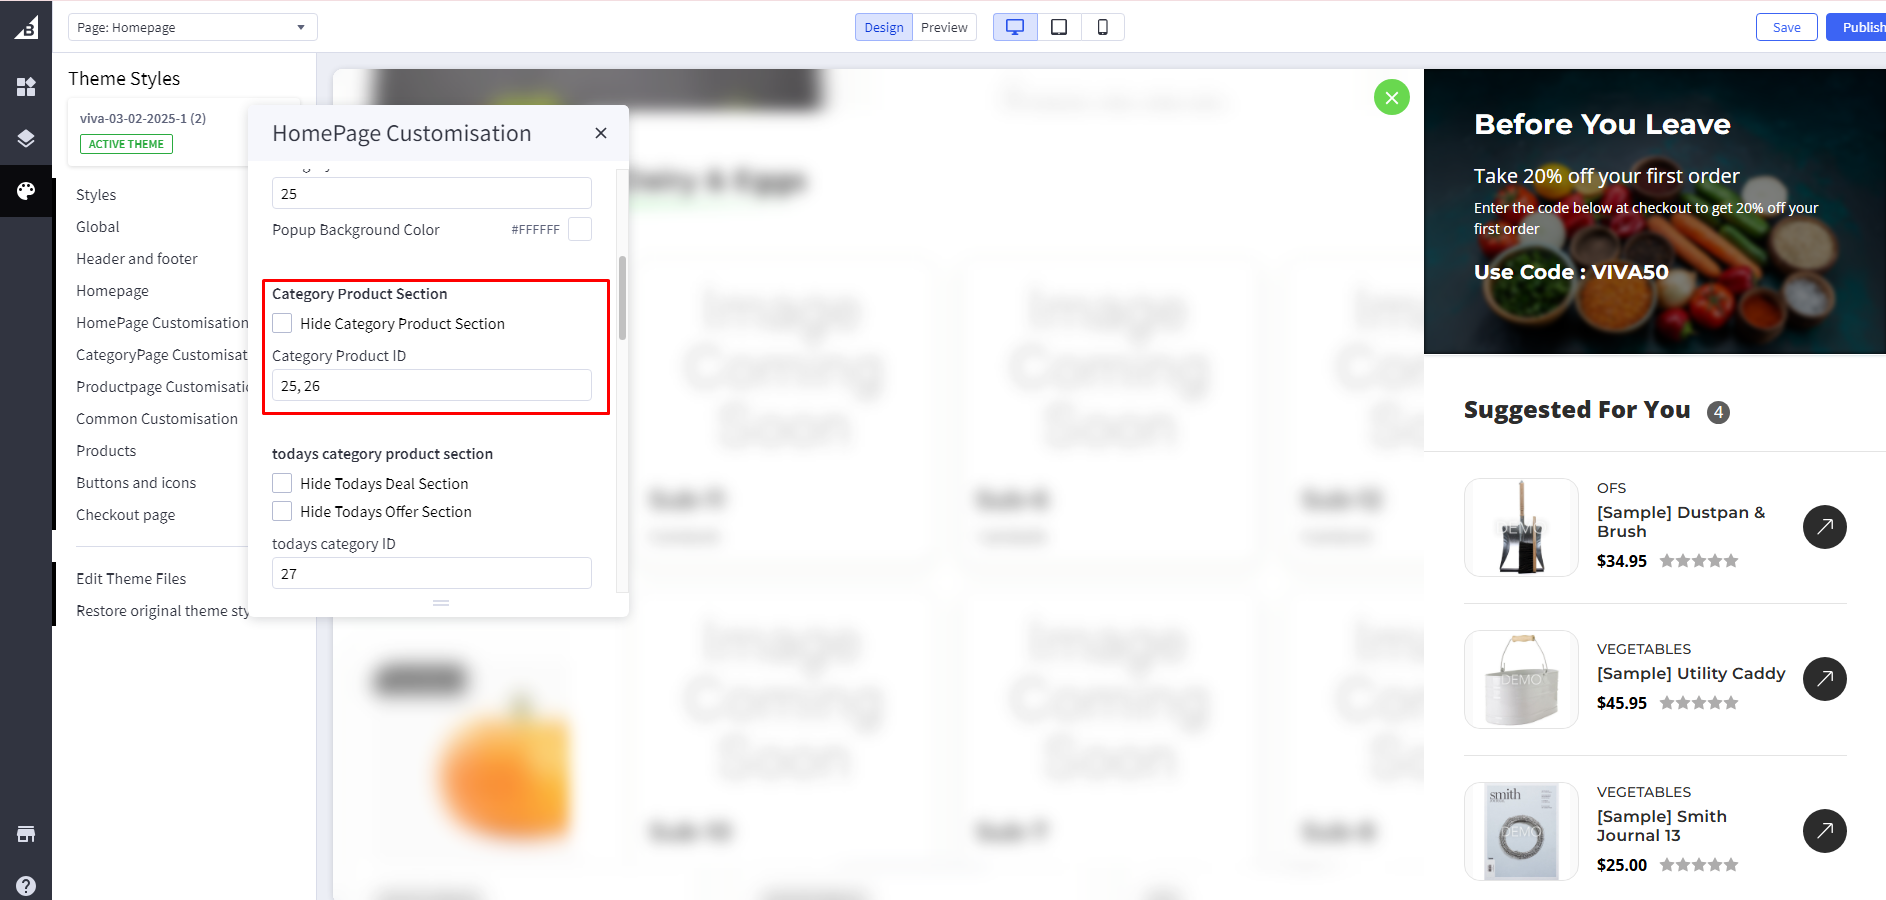
Hide Category Product Section : If Checked , it will hide a category Product section.
Category ID :
Go to Products > Product Categories then hover category name then visible in bottom on category id
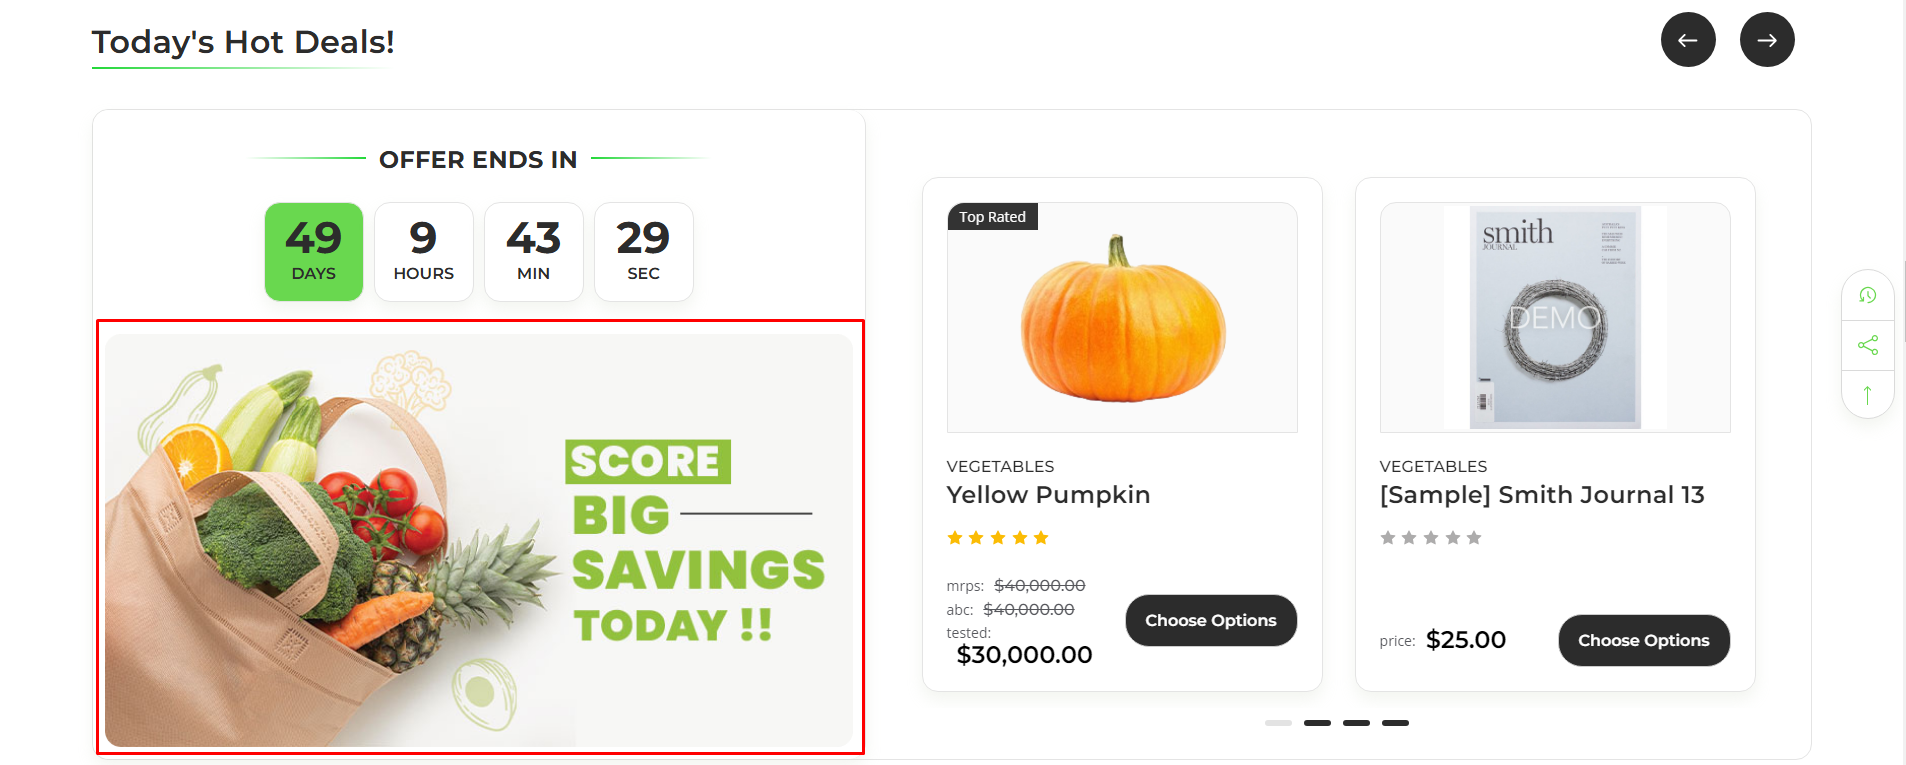
Today’s Deal Category Section
Go to Storefront > My Themes in your control panel and click the blue "Customize" button to launch Theme Editor.
In the left-hand column of the Theme Editor, click the panel labeled 'HomePage Customisation'
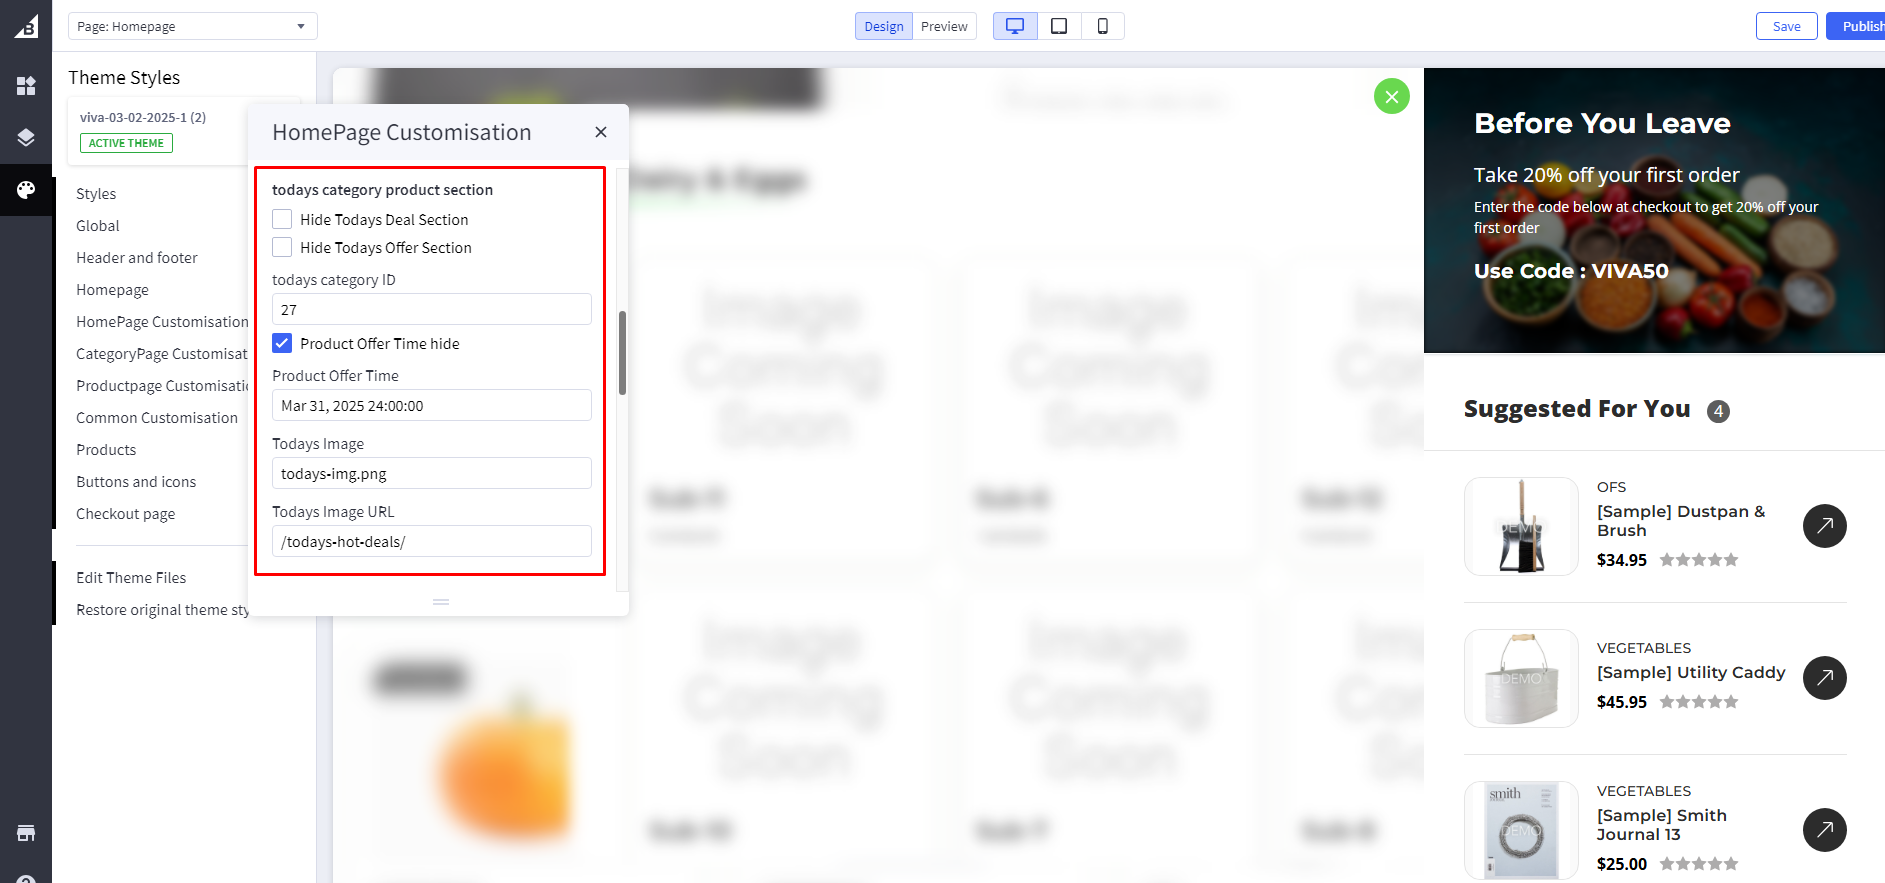
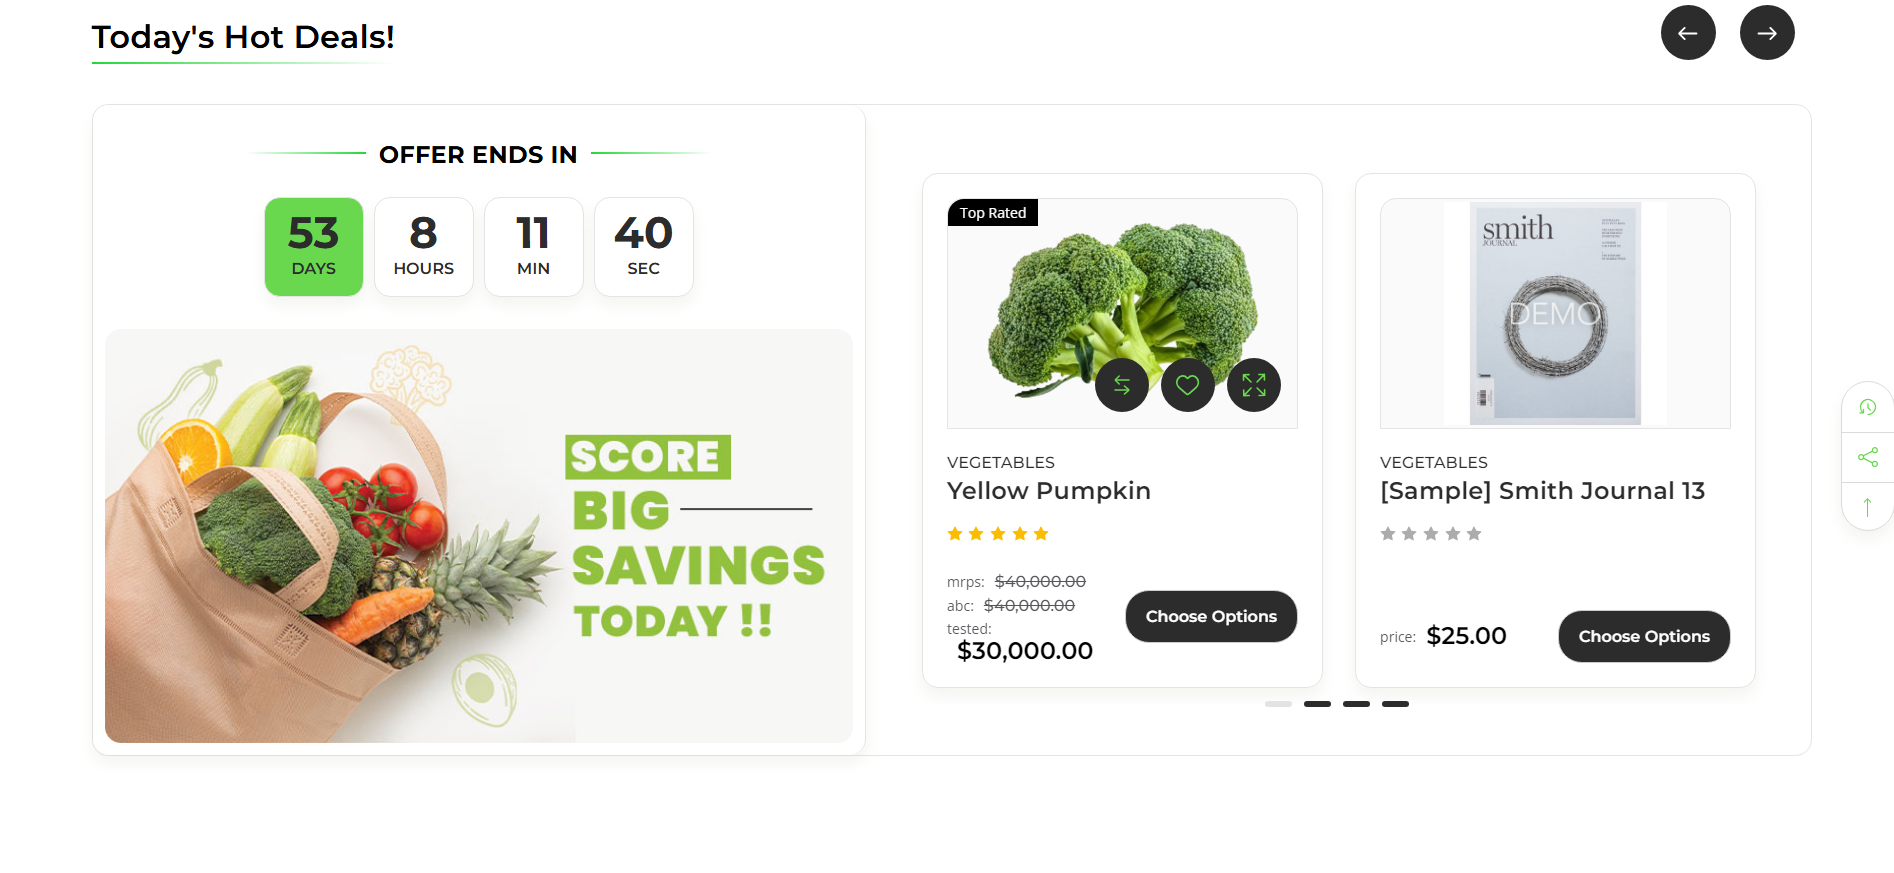
Hide today’s deal Section : If Checked , it will hide a hide today’s deal section
Hide today’s Offer Section : If Checked , it will hide a hide today’s offer section
Hide today’s Offer Timer : If Checked , it will hide a hide today’s offer Timer
Today’s Offer Time Count : set a time count
Today’s Offer Image :
First, you need to head over to "Storefront > Image Manager" and then upload your images here.
Then once uploaded, click "View Full Size" to open the image in a new tab and copy the image name to that image URL.

Today’s Offer Image URL : add image URL
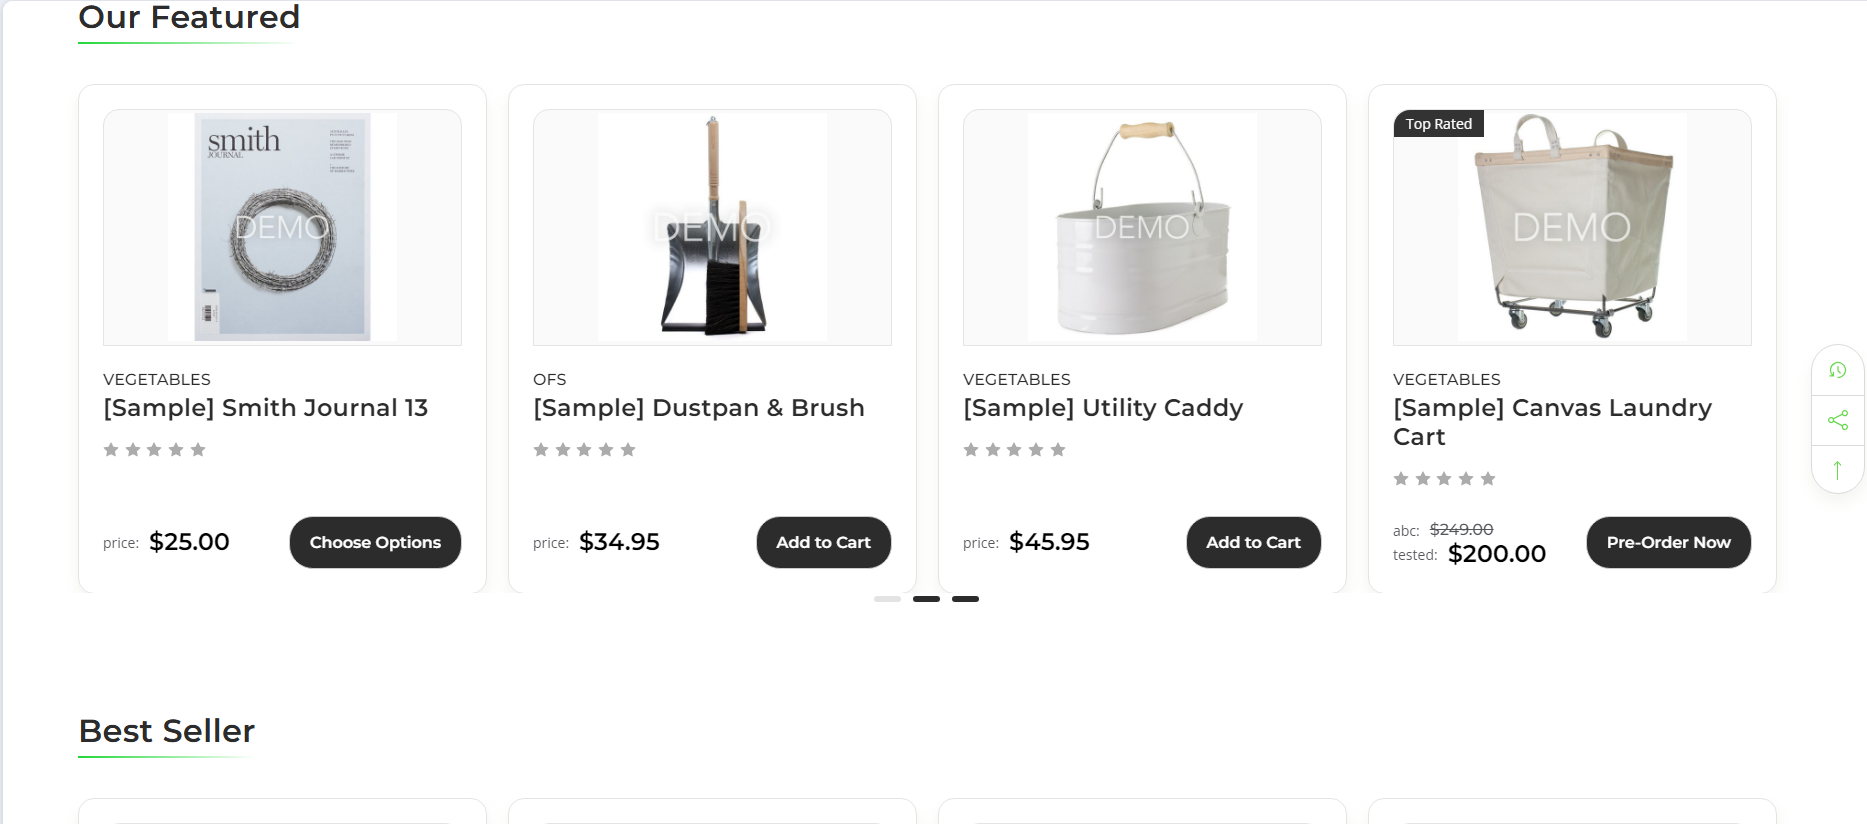
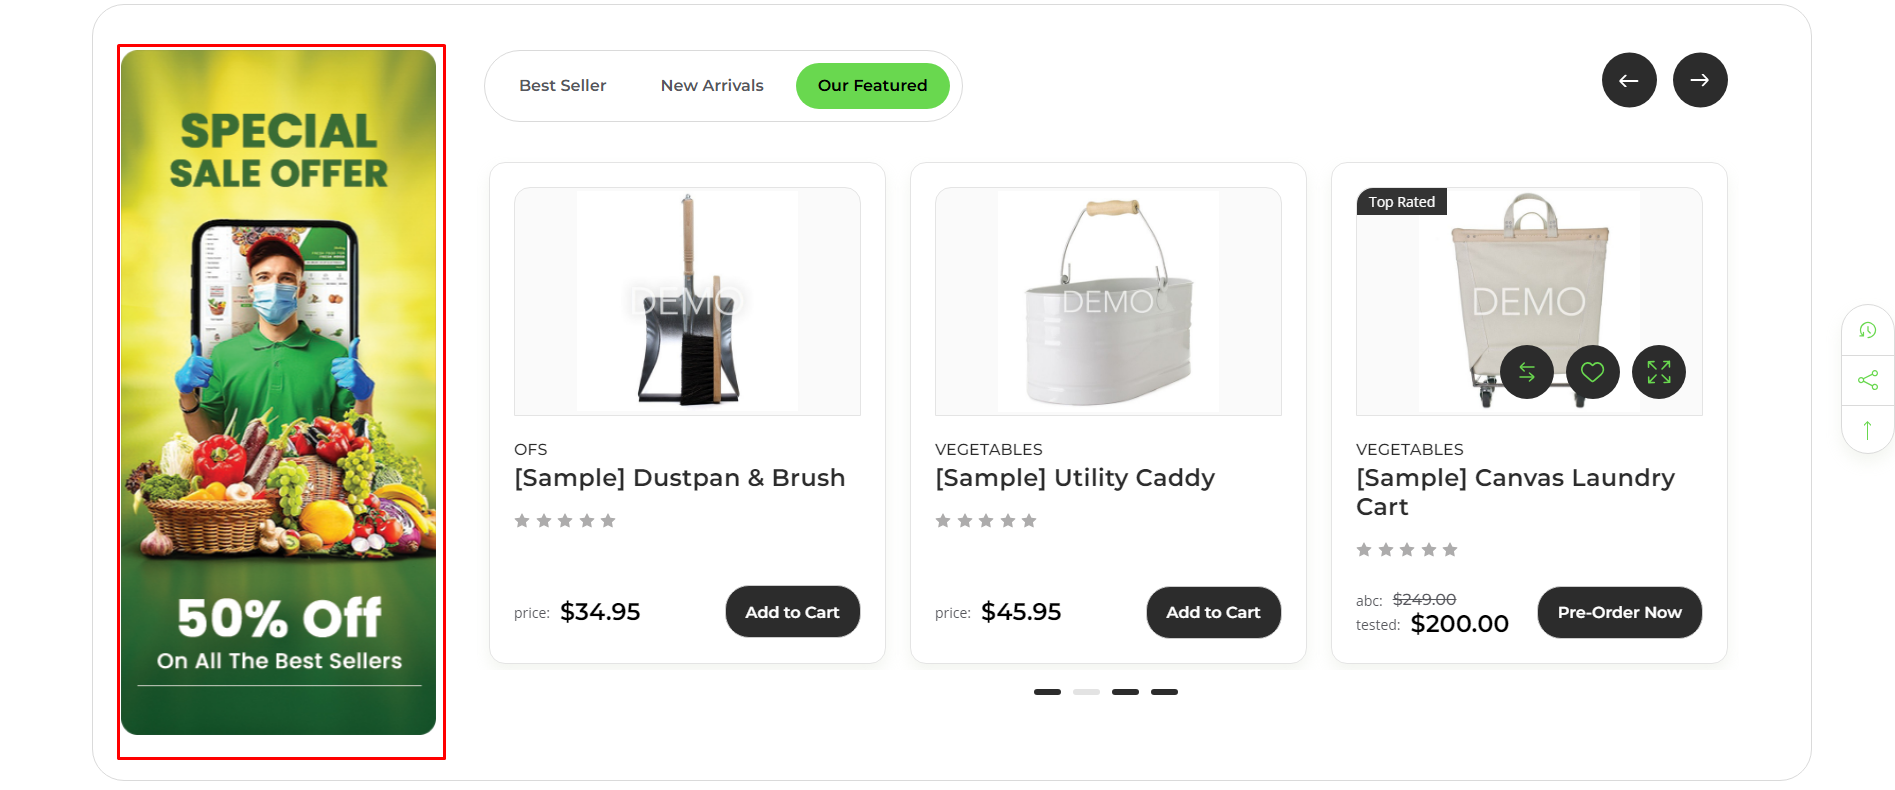
Product Tab Section
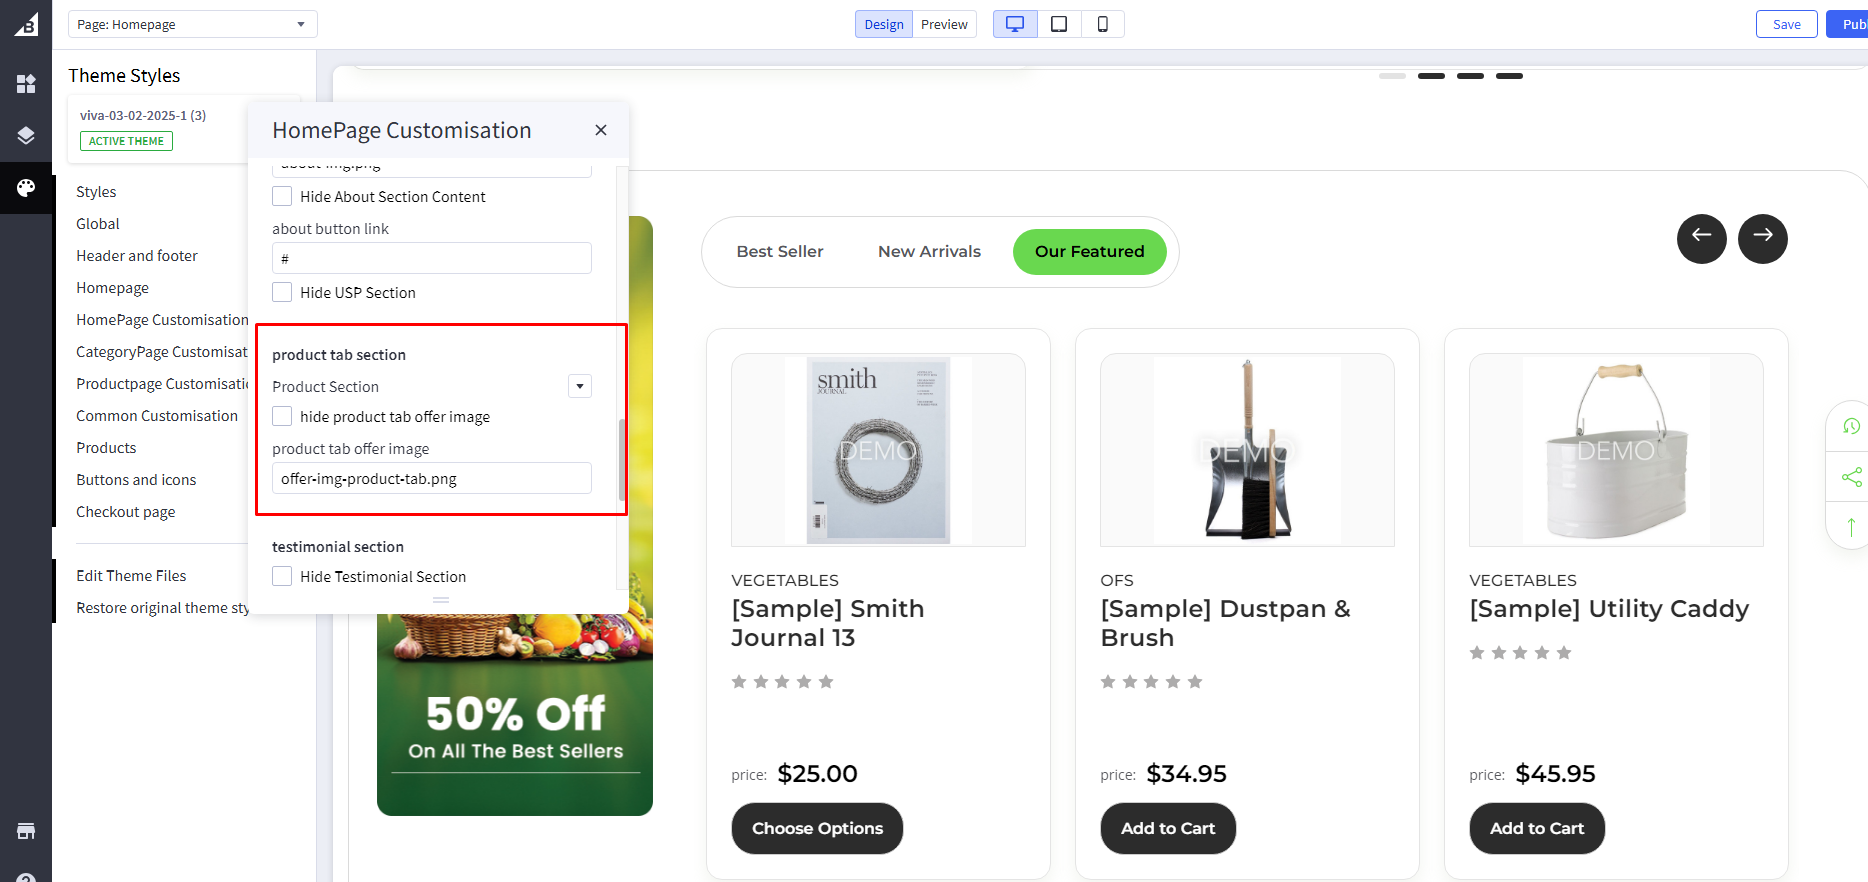

Hide Product Tab Section : If Checked , it will hide a hide Product tab section
Product Section : if change option on tab and row
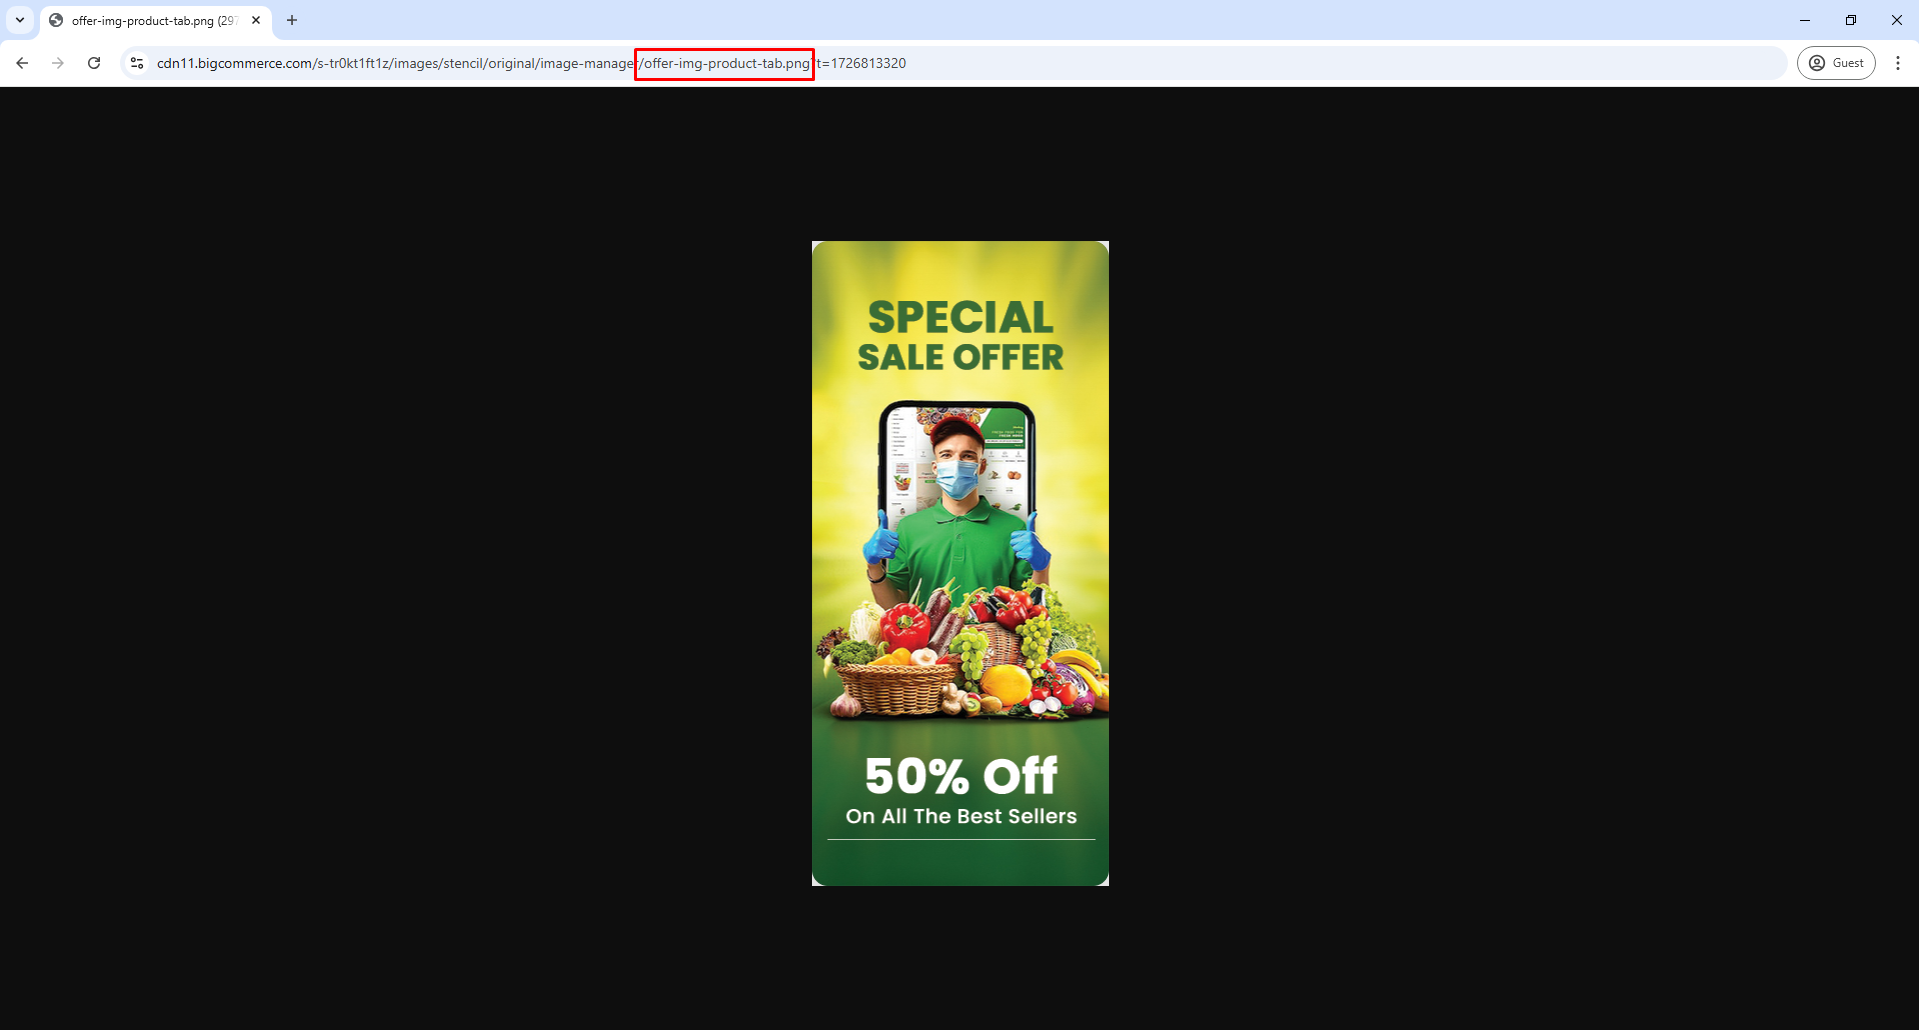
First, you need to head over to "Storefront > Image Manager" and then upload your images here.
Then once uploaded, click "View Full Size" to open the image in a new tab and copy the image name to that image URL.
Testimonial Section


Hide Testimonial Section : If Checked , it will hide a hide Testimonial section
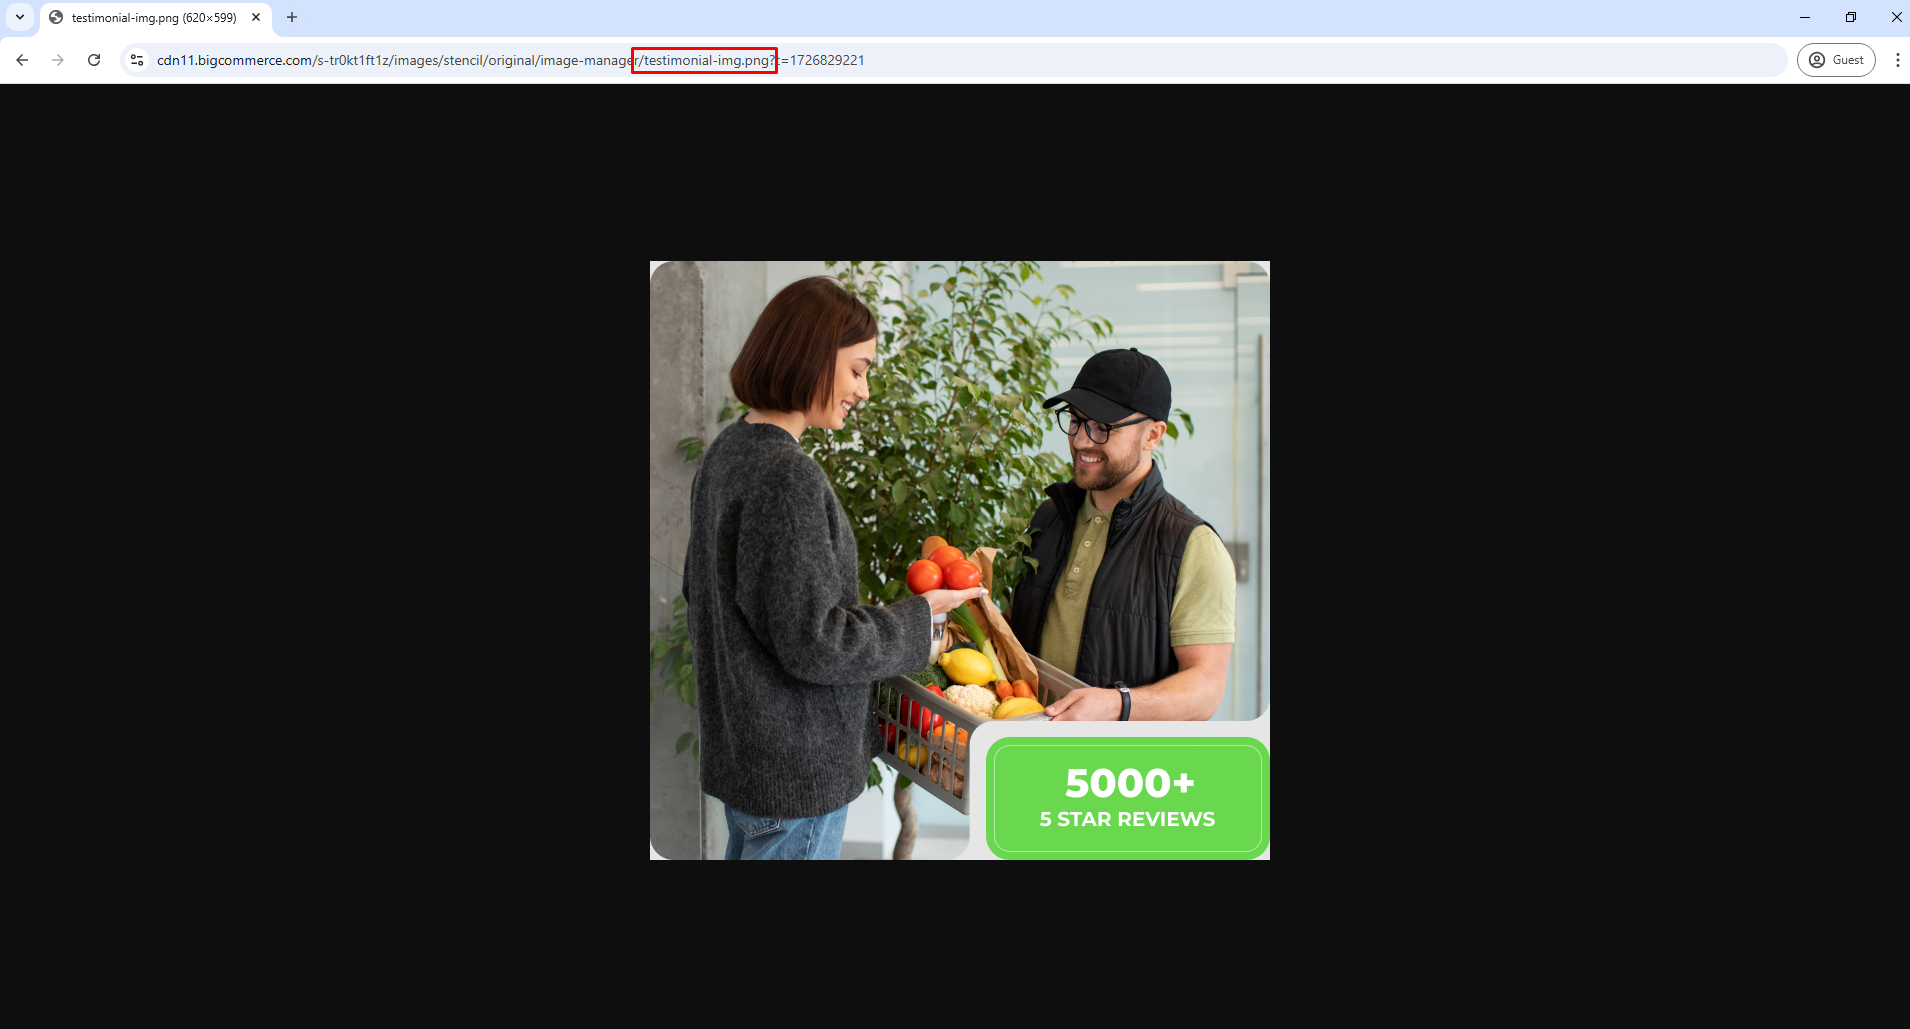
Testimonial Images :
First, you need to head over to "Storefront > Image Manager" and then upload your images here.
Then once uploaded, click "View Full Size" to open the image in a new tab and copy the image name to that image URL.
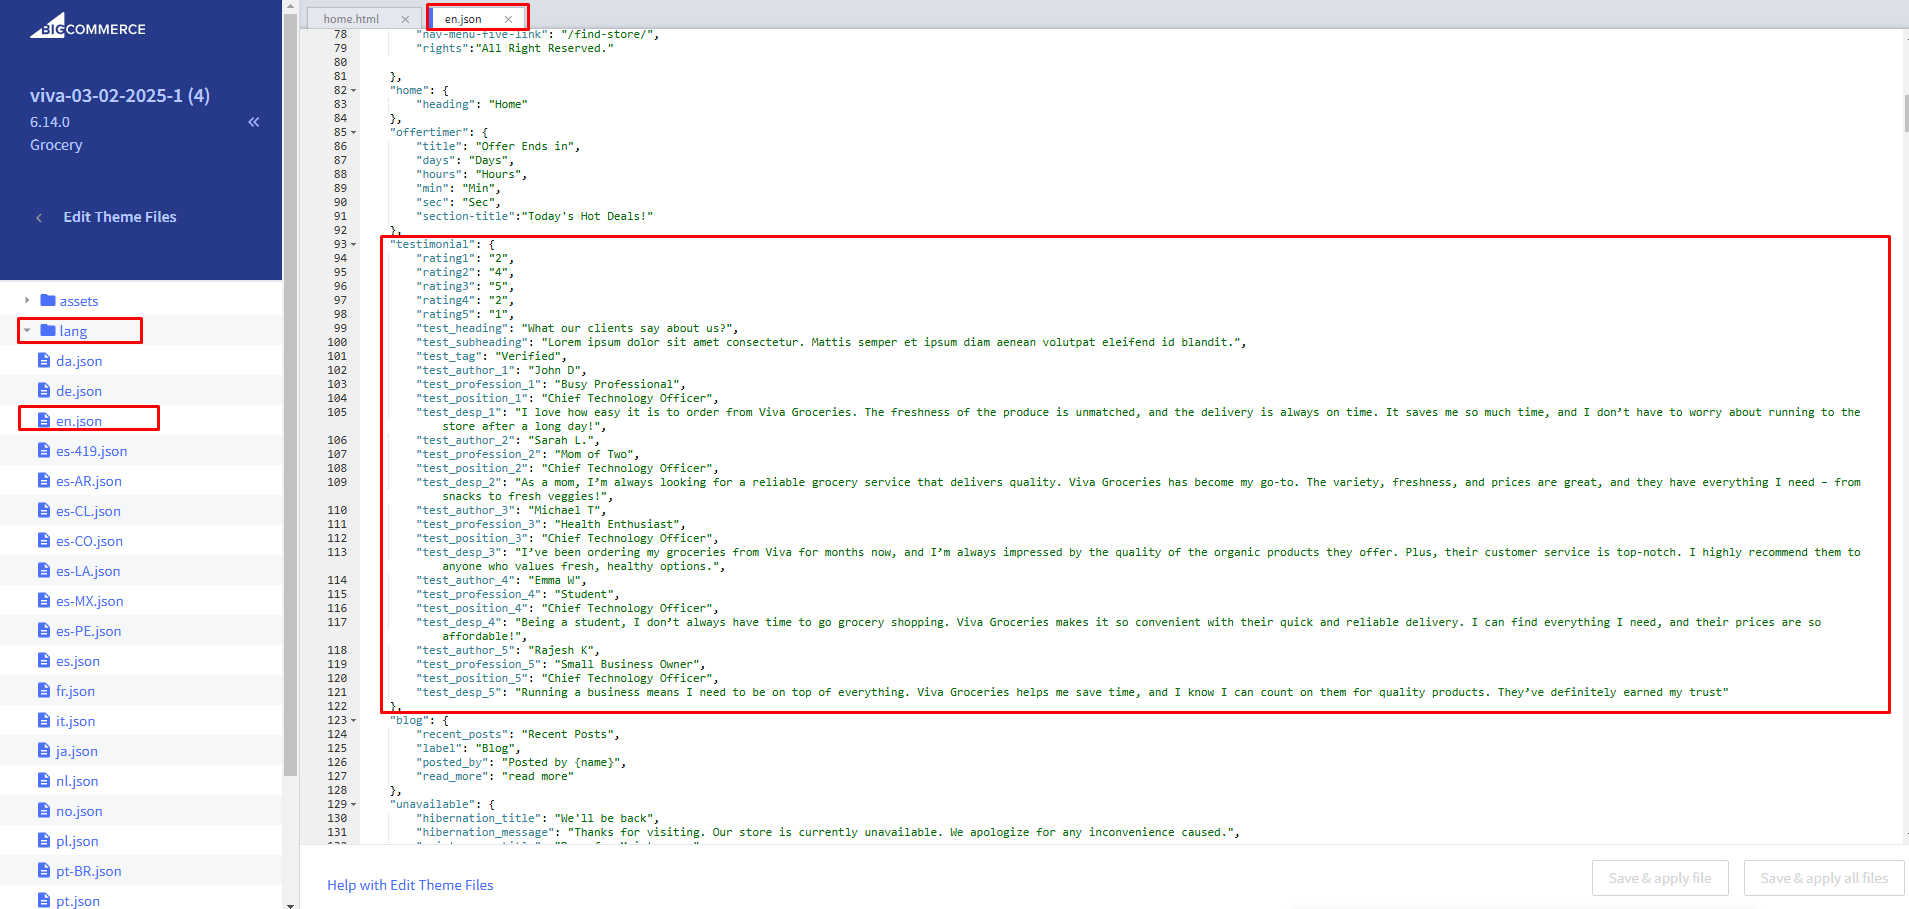
Testimonial Content : For text change Go to channels > Themes > Advanced > Edit Theme Files > lang > en.json and update testimonial Content
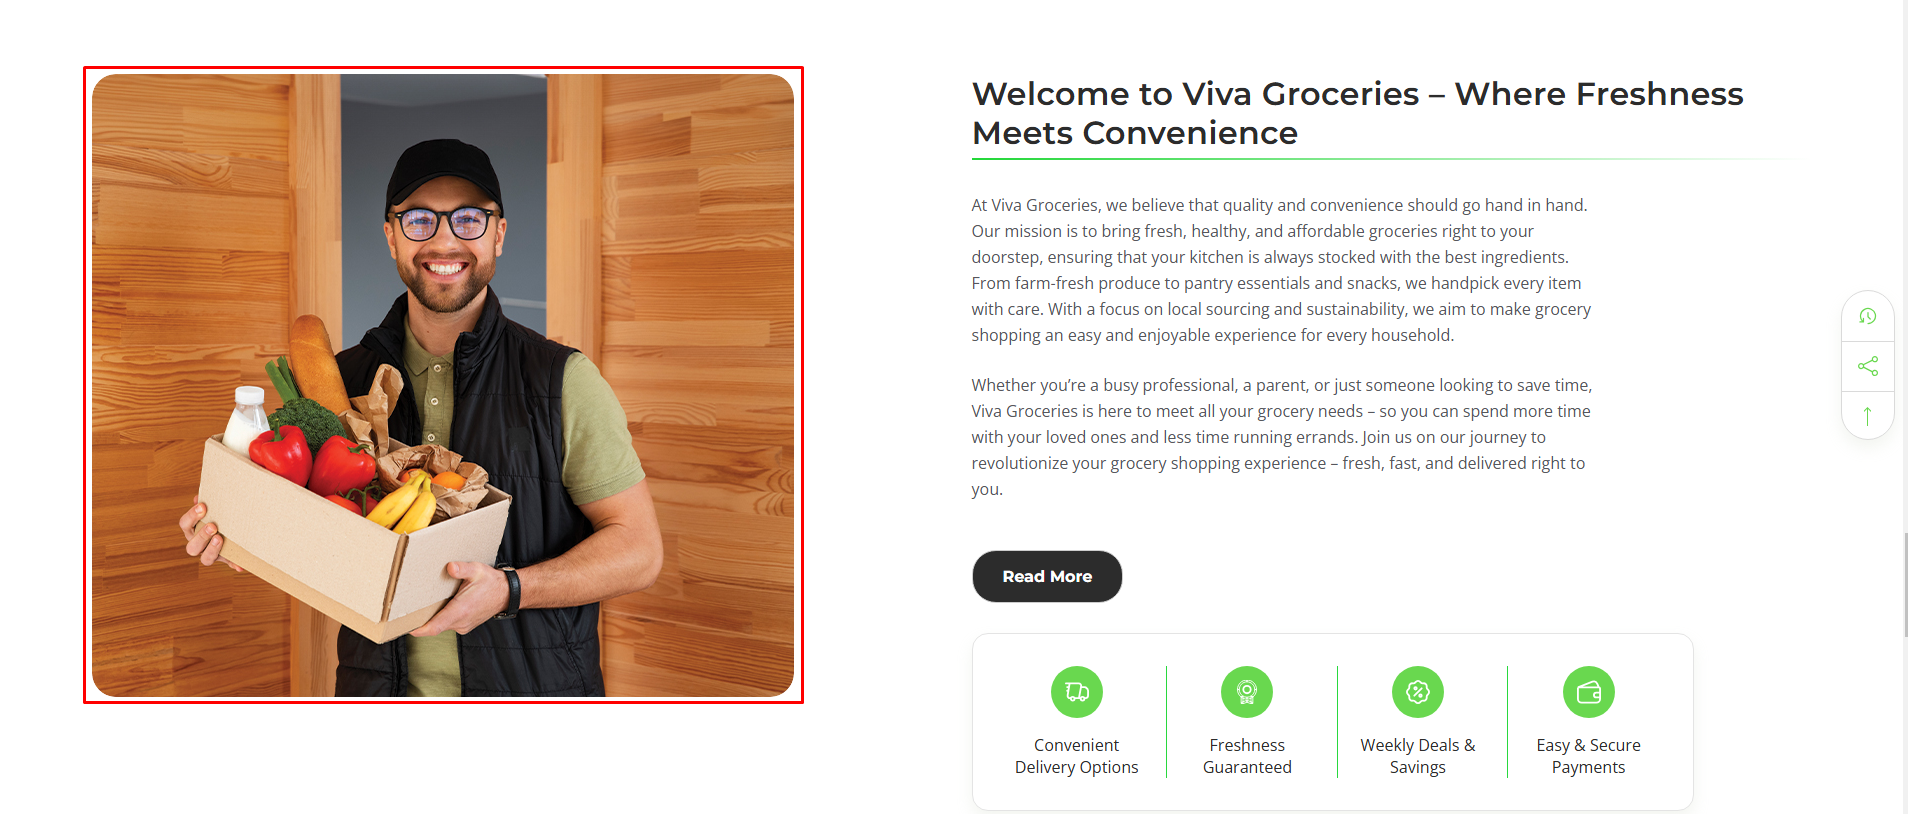
About Section

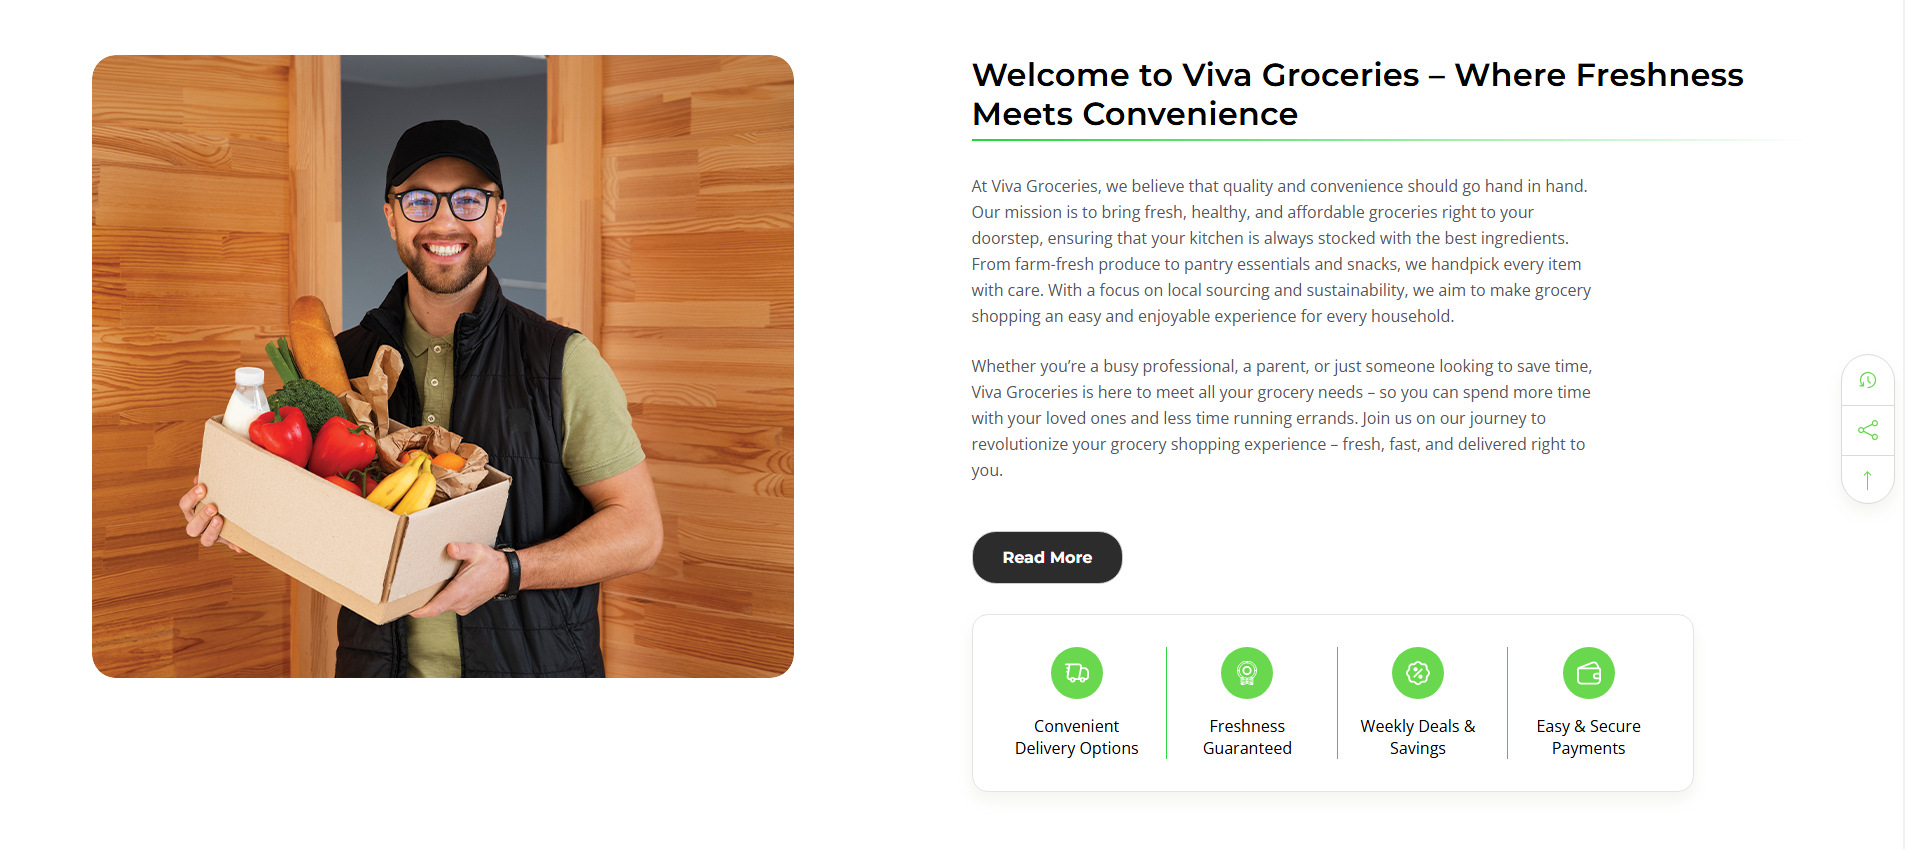
Hide About Section : If Checked , it will hide a hide About section
Hide About Section Content : If Checked , it will hide a hide About section Content
About Section Image :
First, you need to head over to "Storefront > Image Manager" and then upload your images here.
Then once uploaded, click "View Full Size" to open the image in a new tab and copy the image name to that image URL.
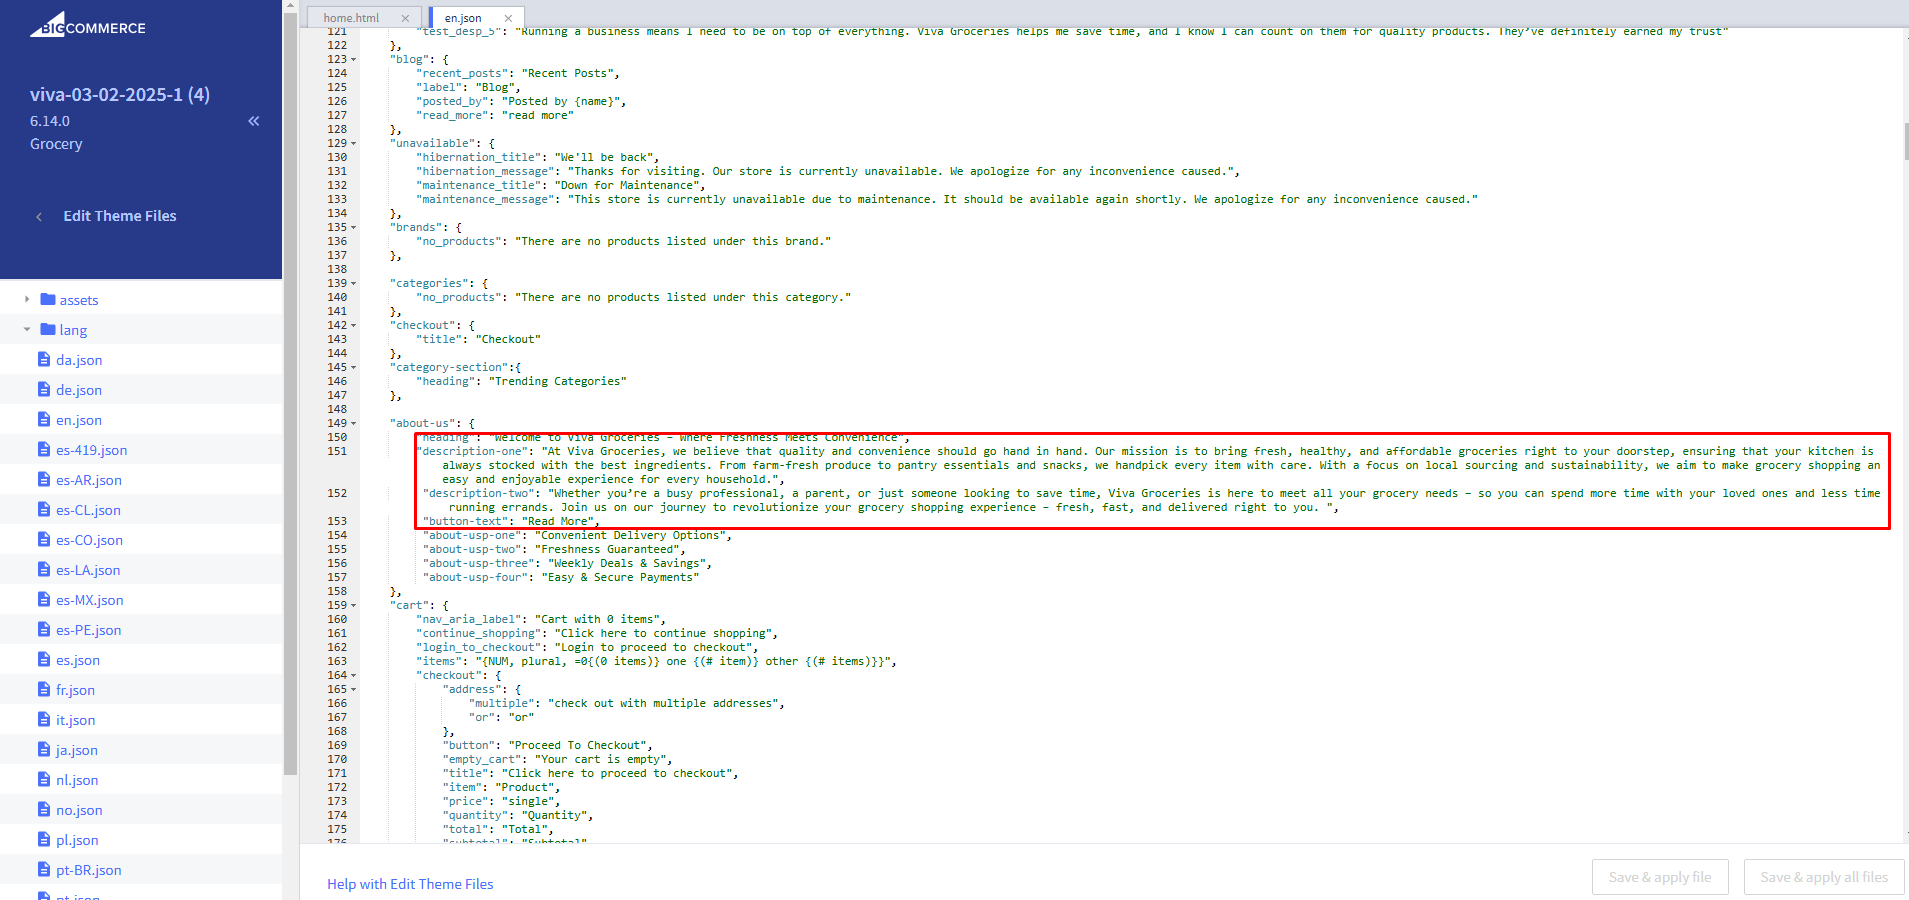
About Content :For text change Go to channels > Themes > Advanced > Edit Theme Files > lang > en.json and update About Section Content
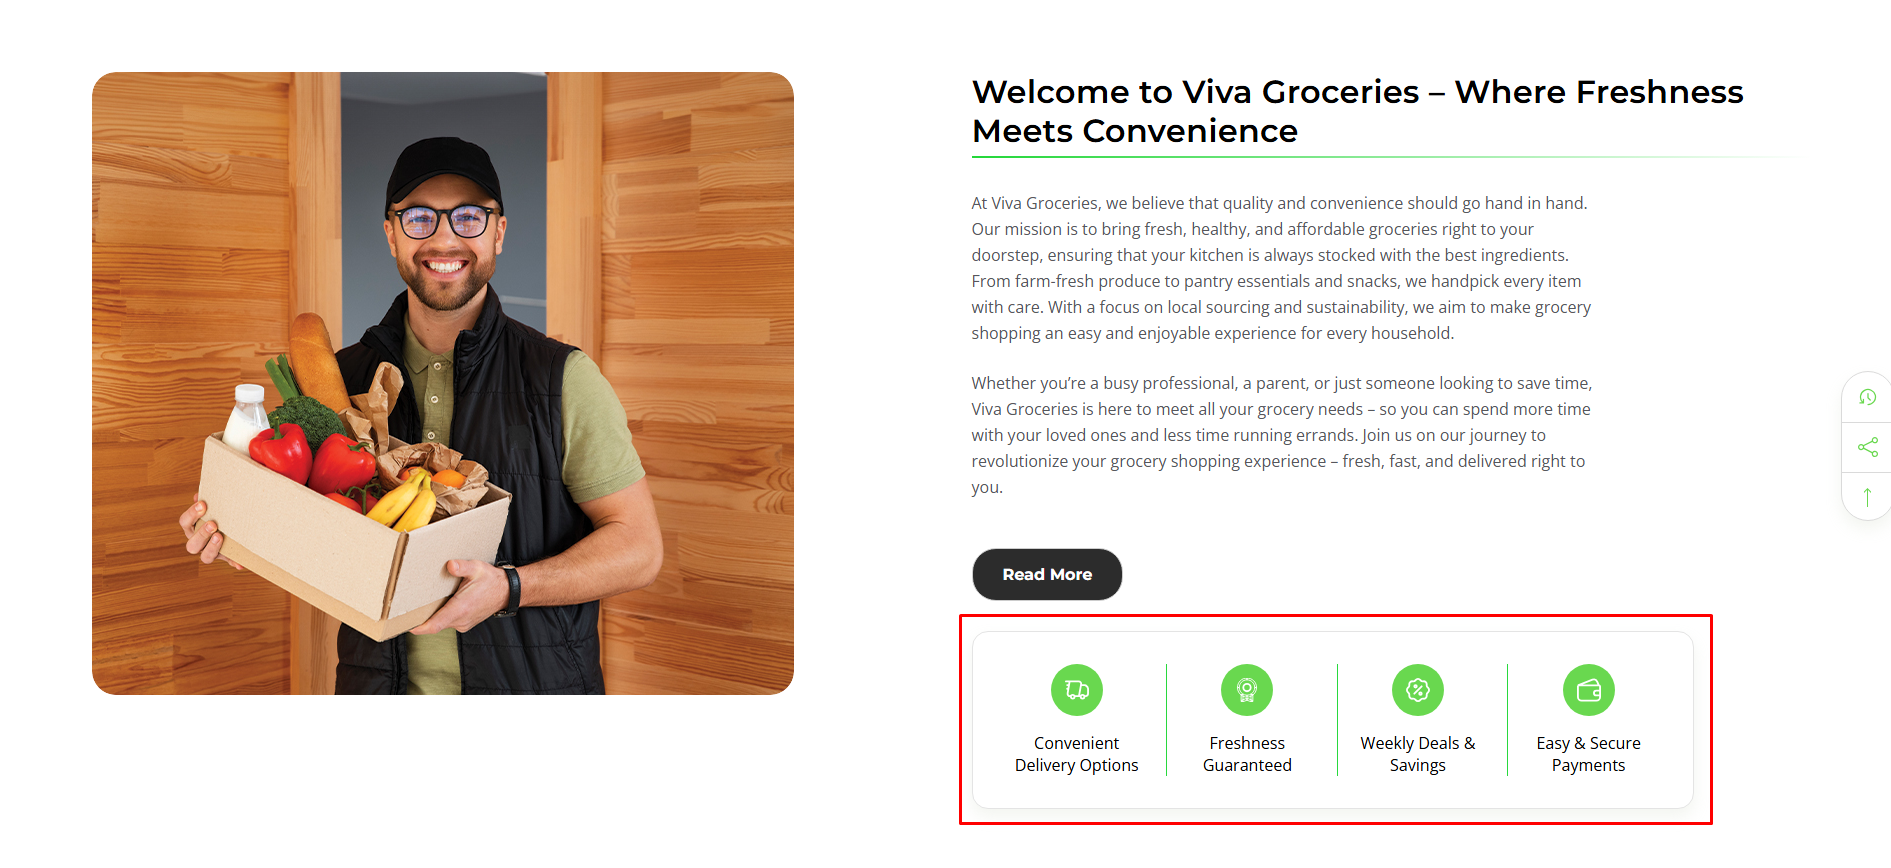
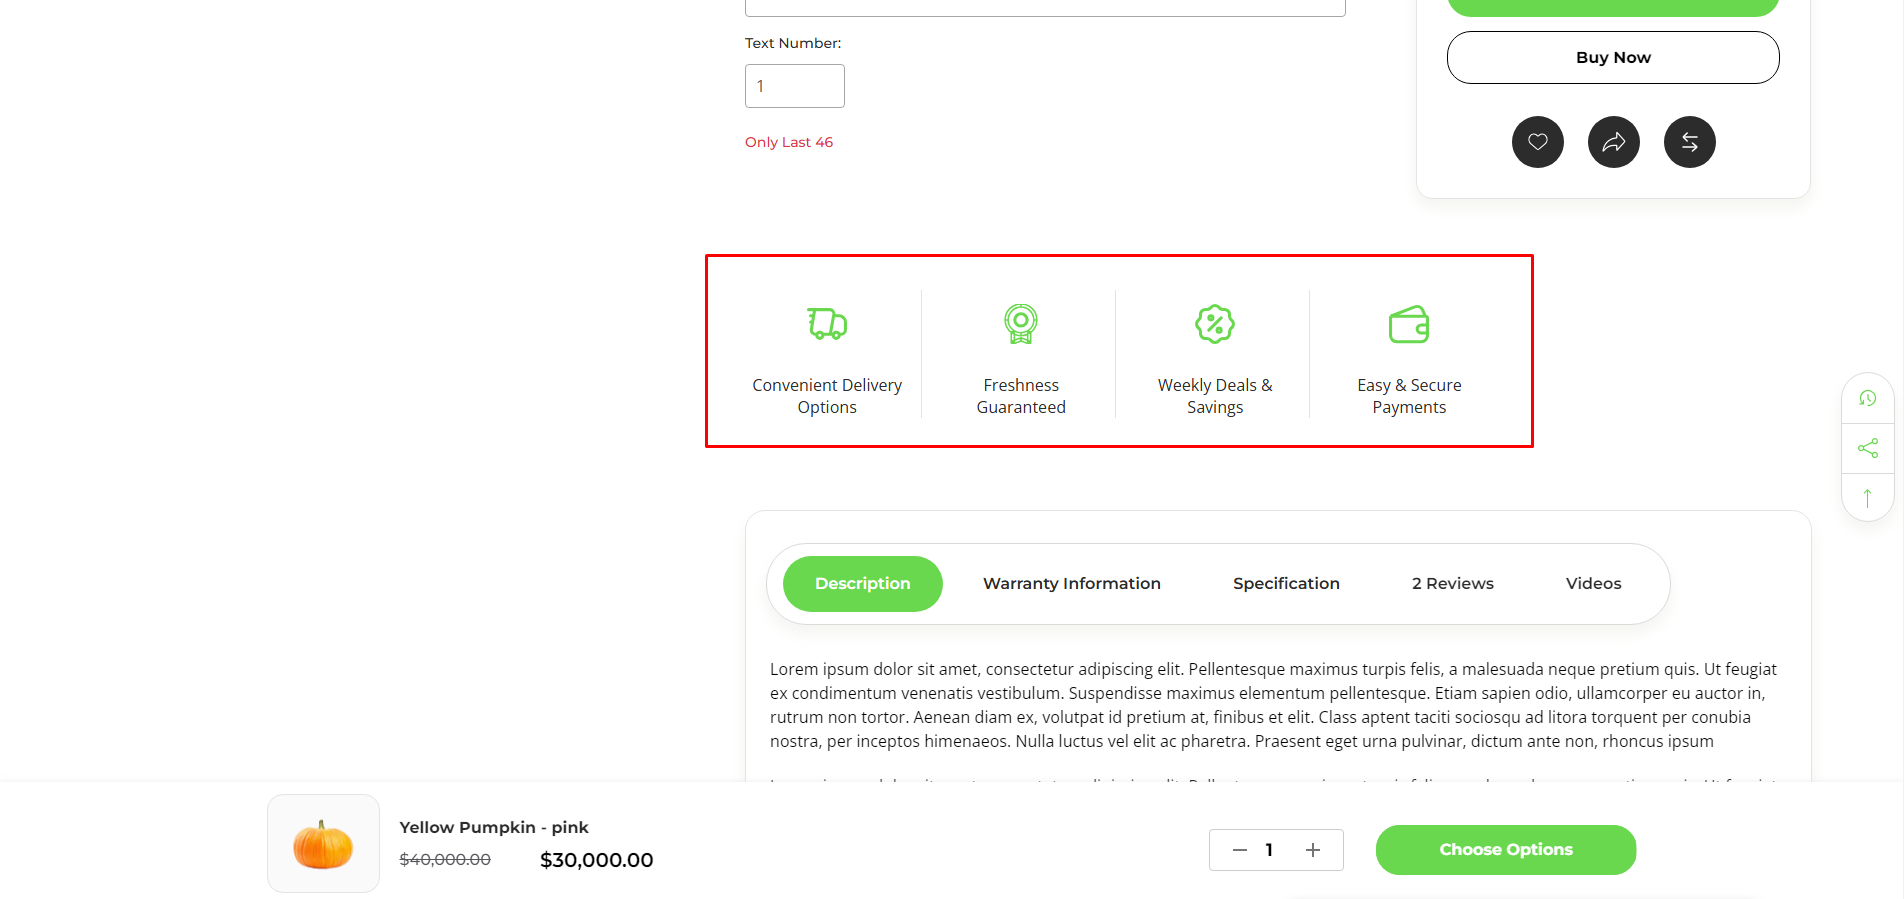
Hide USP Section : If Checked , it will hide a hide USP section
USP Content : For text change Go to channels > Themes > Advanced > Edit Theme Files > lang > en.json and update USP Section Content

CategoryPage Customisation
Go to Storefront > My Themes in your control panel and click the blue "Customize" button to launch Theme Editor.
In the left-hand column of the Theme Editor, click the panel labeled 'CategoryPage Customisation'.
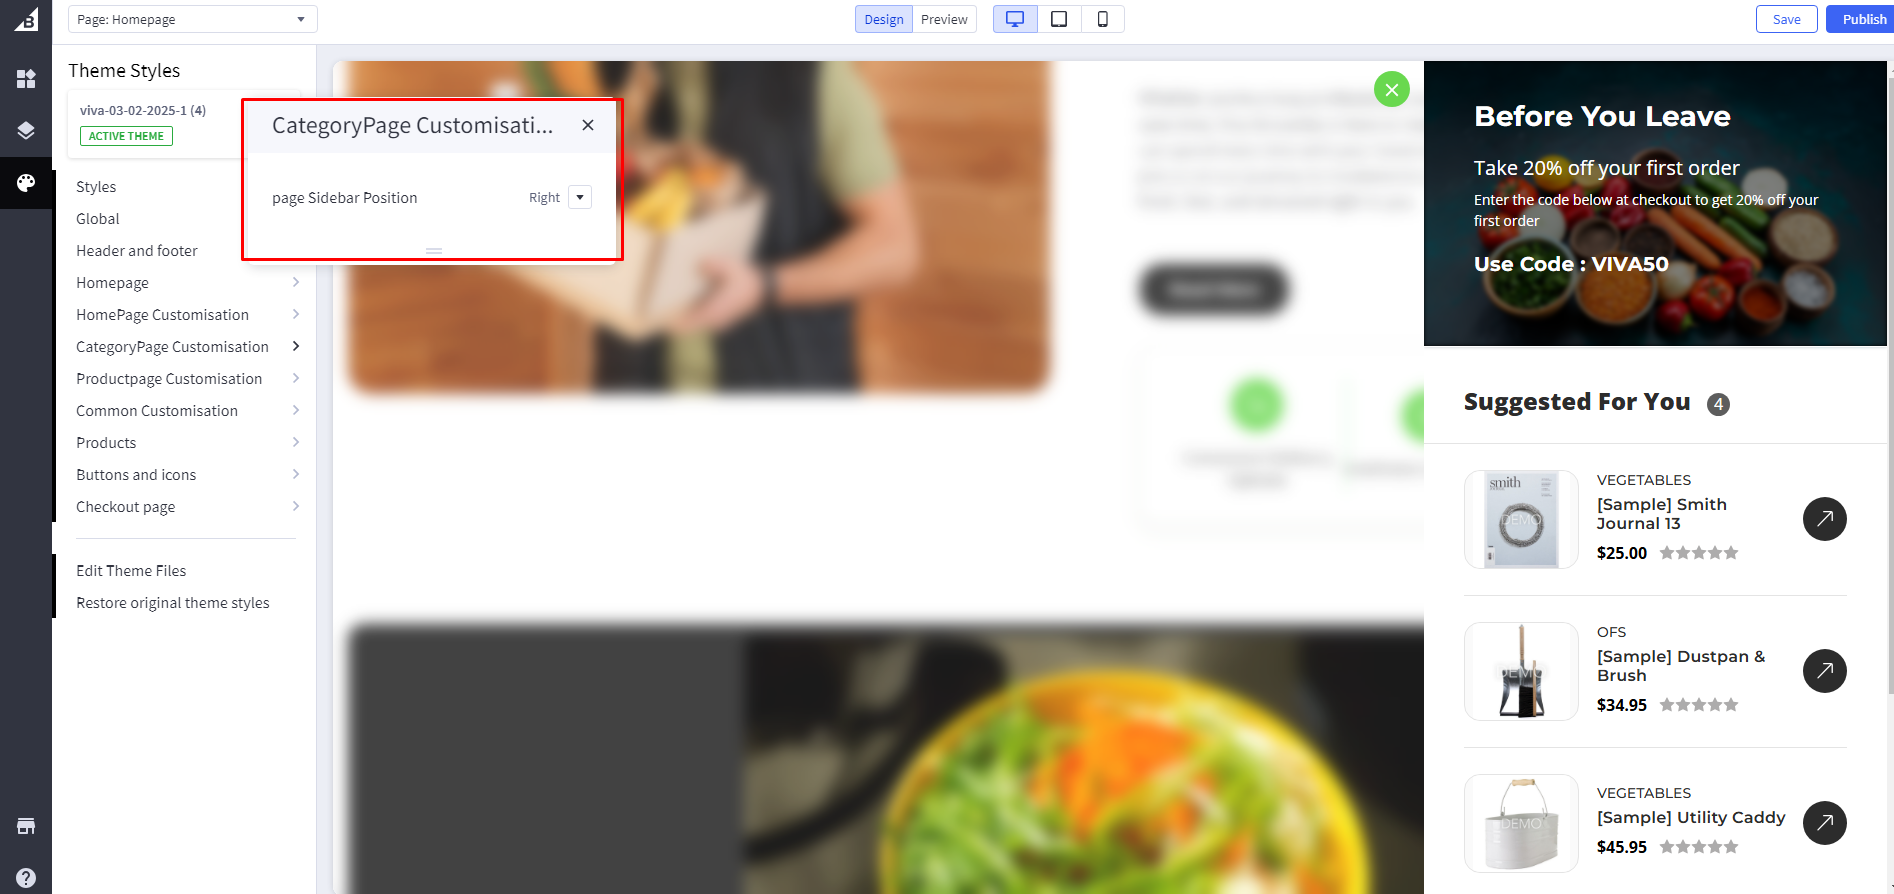
Category page sidebar : If change option left and right
Left Sidebar
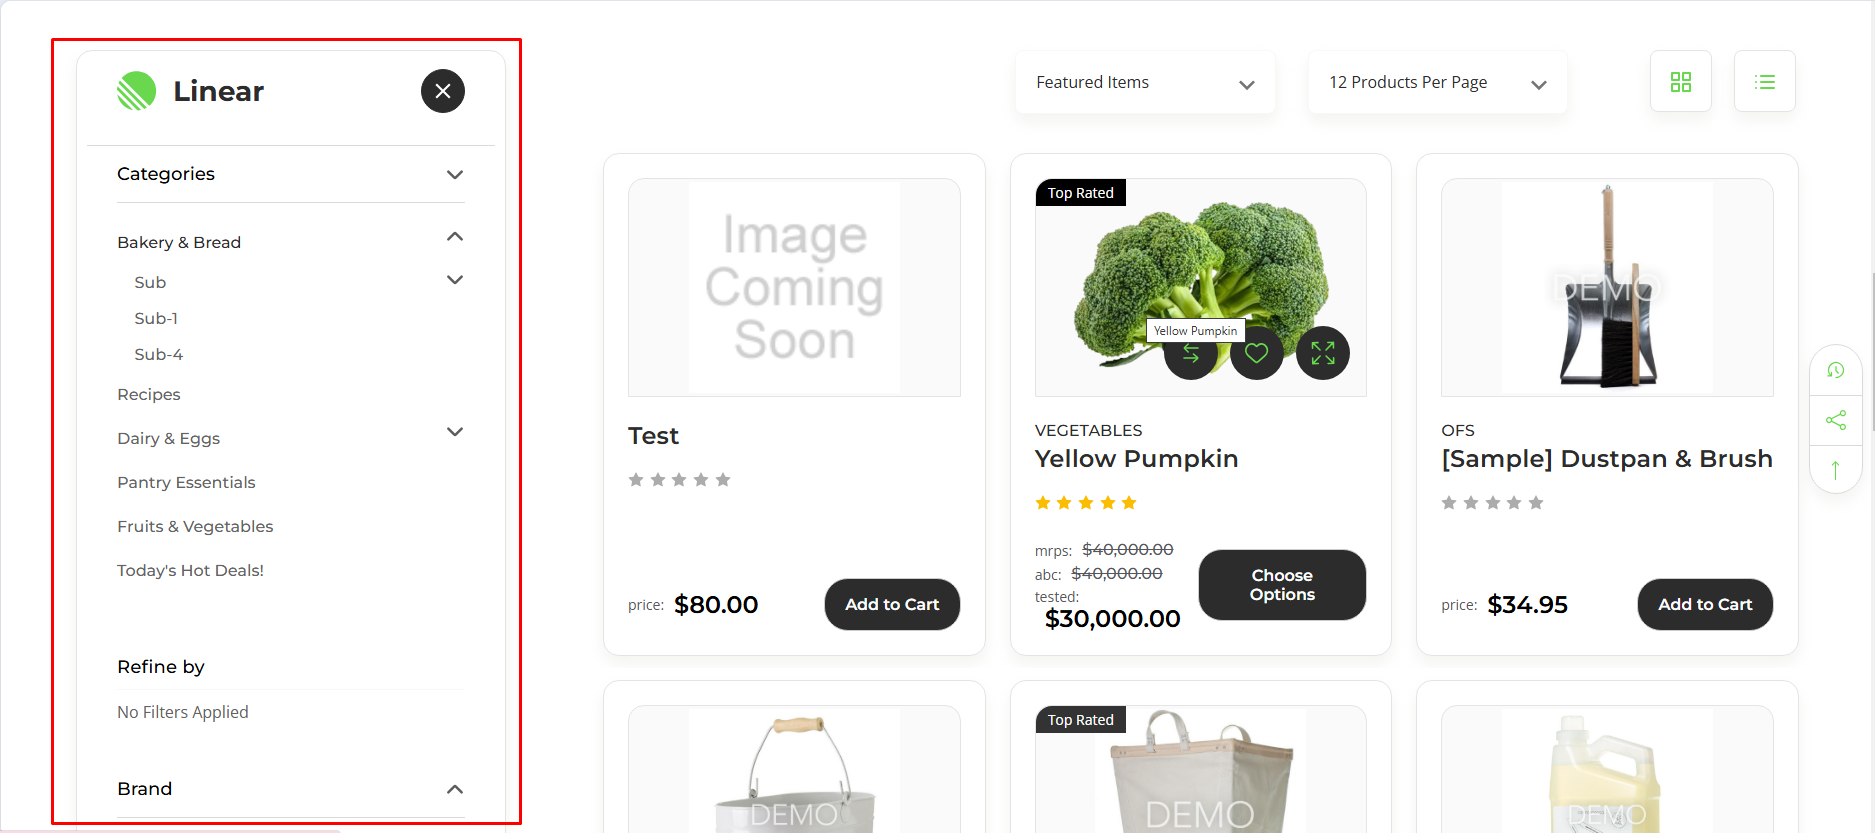
Right Sidebar

Change sidebar heading text
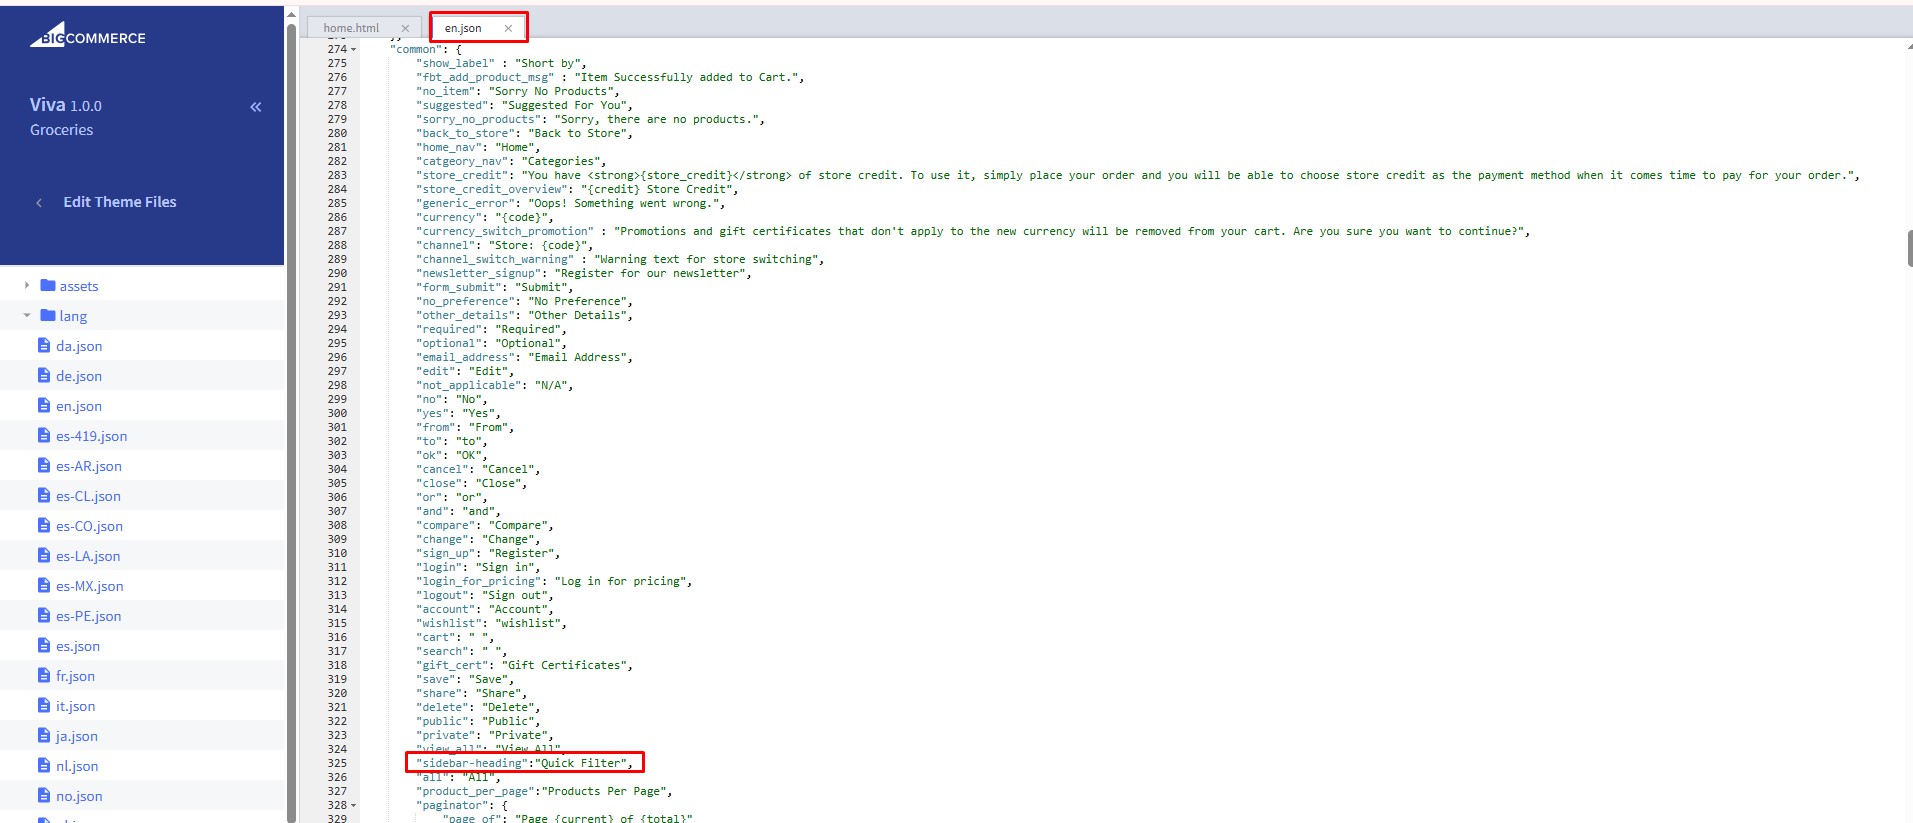
Sidebar heading text : For text change Go to channels > Themes > Advanced > Edit Theme Files > lang > en.json and update sidebar heading text
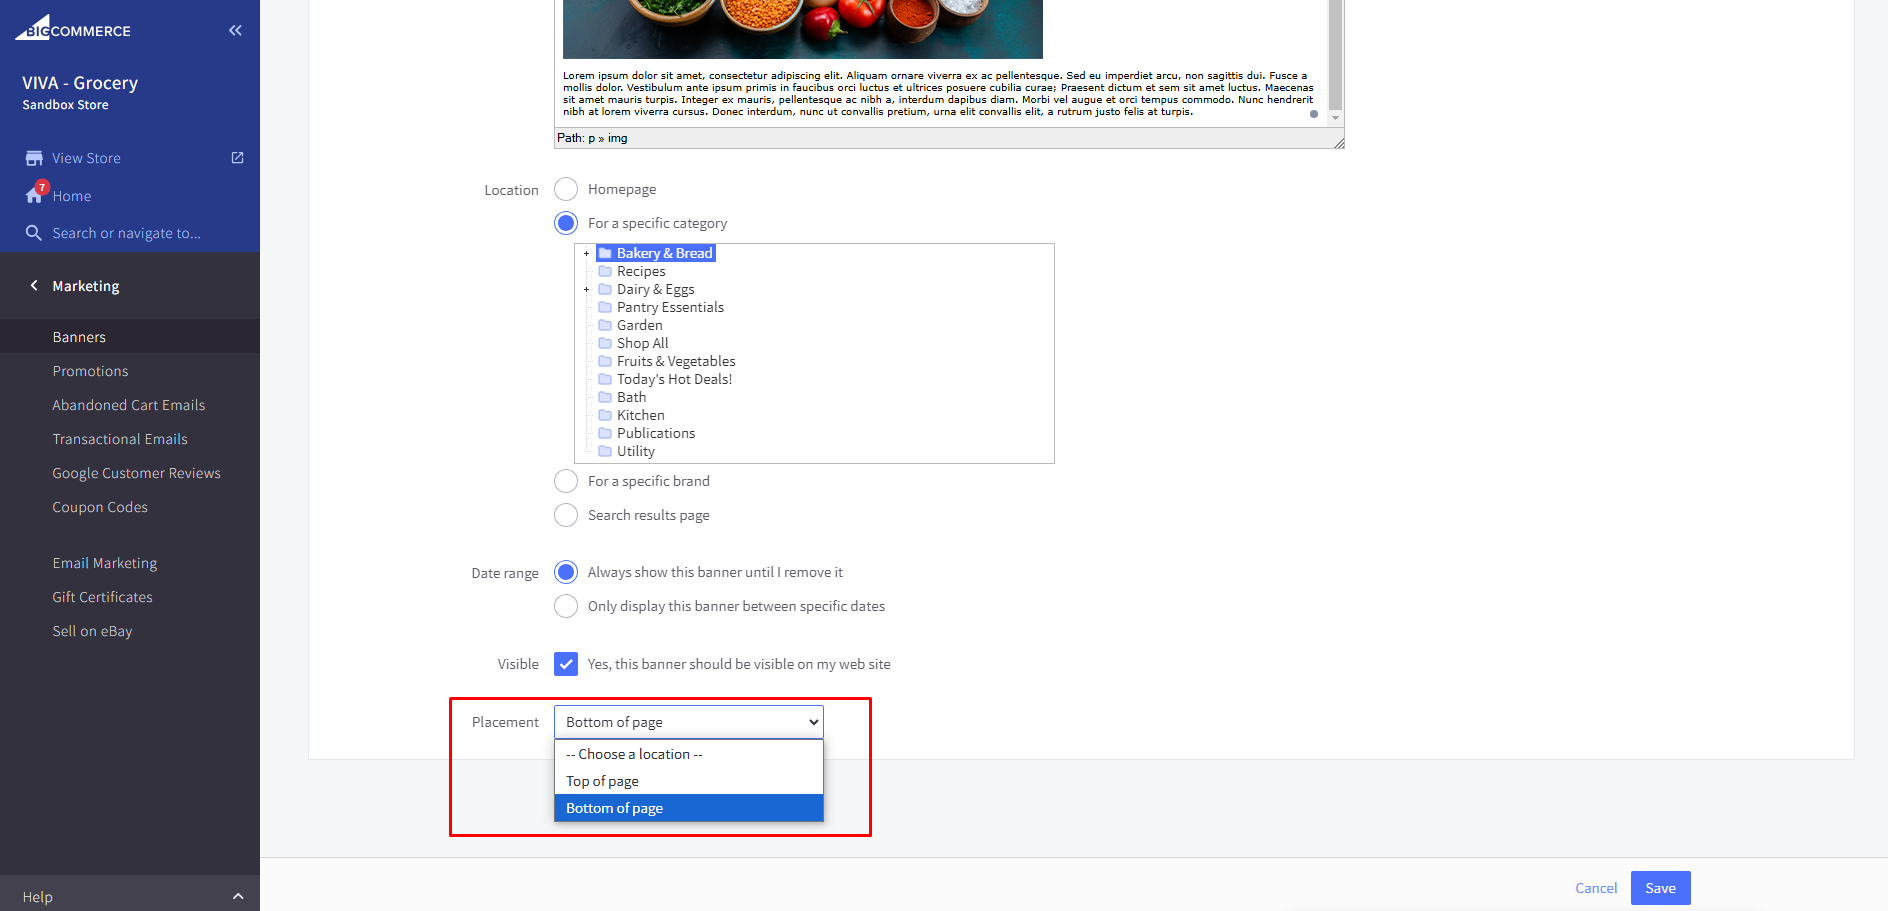
banner on category page will come from marketing banner :
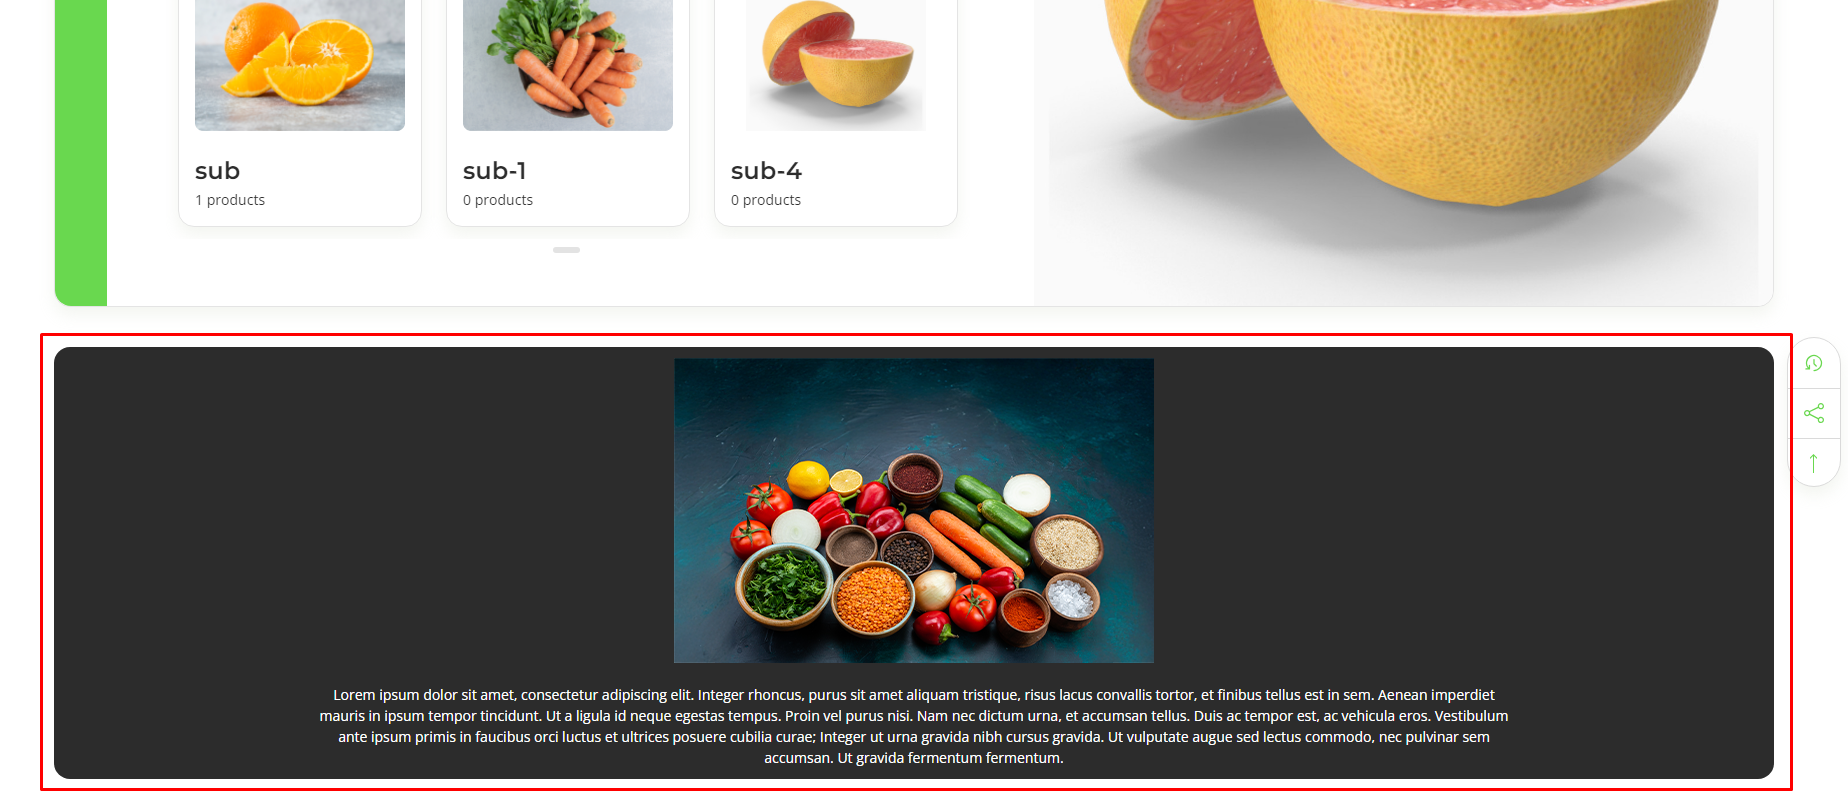
You have to create a banner, add an image and assign it to a particular category in which you want to show the image :
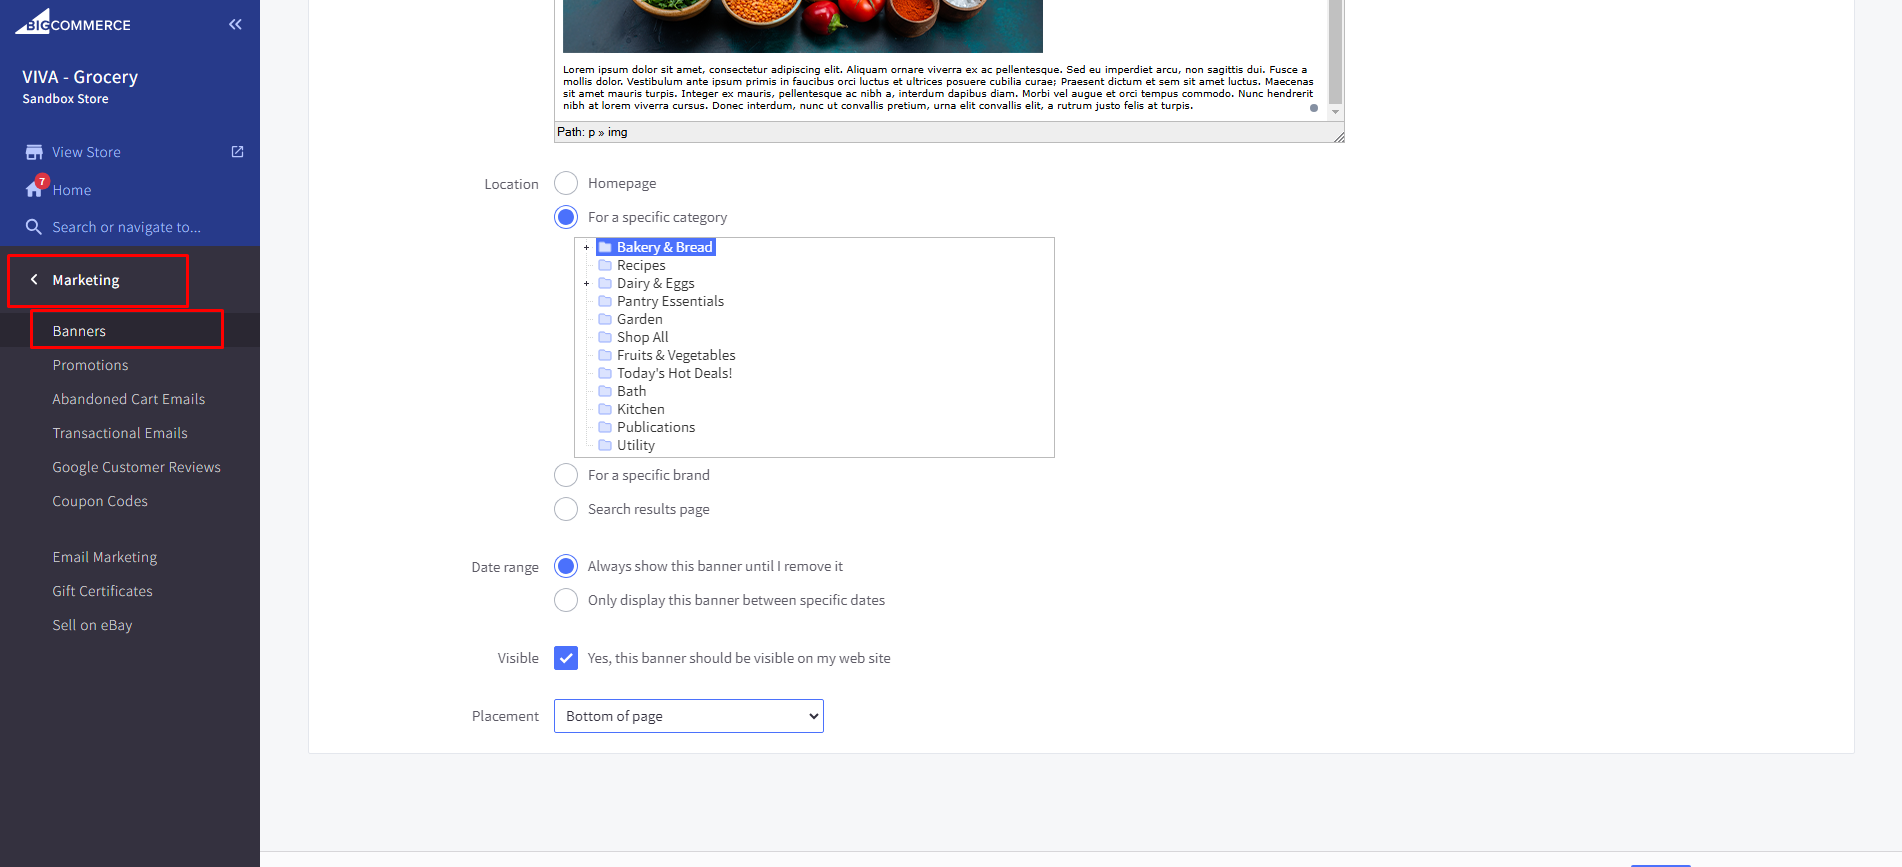
Set Position : Set Banner position in Placement DropDown
ProductPage Customisation
Go to Storefront > My Themes in your control panel and click the blue "Customize" button to launch Theme Editor.
In the left-hand column of the Theme Editor, click the panel labeled 'ProductPage Customisation'.
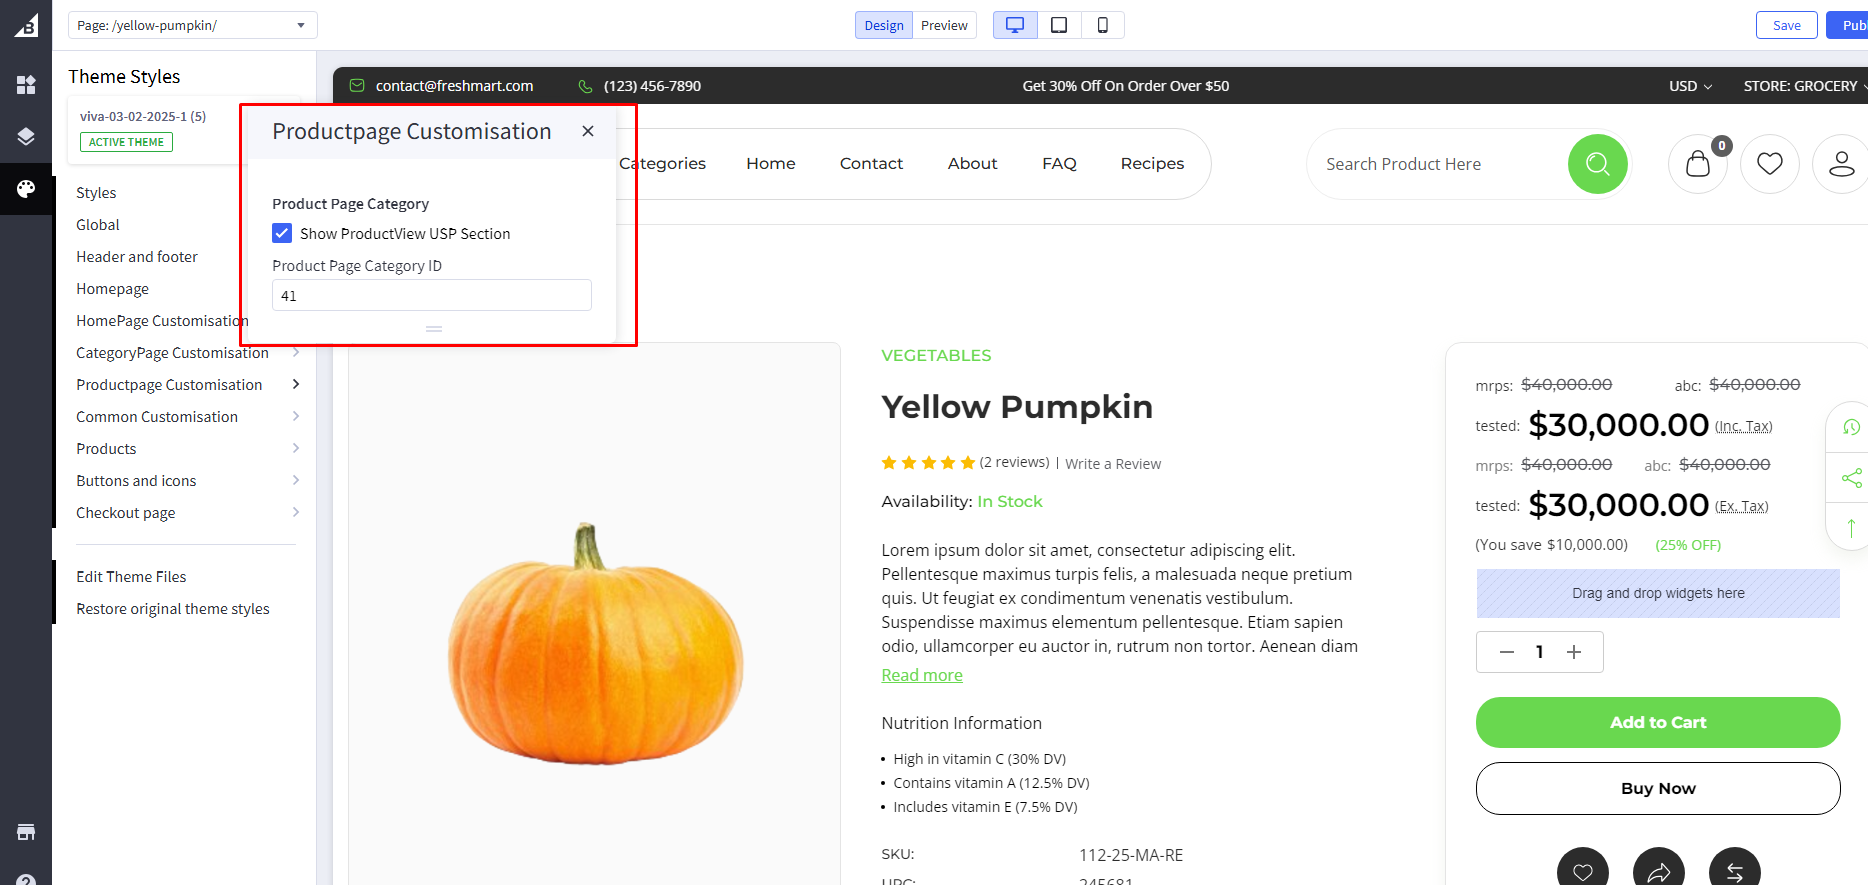
Show ProductView USP Section : If Checked , it will Show a ProductView USP section
Product Page Category ID :
Go to Products > Product Categories then hover category name then visible in bottom on category id
From fram to Table section one
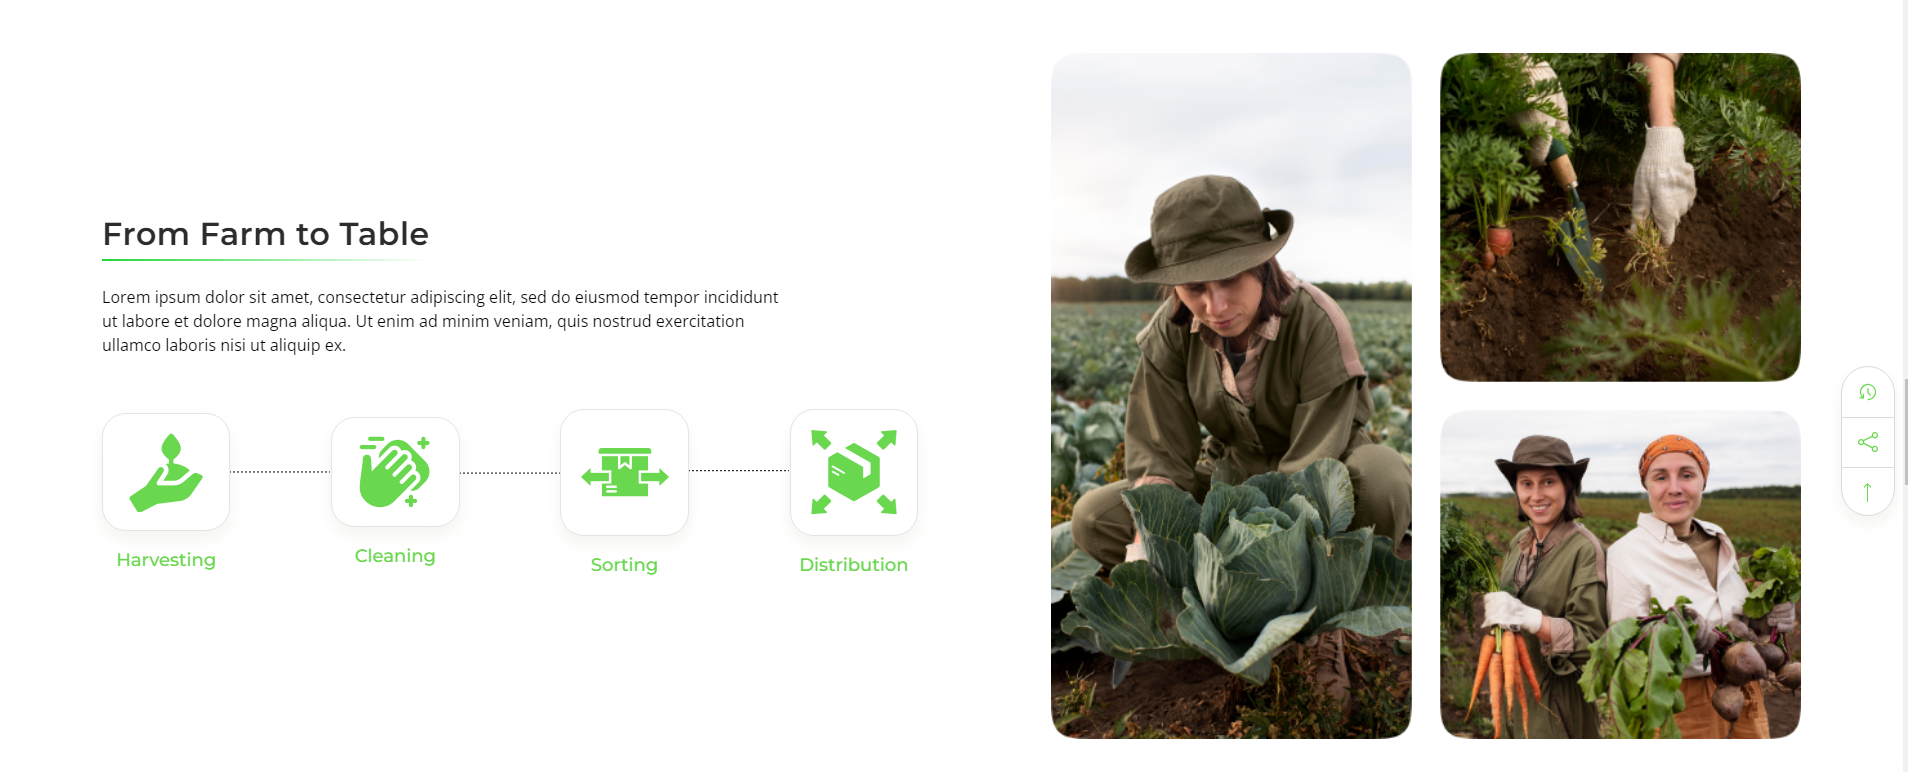
This section is used for a specific product, and its steps and code are given below.
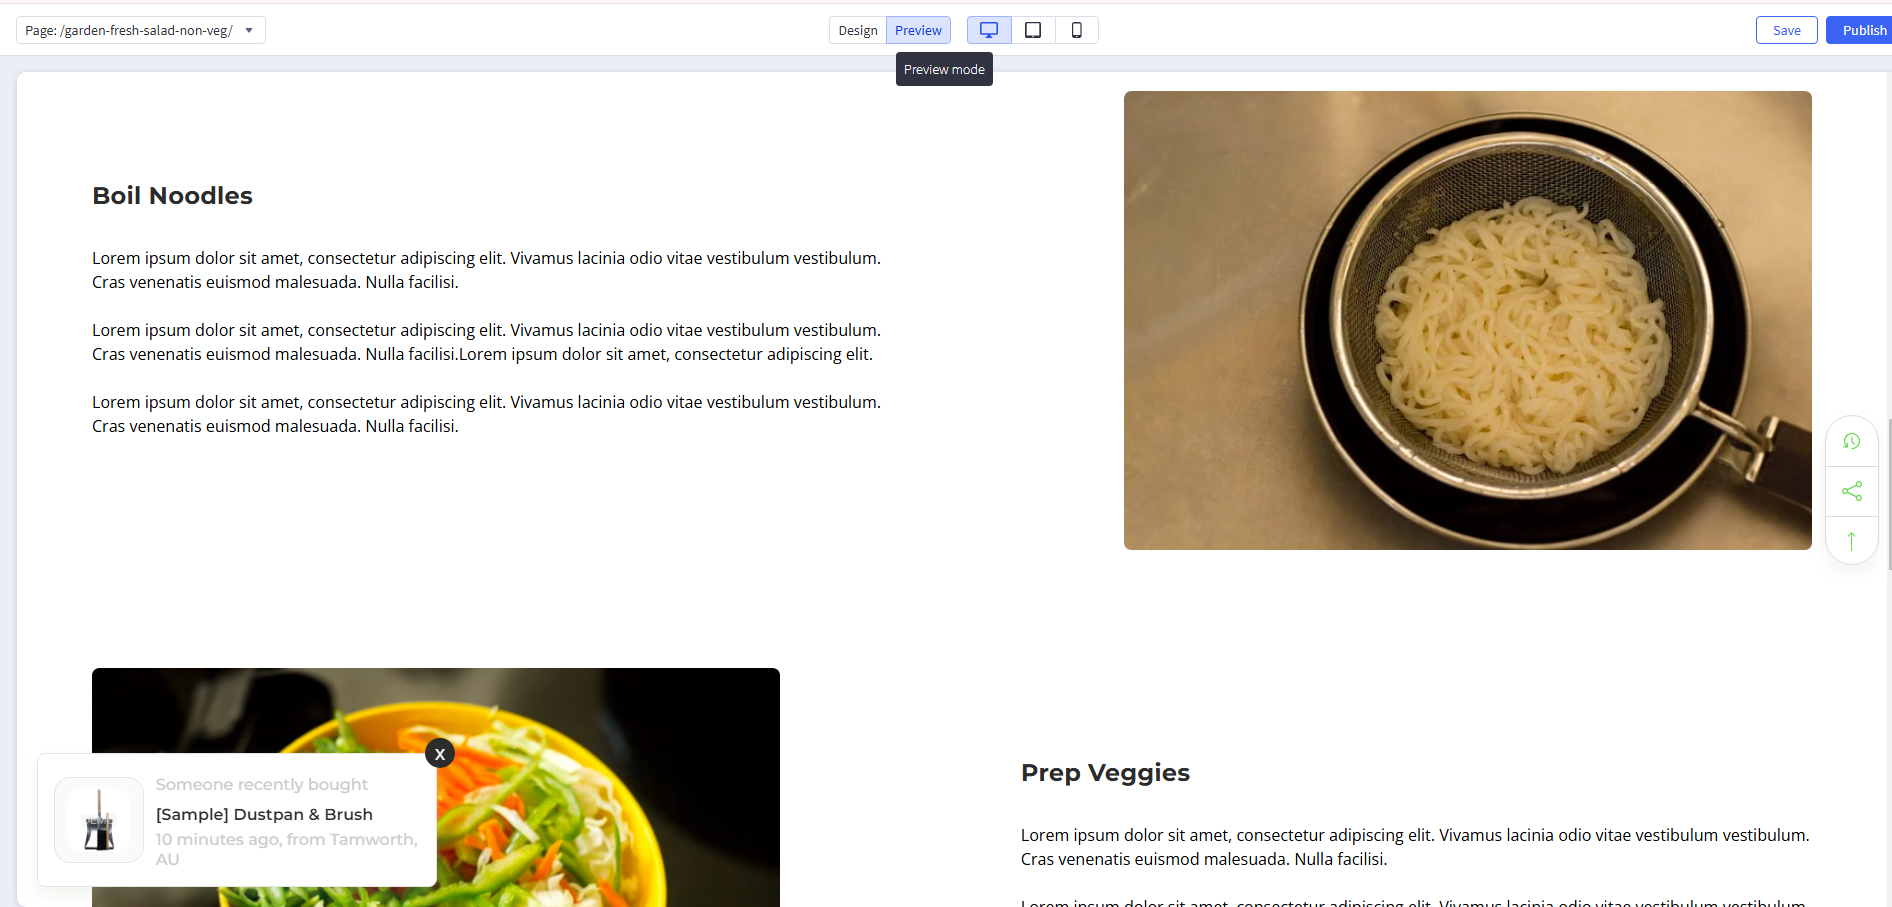
Go to Storefront > Theme > Customize > preview
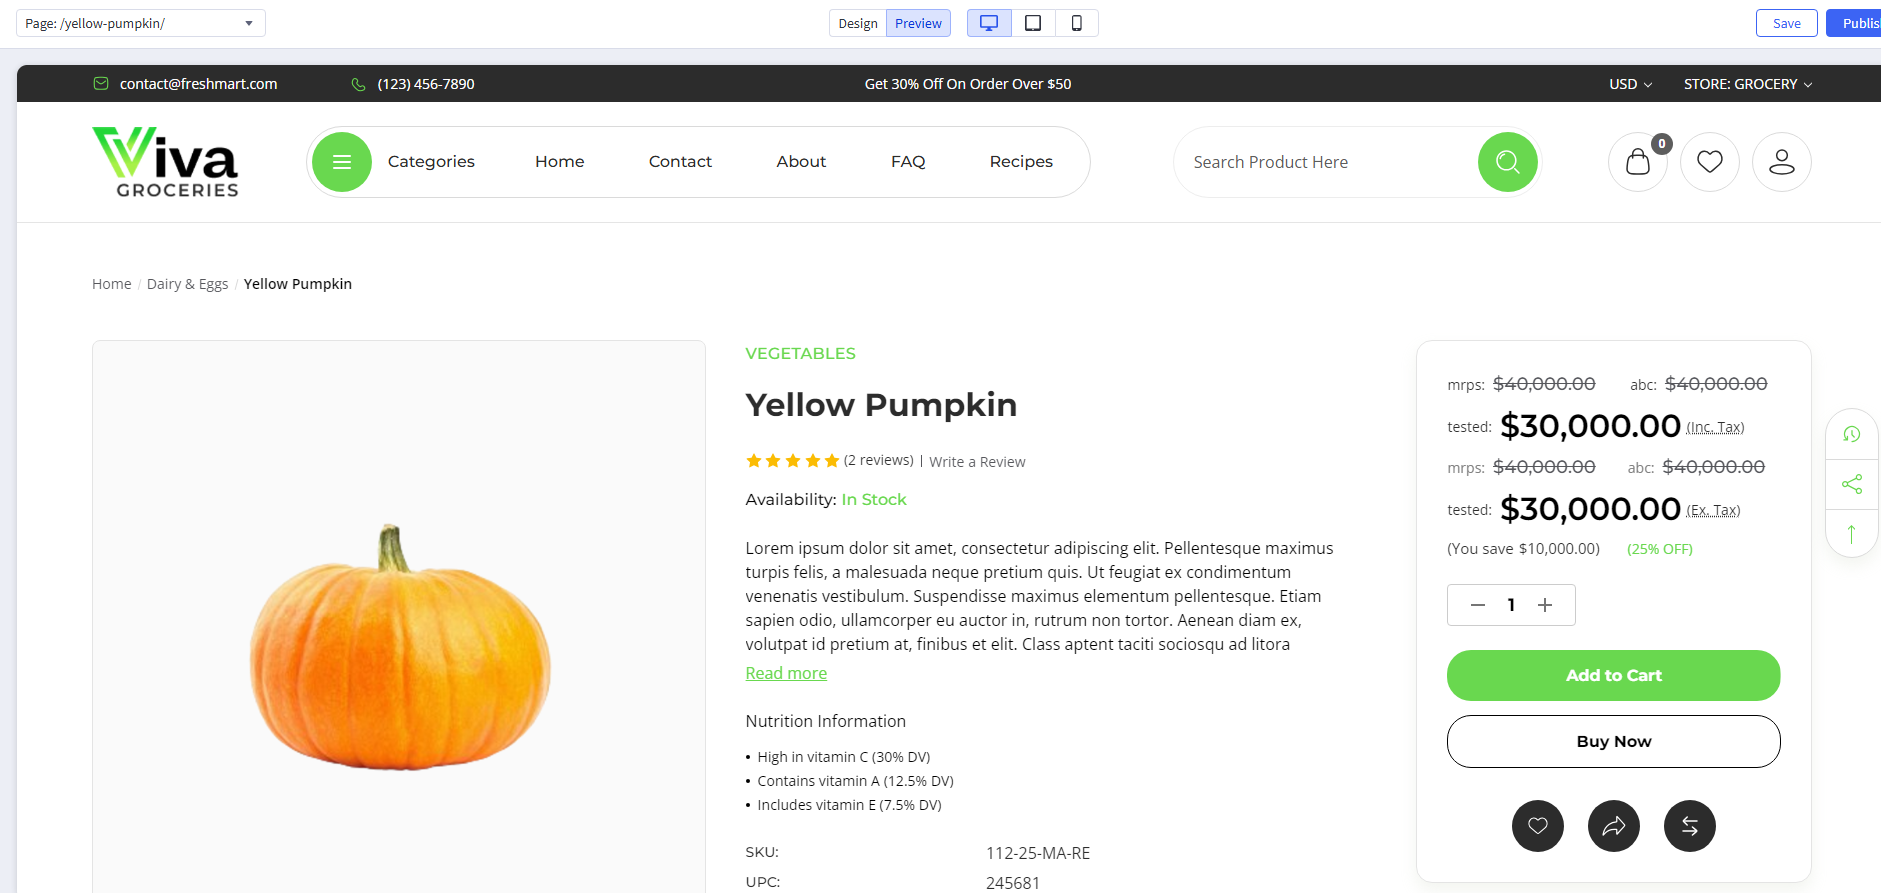
Then after choose your product and redirect to product page
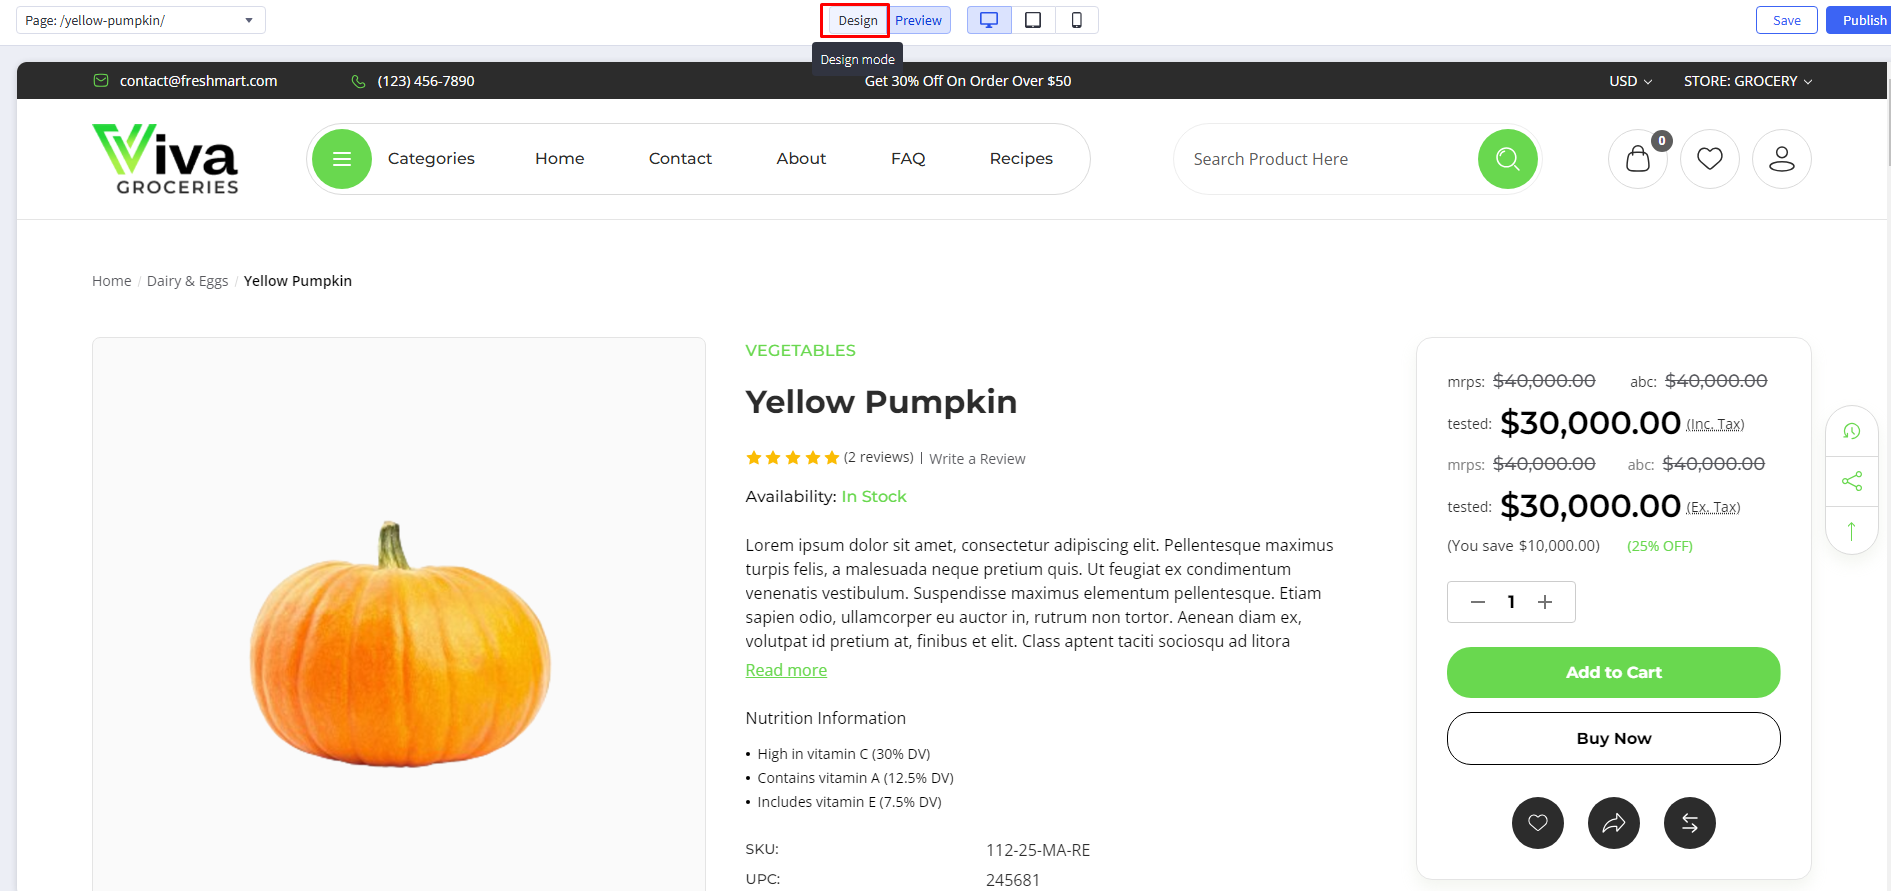
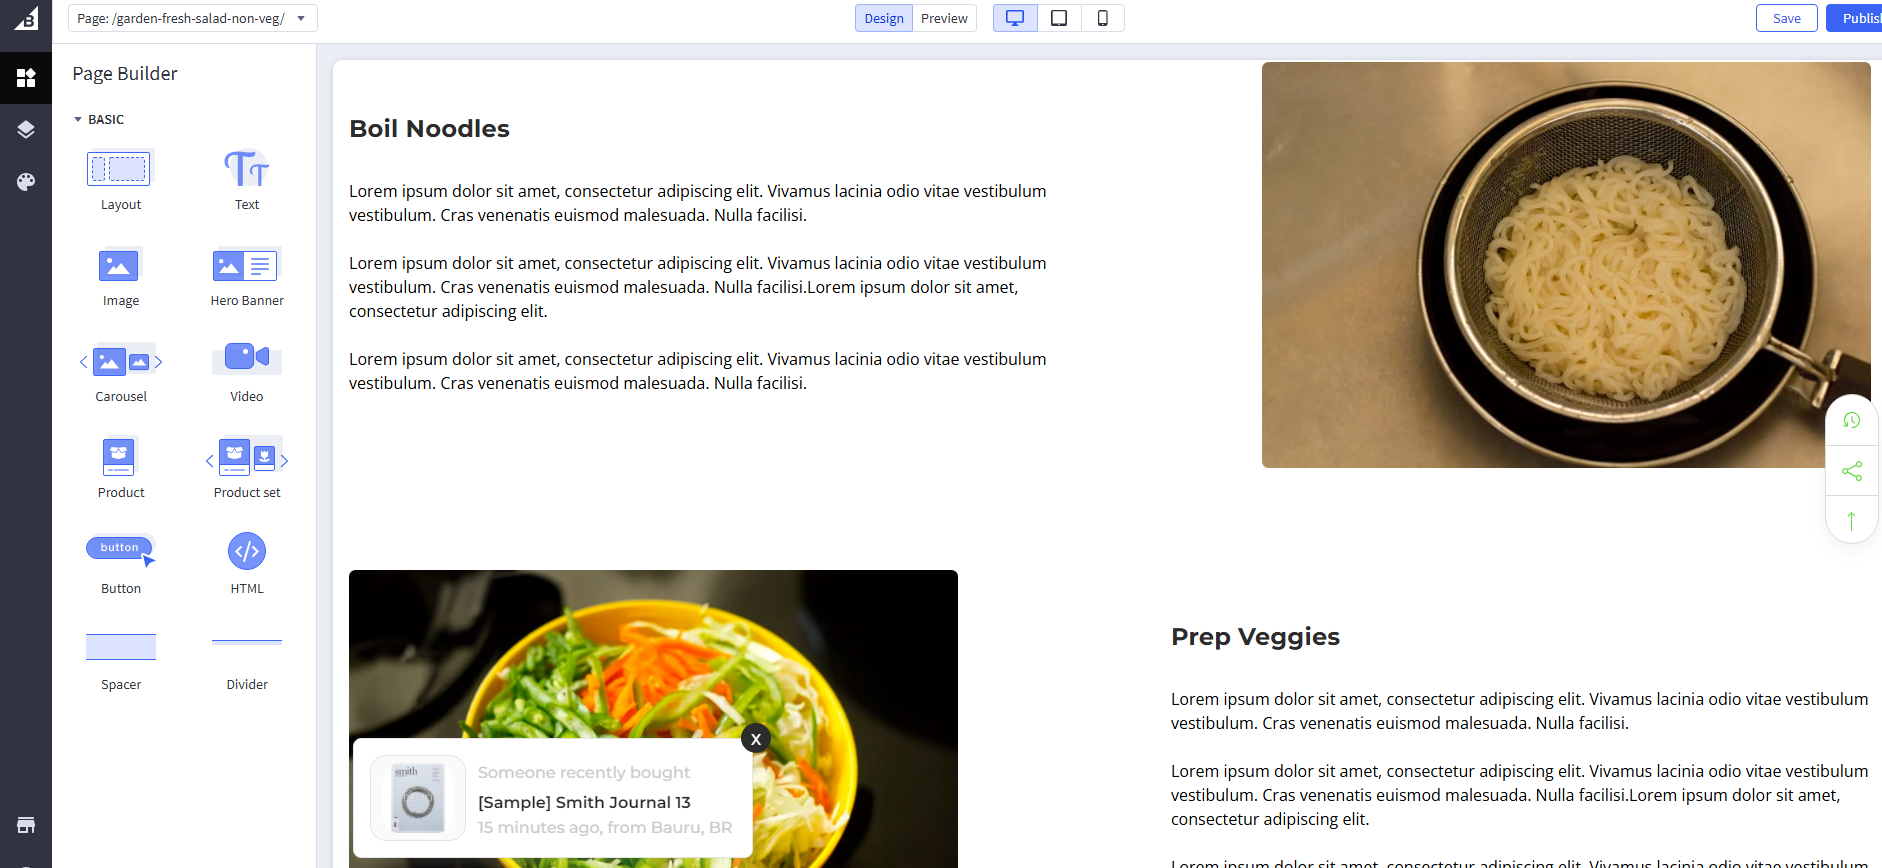
Then move to Design
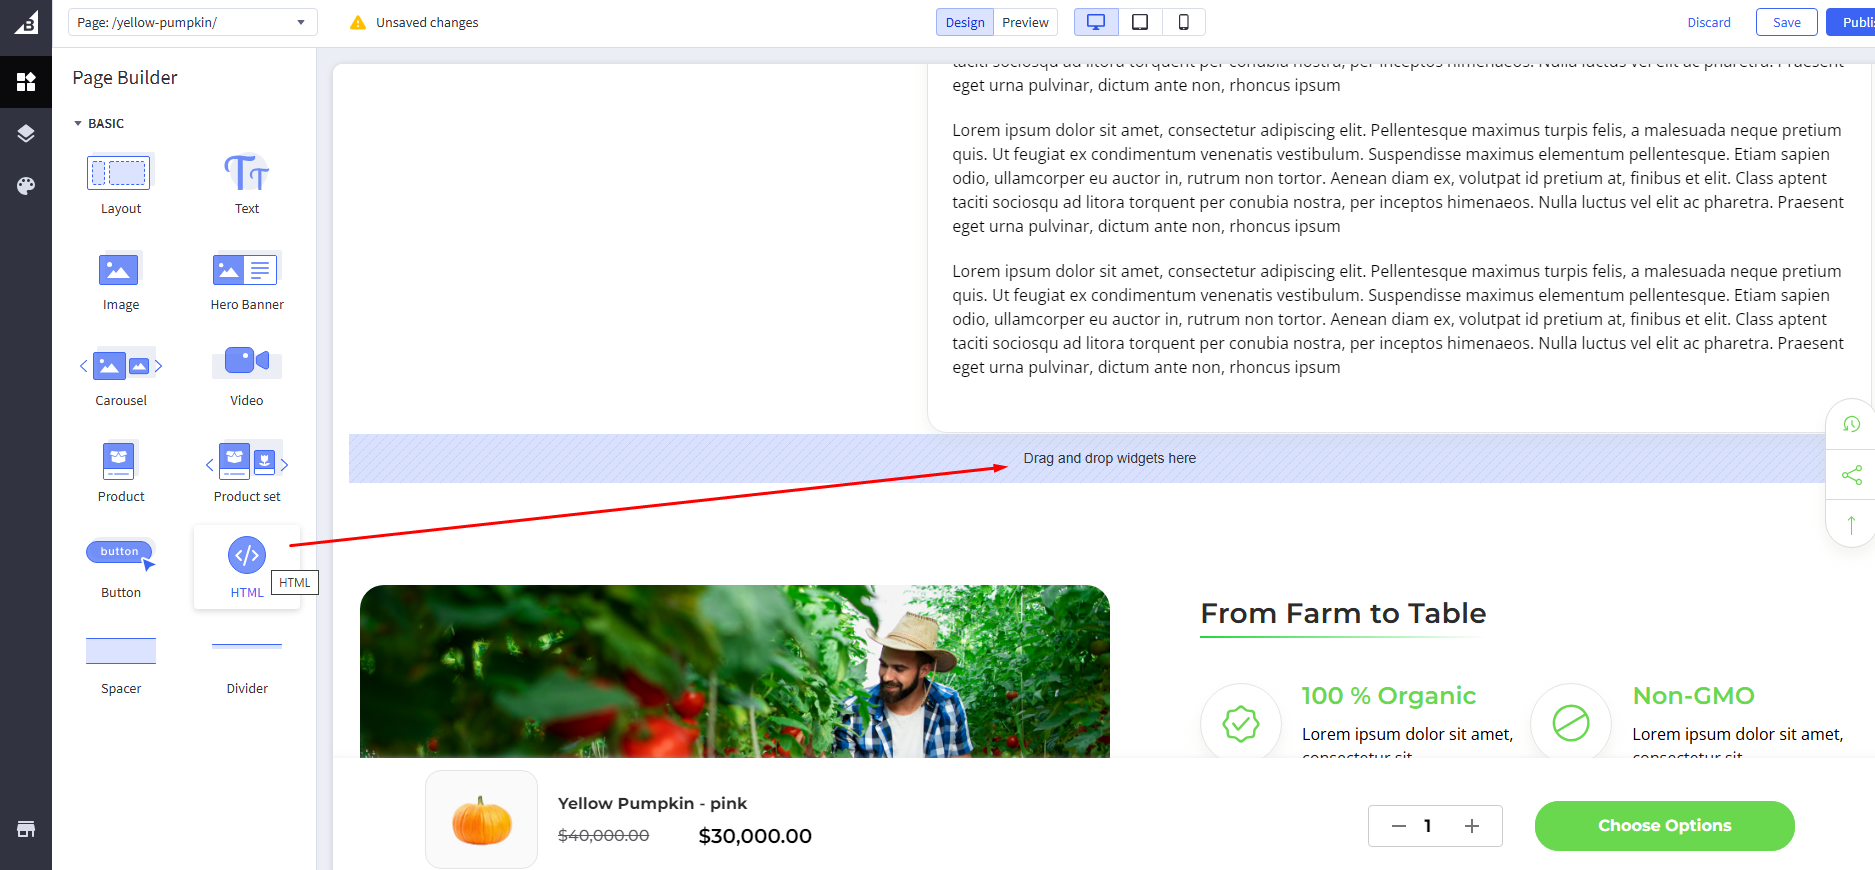
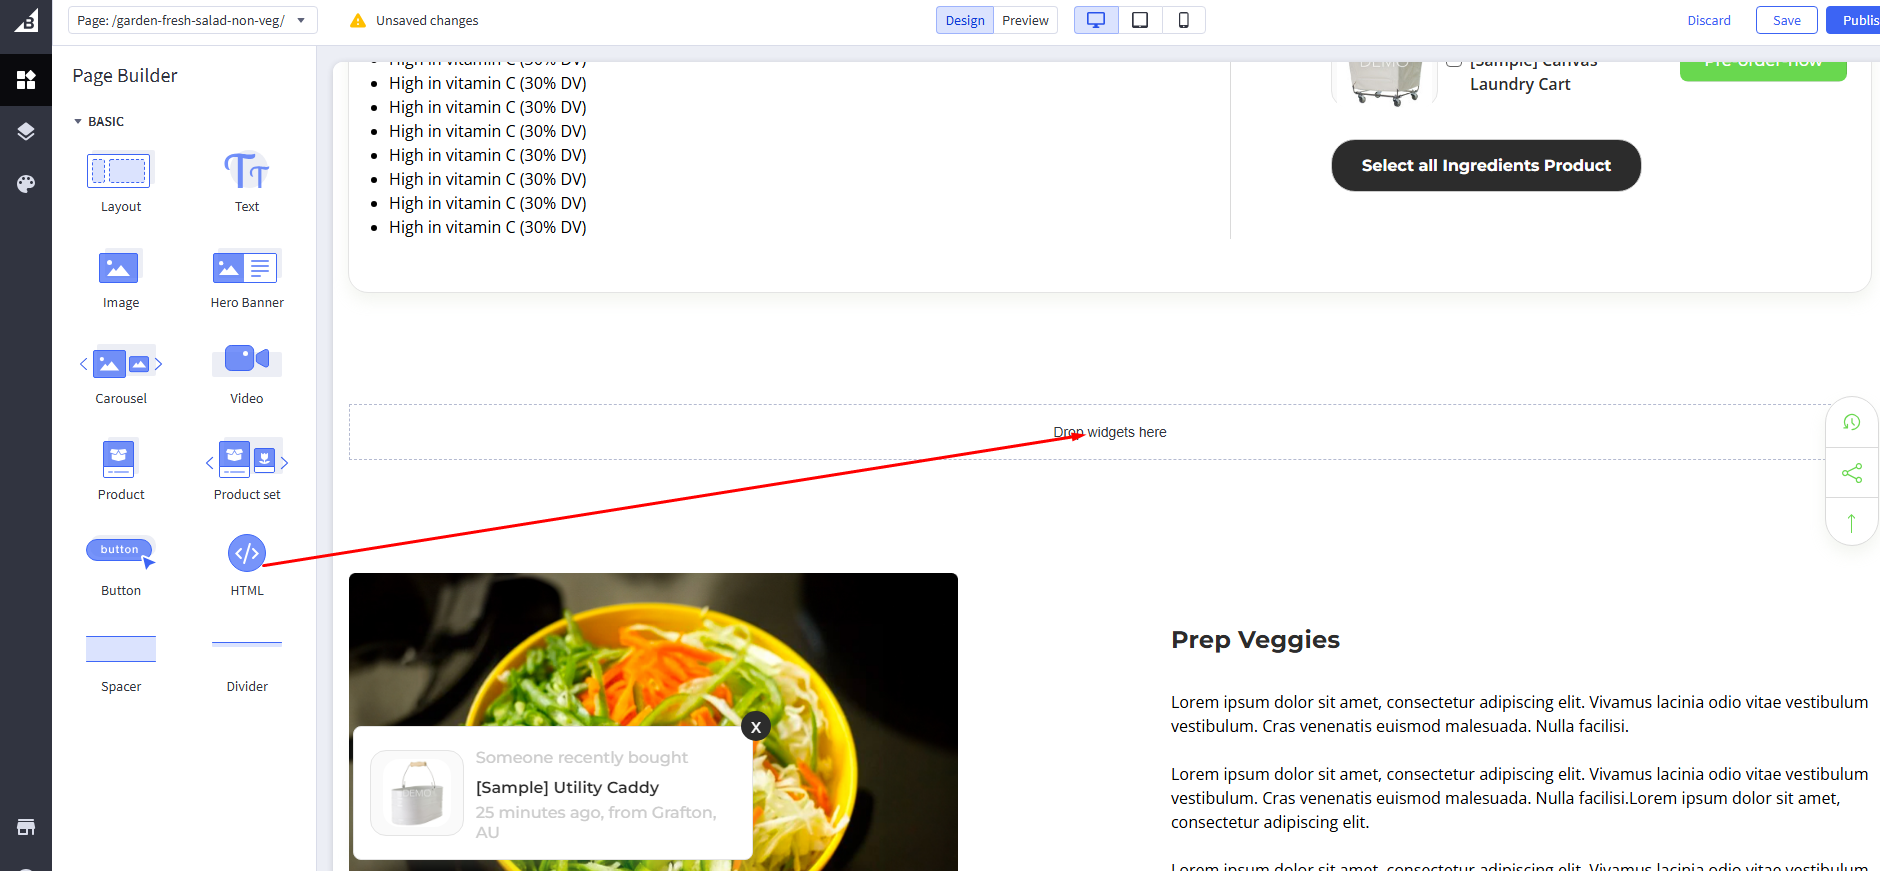
Then dregen and drop wigest on HTML
HTML CODE :
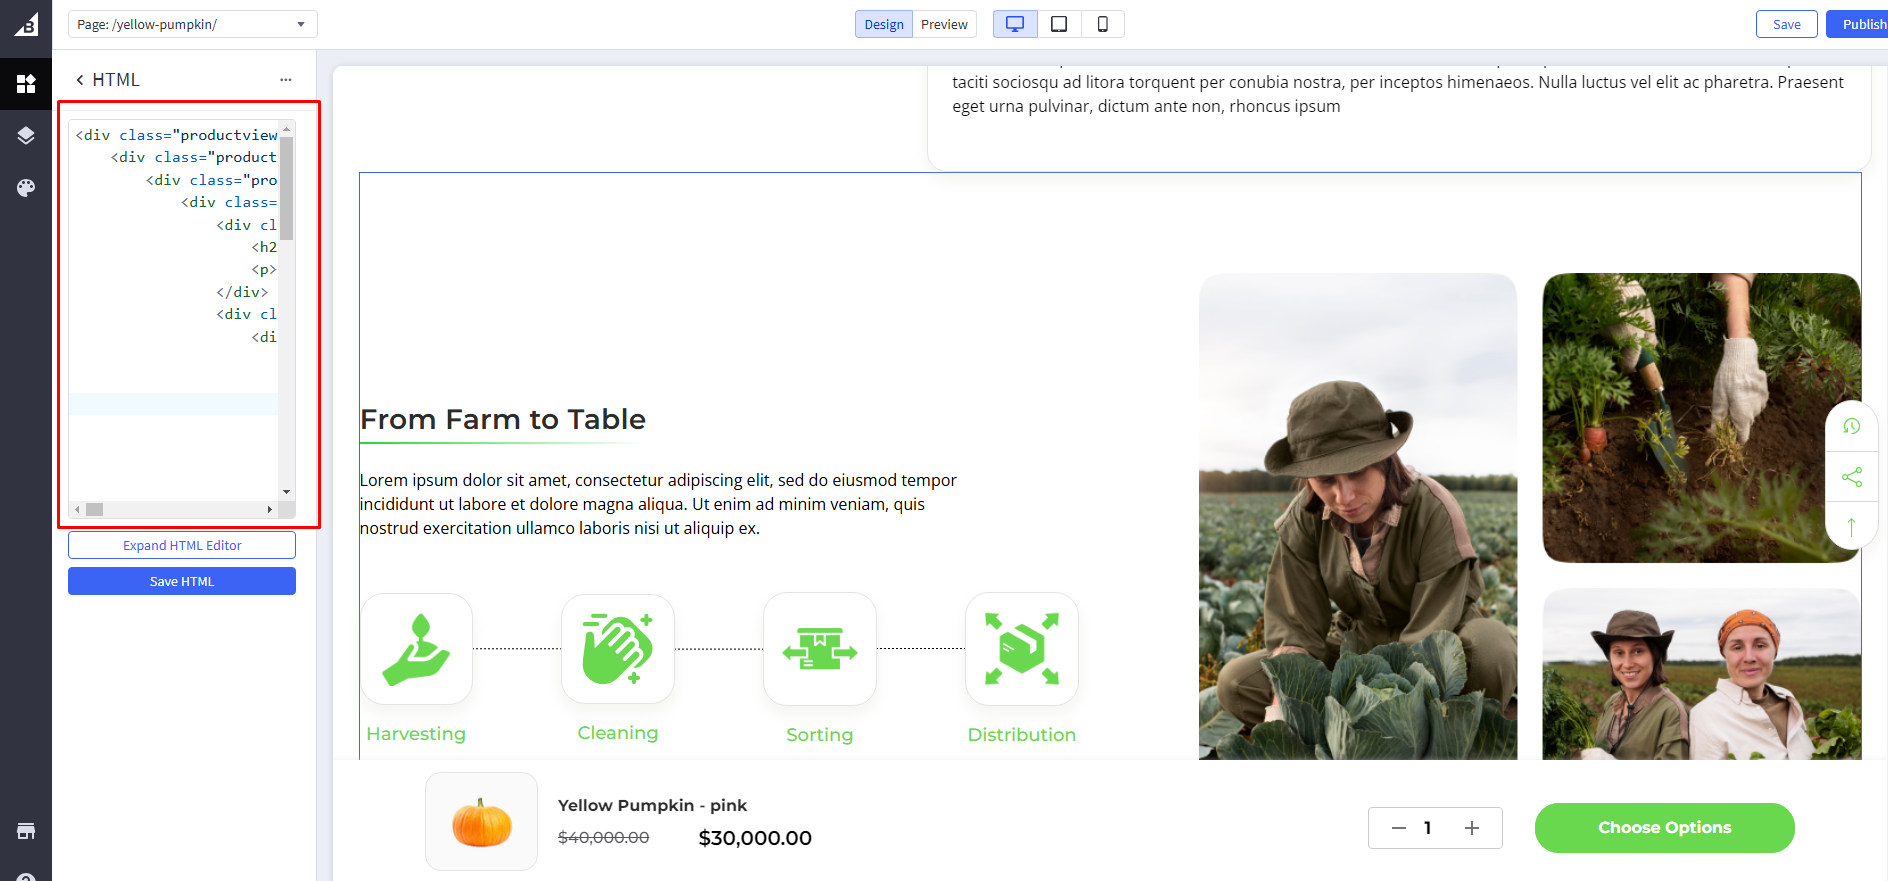
And click on save HTML button and publish your theme.
From fram to Table section Two
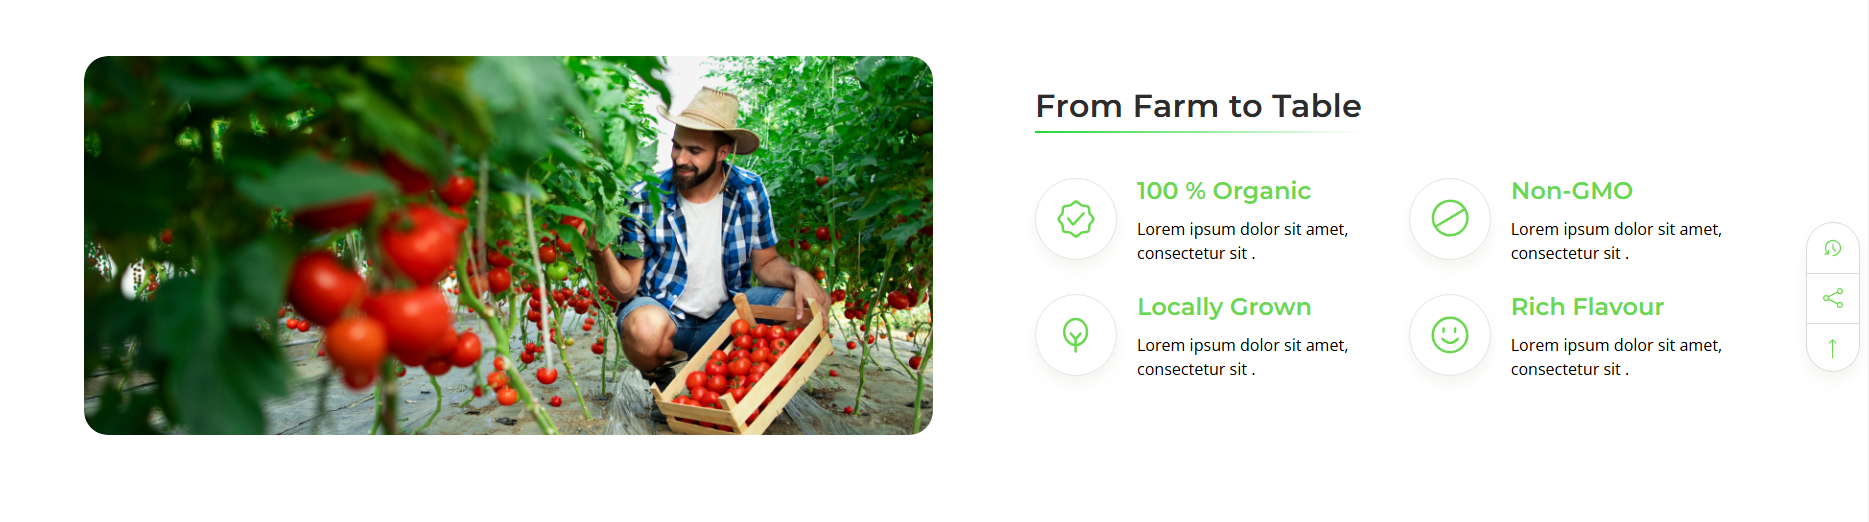
Same method use of From fram to Table section one just different is Code
HTML CODE :
Frequently Asked Questions
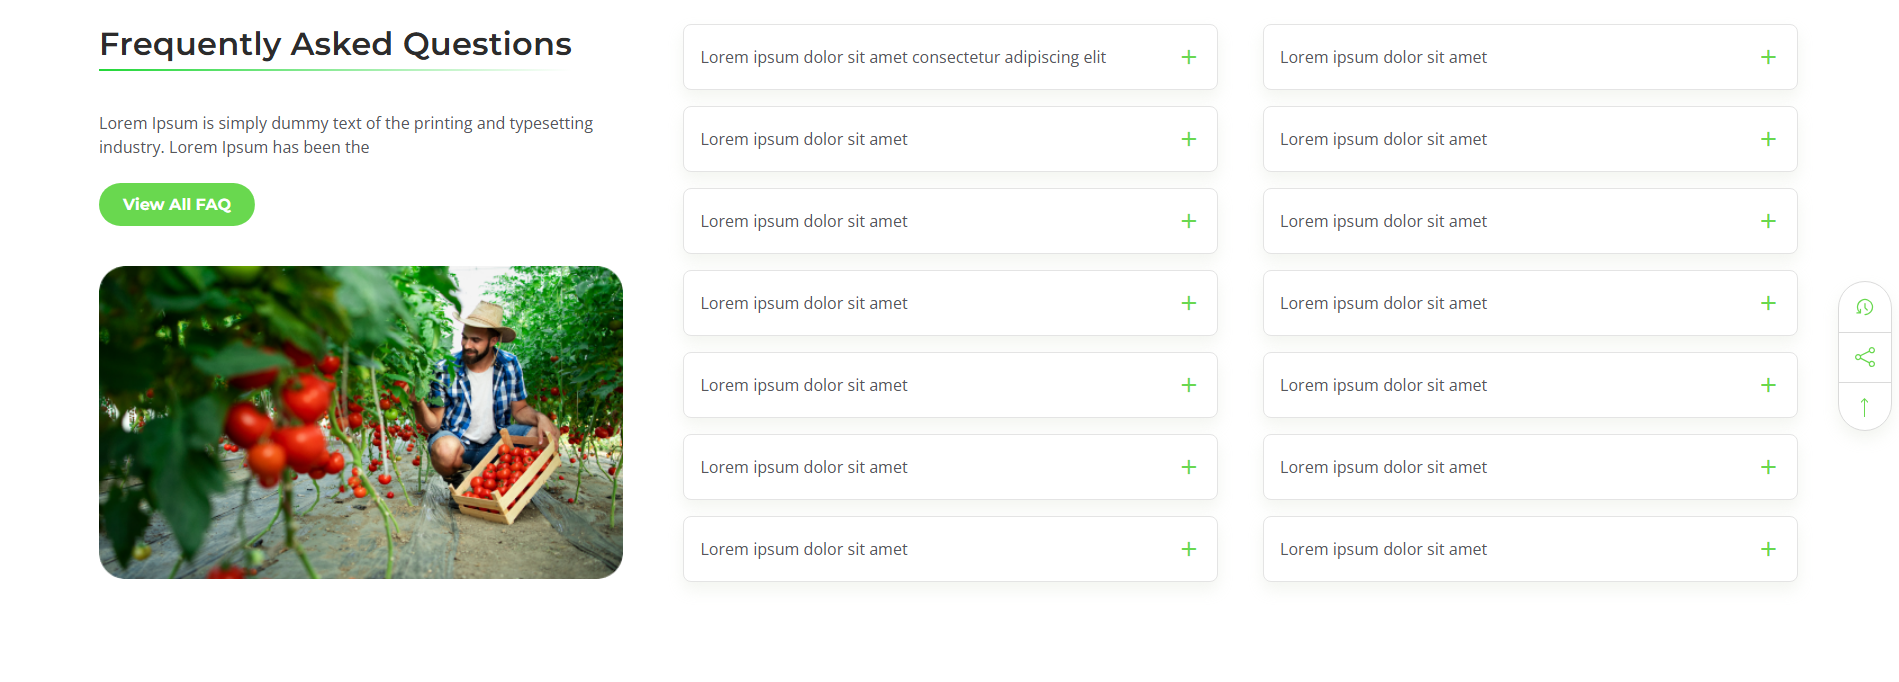
Same method use of From fram to Table section one just different is Code
HTML CODE :
Image add in Frome fram to Table section , Frome fram to Table section Two and FAQ
First, you need to head over to "Storefront > Image Manager" and then upload your images here.
Then once uploaded, click "View Full Size" to open the image in a new tab and copy the image name to that image URL.
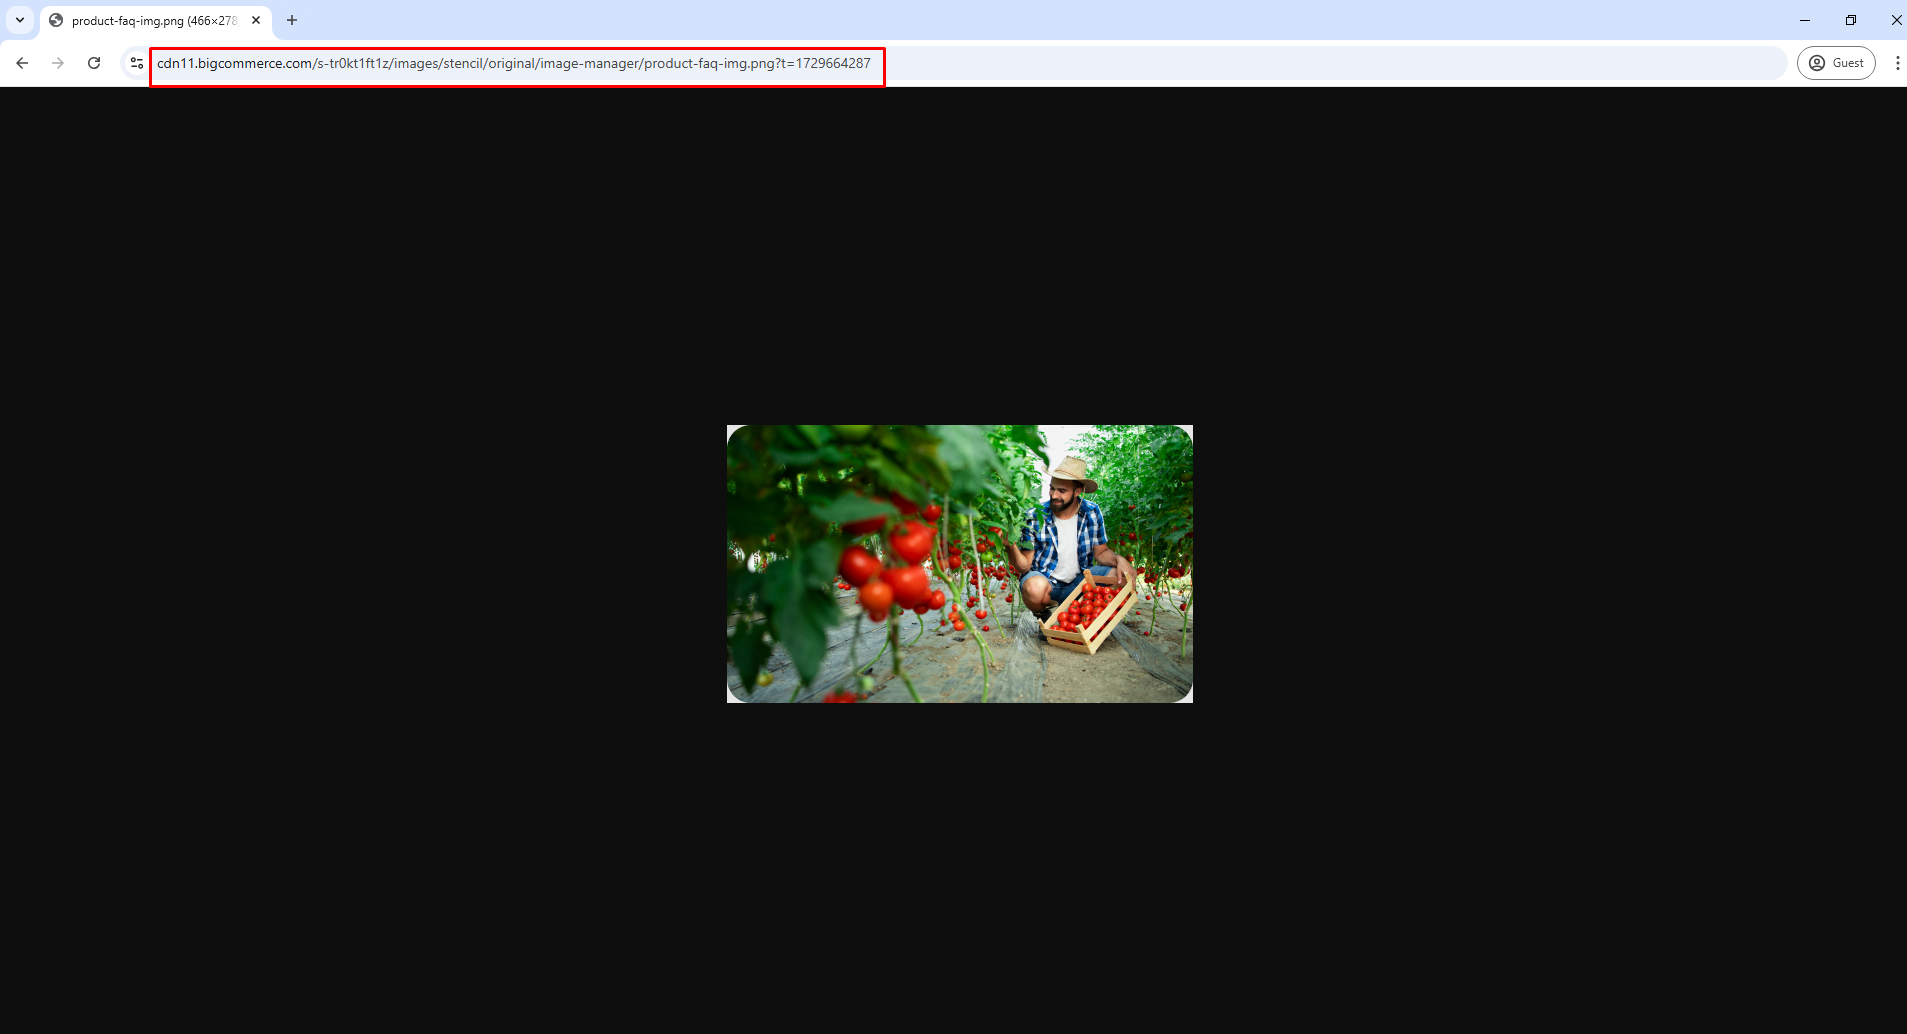
NOTE : Do not change HTML code structure only for update content and image
Common Customisation
Go to Storefront > My Themes in your control panel and click the blue "Customize" button to launch Theme Editor.
In the left-hand column of the Theme Editor, click the panel labeled 'Common Customisation'.

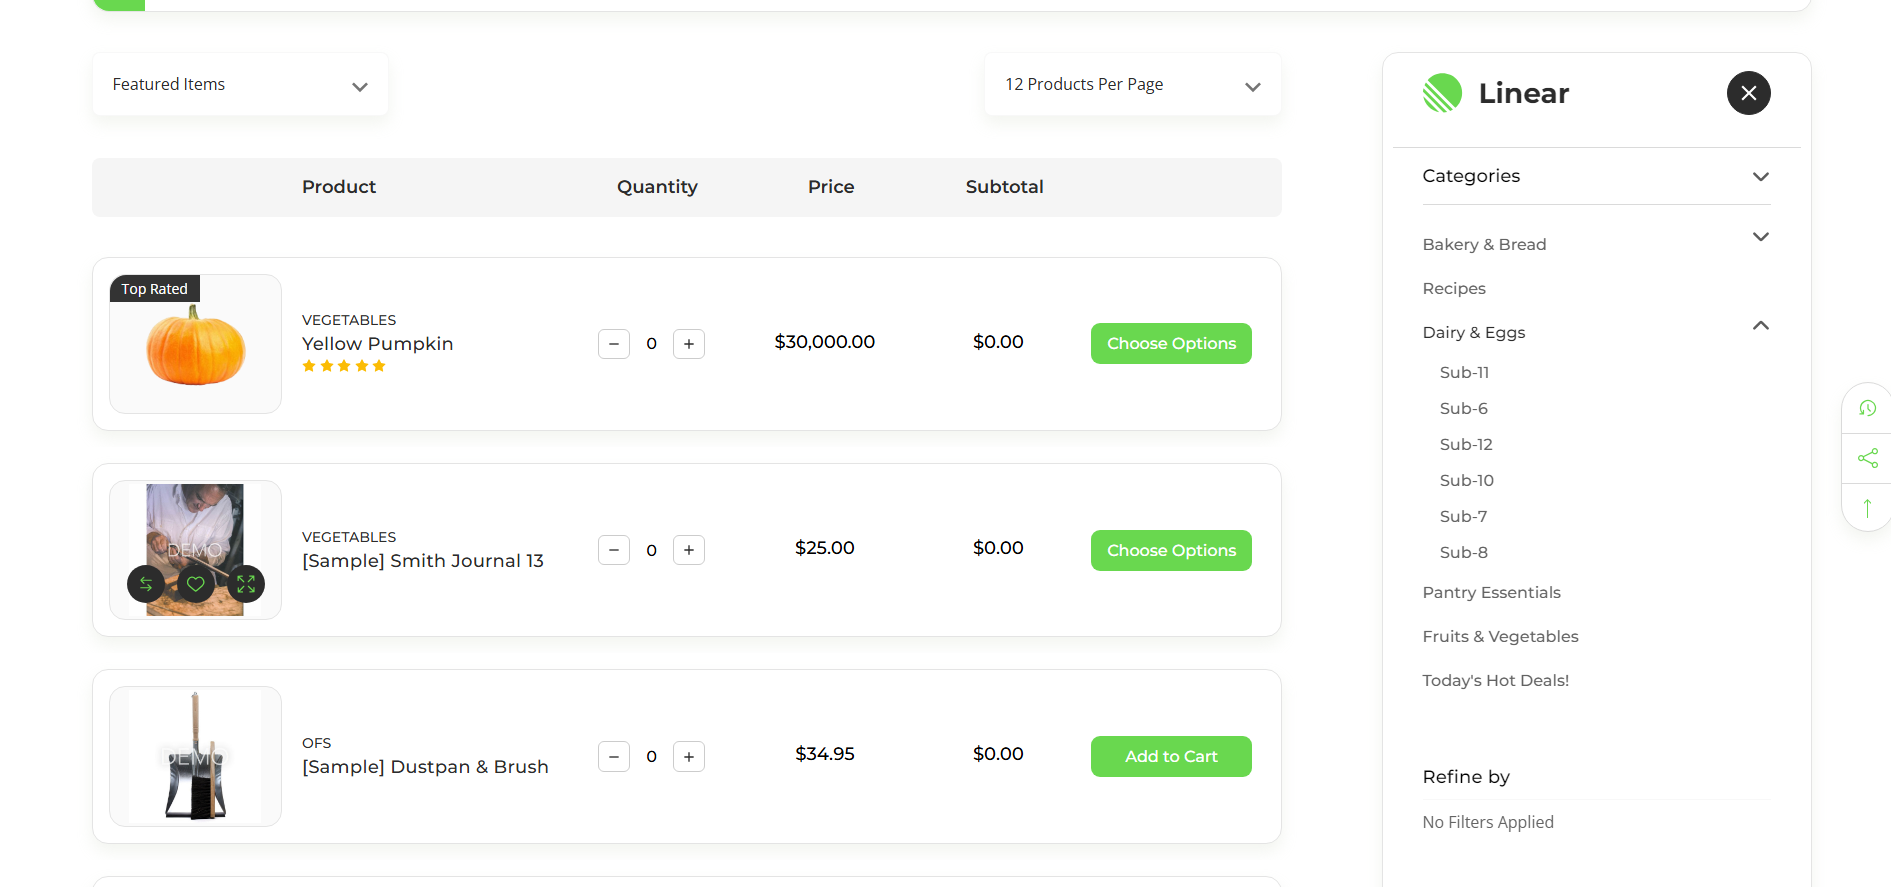
Bulk order page
The Bulk Order page on Viva is designed to make it simple for customers to purchase a wide range of products in large quantities, catering to both individual consumers and businesses like restaurants, retailers, or event planners. The page showcases a variety of products within each category—whether it's automotive parts, grocery items, or gift sets—with clear descriptions, prices, and availability. The layout is clean and intuitive, providing easy navigation between different products so users can quickly find what they're looking for. Each product listing offers an option to specify the desired quantity, making it ideal for bulk buyers.
In addition to standard product information, the page includes bulk-specific features such as volume discounts, which are automatically applied when customers order a higher quantity of a single product. A prominent call-to-action encourages users to inquire about custom orders or get assistance if they require specific bulk quantities not listed on the page. The design is responsive, optimized for both desktop and mobile devices, ensuring that customers can place their bulk orders easily, no matter the device they are using.
- Bulk Pricing & Discounts
- Quantity Input for Each Product
- Cart Update in Real-Time
- Product Details
- Price Transparency
- Fast Checkout
- Mobile-Friendly Design
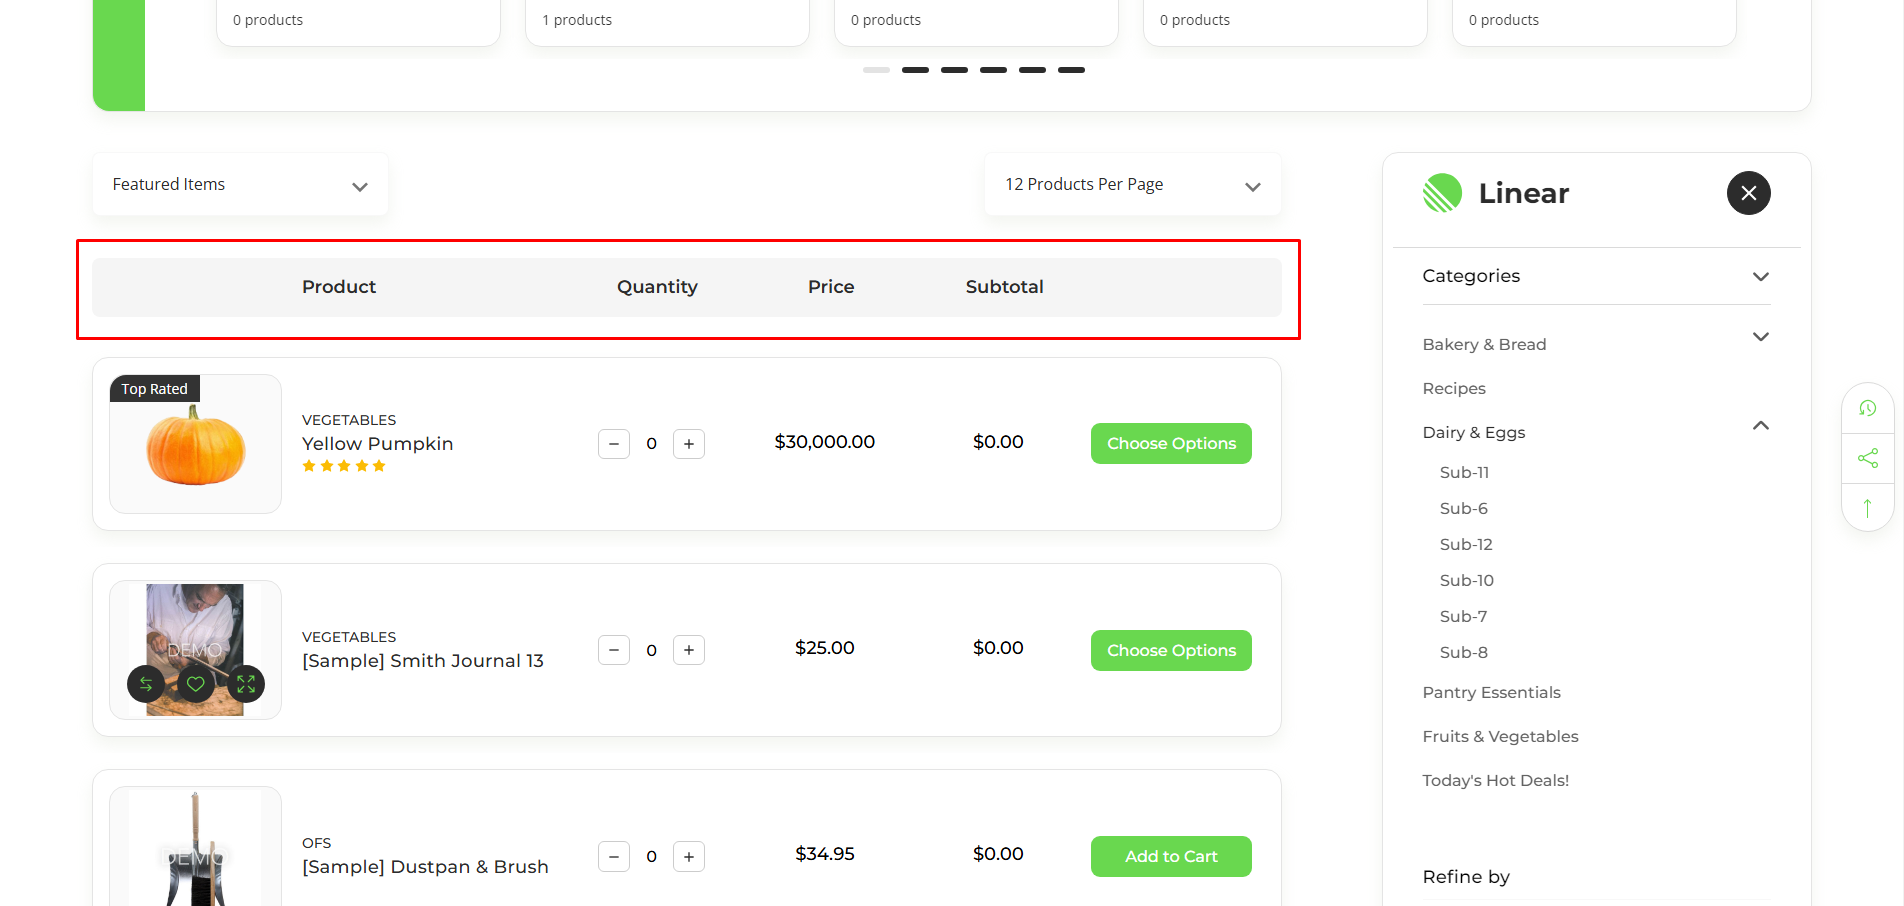
Ajax add to cart : If Checked , it will add ajax addto cart
Show bulk order mode : If Checked , it will working on bulk order
Bulk order Header background : add background Color
Can you add bulk order functionality to any category. The steps for how it will be used are given below.
Go to products > product categories
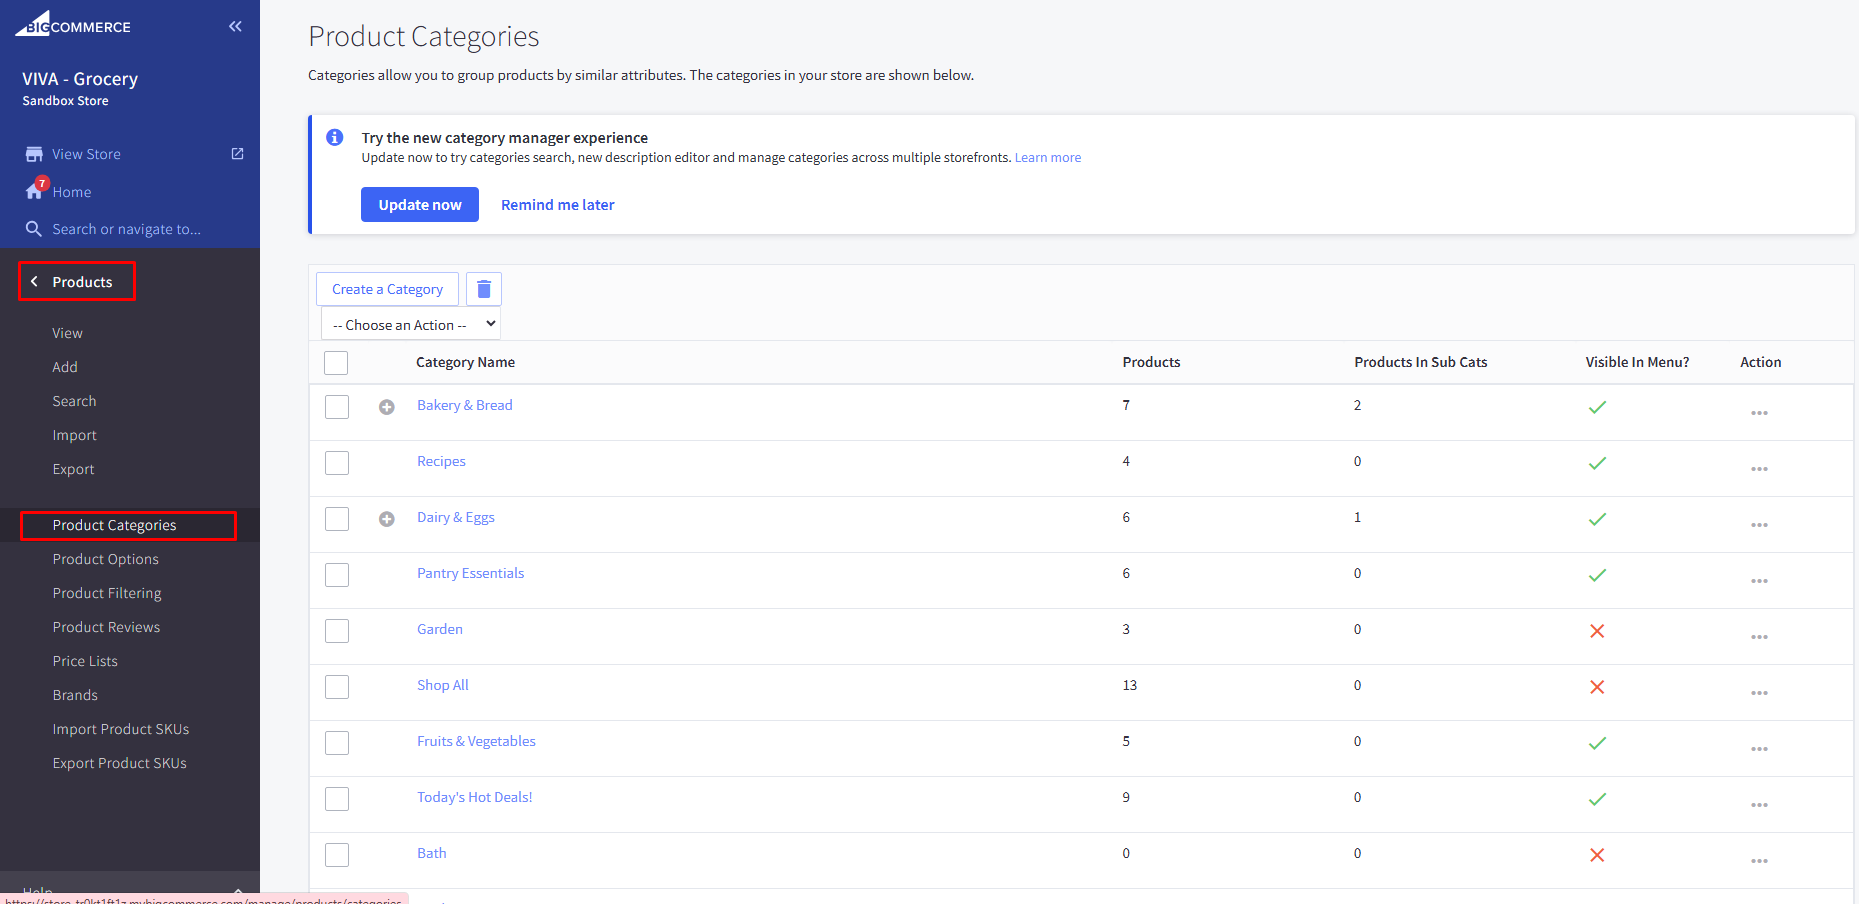
Then click anyone category name
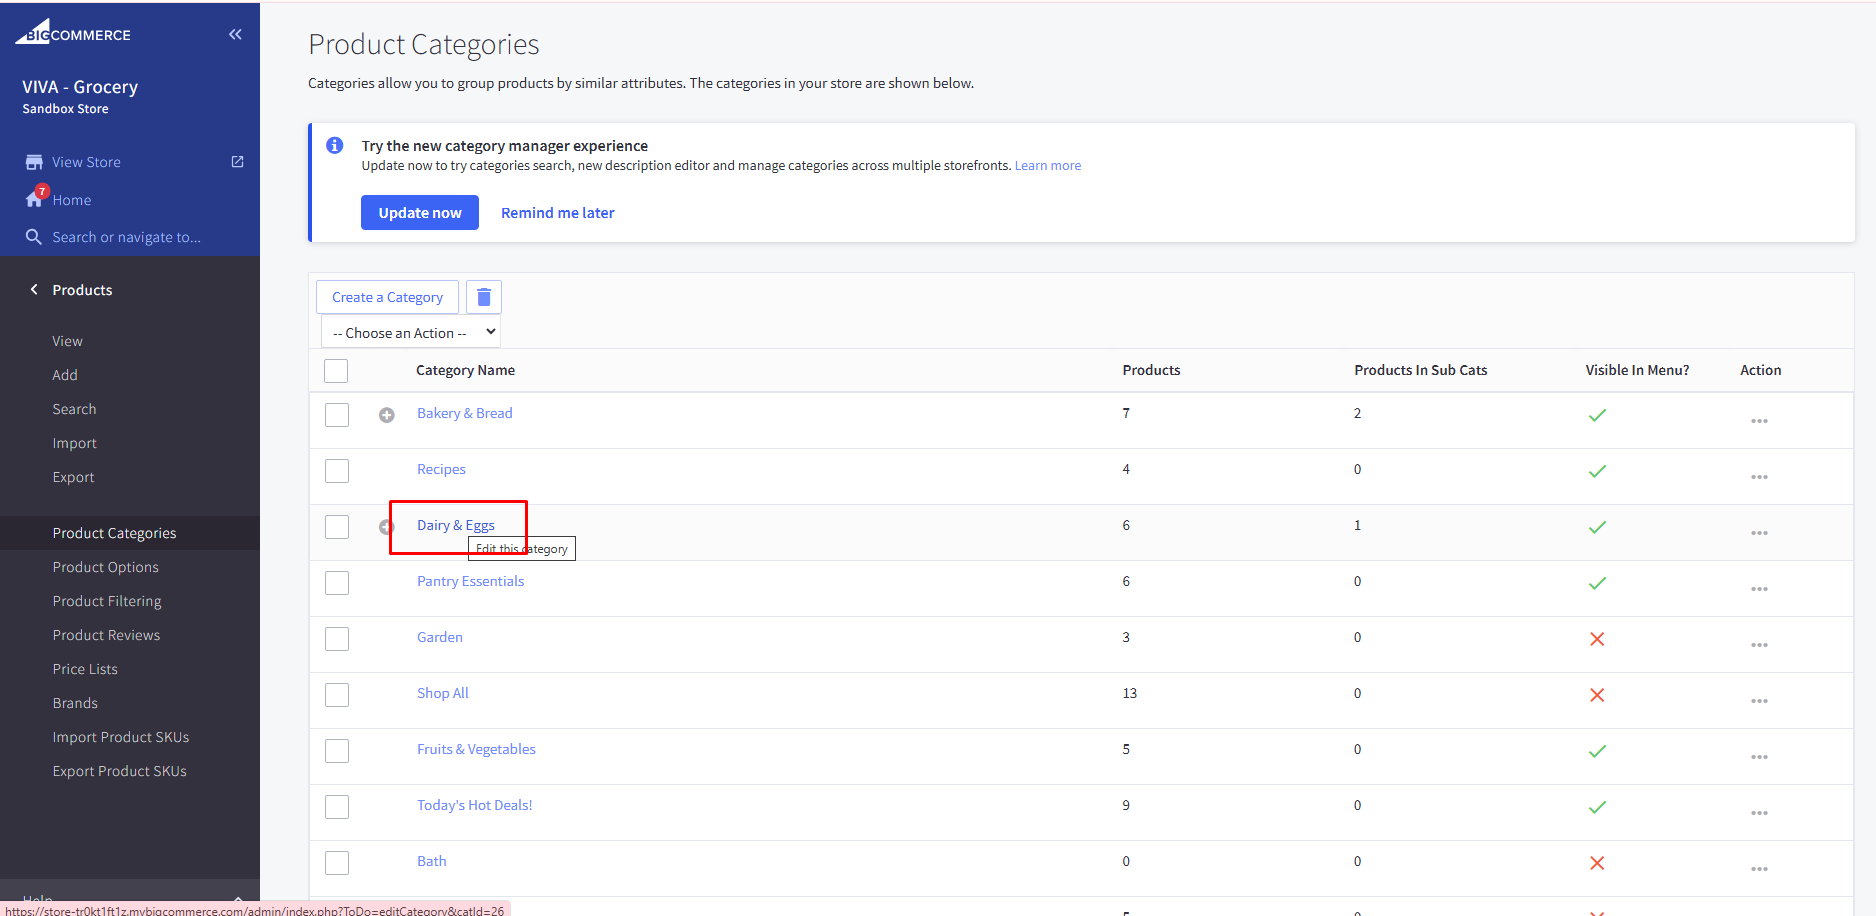
Then add template layout file : bulk-order
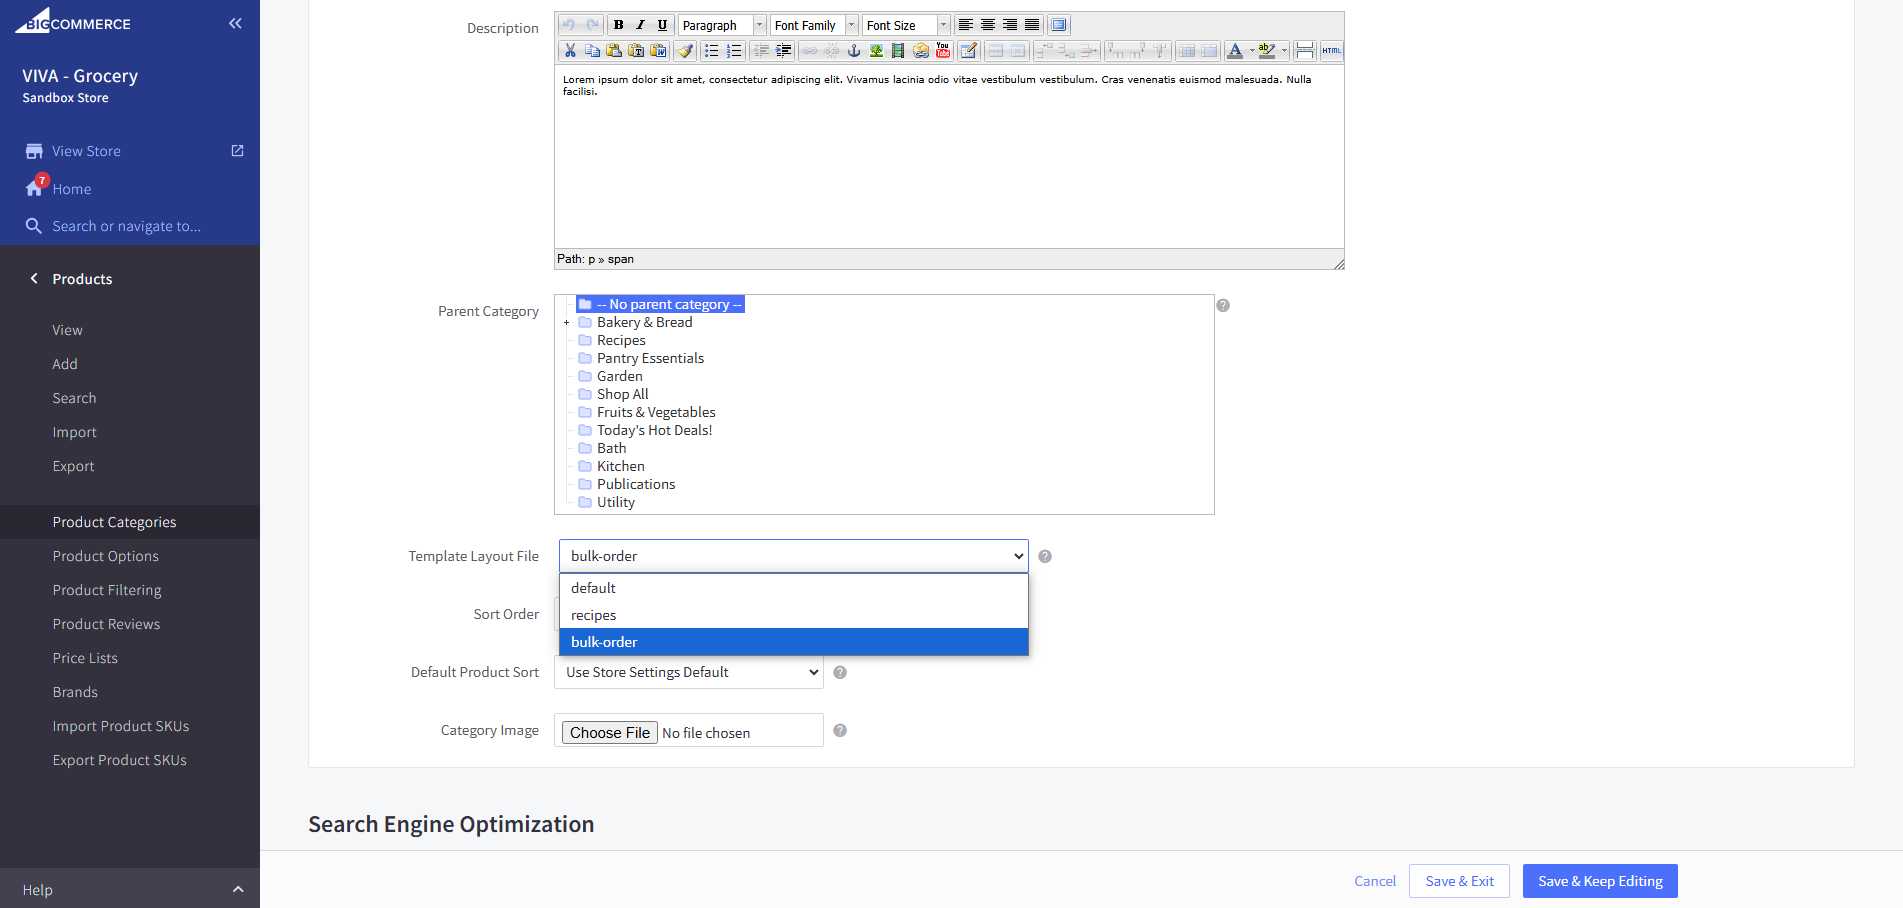
Output : https://viva-grocery.mybigcommerce.com/dairy-eggs/
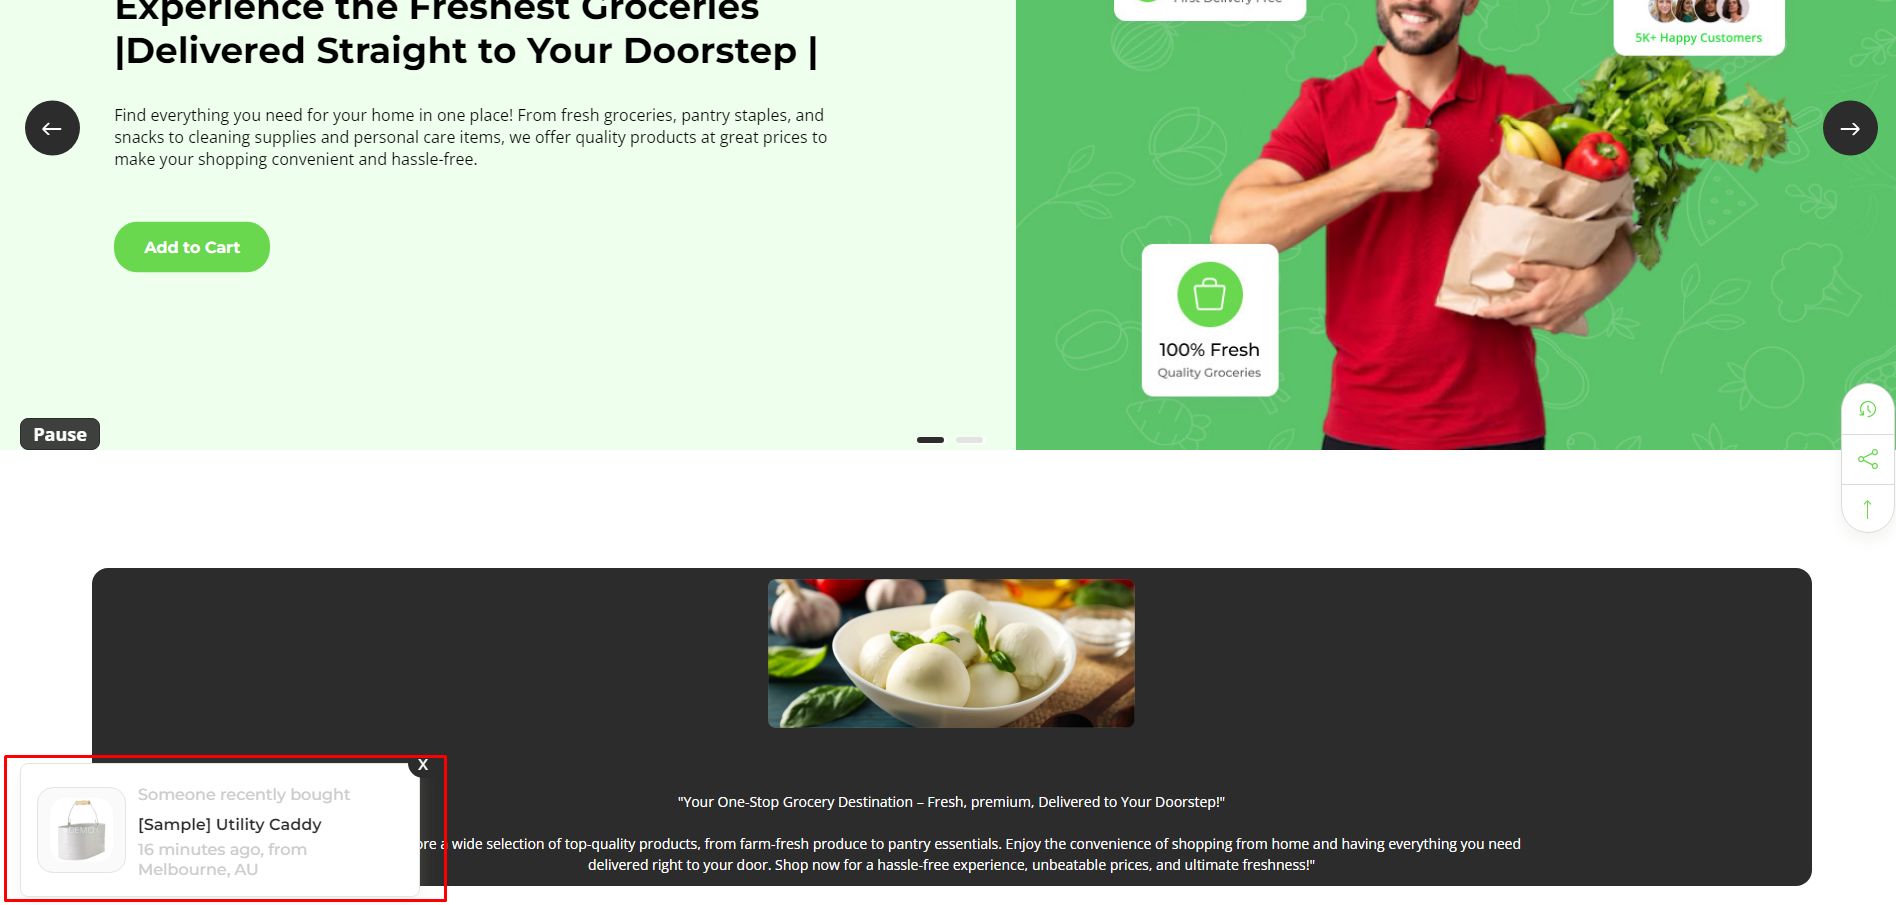
Recently Bought

Recently Bought Change Slides : add second in change slide
Recently Bought Hours : add hours in product purchase count
Recently Bought Hide/Show : If checked , it will visible Recently Bougth popup and if unchecked then hide popup
Recently Bought Product ID : add product ID in visible product
Recently Bought Text Info : add info text
Recently Bought Text Name : add name text
Recently Bought Location 1 : add location text 1 to 8
Discount Popup

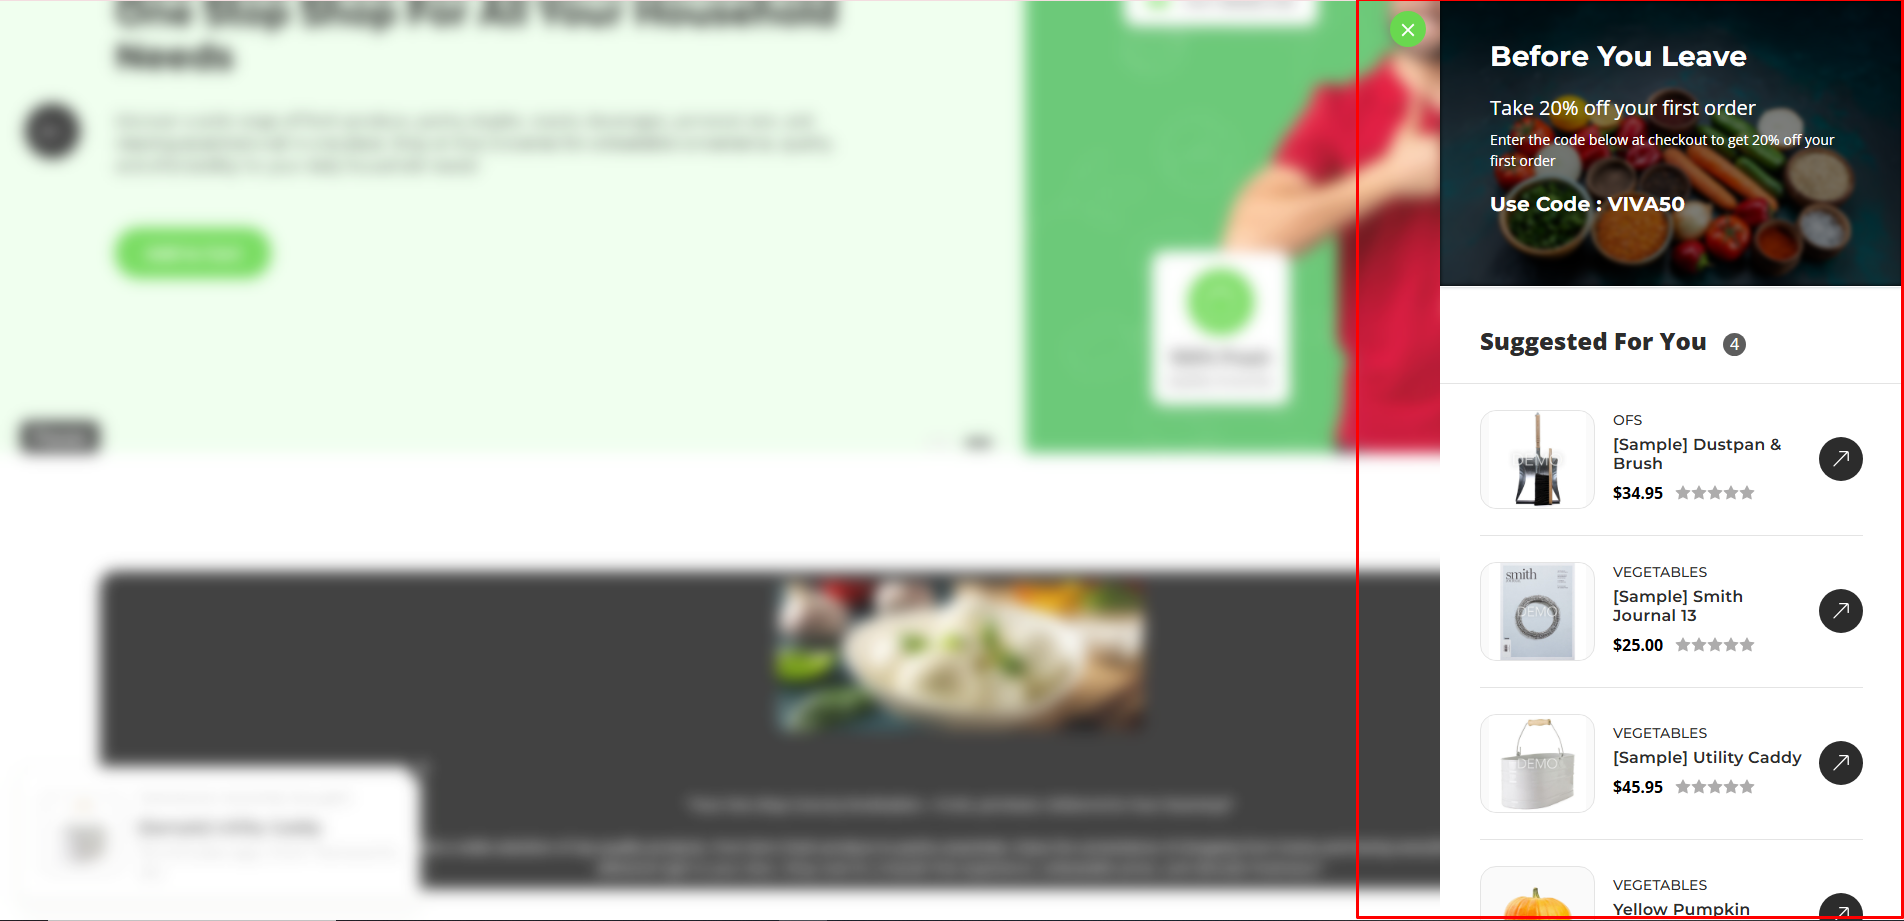
Enable Discount Popup : If Checked , it will show Discount popup
Discount Popup Time : Add time in second for popup show
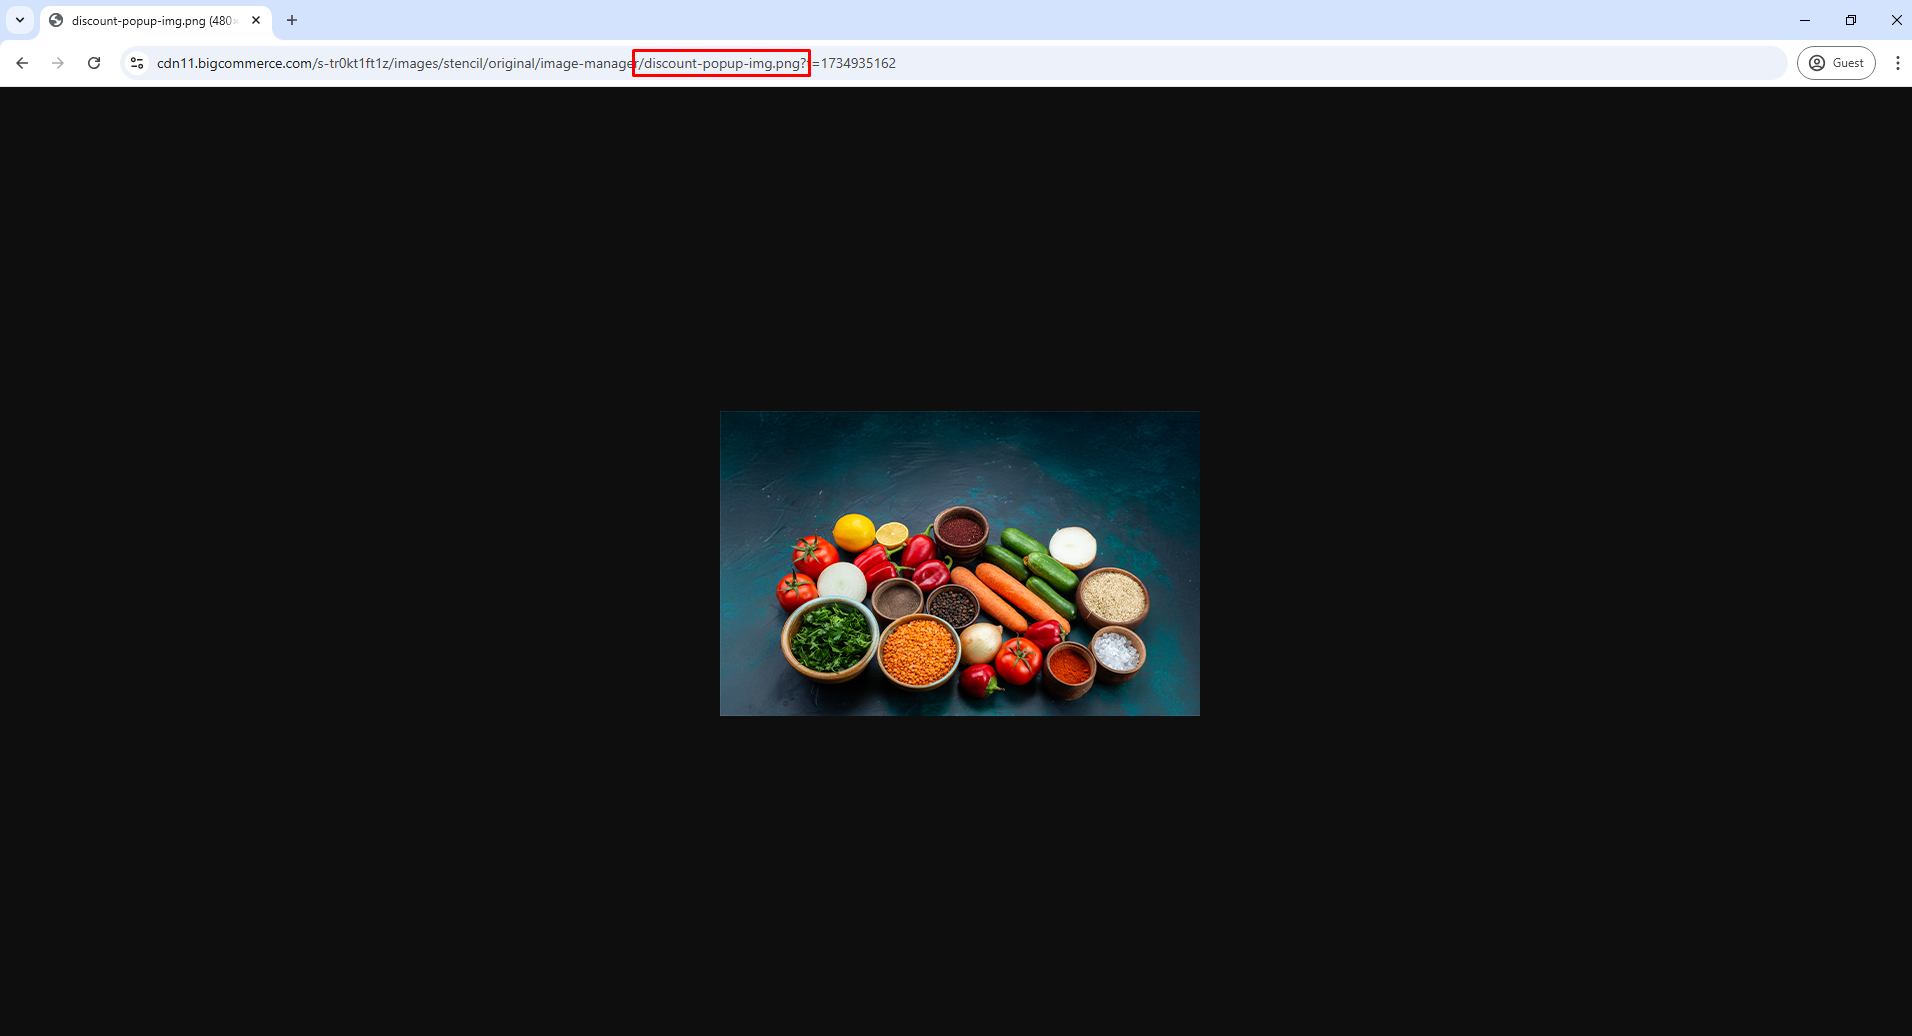
Discount Popup Image :
First, you need to head over to "Storefront > Image Manager" and then upload your images here.
Then once uploaded, click "View Full Size" to open the image in a new tab and copy the image name to that image URL.
Discount Popup Background : Add background color
Discount Popup Color : Add discount popup text color
Discount popup Link : Add discount popup button link
Discount popup Title : Add discount popup title text
Discount popup Text 1 : Add discount popup description text one
Discount popup Text 2 : Add discount popup description text two
Discount popup Heading : Add discount popup Heading text
Discount popup Button text : Add discount popup Button text

Enable discount popup Suggested : If Checked , it will hide a show products
Discount popup Suggested ID : add product ID in maximum 4
Recently Viewed Product

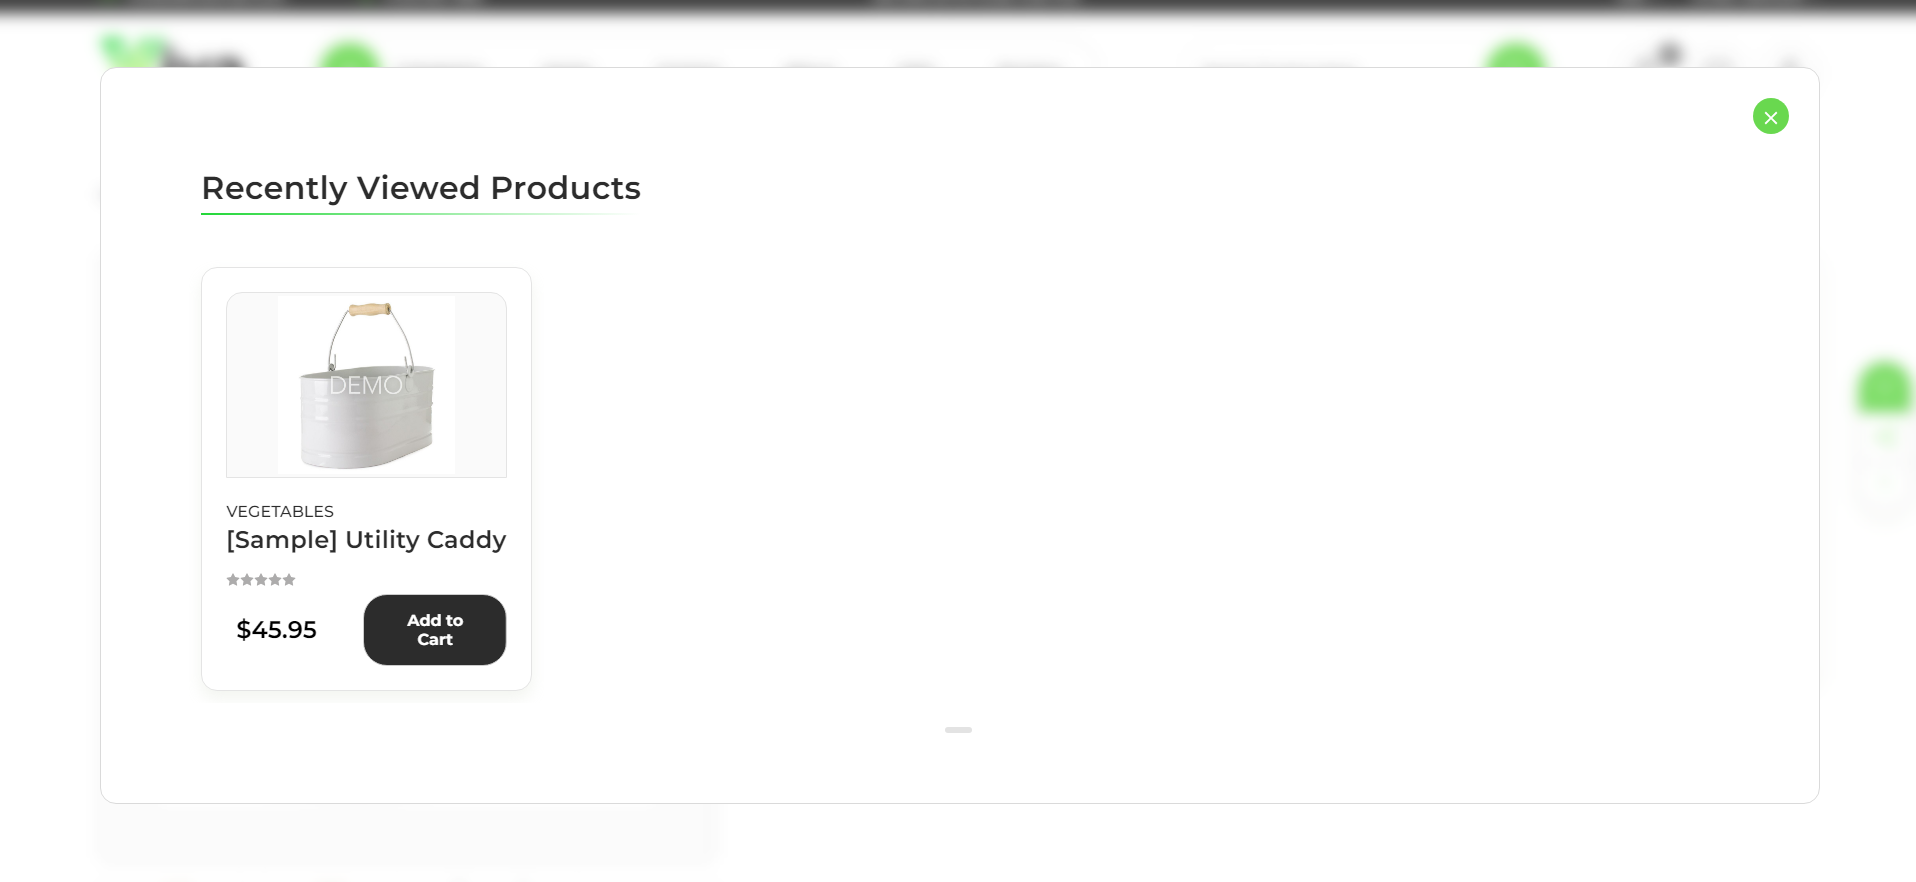
Recently Viewed Products Hide/Show : If Checked , it will hide and show popup
Recently Viewed Products Top : If Checked , it will Product Top
Recently Viewed Products Title : Add recently Viewed title
Recently Viewed Products Count : Add recently Viewed Product Count
Recently Viewed Products Expires Date : Add recently Viewed Product Exprise Date
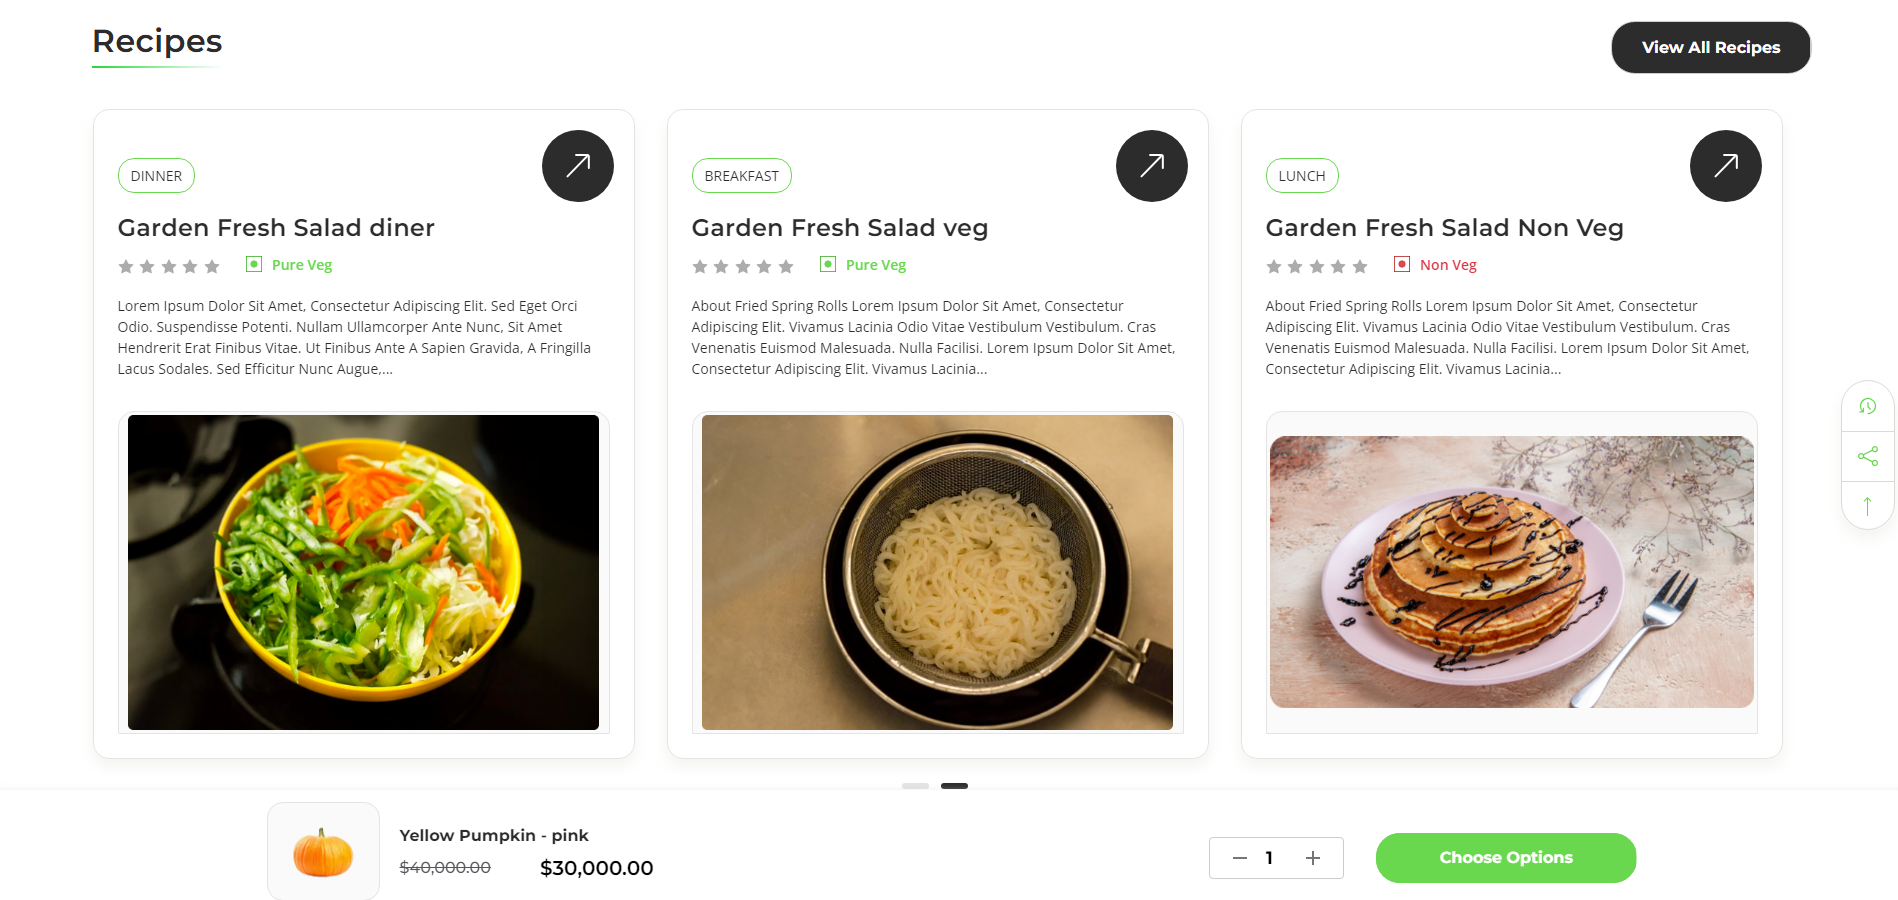
Recipes Page
Each Viva theme includes a specialized content hub tailored to its target audience — recipes for grocery shoppers, maintenance guides for auto buyers, and gift ideas for those shopping special occasions. These pages not only enhance user experience but also serve as strategic content marketing tools that boost product discovery, SEO, and conversions
- Content-driven, CMS-style layouts
- Visual cards or blocks with featured images and summaries
- Links to relevant products or categories
- SEO-friendly structures with headings, keywords, and internal linking
- Enhance user experience by educating, inspiring, or guiding purchase behavior
- Great for content marketing and organic traffic growth
- Boost engagement and lower bounce rates with informative content
These pages are built using custom page templates integrated within the theme’s structure, leveraging BigCommerce’s Page Builder and custom Handlebars layouts. Each page is uniquely tailored to match the store’s industry while maintaining dynamic linking with products and categories
Recipes Listing Page
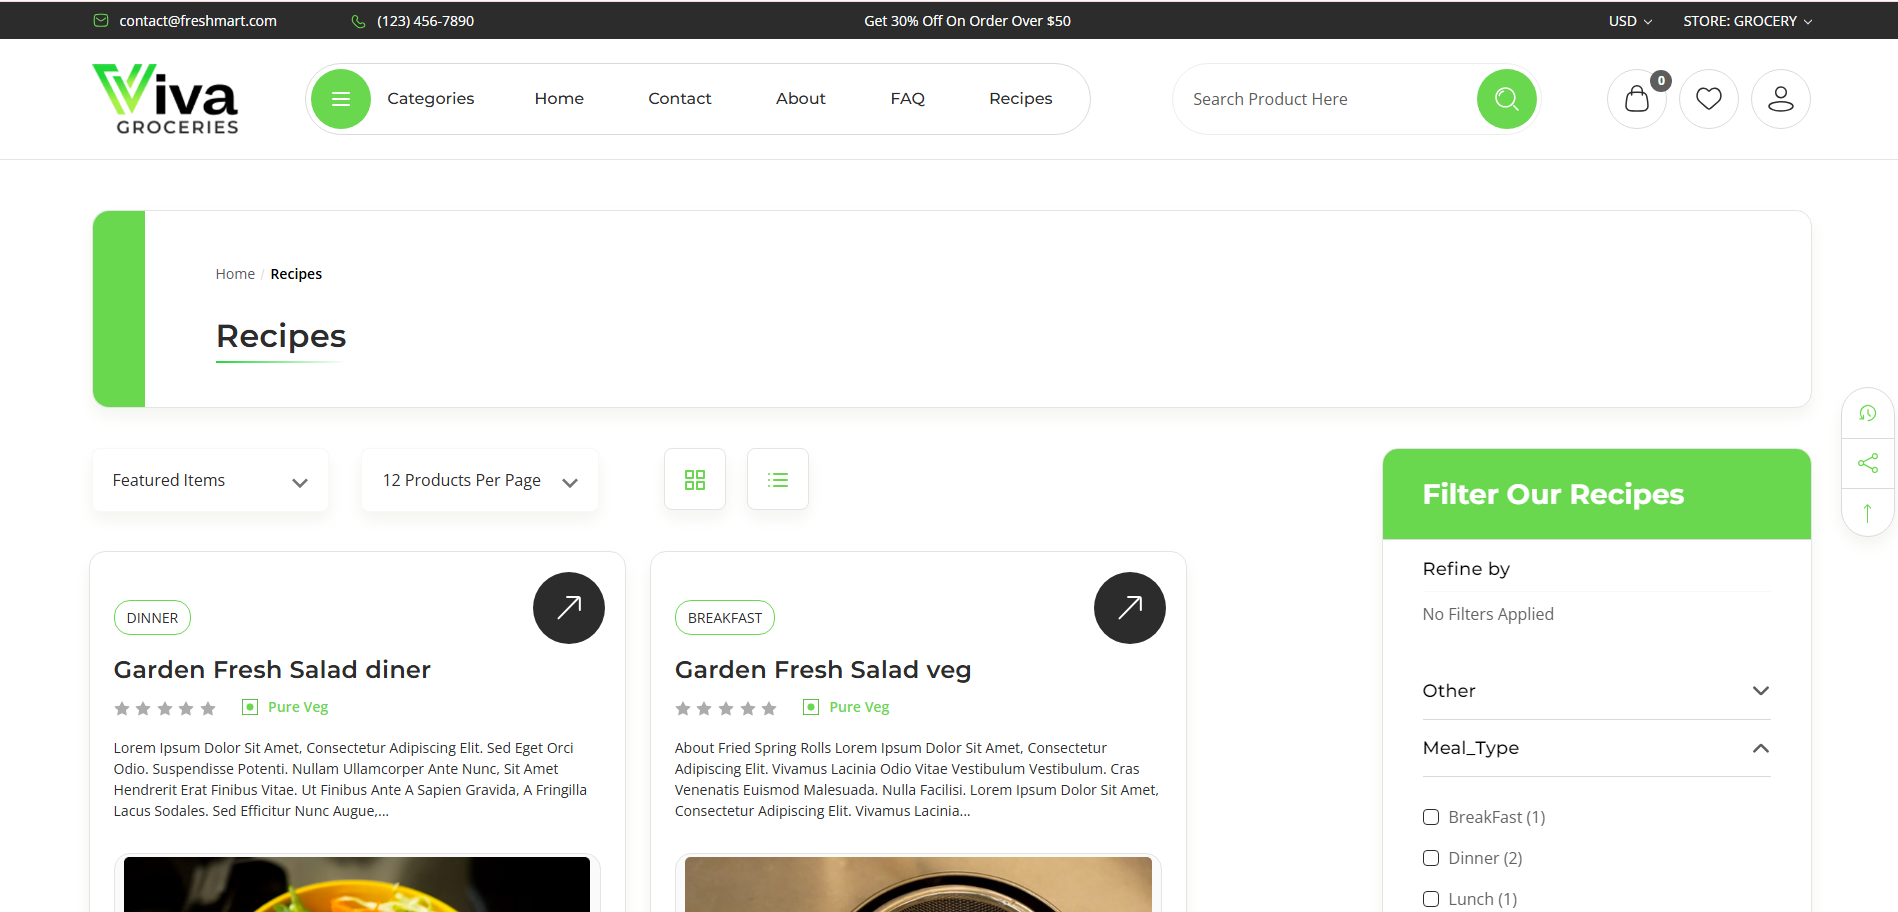
If you want to view the recipes page, follow the steps below.
- First If you want add recipes so please creat a new Category and name is add “Recipes”
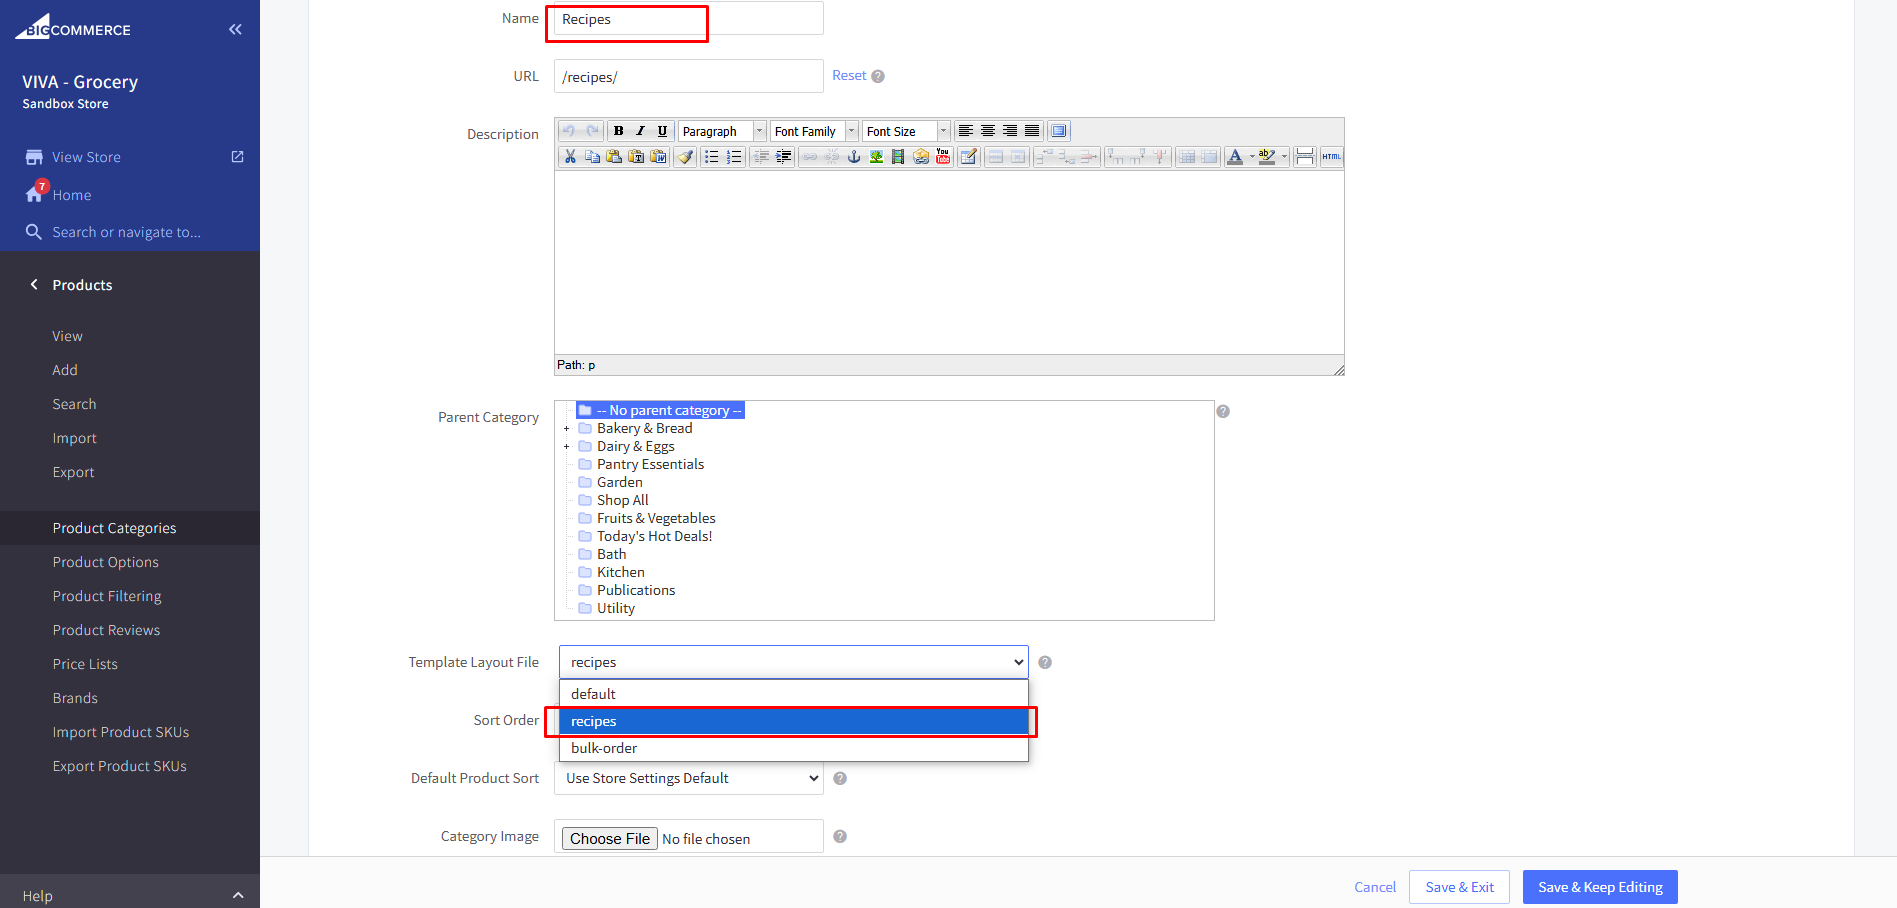
- Add a template Layout file a “recipes”
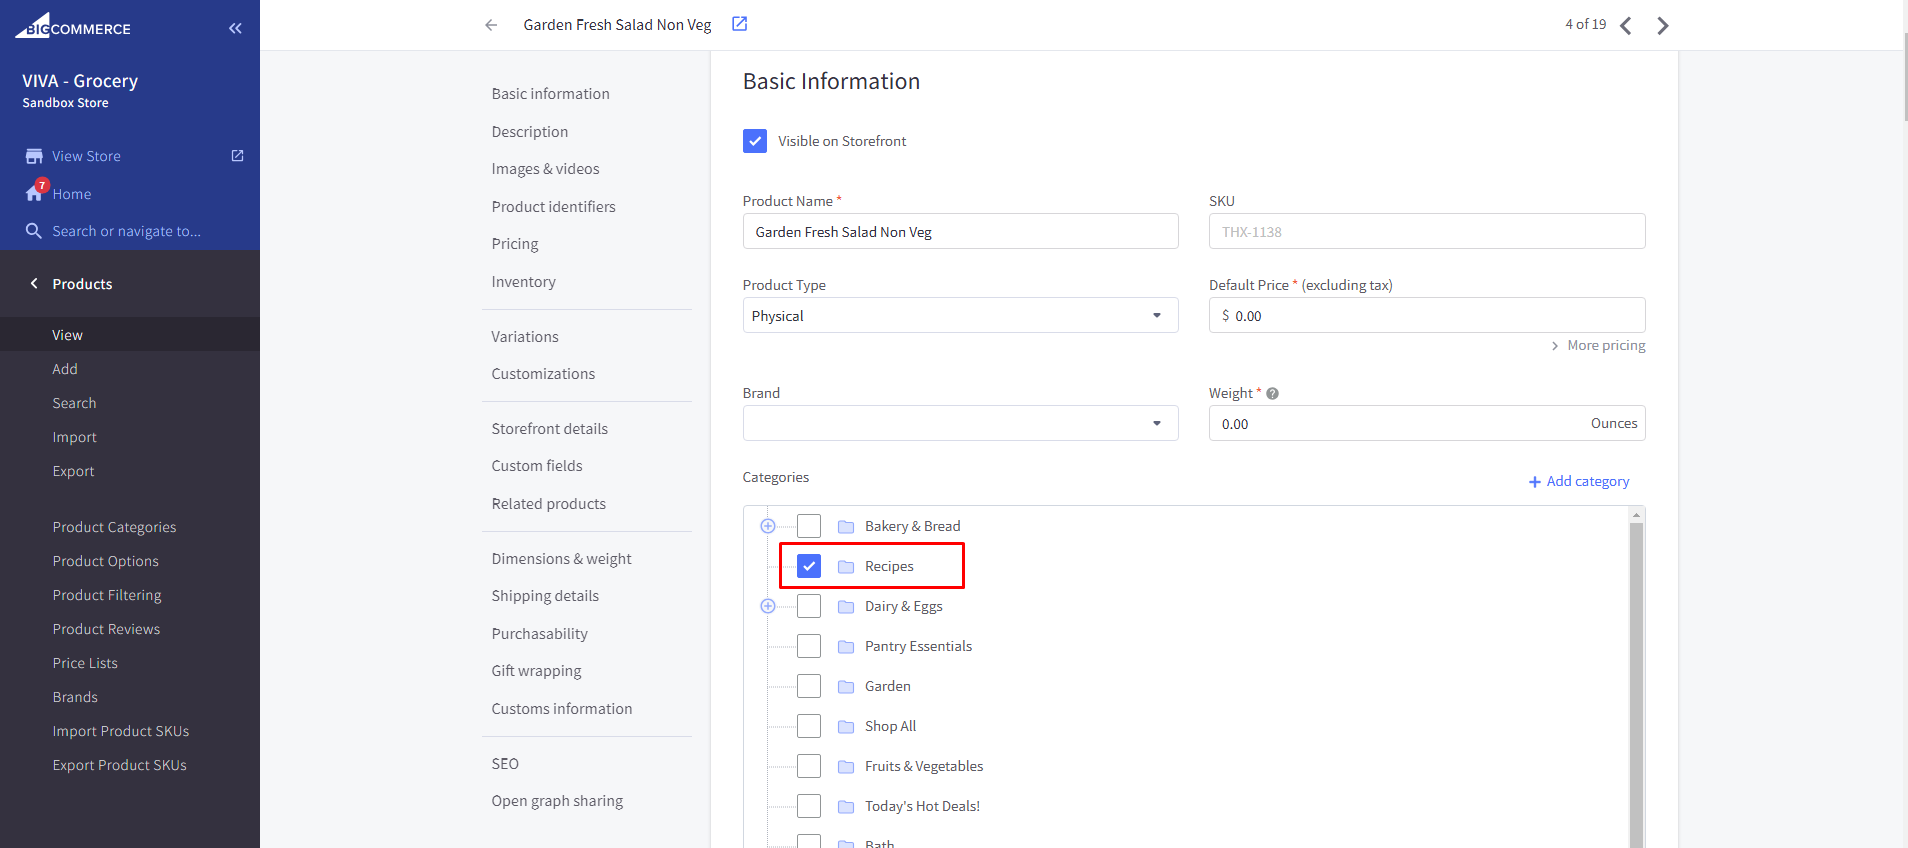
If you want to add a product to the "Recipes" category, it should be assigned to that category.
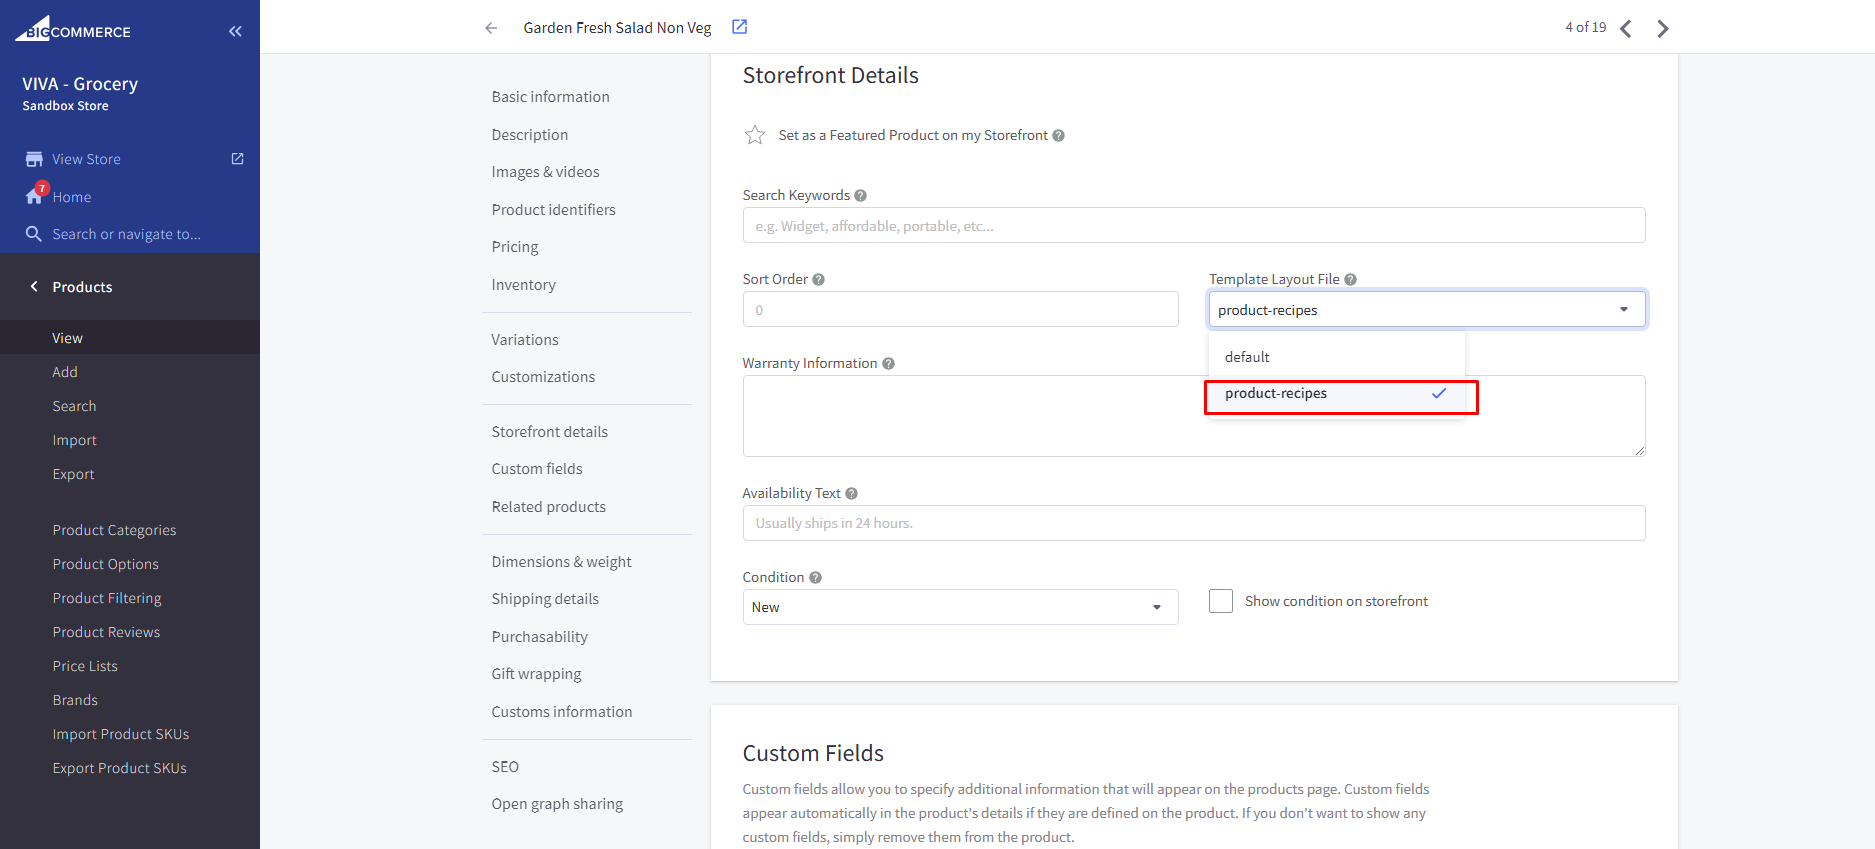
- then add product template layout file is “product-recipes”
Recipes Product Page


Add custom filed
- he custom file name should not be changed, only the value should be updated.
- custom filed name
1. Food_type_nonveg OR Food_type_veg : Specifies the category or type
2. Time : relevant duration information such as preparation
3. Easy : Helps set the right expectations for users
4. Serves : How many people can use, consume, or benefit
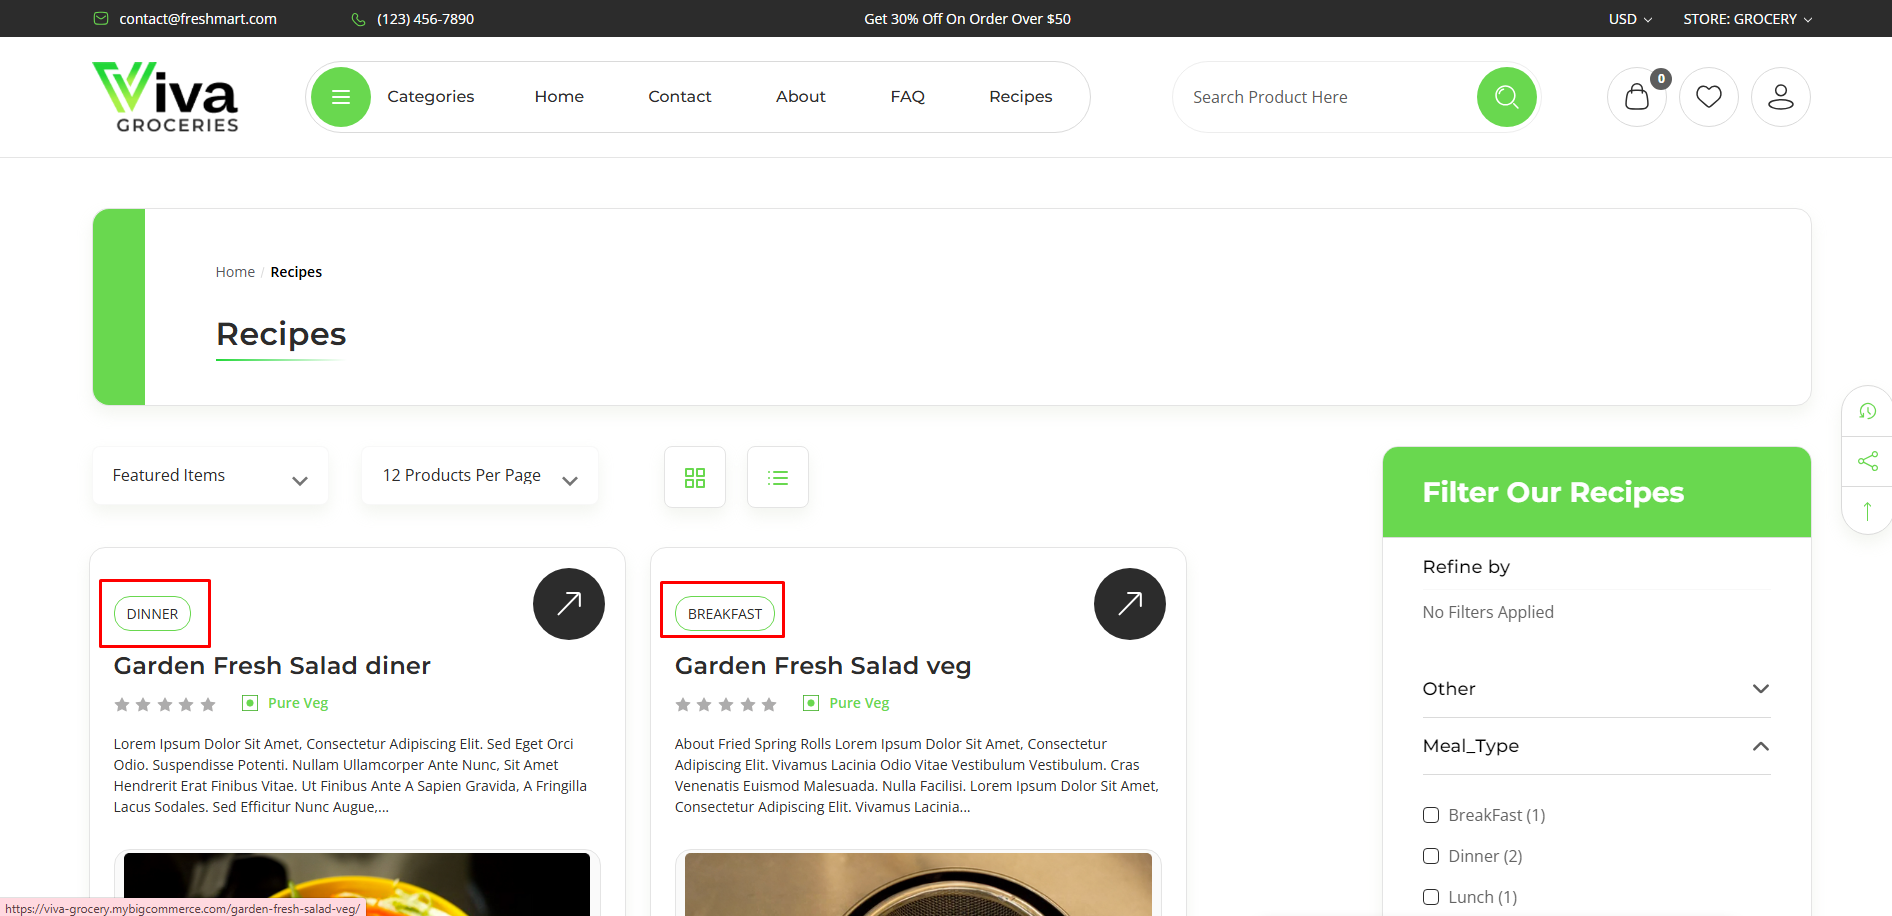
If you add tag so use of custom filed and use tane name of “Meal_Type” and add the your value
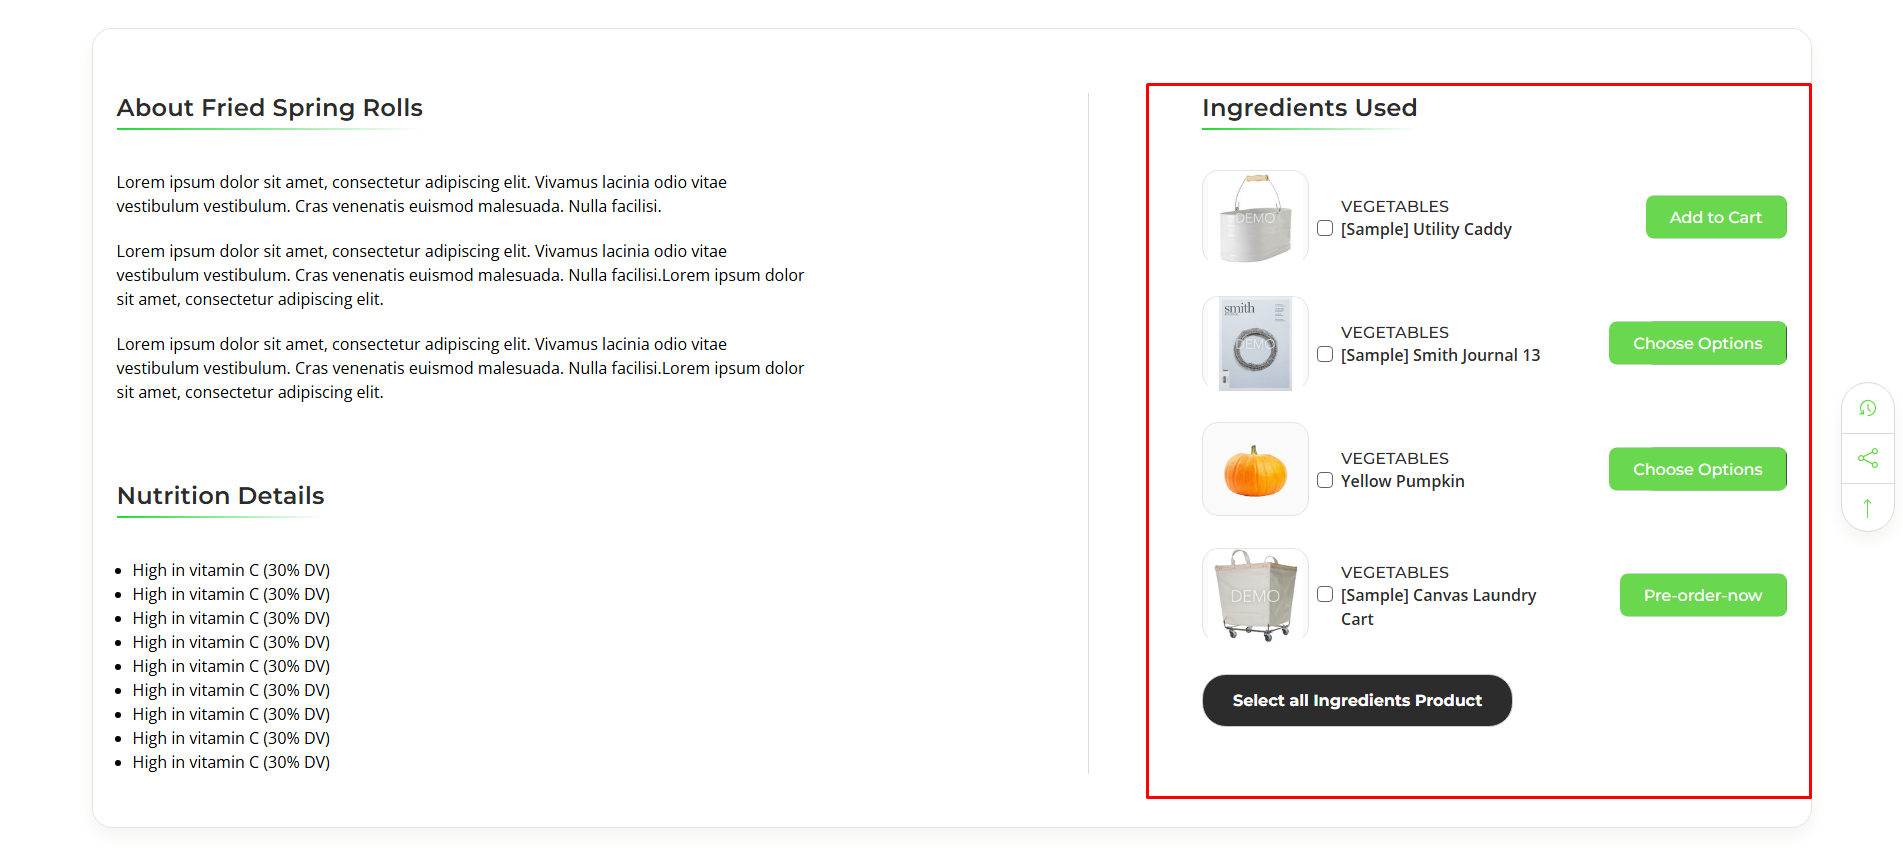
If you want to add ingredient used product ,so please follow the below the step
- The ingredients used will be listed in the particular product.
- Whatever product you want to display, its product ID should be added to the custom field value.
- Custom filed name usd to “__bundleid”
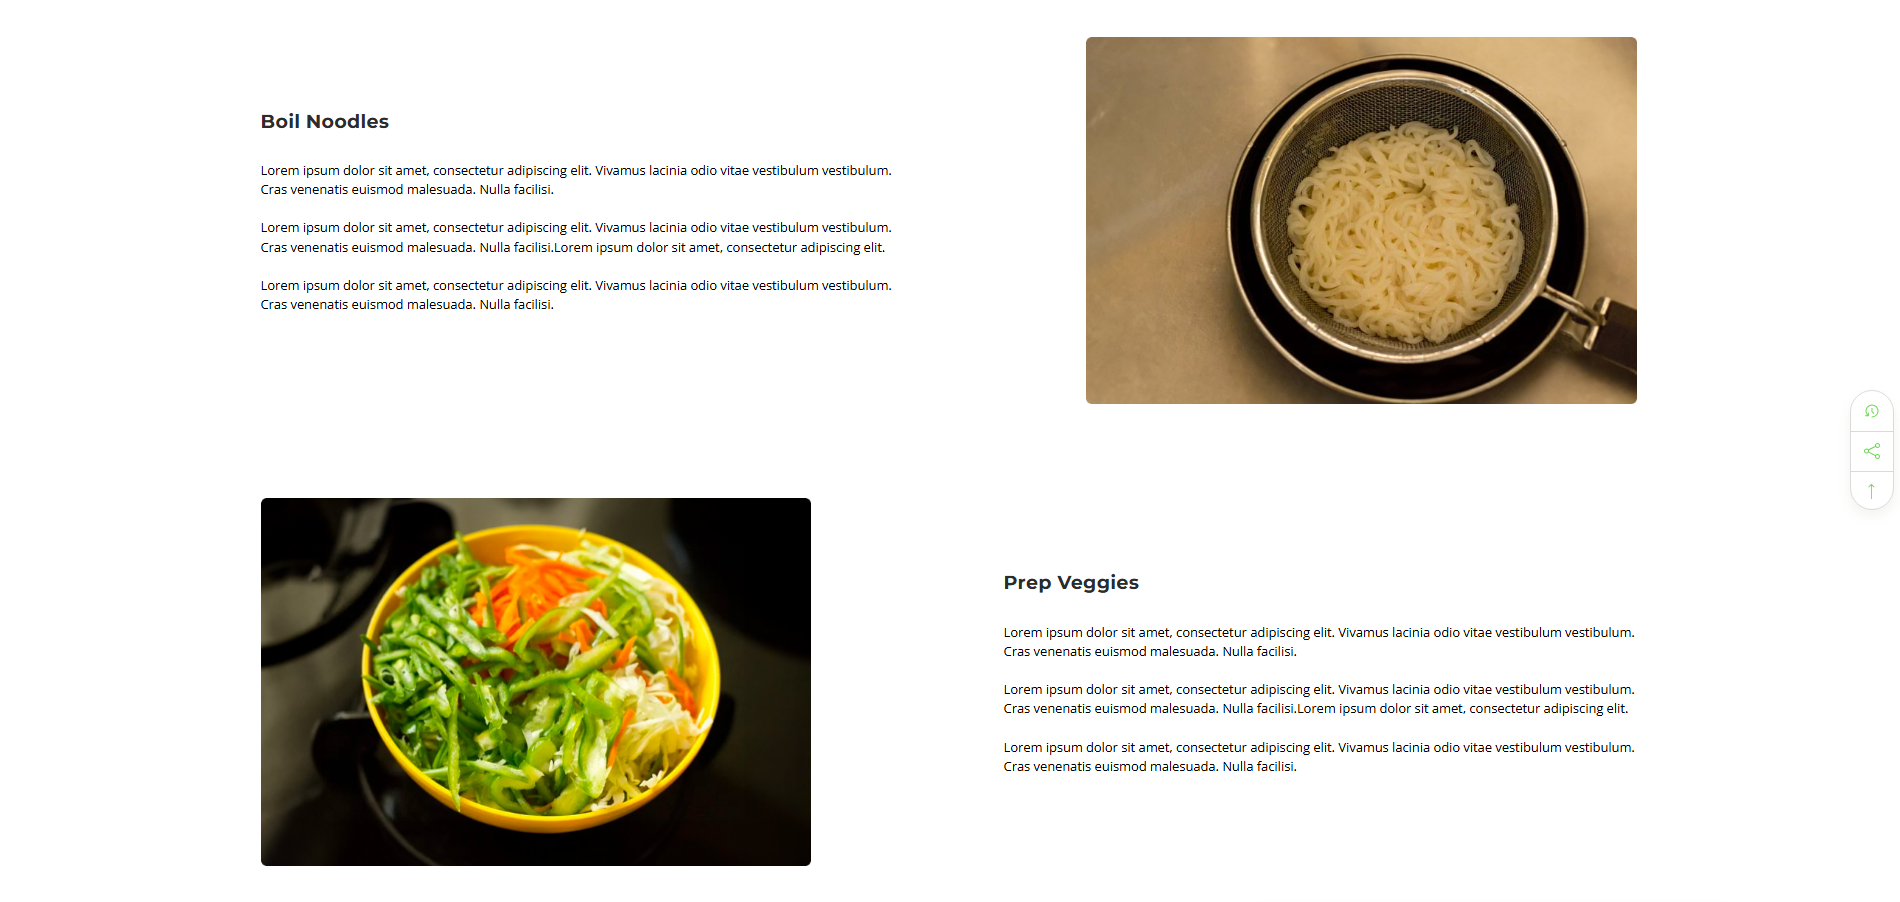
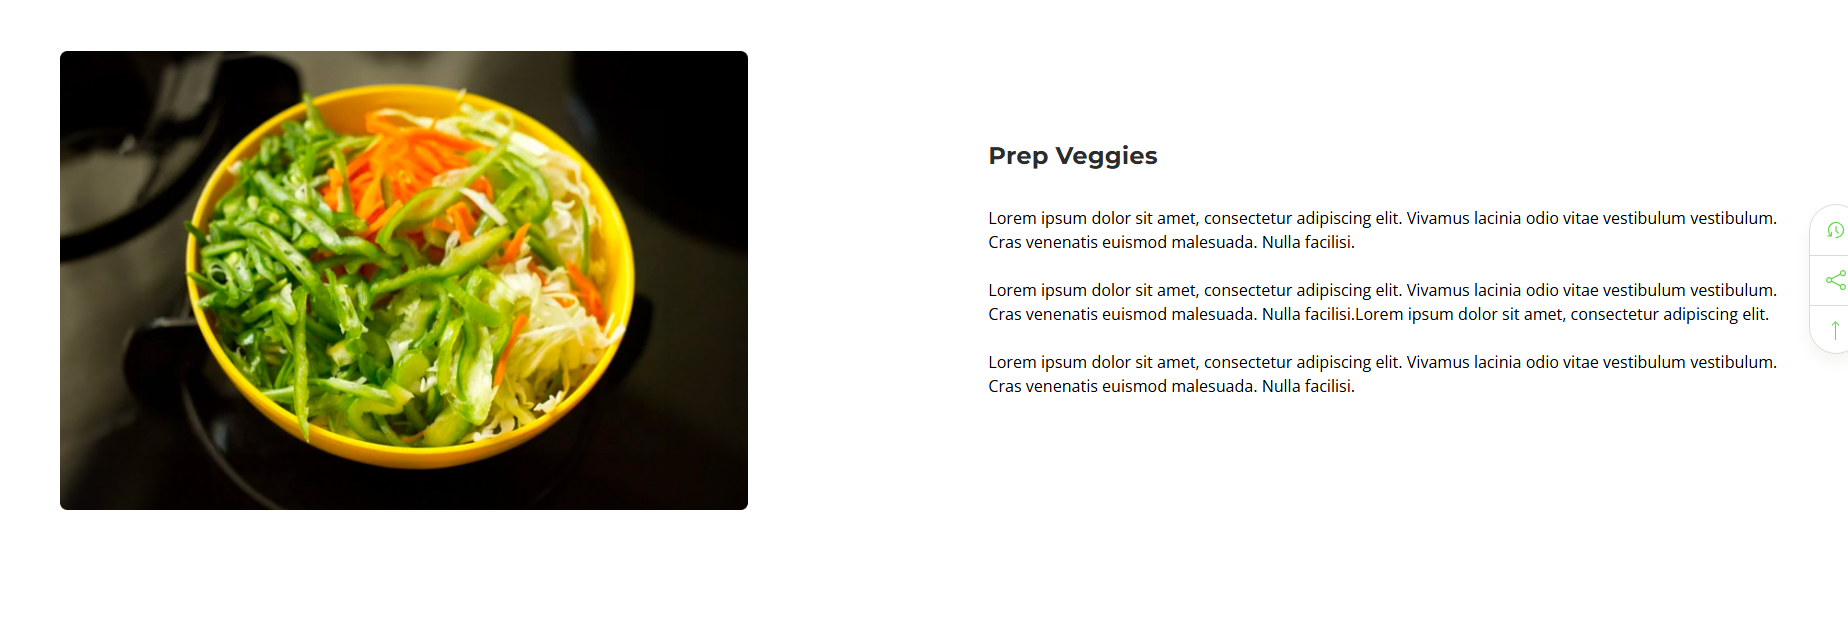
This section is used for a specific product, and its steps and code are given below.

Then after choose your product and redirect to product page
Then move to Design
Then dregen and drop wigest on HTML
Then add you HTML code
HTML CODE :
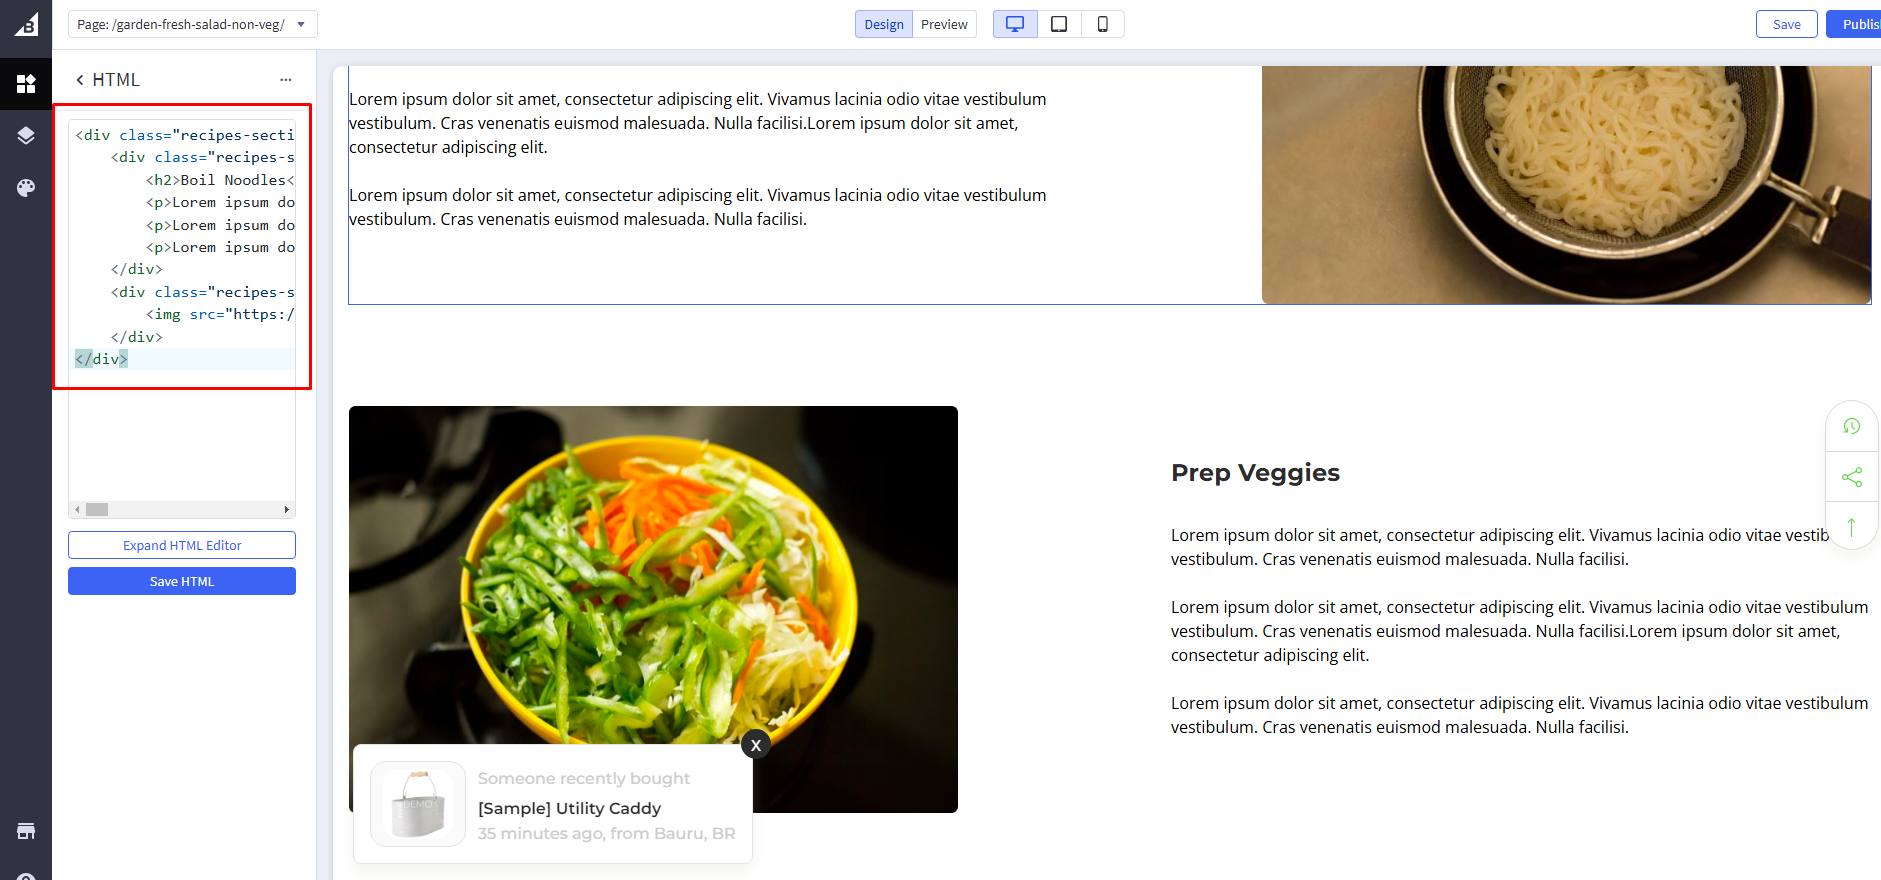
And click on save HTML button and publish your theme.
Add a second section so please follow the step of first section
Just differnt a code IN HTML
HTML CODE :
Image add :
First, you need to head over to "Storefront > Image Manager" and then upload your images here.
Then once uploaded, click "View Full Size" to open the image in a new tab and copy the image name to that image URL.
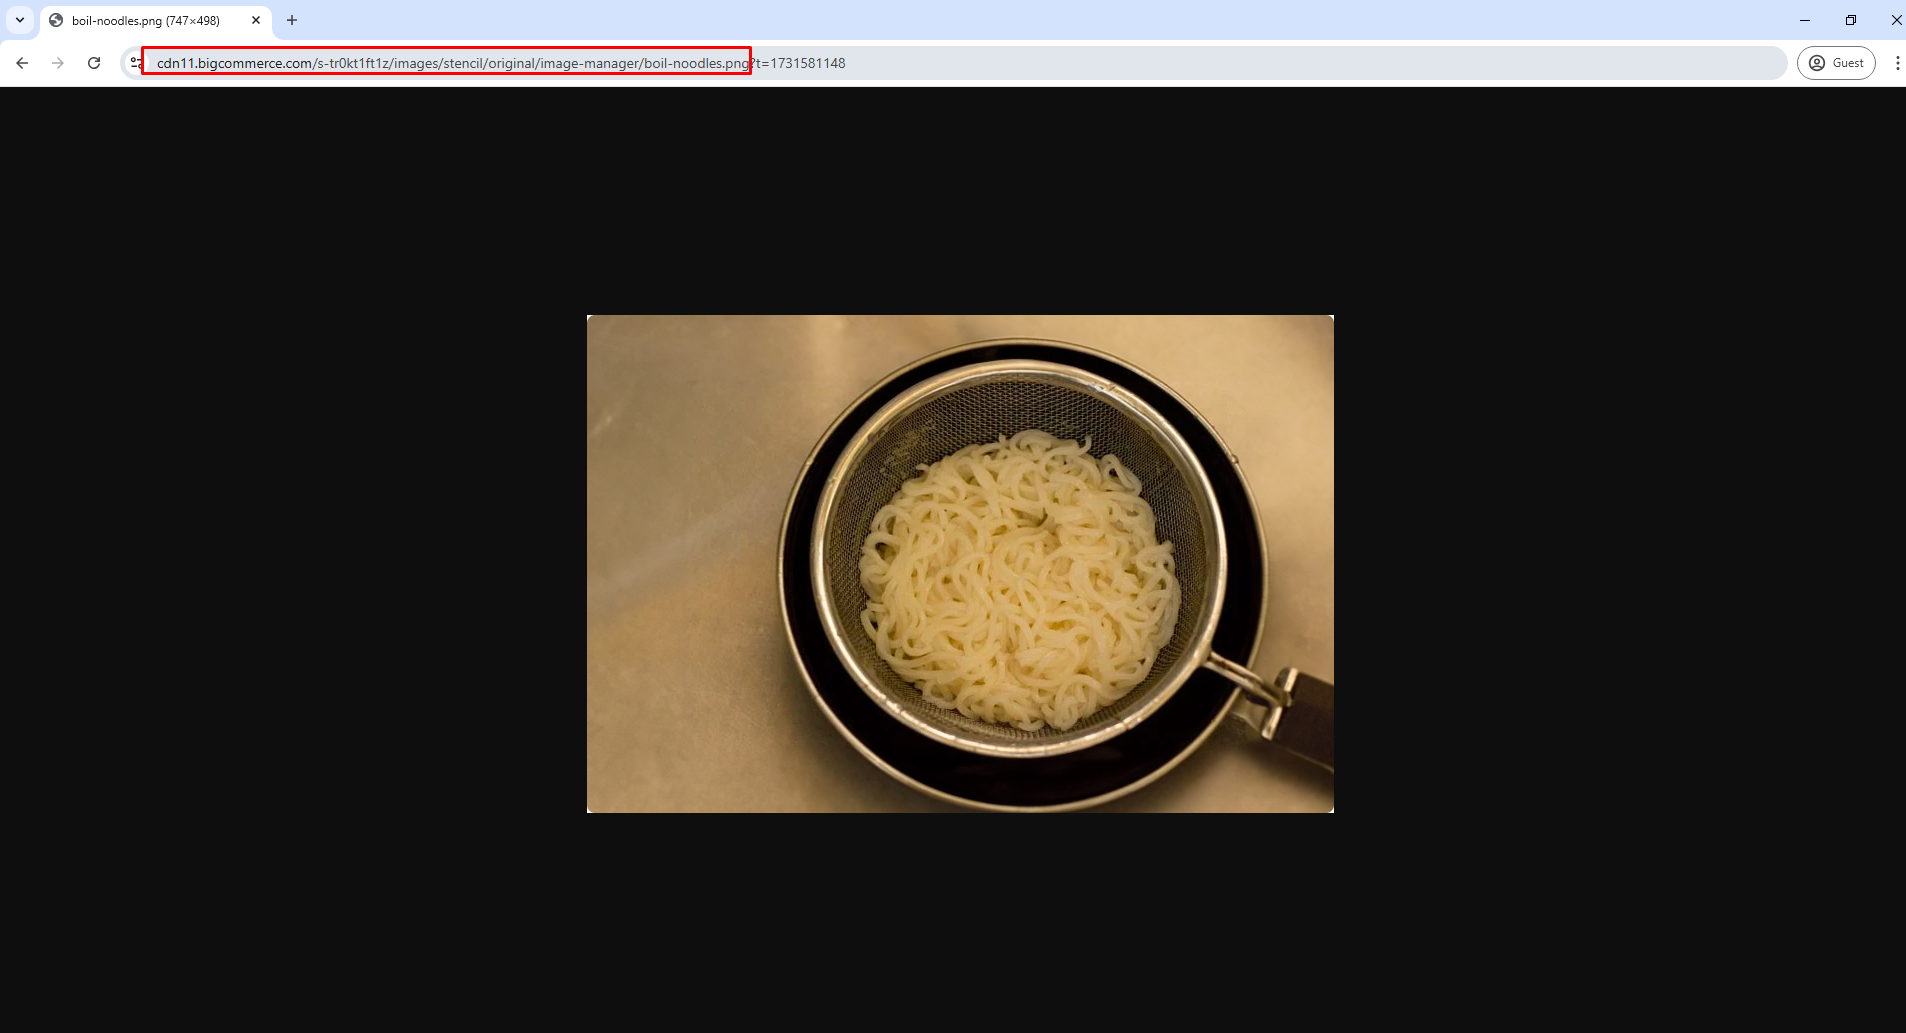
NOTE : Do not change HTML code structure only for update content and image
NOTE FOR RECIPE PAGE : The custom category used inside the header is specifically for the recipes page, so whatever category name you choose, you will need to add it to the custom category in the header.
Recommended Image Dimension
Carousel Image
Hero Carousel Image Desktop: 1920px X 644px
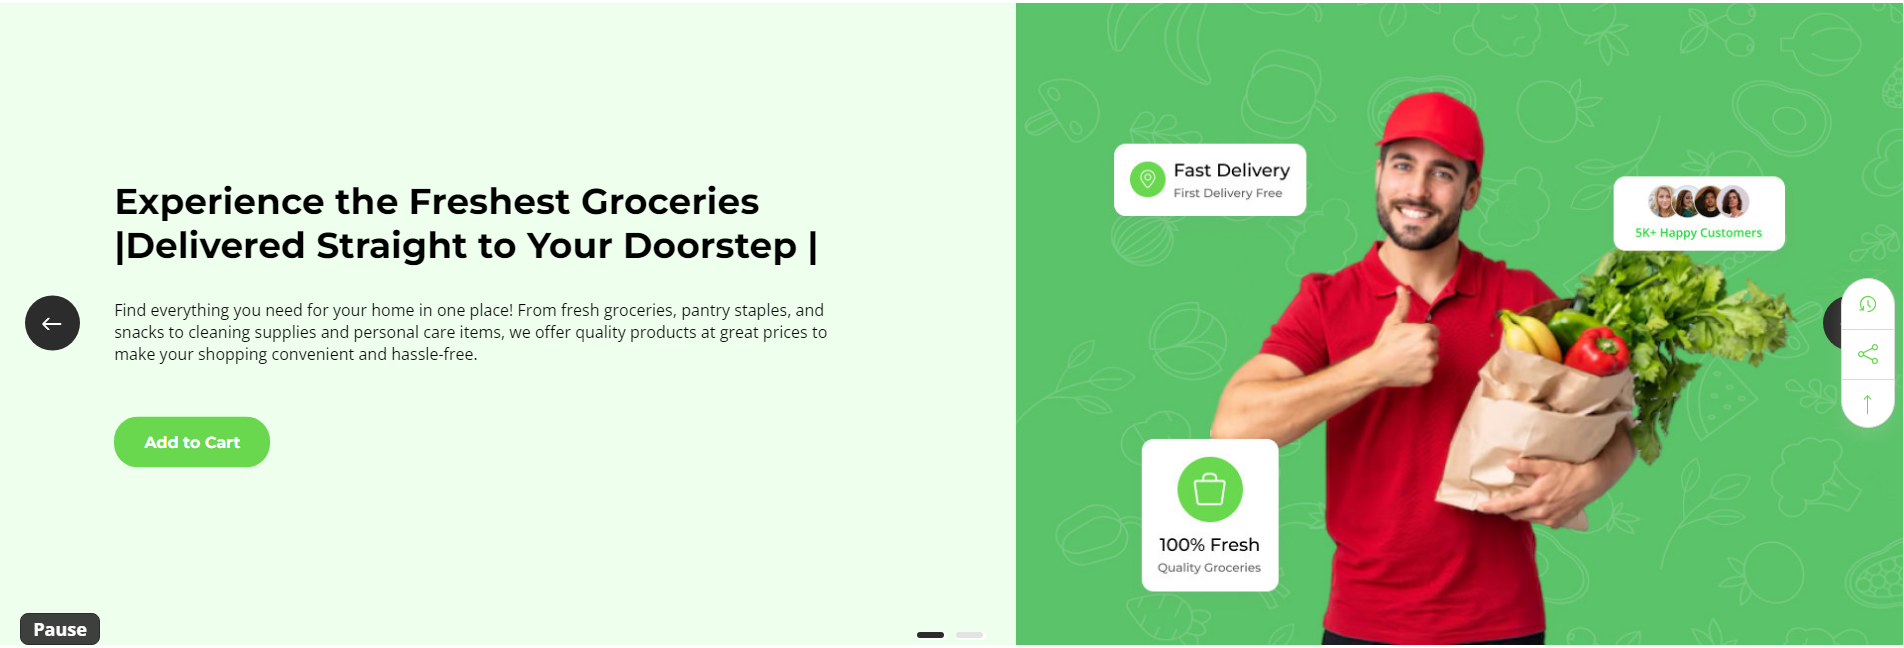
Hero Carousel Image Mobile: 640px X 449px
Trending categories Image
Category Image : 640px X 376px
Today’s deal section Image
Image : 736px X 407px
Product tab Image
Image : 297px X 645px
Testimonial Image
First Image : 620px X 599px
Second Image : 75px X 75px

About Image
Image : 702px X 625px