Kyro BigCommerce Theme Manual
The Kyro theme family is designed to bring style, performance, and flexibility together for modern eCommerce stores. Each theme variant is tailored to its niche industry, yet all are built on the same foundation of speed, usability, and engaging design. With responsive layouts, advanced navigation, and conversion-focused features, Kyro themes make online shopping smooth and enjoyable for customers across all devices.
Kyro Skin Care, Kyro Fashion & Jewelry, and Kyro Furniture – each variant offers a unique look and feel that reflects its industry while sharing powerful built-in tools. Features like promotional homepage sliders, newsletter popups, product quick view, wishlist support, and blog-ready layouts come standard across all Kyro themes. Combined with elegant typography and thoughtfully balanced color schemes, the Kyro series ensures that brands can deliver a seamless and professional online experience that drives engagement and sales.
Theme Settings & Customization
Features of Kyro theme
- Share Icon Popup
- Sticky Add to Cart Popup
- Newsletter Popup Modal
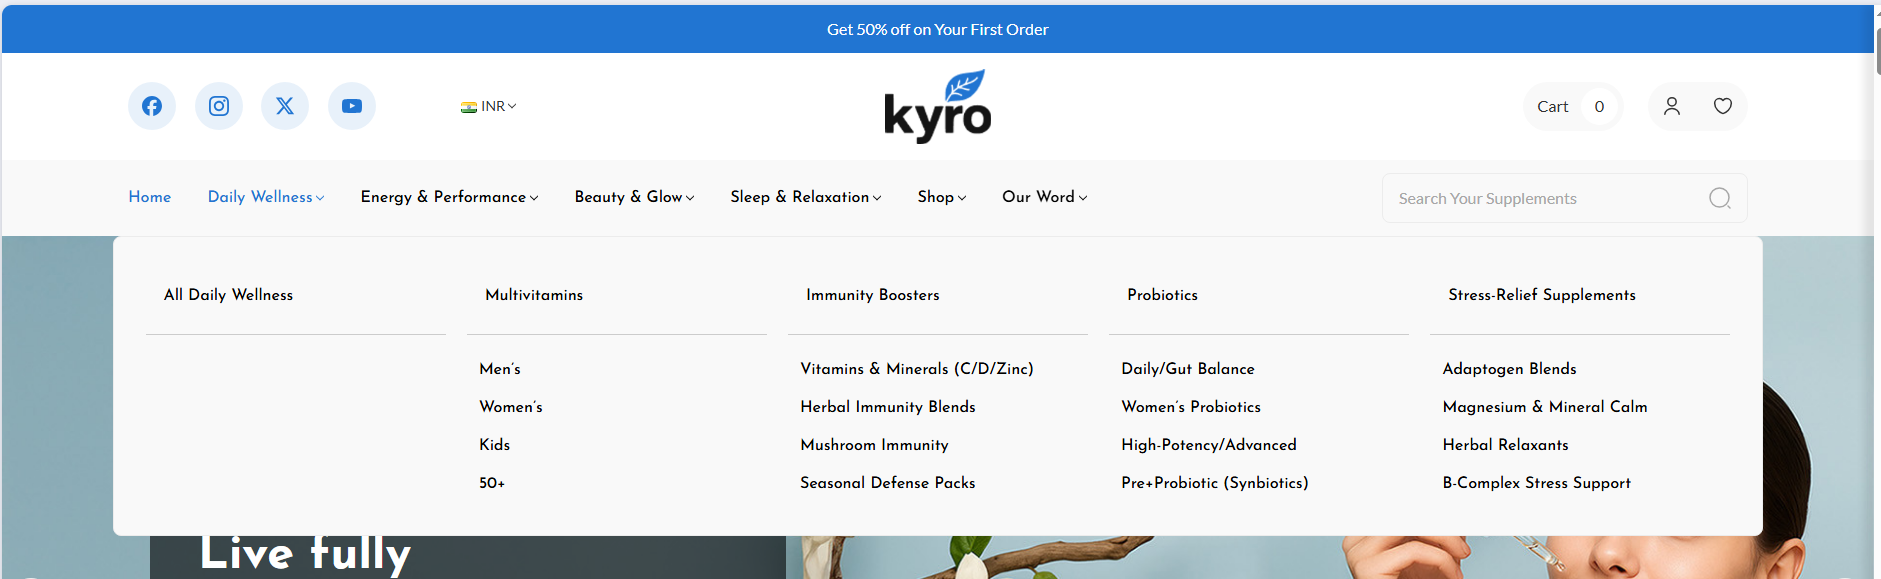
- Mega menu with image support
- Testimonial / Review Section on Homepage
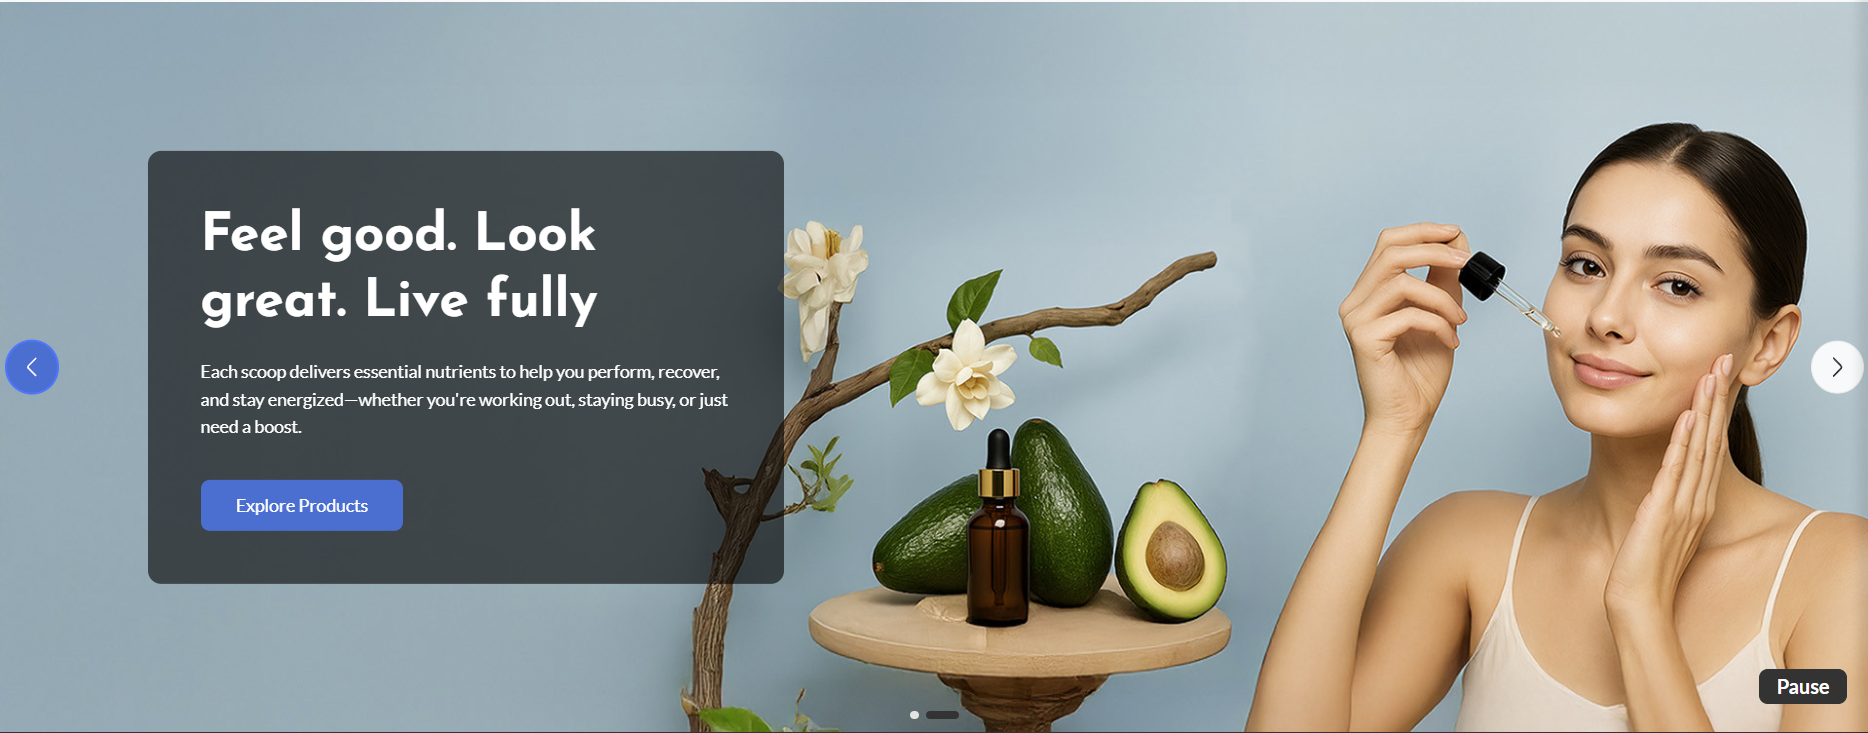
- Homepage promotional banners
- Sticky Compare popup
- Custom category product section on homepage
Header & Footer
In your control panel, go to Storefront > My Themes, and click the blue "Customize" button to launch Theme Editor.
In the left hand column of the Theme Editor, click the panel labelled 'Header & Footer'.
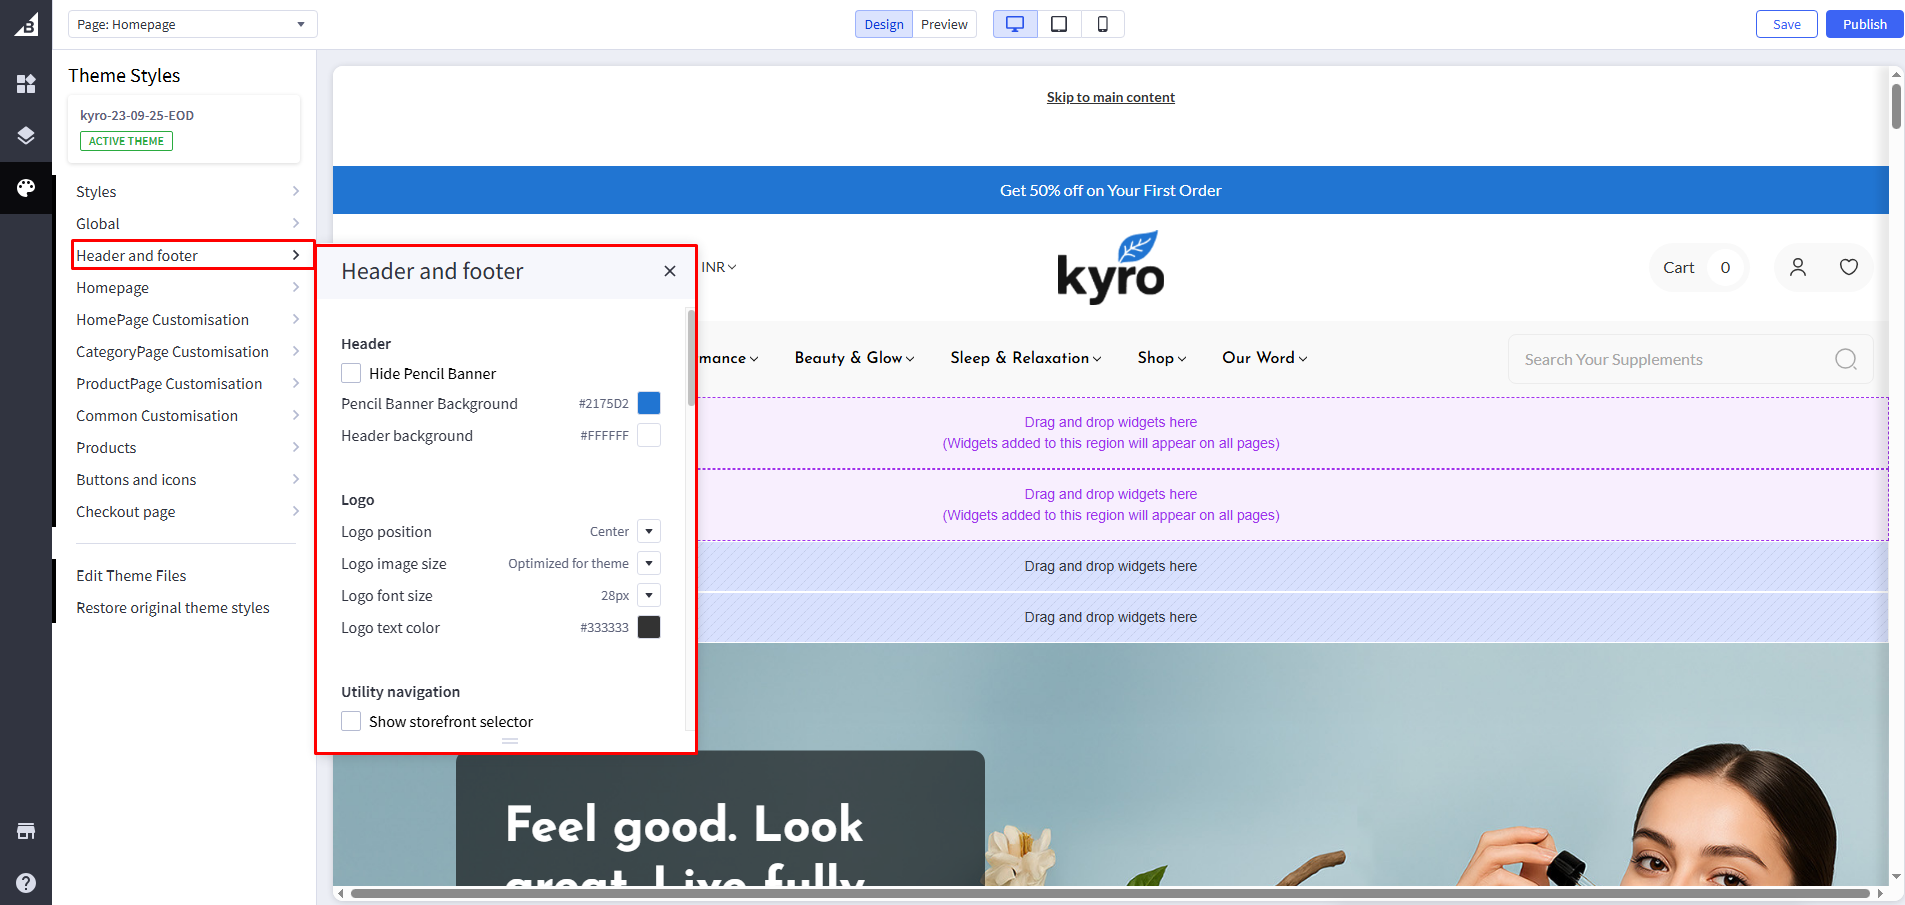
Pencil Banner
Hide Pencil Banner: If checked, it will hide the pencil banner, i.e. Get 50% Off on Your First Order
Pencil Banner Background color: Add color code in Pencil Banner background

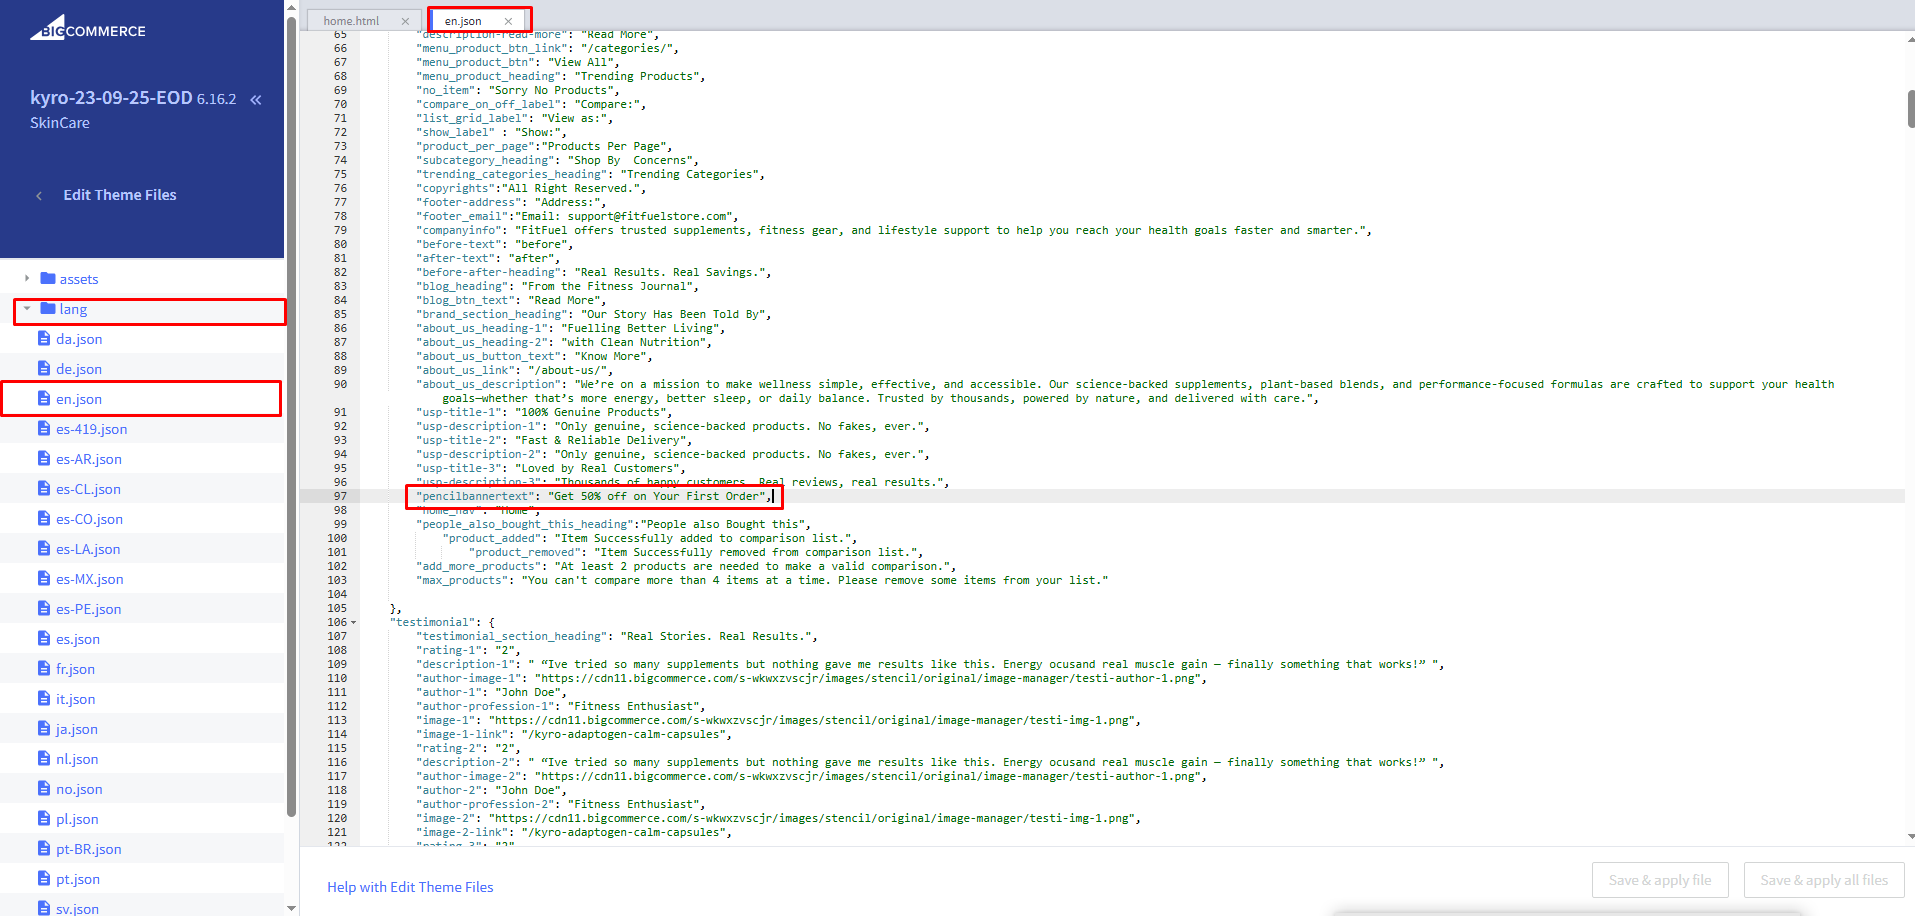
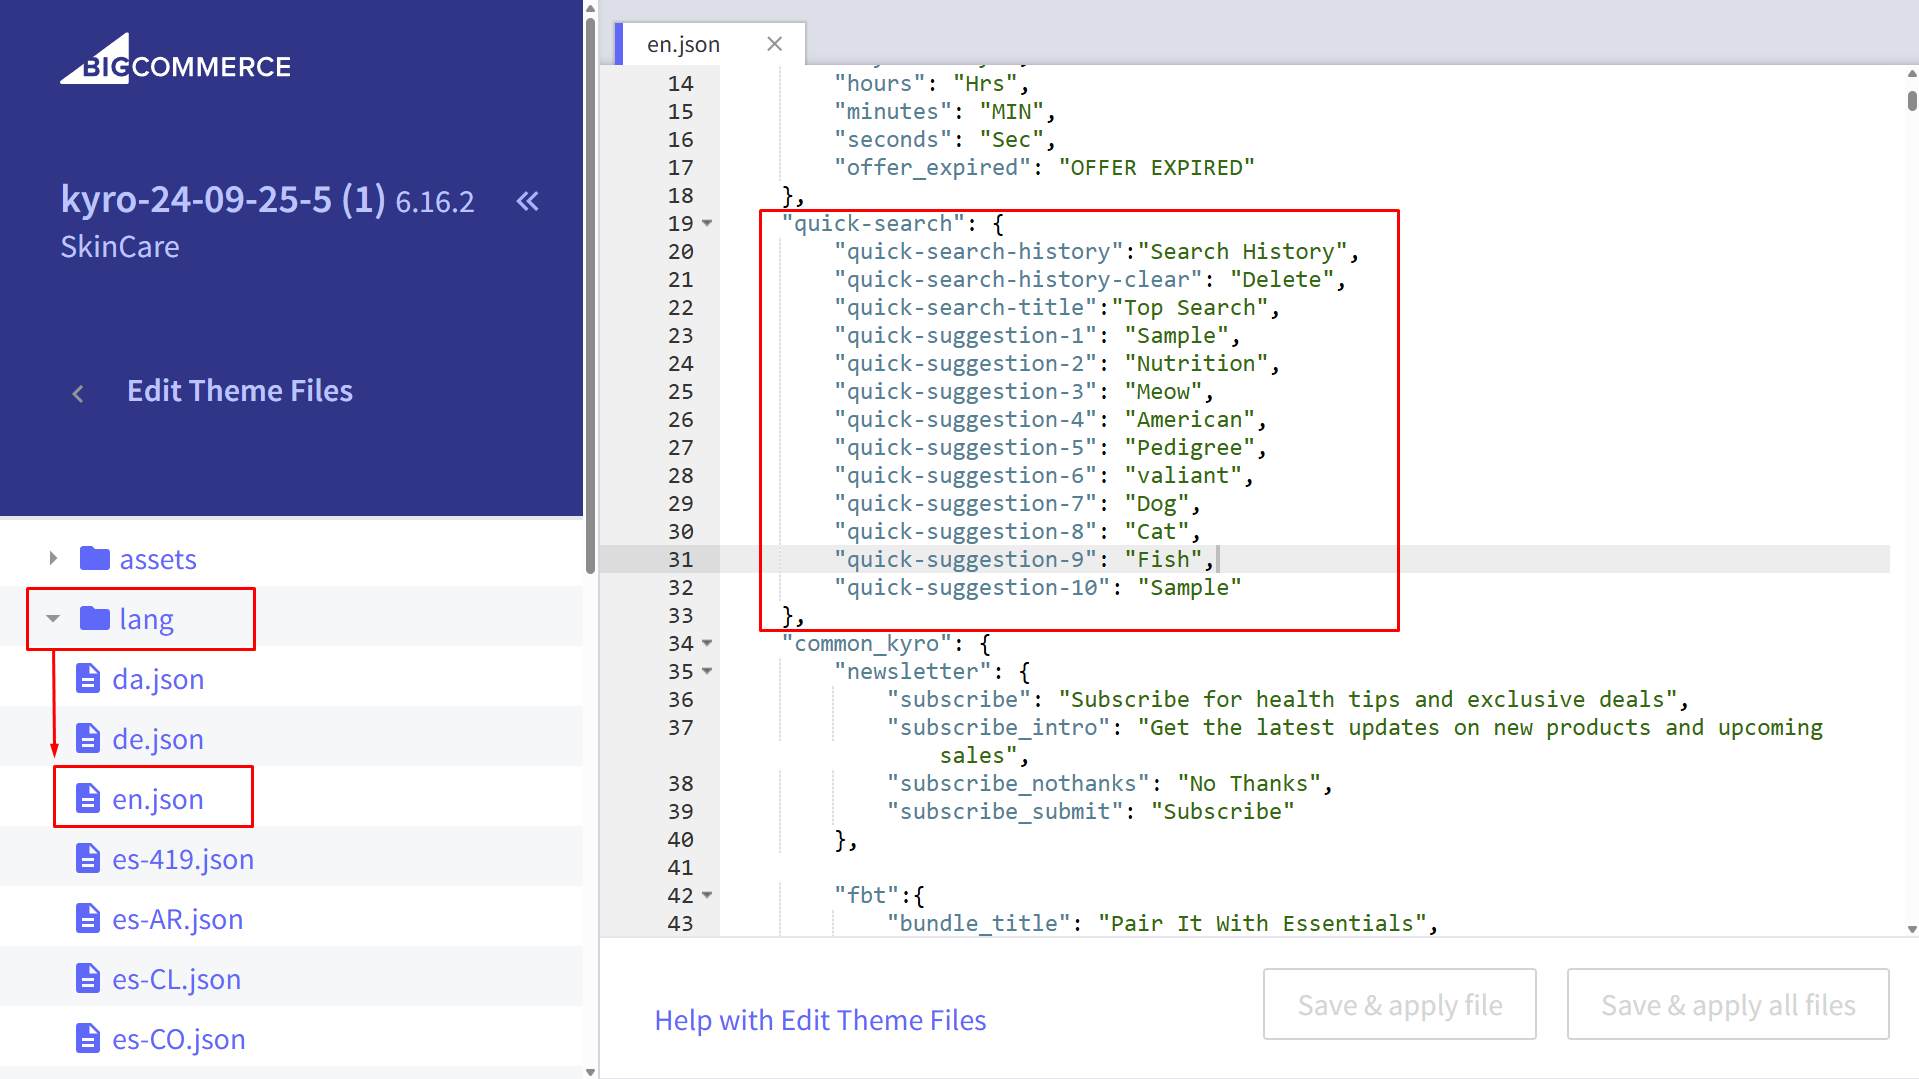
Manage Pencil Banner text: For text change Go to channels > Themes > Advanced > Edit Theme Files > lang > en.json and update text in pencilbannertext
Header Logo
Logo position: Aligns the logo left, center or right. Applicable for both image and header content.
Logo Center View:
Kyro SkinCare
Kyro Fashion
Kyro Furniture
Logo Left View:
Kyro SkinCare
Kyro Fashion
Kyro Furniture
Logo Right View:
Kyro SkinCare
Kyro Fashion
Kyro Furniture
Header
Header Background Color: Set background color. It will appear behind the logo.
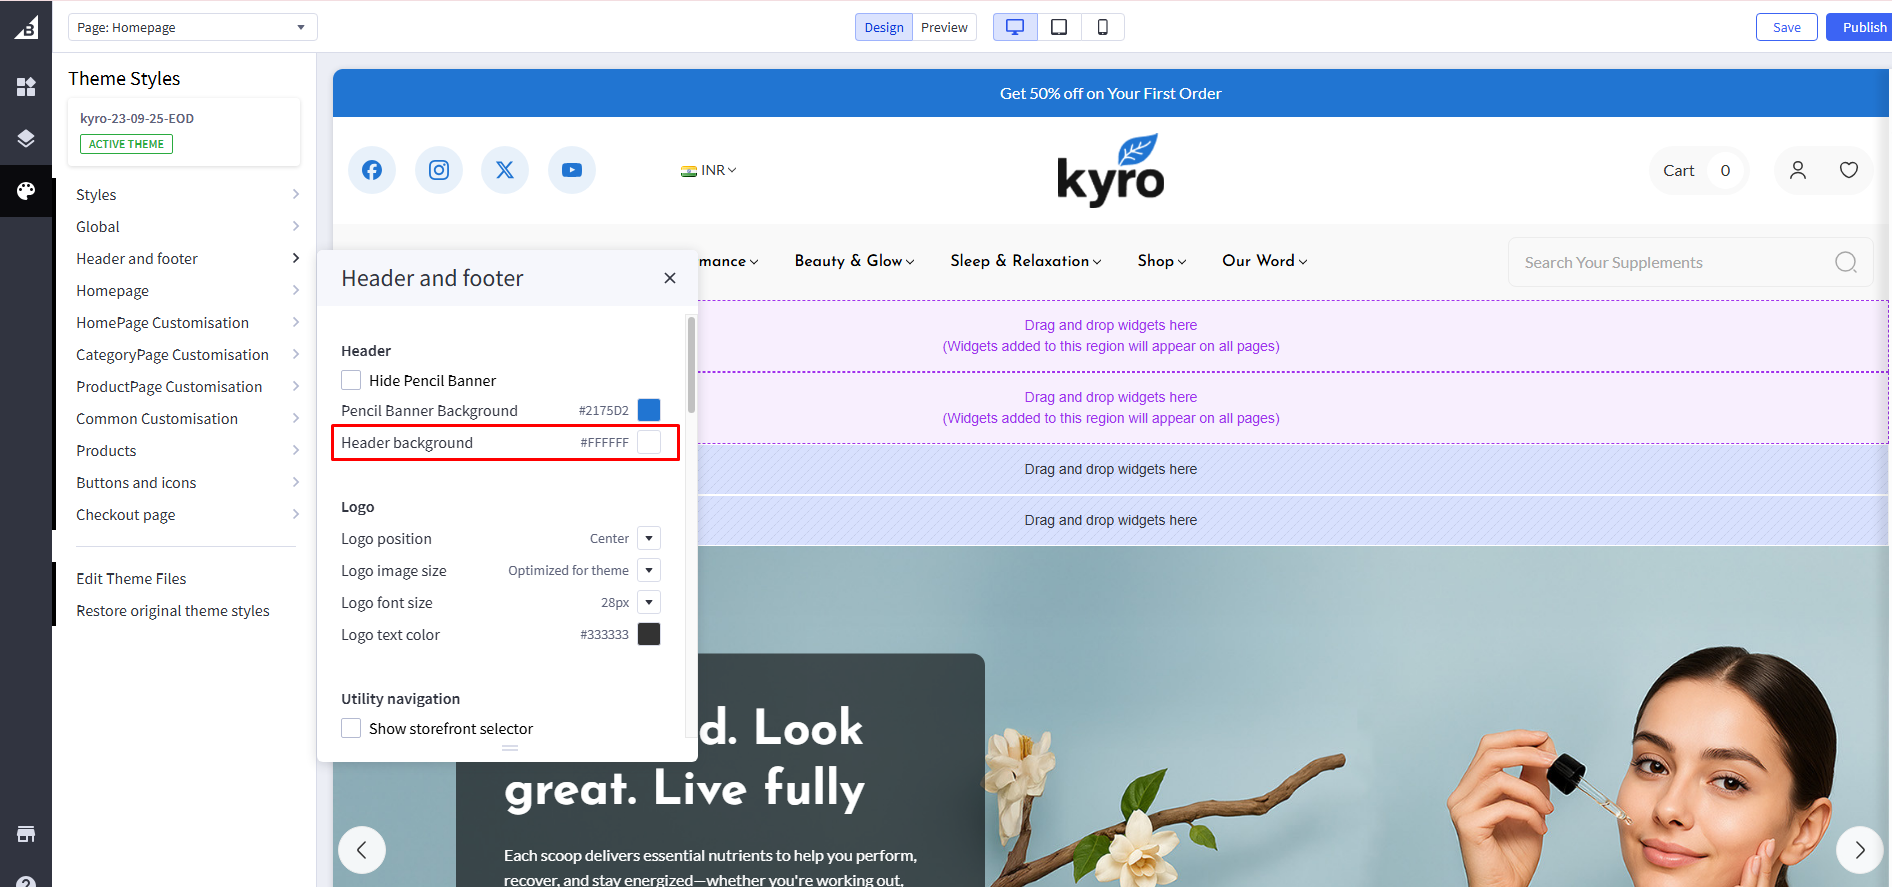
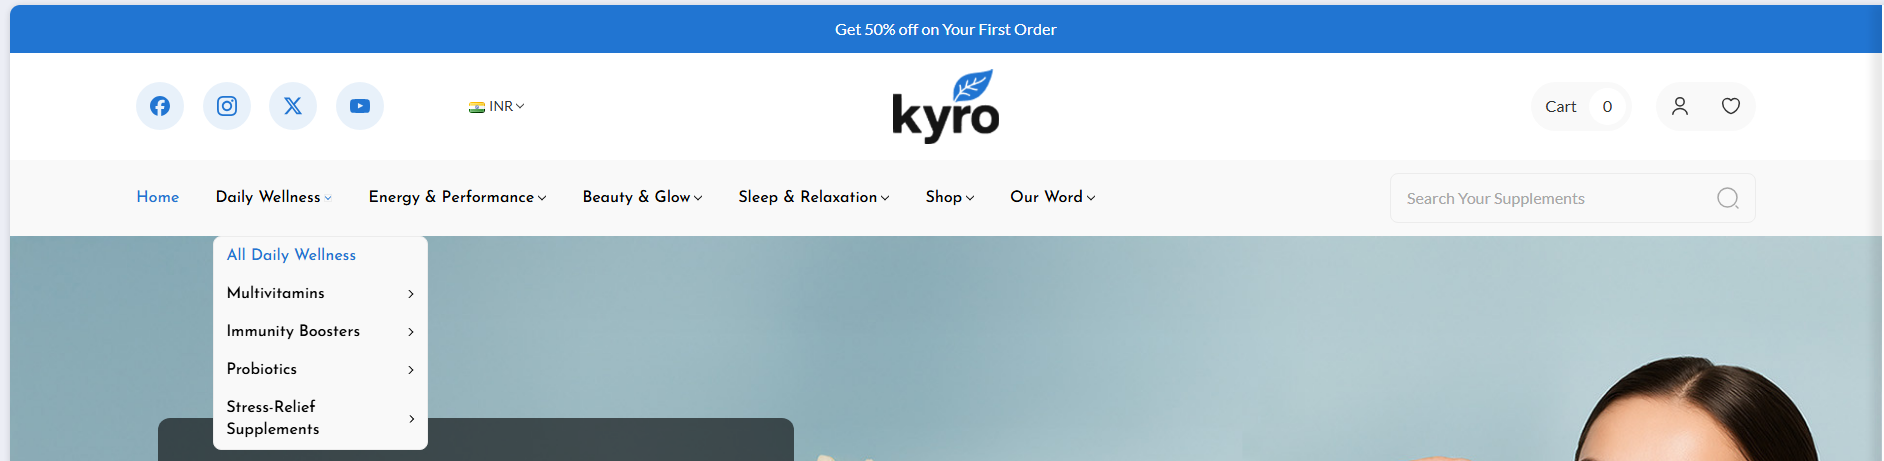
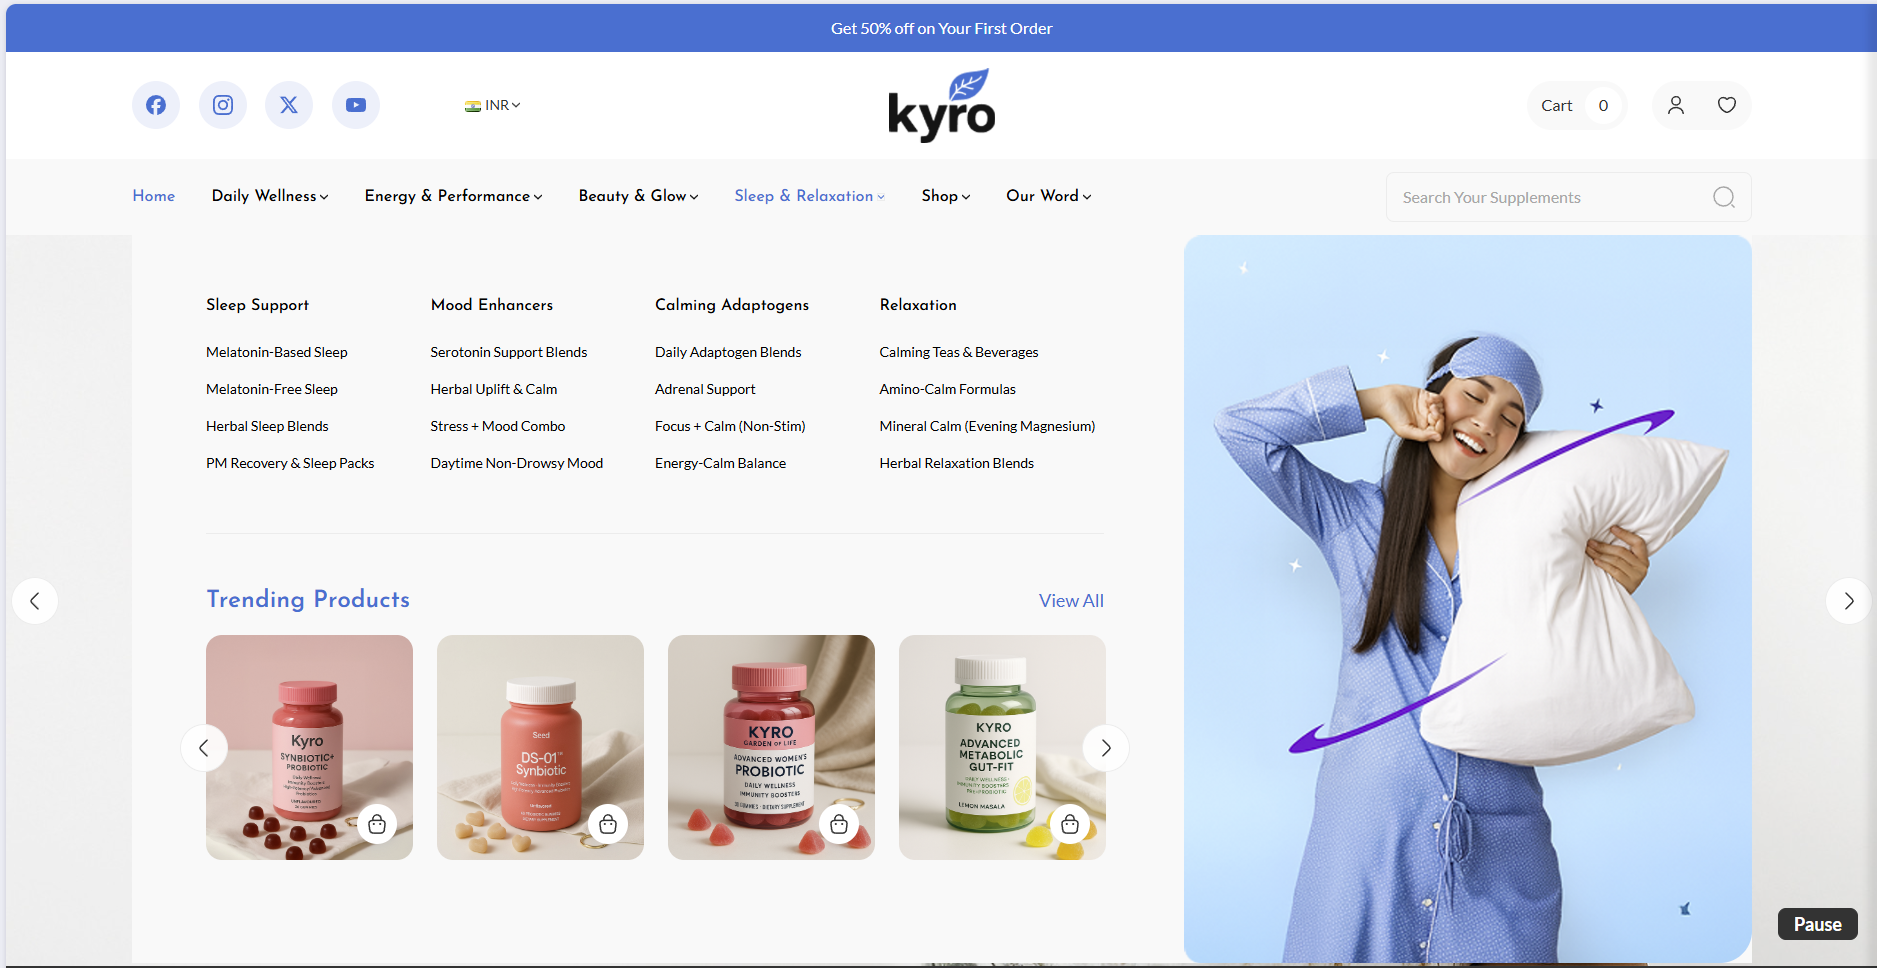
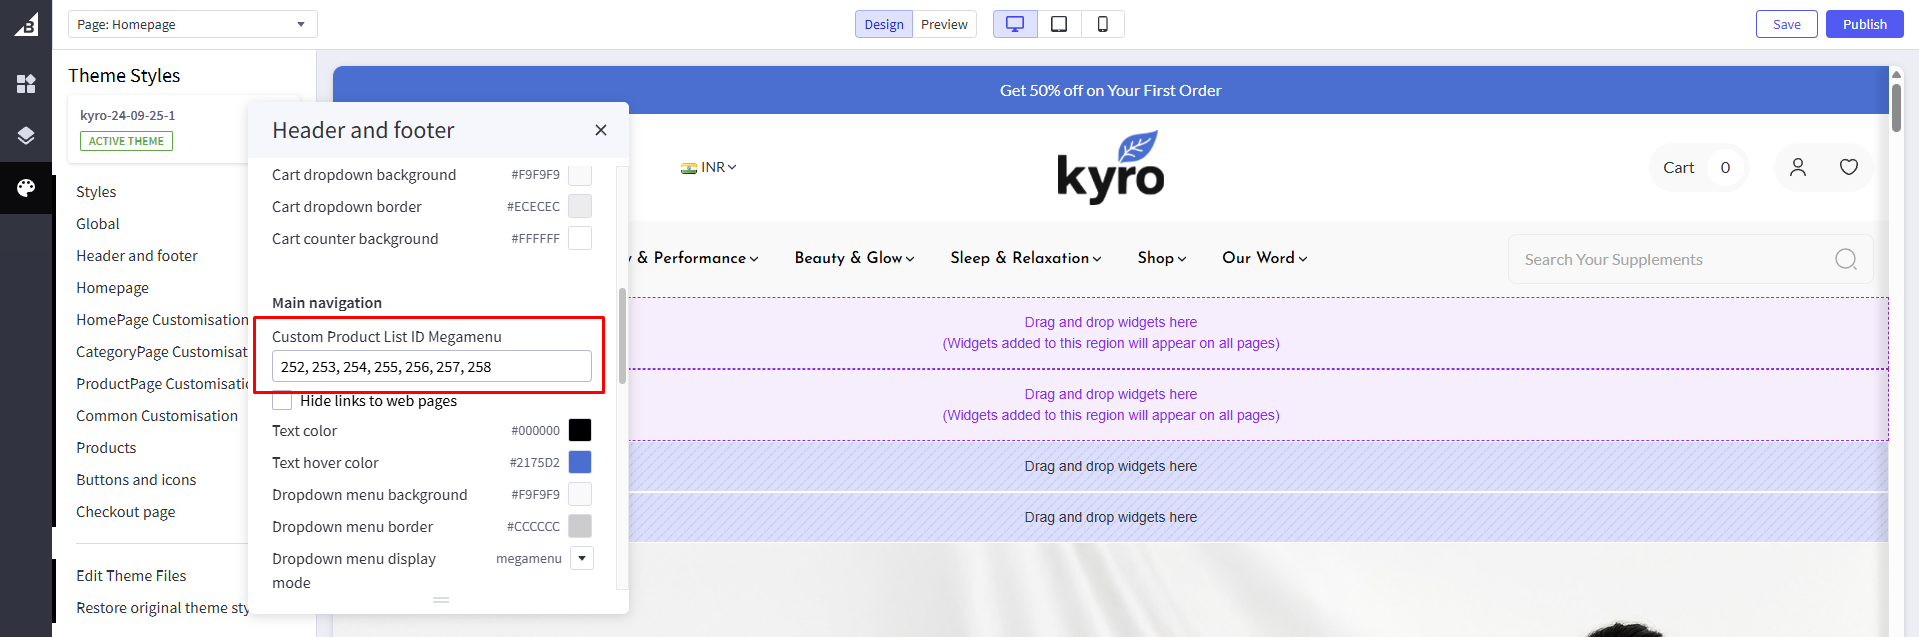
Dropdown menu display mode: Change Dropdown menu display Mode to Simple , Alternate and megamenu.
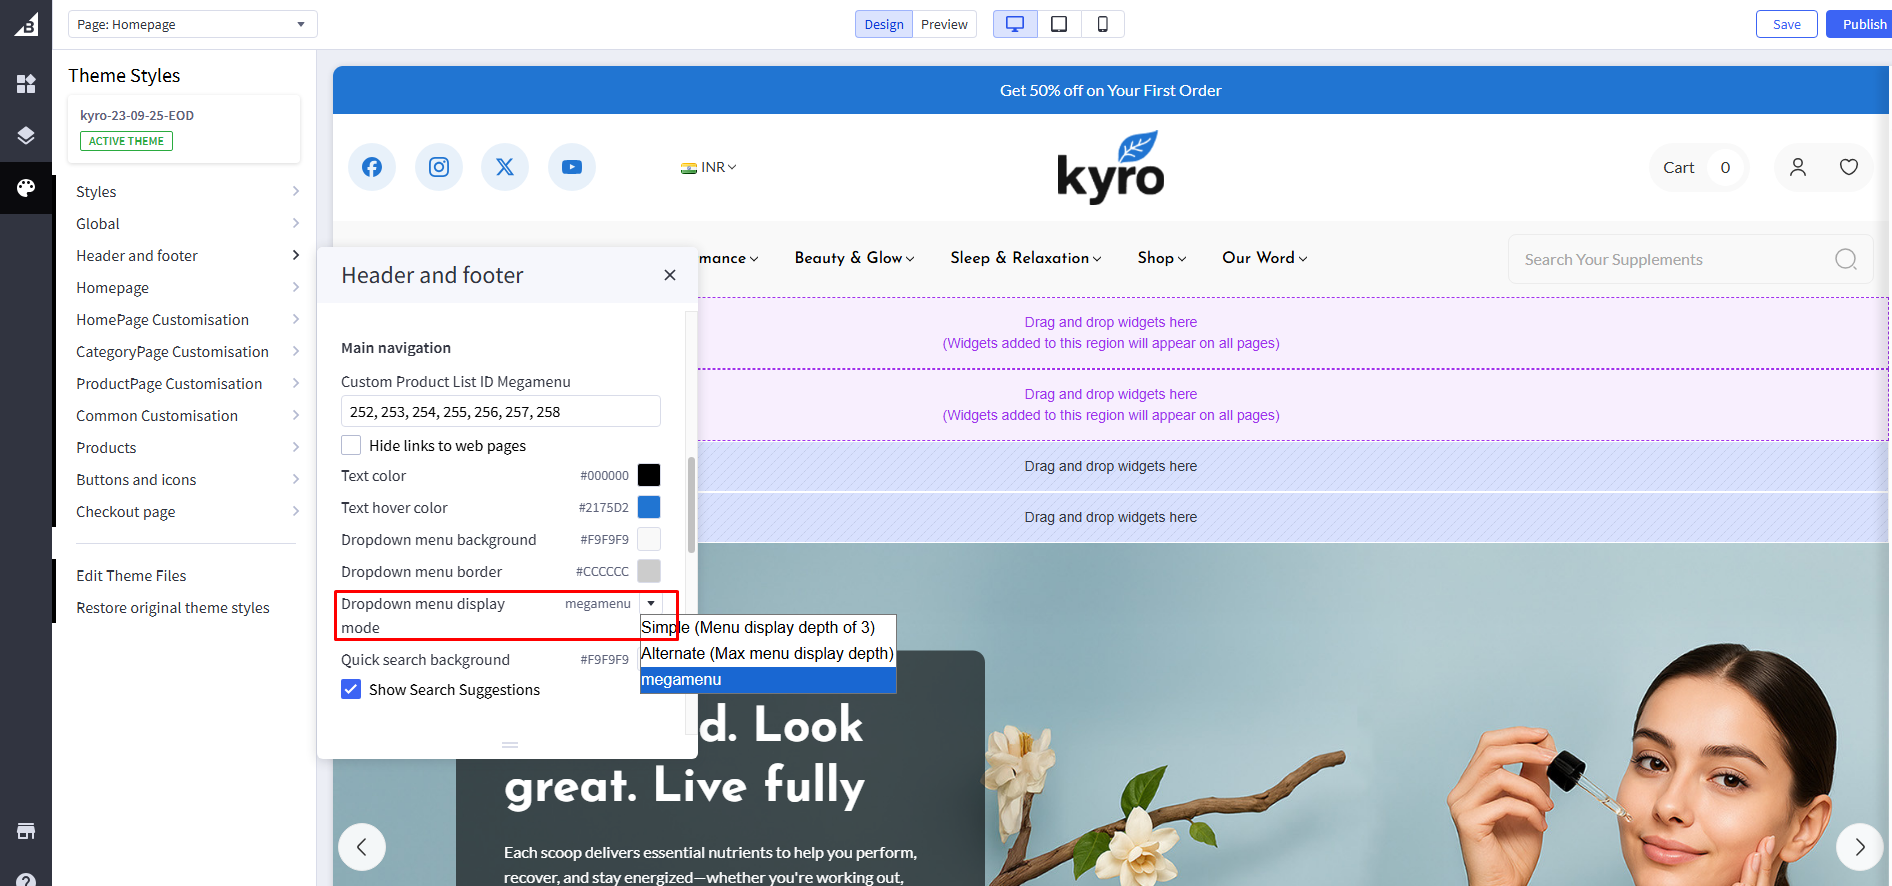
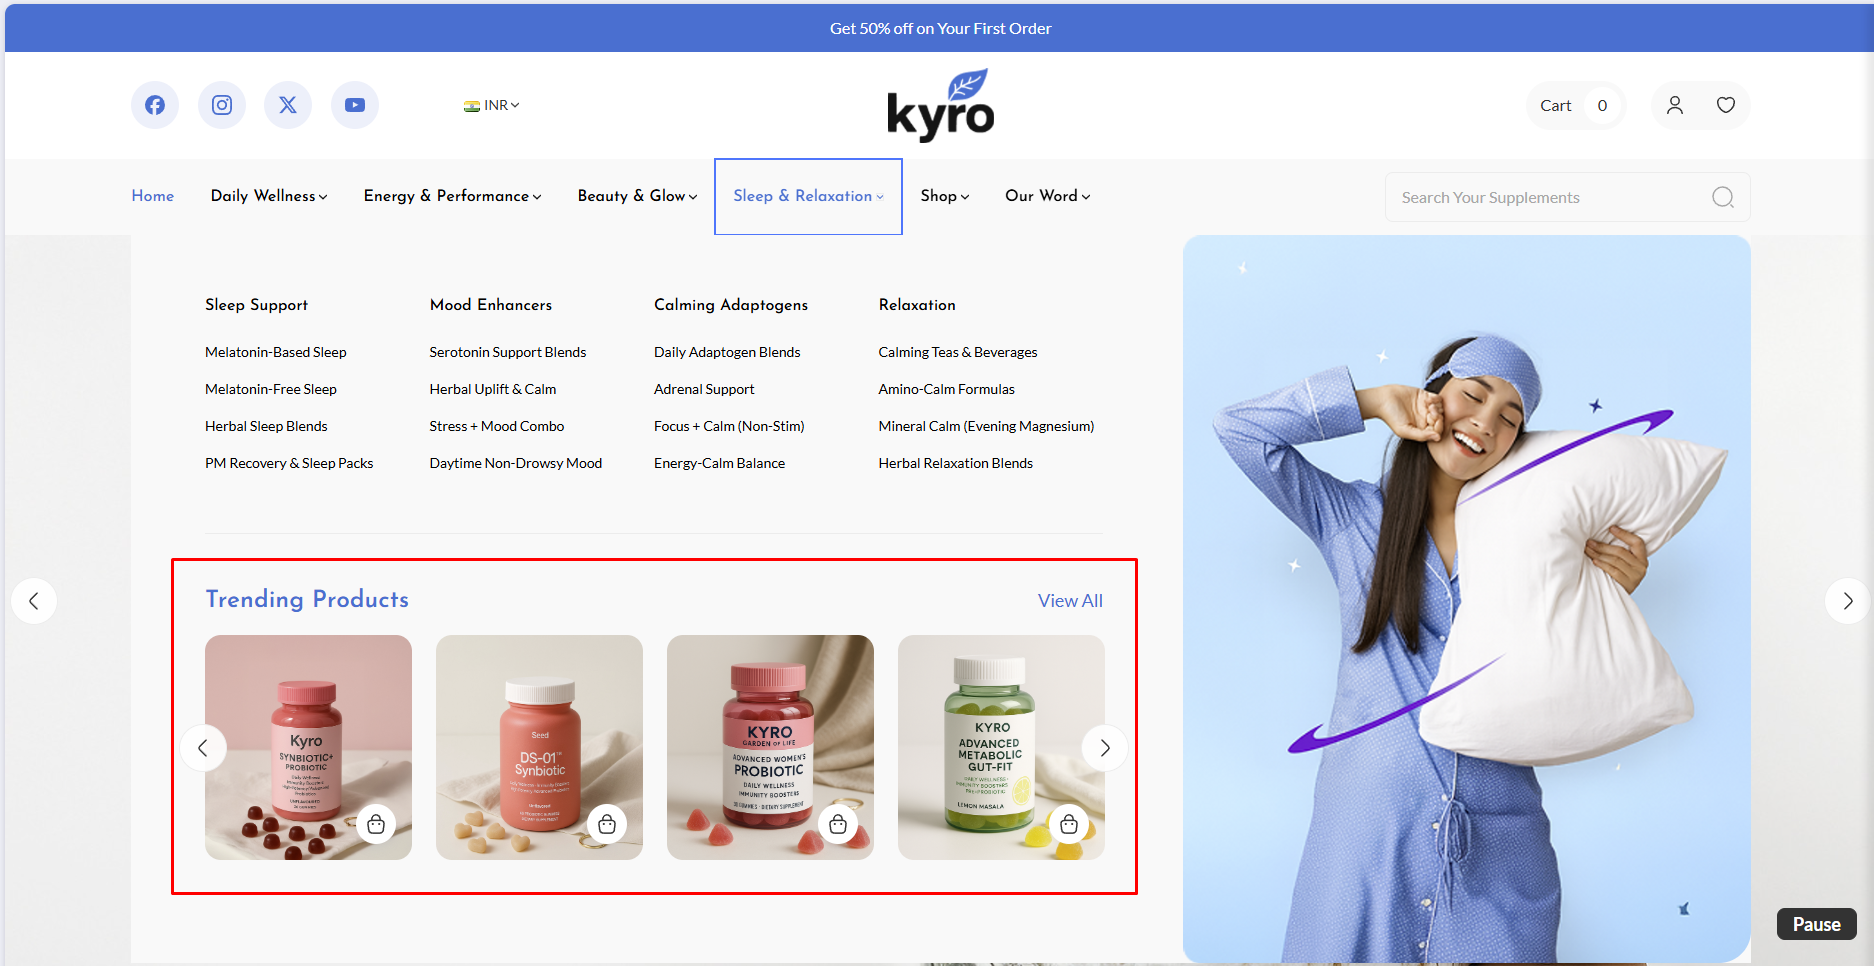
Custom Product List ID Megamenu: Add Product IDs to showcase a products as Trending Products in megamenu, separated by a comma(,)
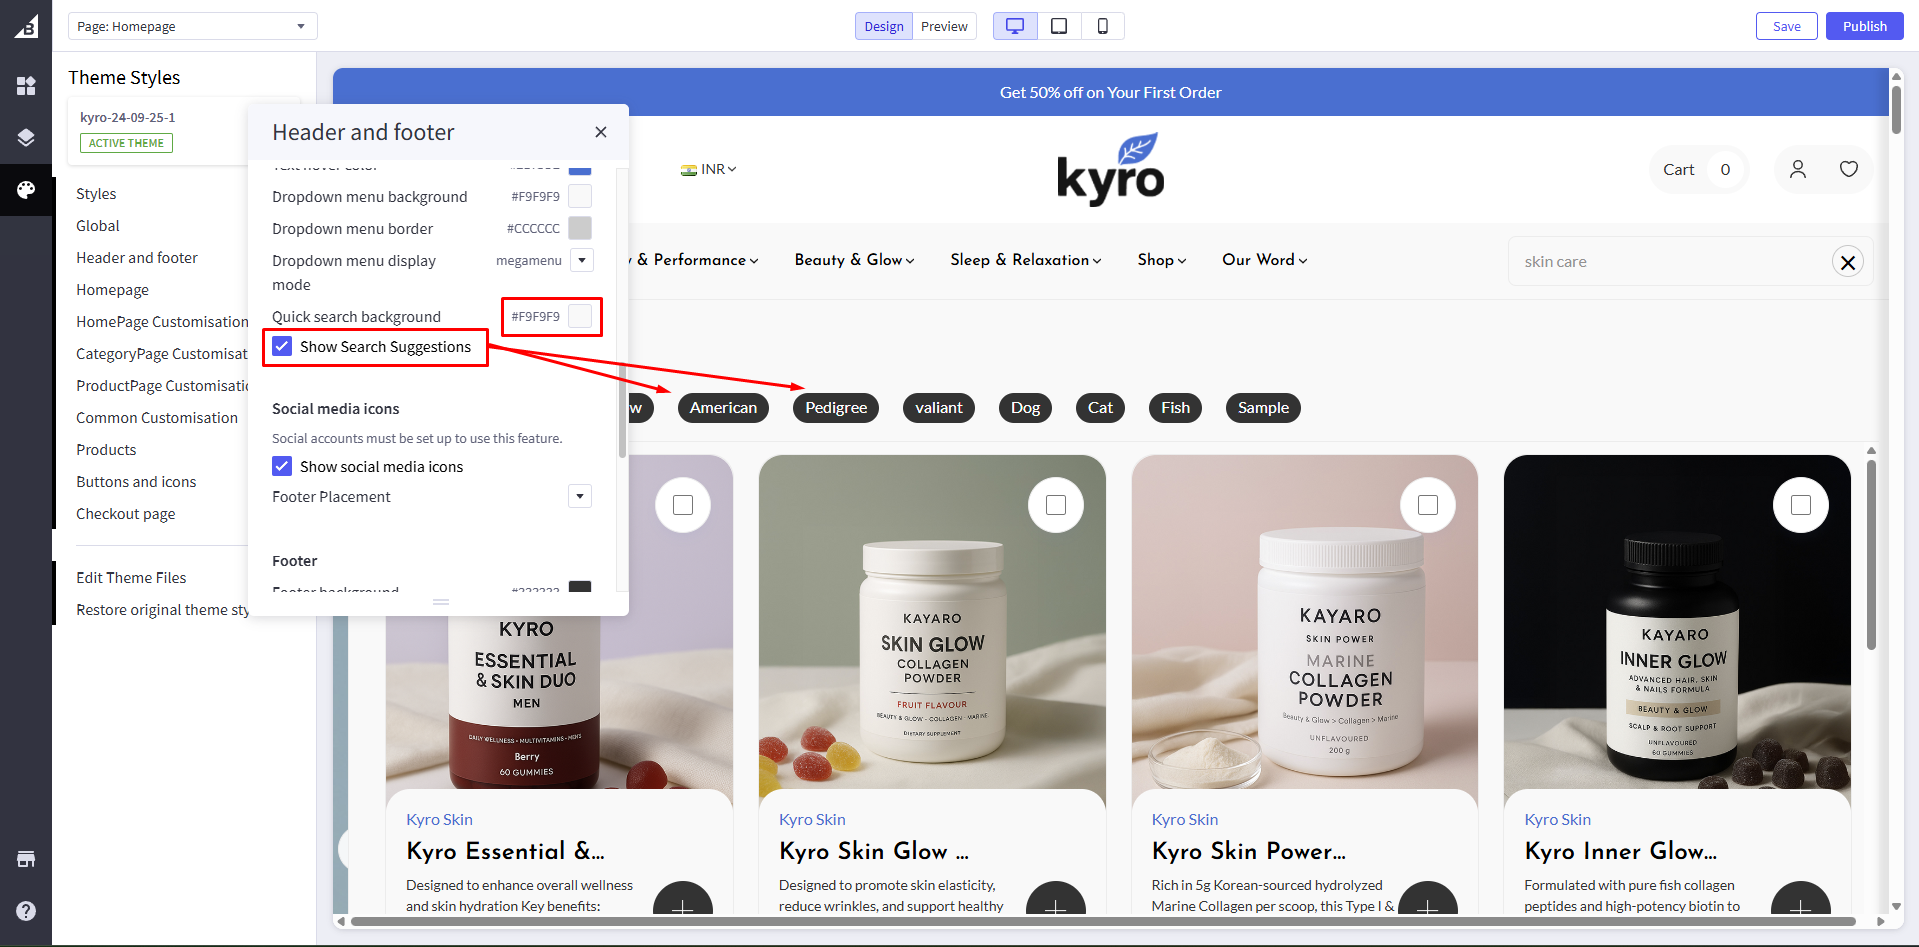
Search Suggestion
As users type in the search bar, real-time suggestions appear instantly, showing matching products, categories, and popular keywords. This enhances the user experience by helping customers find what they’re looking for faster and boosting product discovery
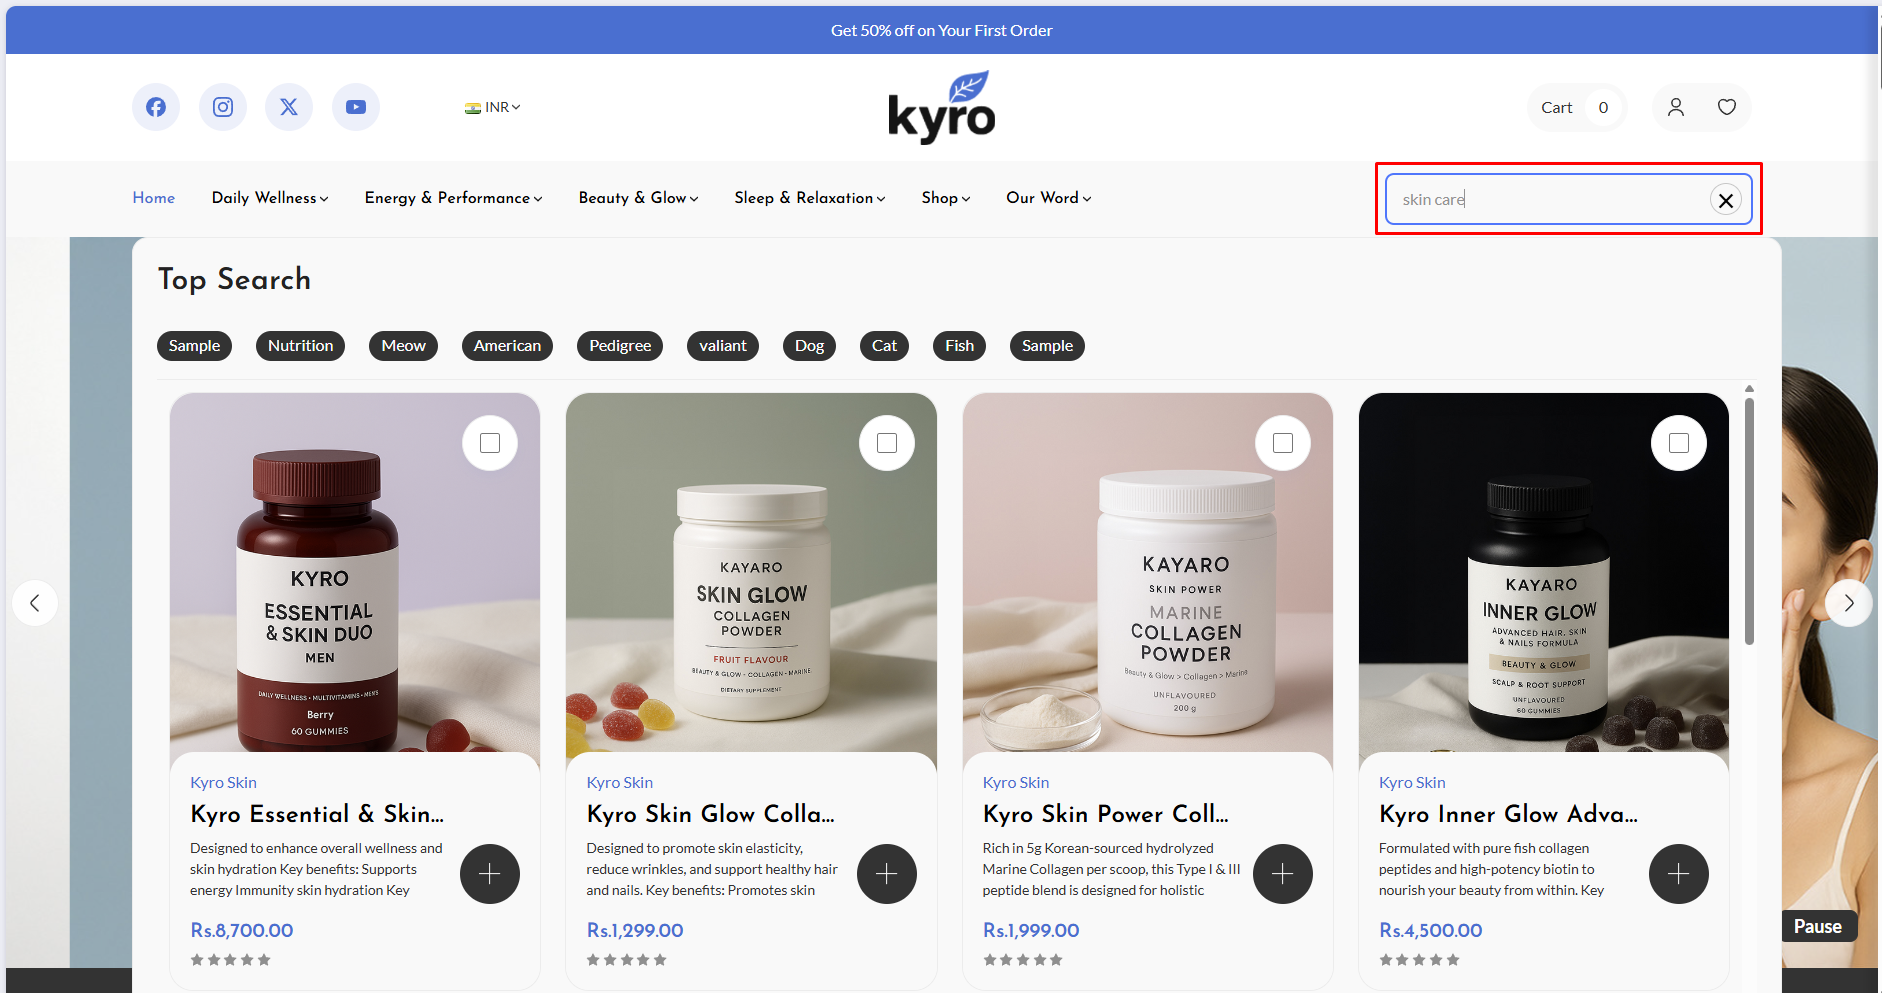
Show Search suggestions: If unchecked, it will hide the search suggestions.
Quick search Background: Add color code in search result background
Manage suggestion text: For text change, go to channels > Themes > Advanced > Edit Theme Files > lang > en.json and update text in quick-suggestion-1 to quick-suggestion-10
Footer
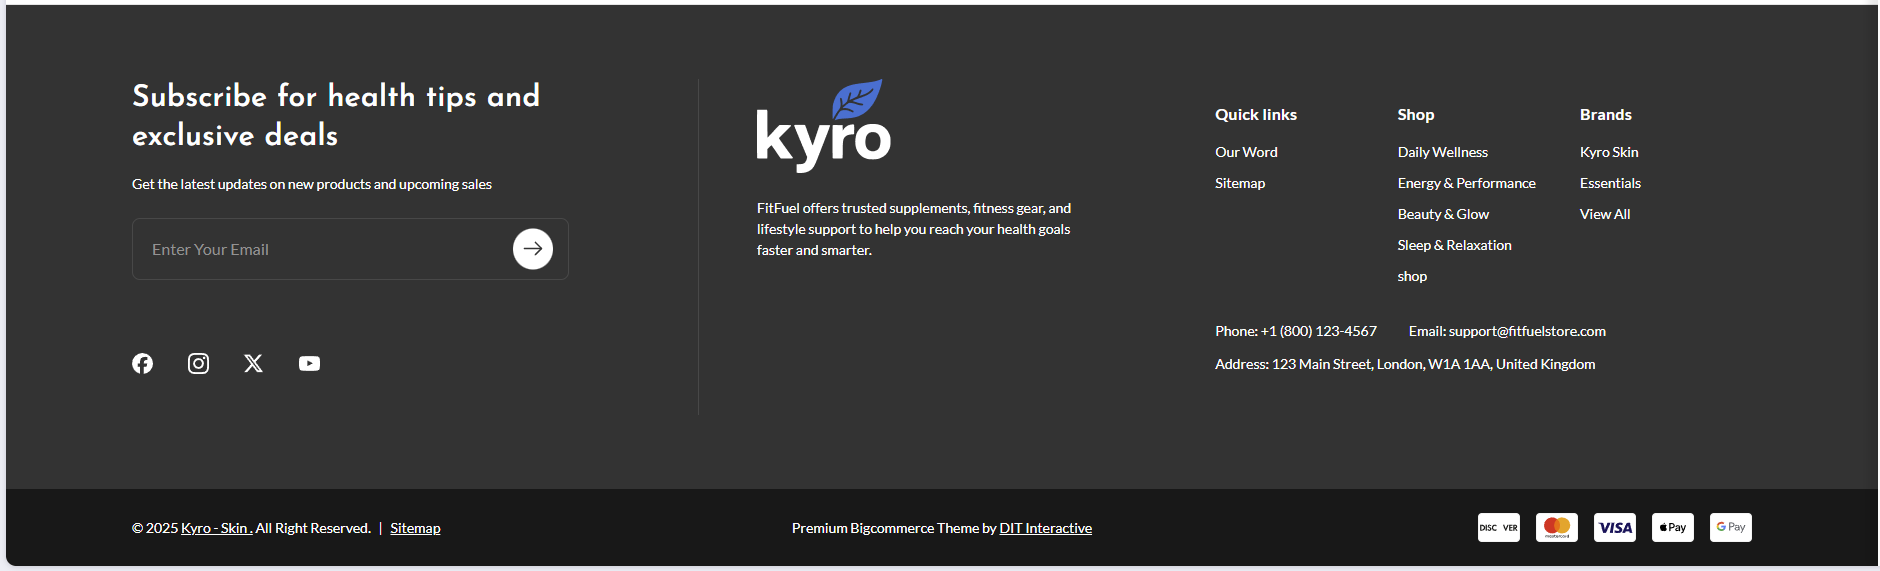
Kyro SkinCare Footer
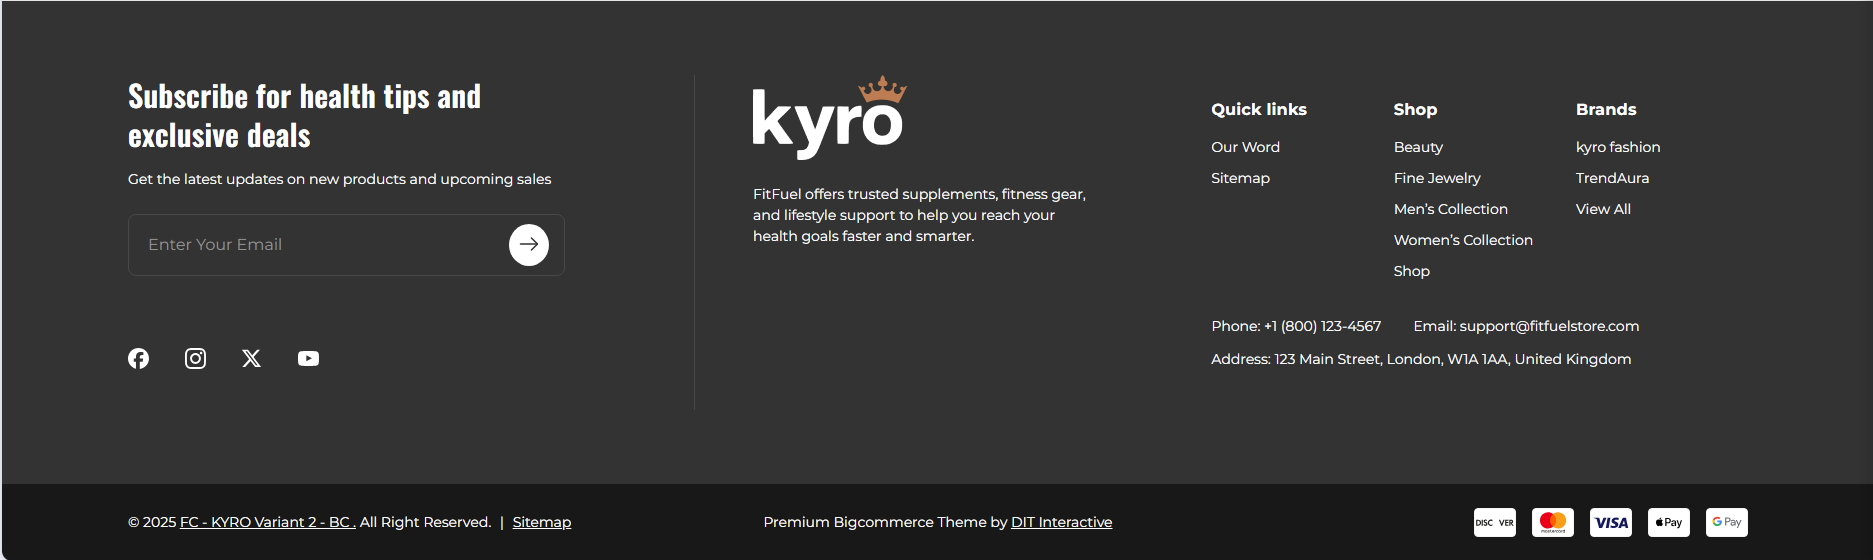
Kyro Fashion Footer
Footer Background Color: Add color code in Footer background.
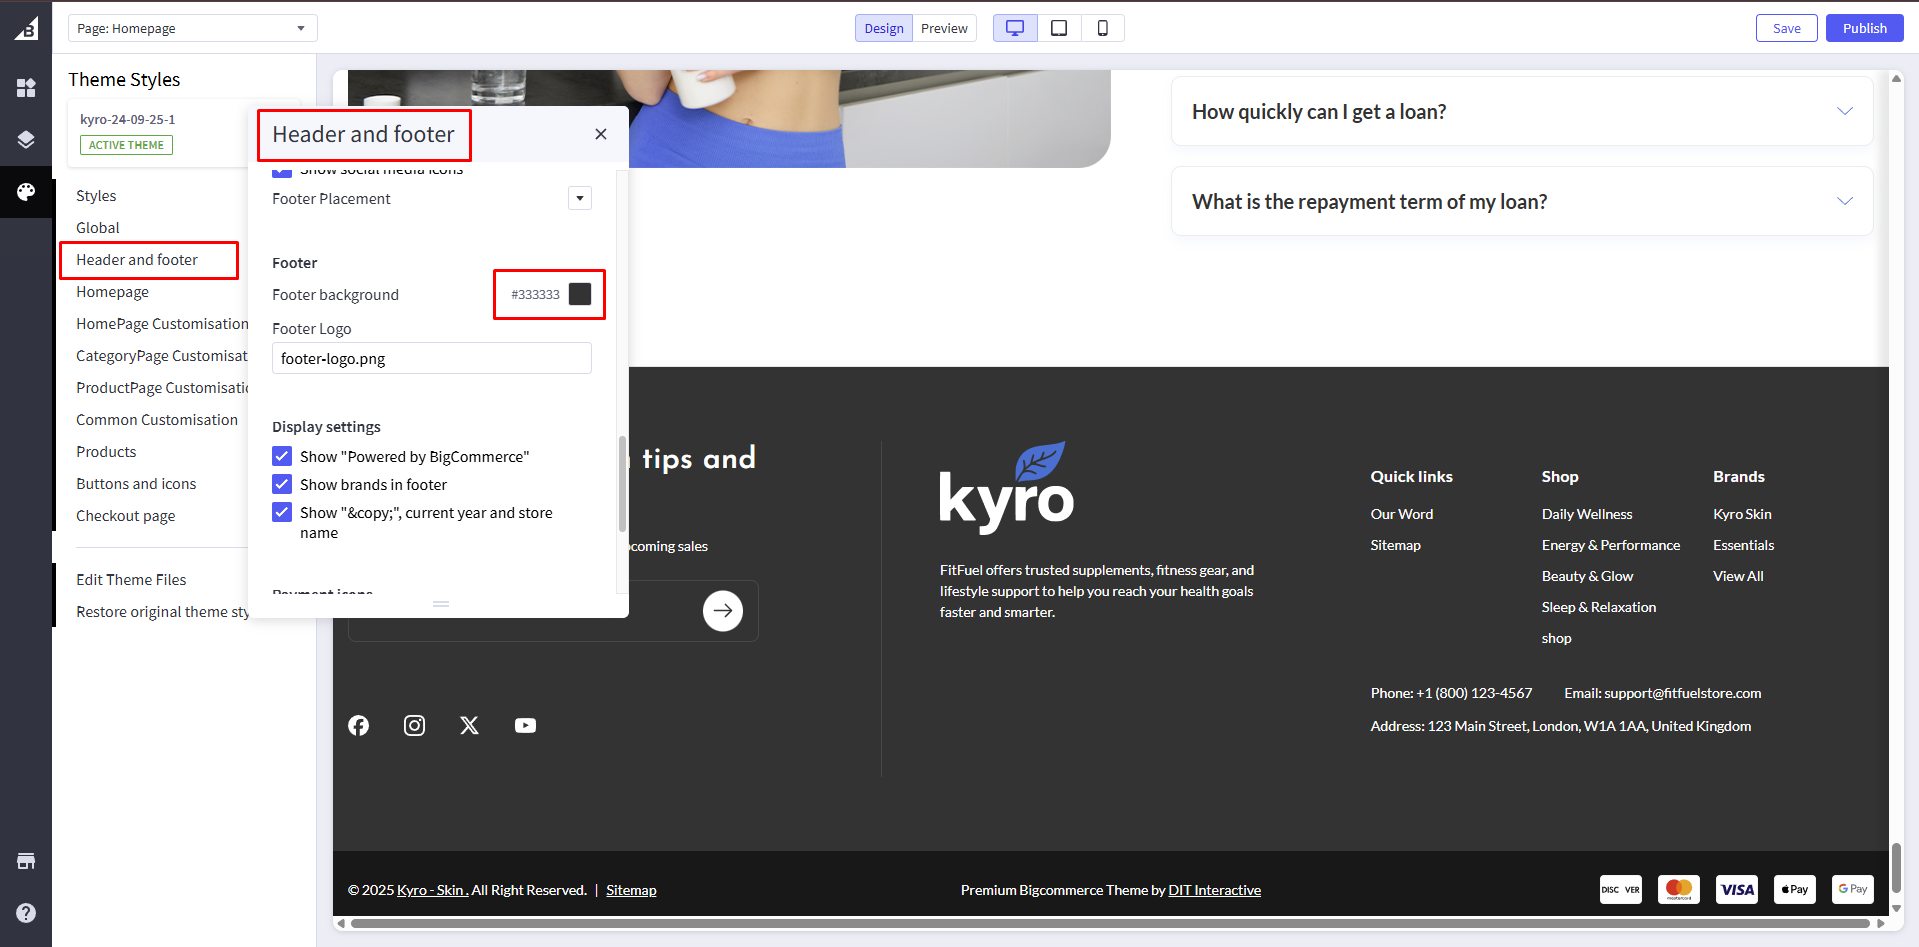
Footer Logo: Add the footer logo file to change the footer logo
Home Page
Go to Storefront > My Themes in your control panel and click the blue "Customize" button to launch Theme Editor.
On the left-hand column of the Theme Editor, click the panel labelled 'Home Page'.
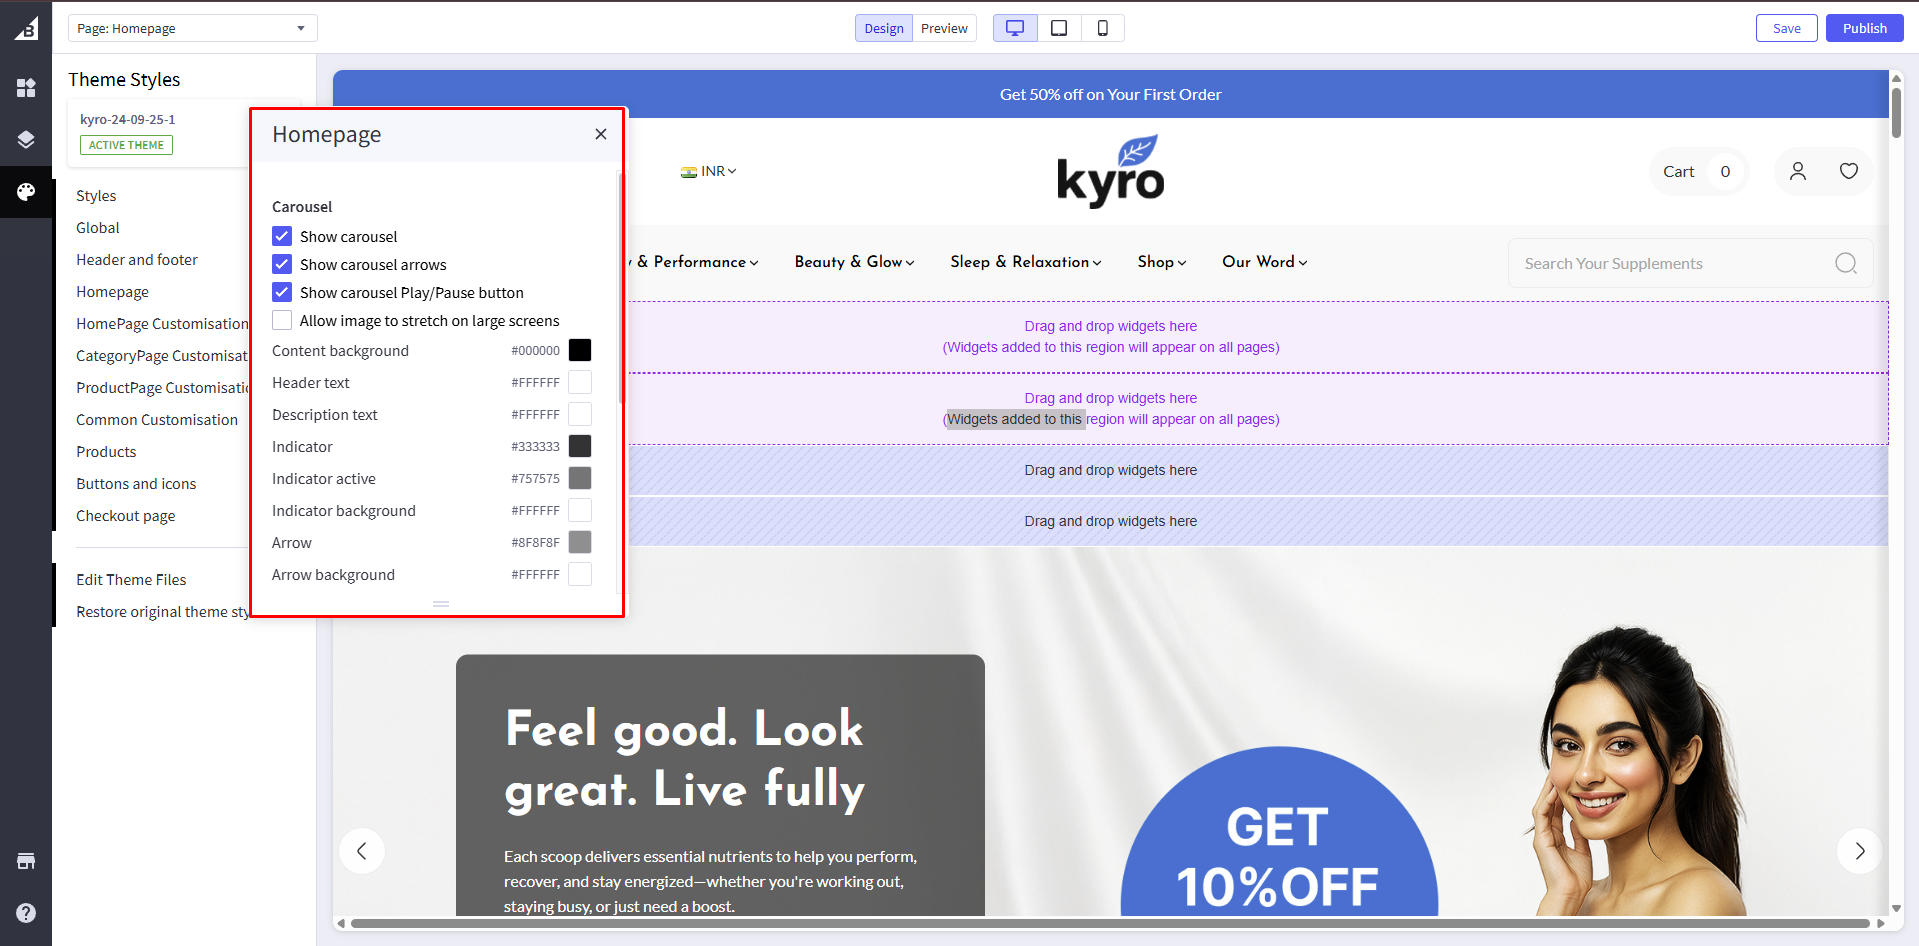
Home Page Customisation
Go to Storefront > My Themes in your control panel and click the blue "Customize" button to launch Theme Editor.
On the left-hand column of the Theme Editor, click the panel labelled 'HomePage Customisation'.
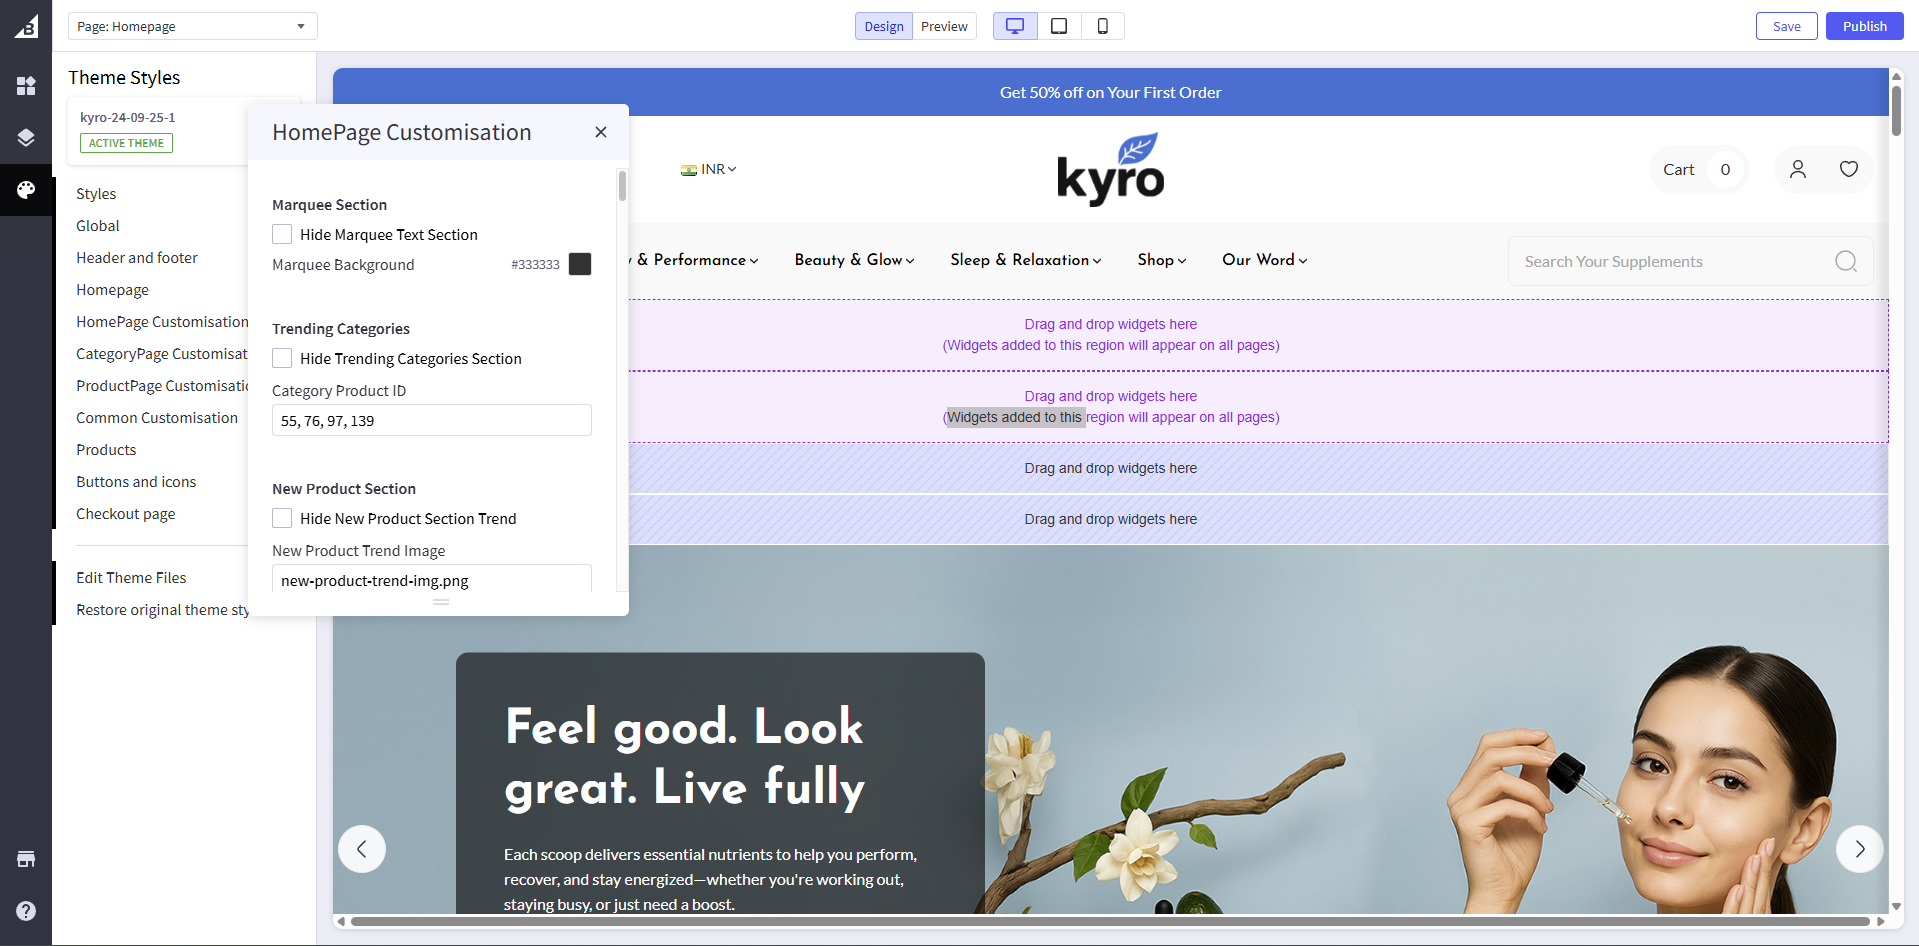
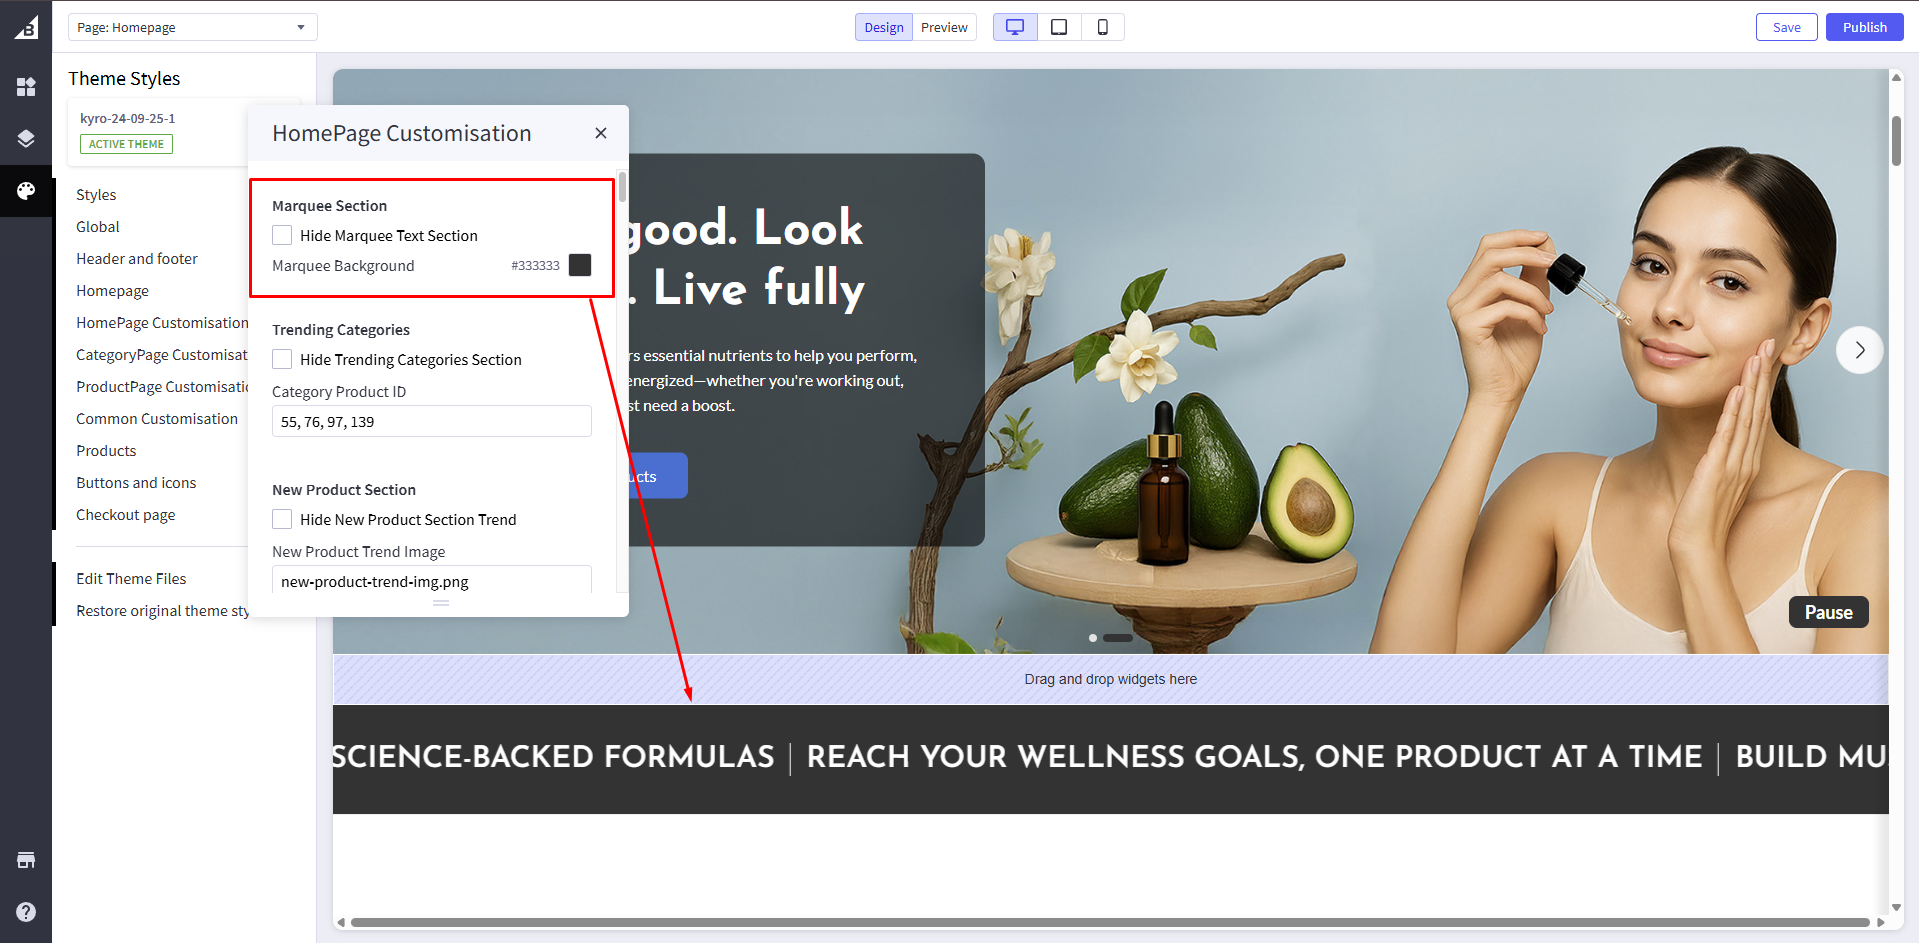
Marquee Section
Hide Marquee Text Section: If checked, it will hide the Marquee section.
Marquee Background: Add color code in Marquee background.
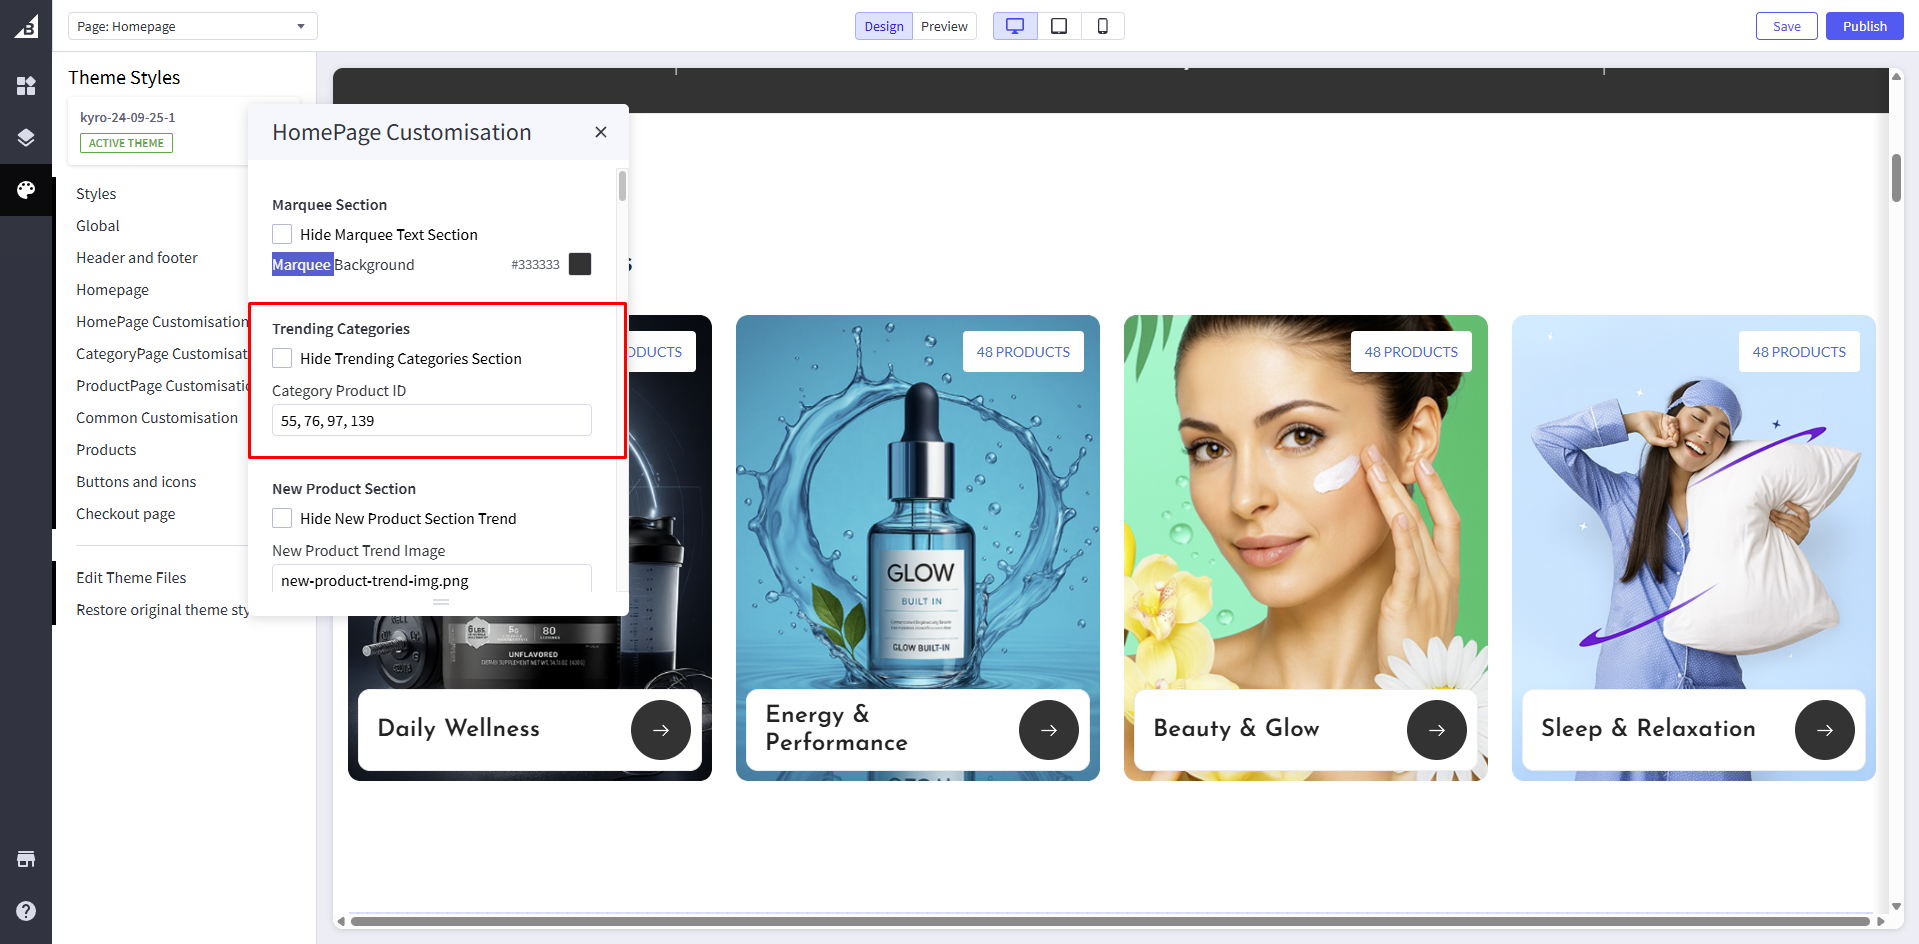
Trending Categories
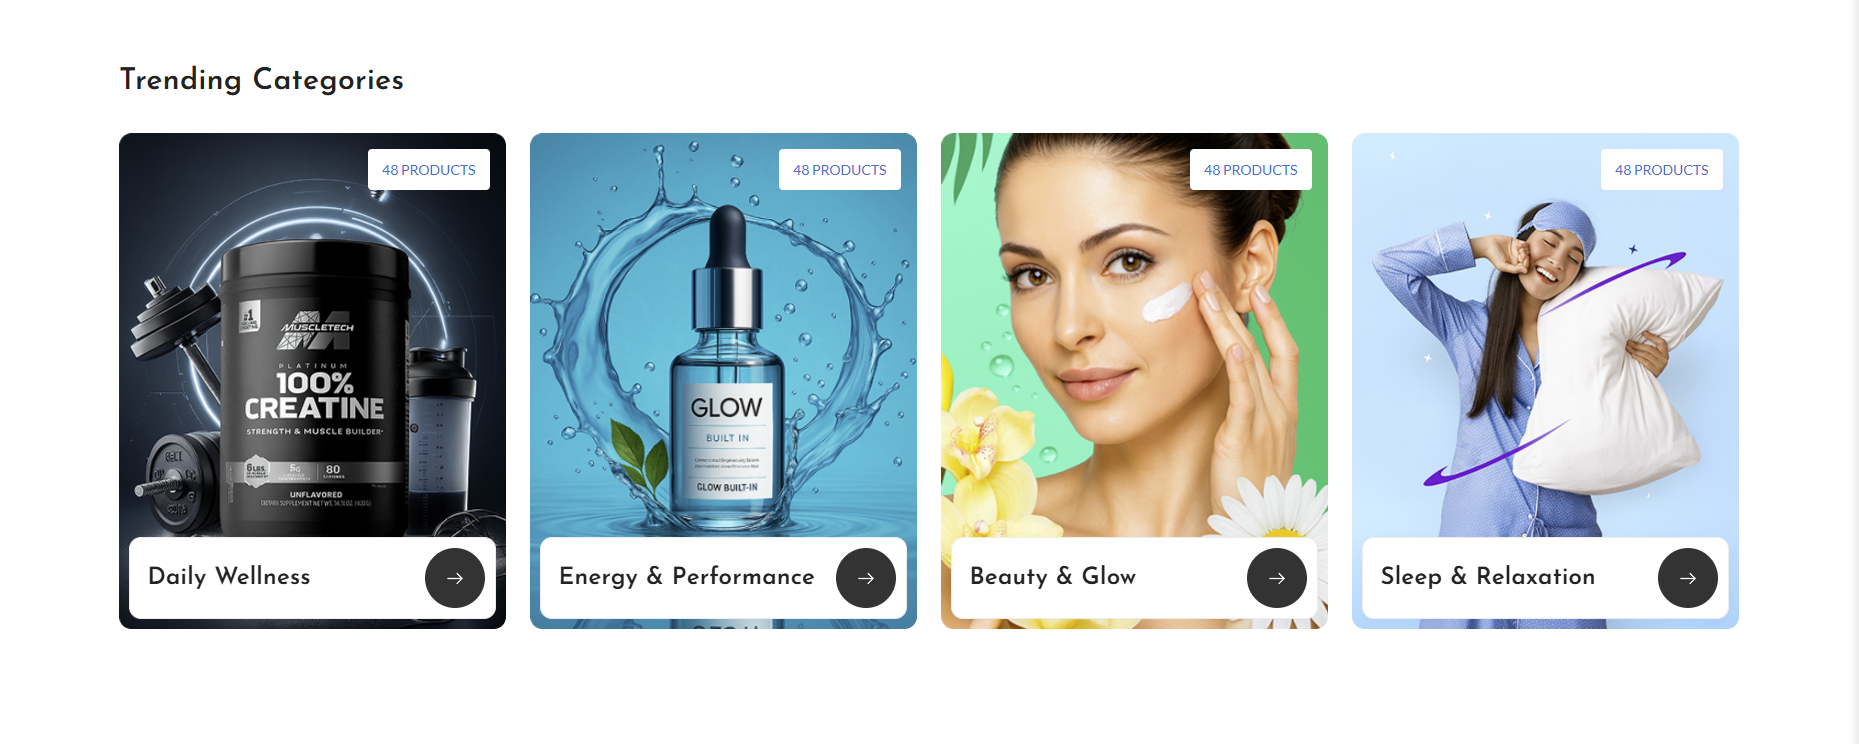
Hide Trending Categories Section: If checked, it will hide the Trending Categories section from the home page.
Category Product ID: Add Category IDs to showcase a category as a Trending category, separated by a comma(,)
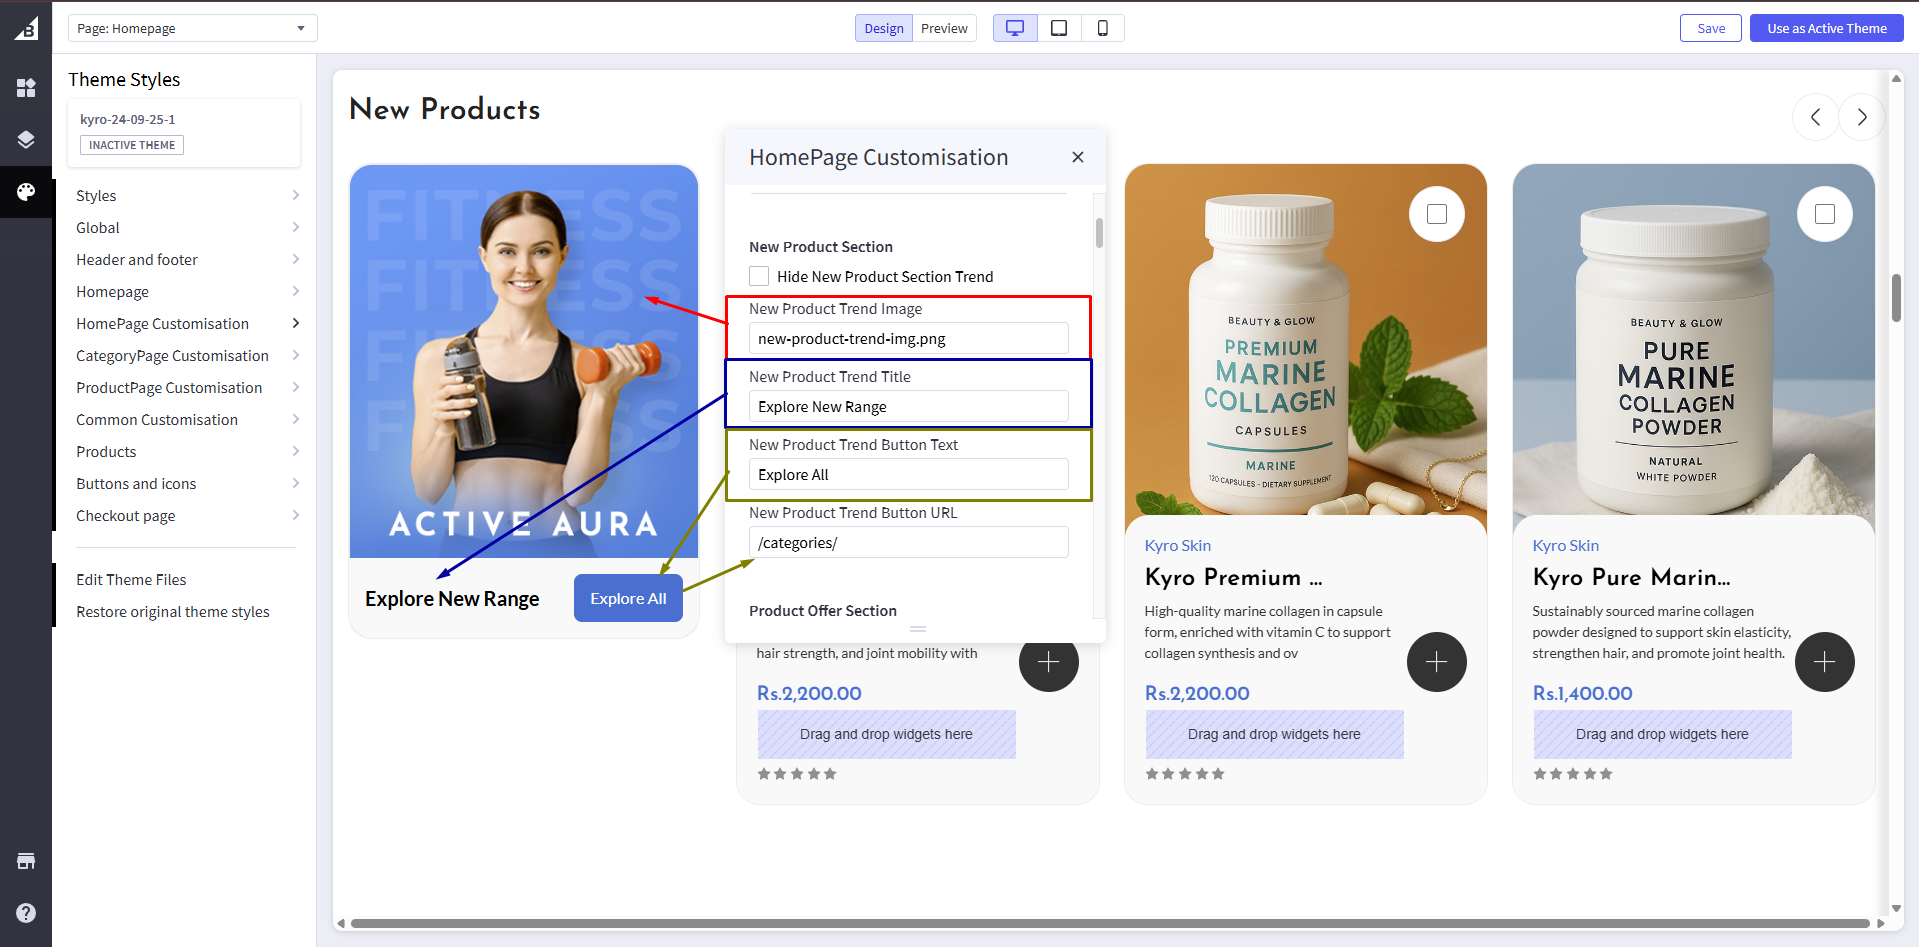
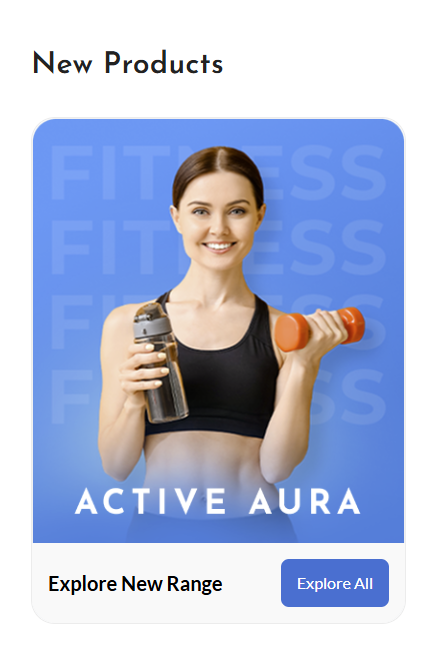
New Product Section
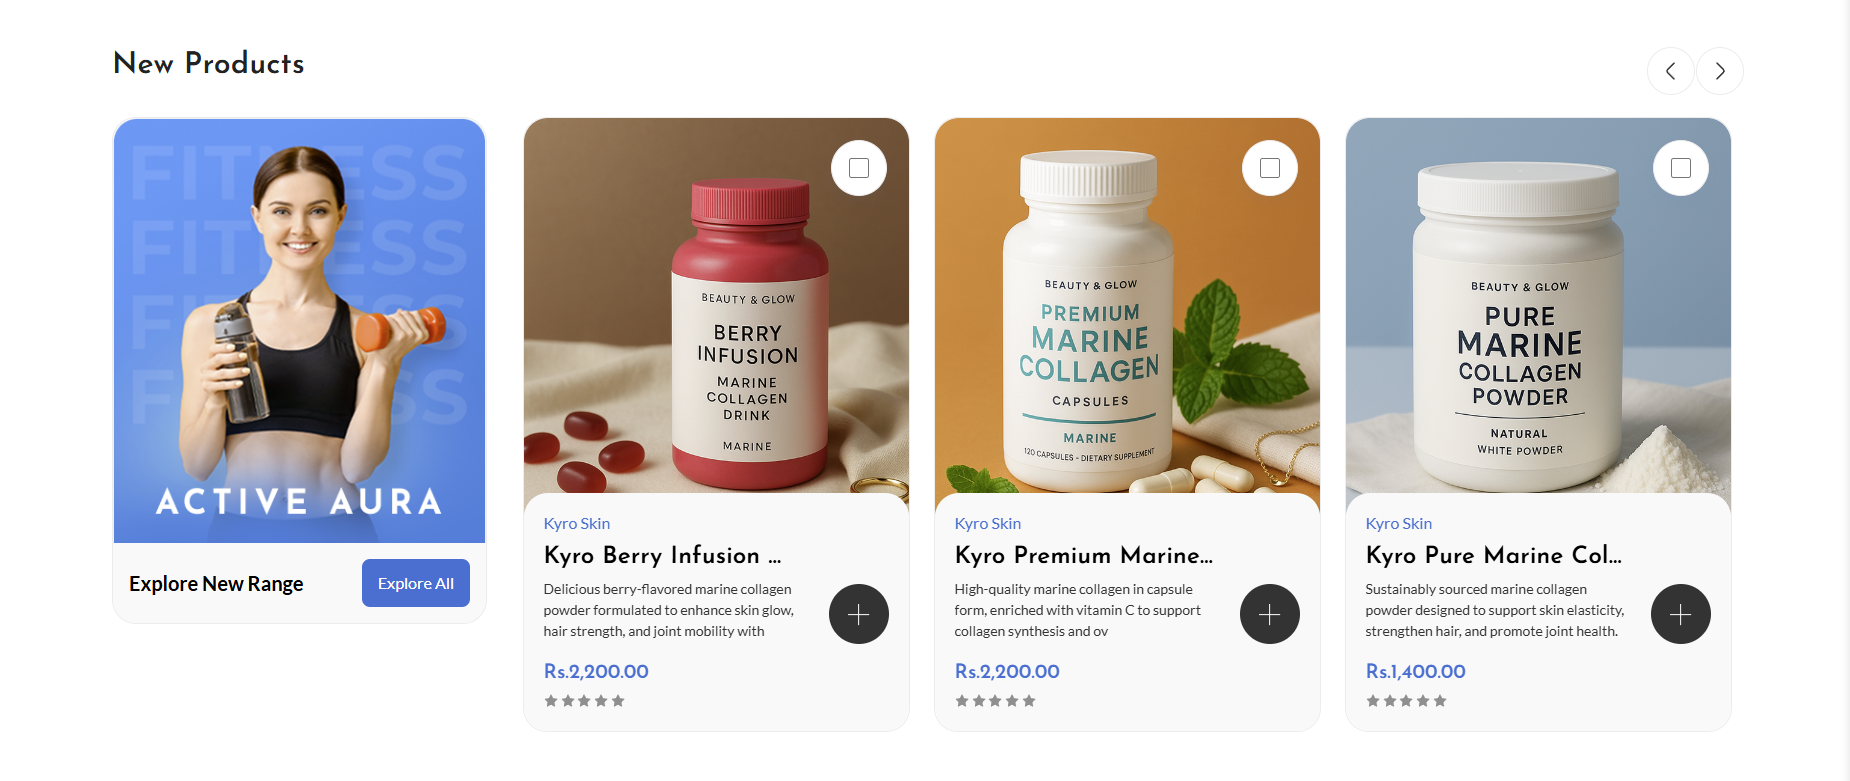
Hide New Product Section Trend: If checked, it will hide the New Product Section trend card from the New Products. (“Explore New Range” card will be hidden, and products will remain)
New Product Trend Image: Add the New product trend image file to change the image.
New Product Trend Button Text: Add the text for the CTA button text.
New Product Trend Button URL: Add the URL for the CTA button to get redirected to the destination.
Product Offer Section

Show Product Offer Section: If unchecked, it will hide the Product offer section from the home page.
Sale Section Background: Add color code in Sale Section Background.
Sale Section Text Color: Add color code in Sale Section Text Color.
Product Offer Timer: Add the end date and time in the product offer timer in the same format as the demo image.
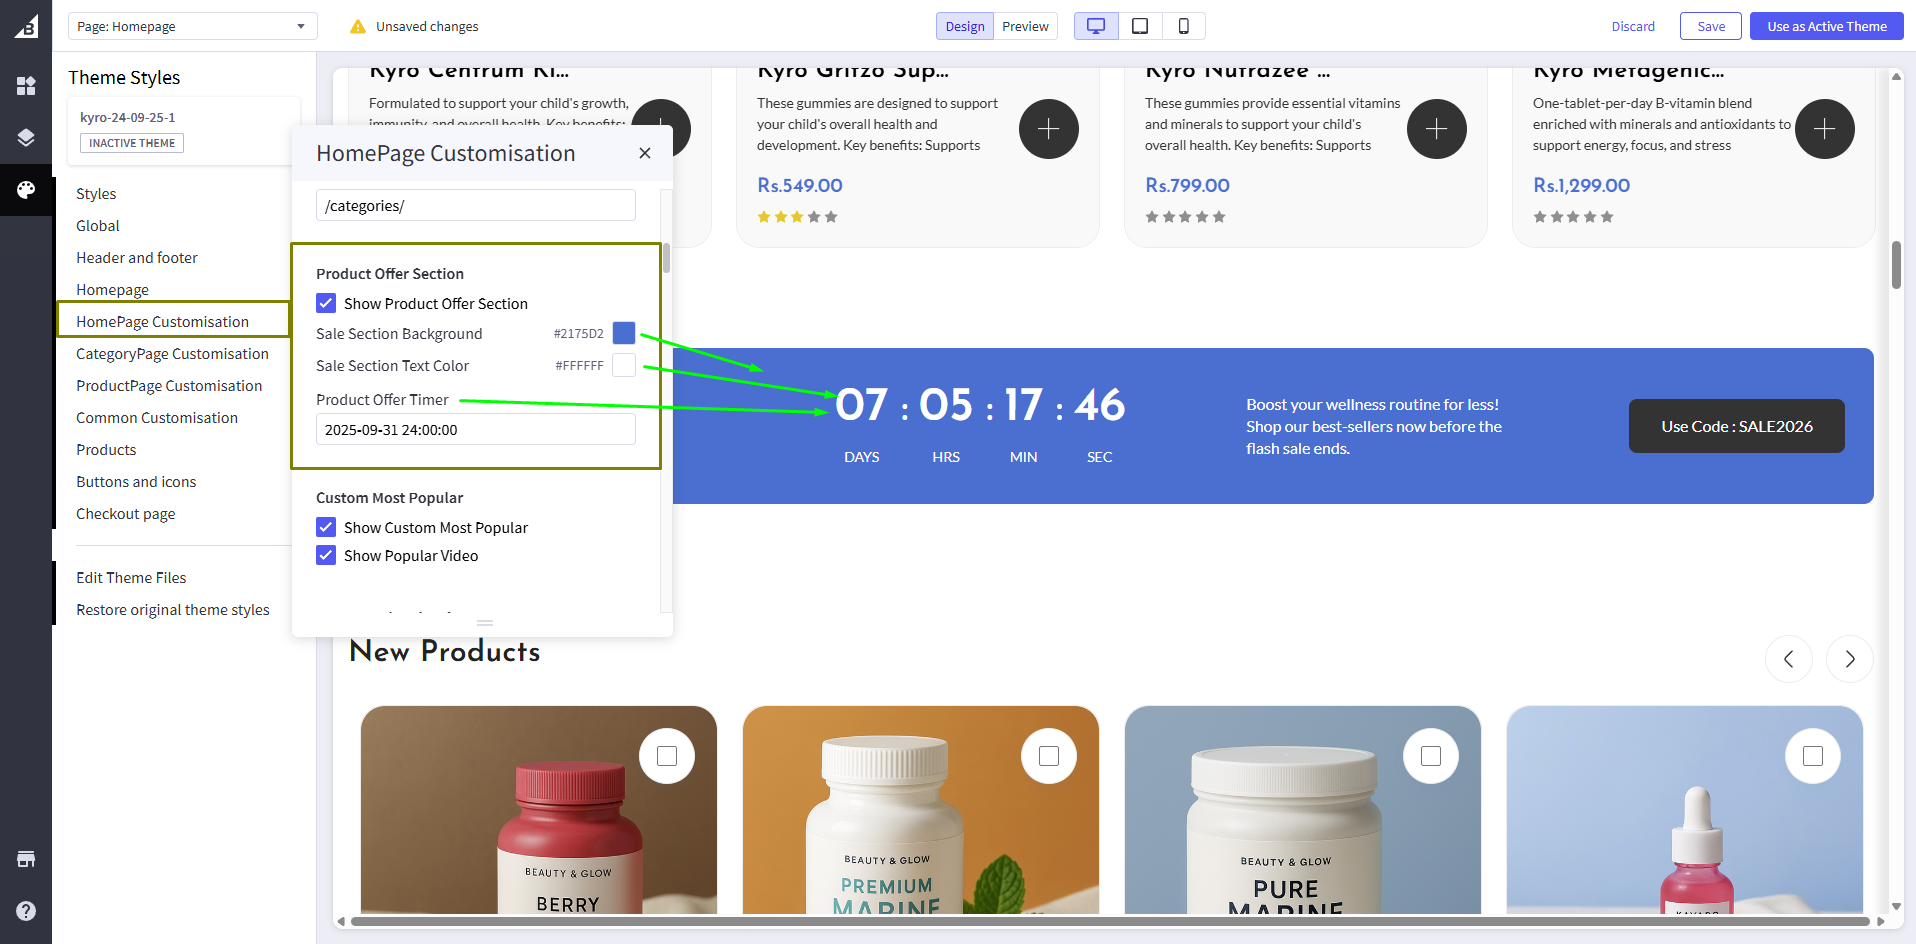
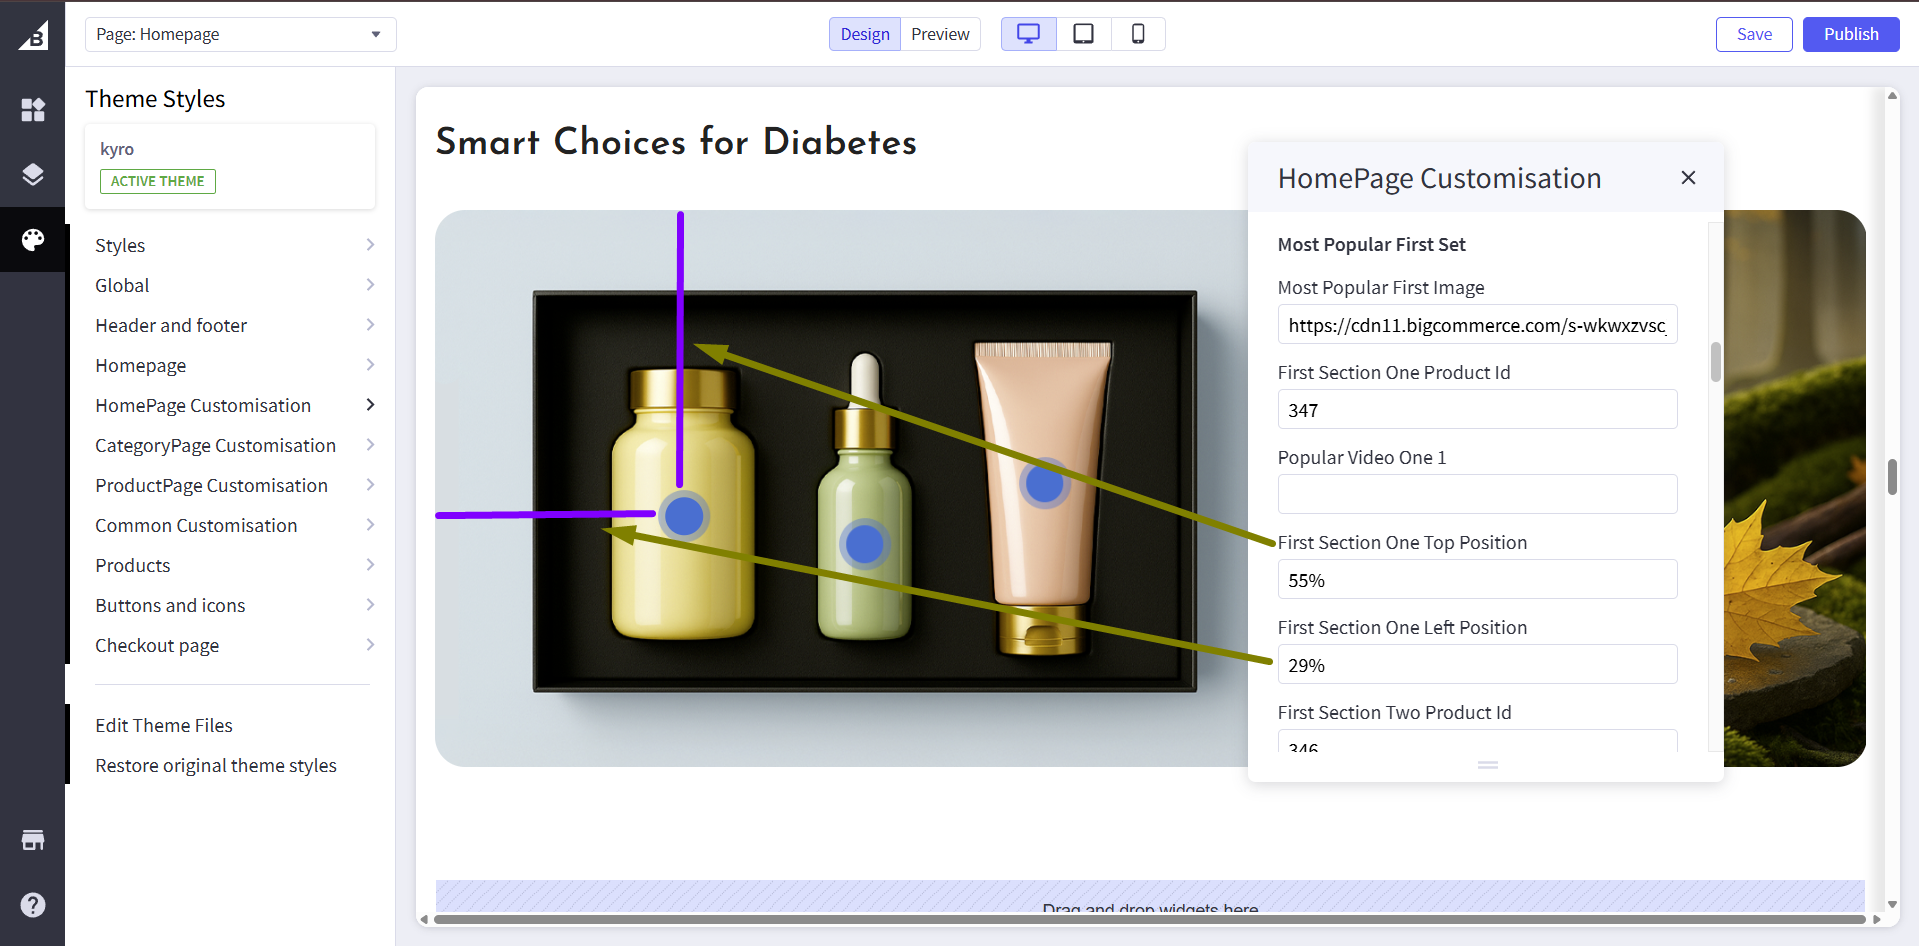
Custom Most Popular
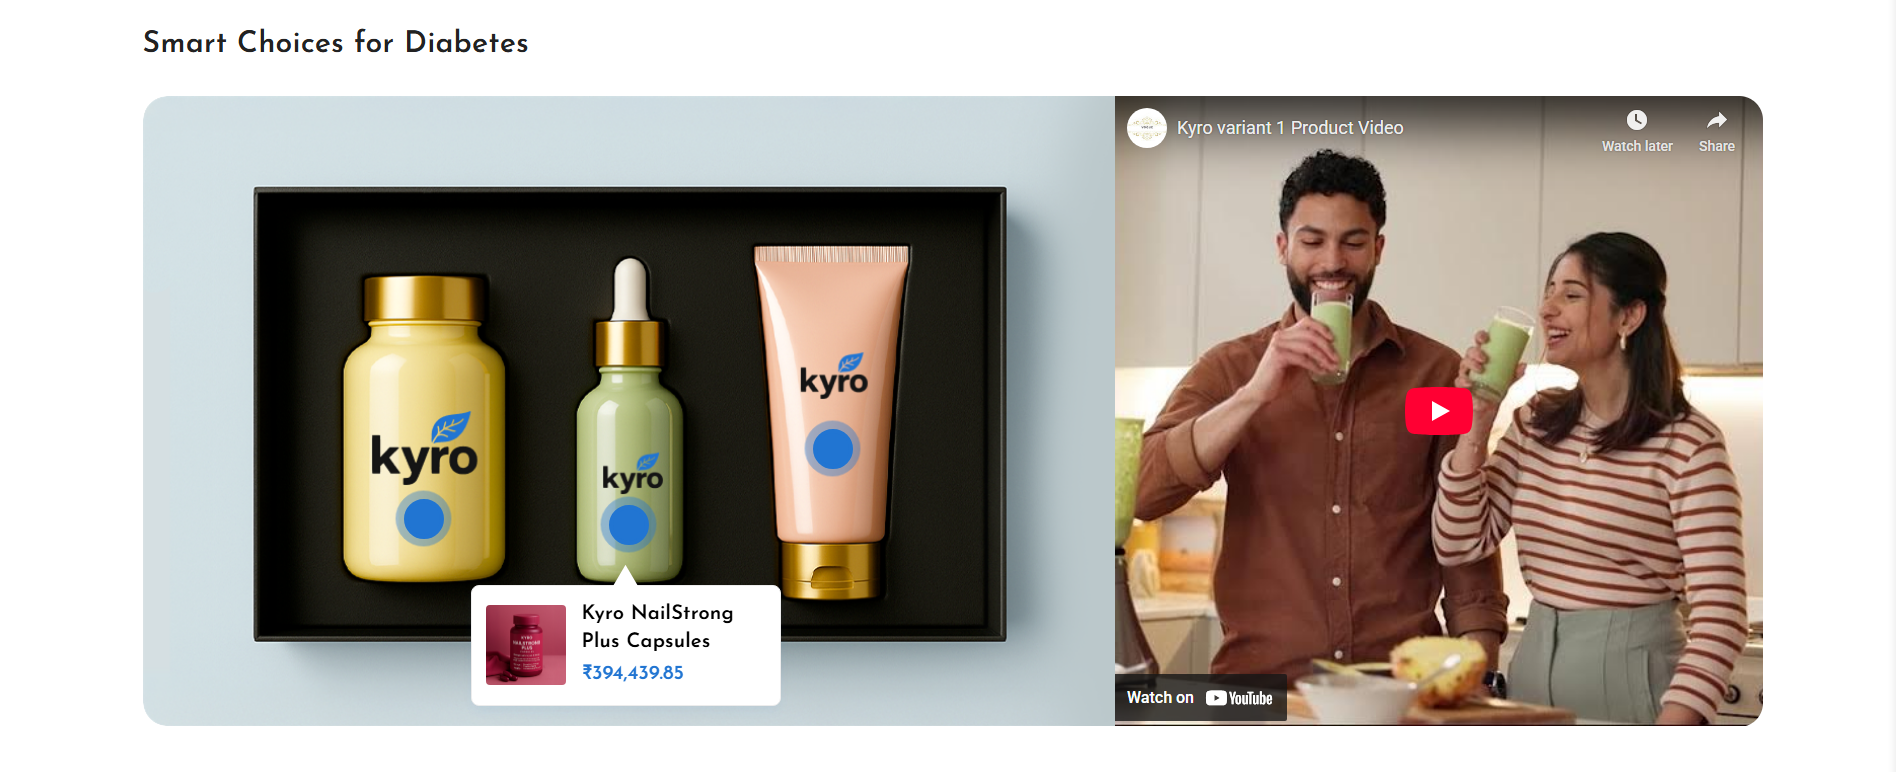
Show Custom Most Popular: If unchecked, it will hide the Most Popular section from the home page.
Popular Video Image Default: Add a default image that will be displayed when a video is not added for a product.
Hide Popular video: If unchecked, it will hide the video from all the sets/slides. (will show only the First image)
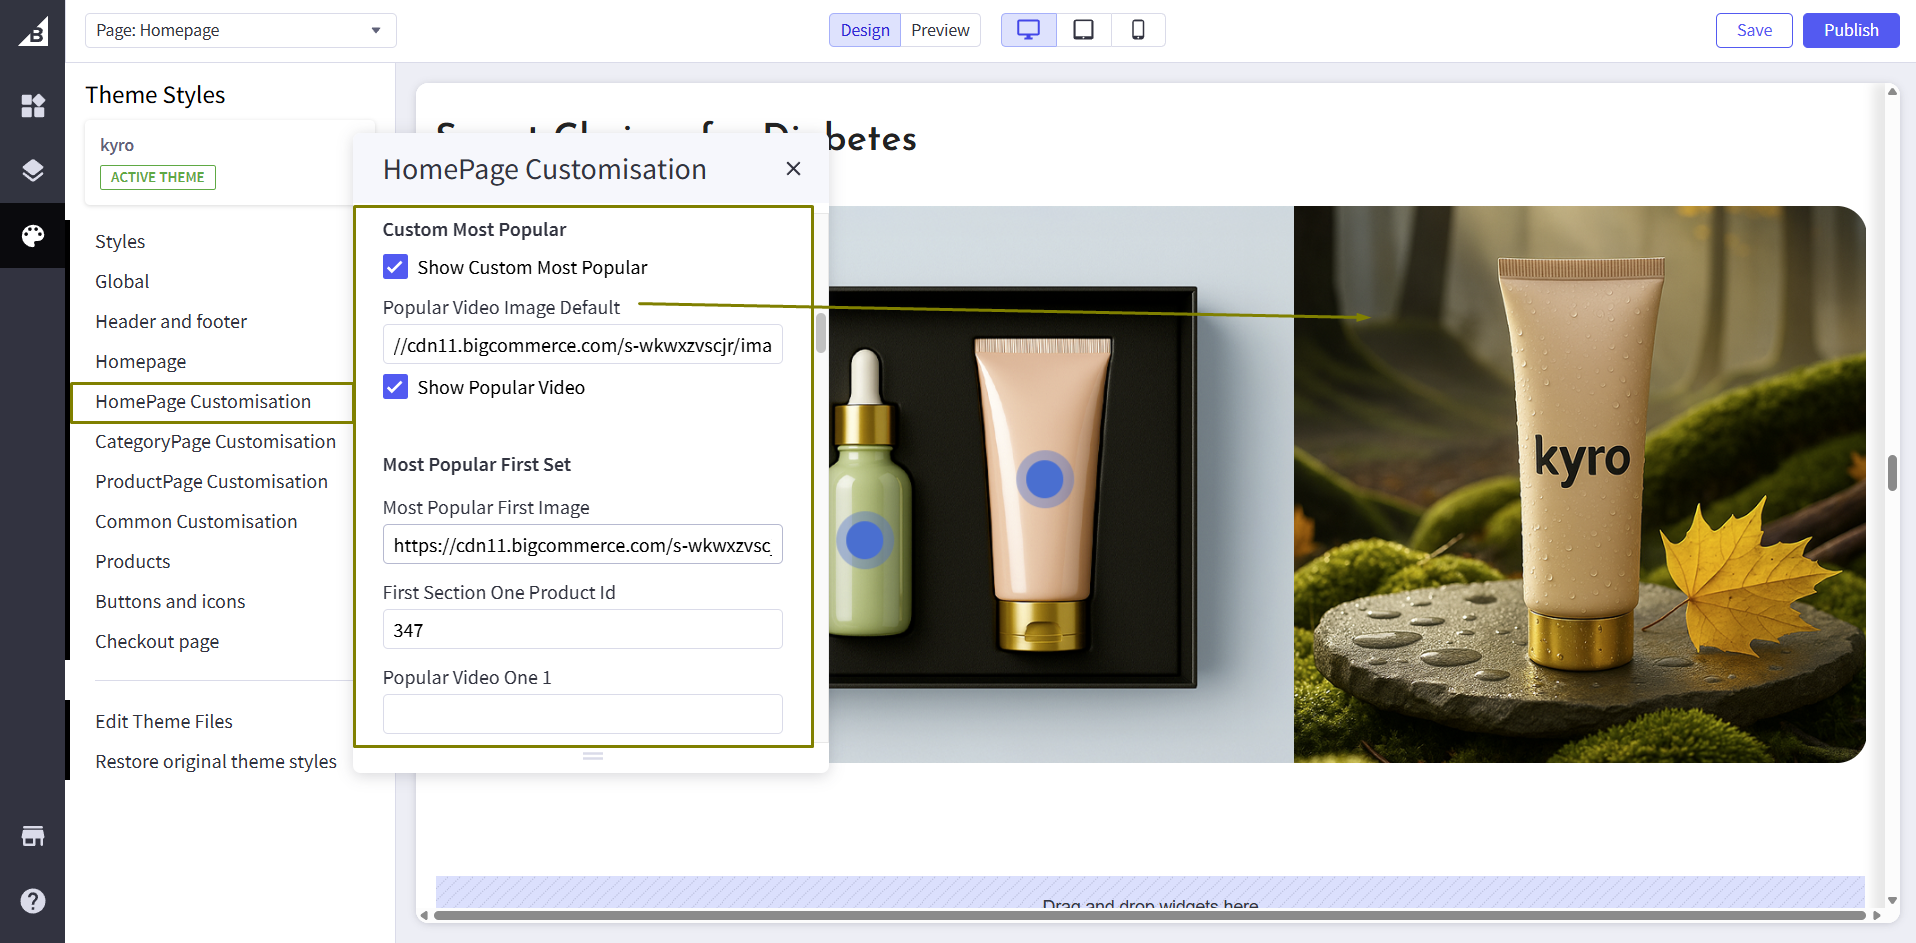
Most Popular First Image: Add a background image for the left-hand side.
First Section One Product ID: Add Product ID.
Popular video One 1: Add video URL for individual product.
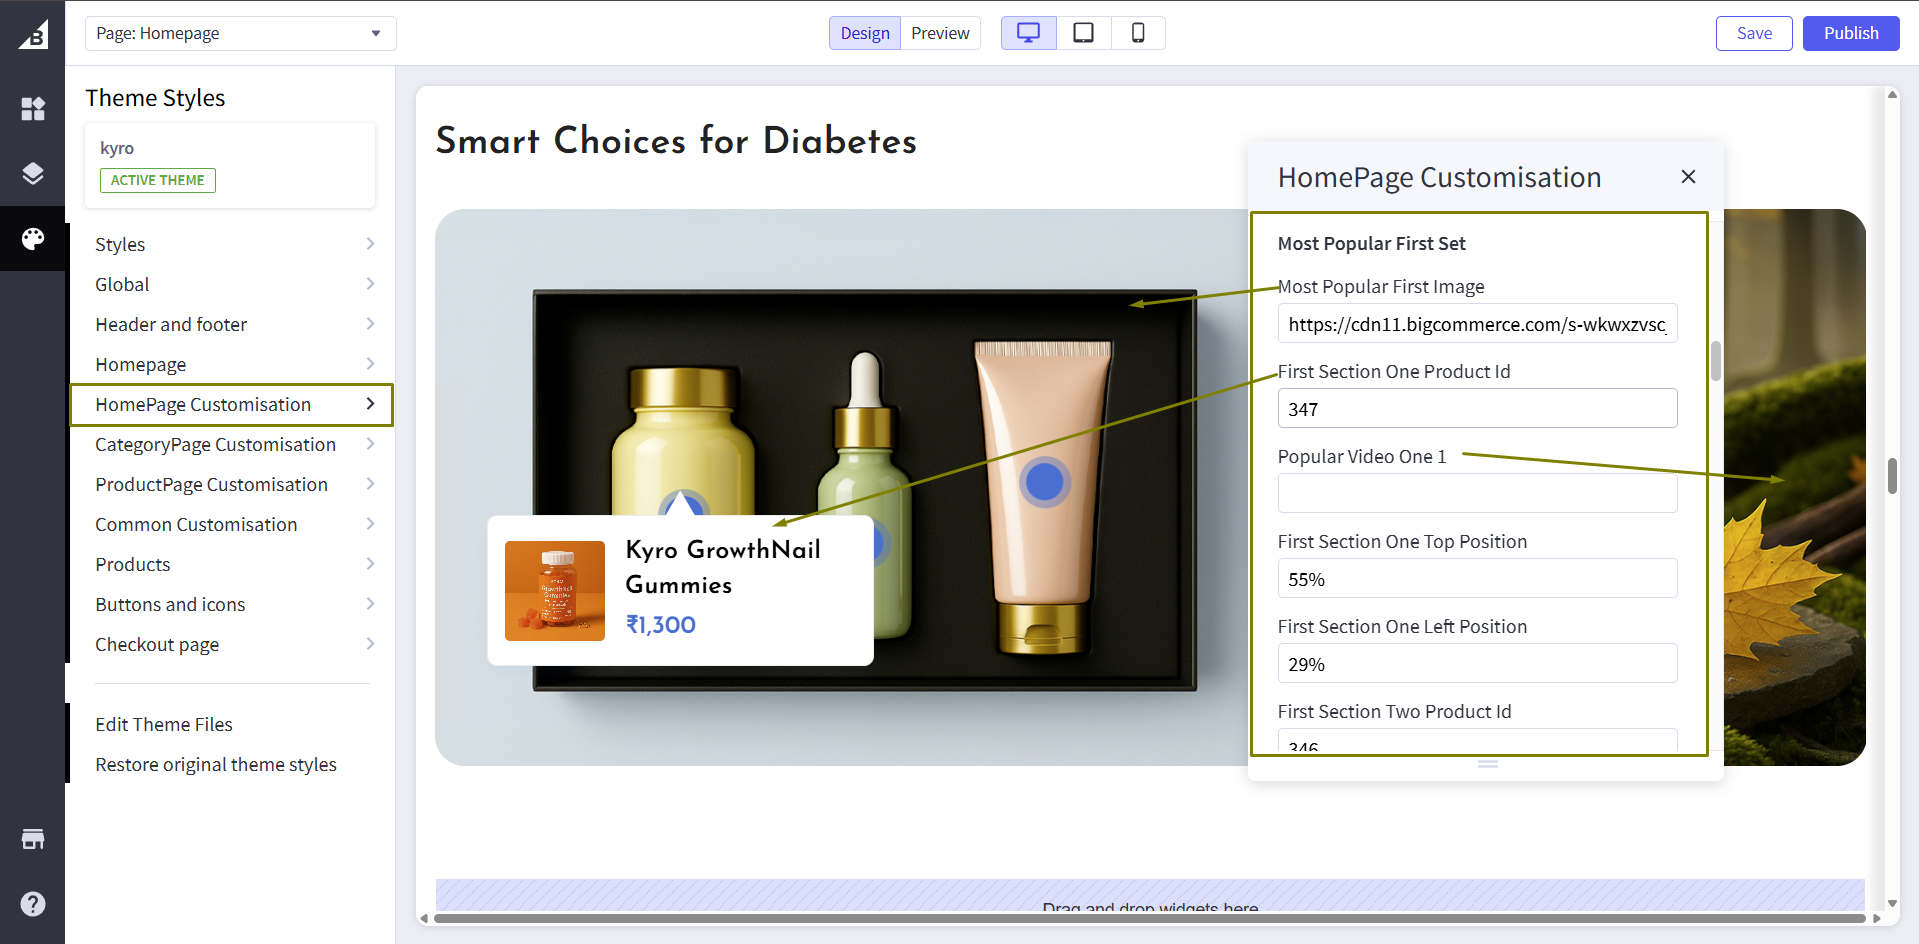
First Section One Top Position: Add top position.
First Section One Left Position: Add left position.
About Us Section
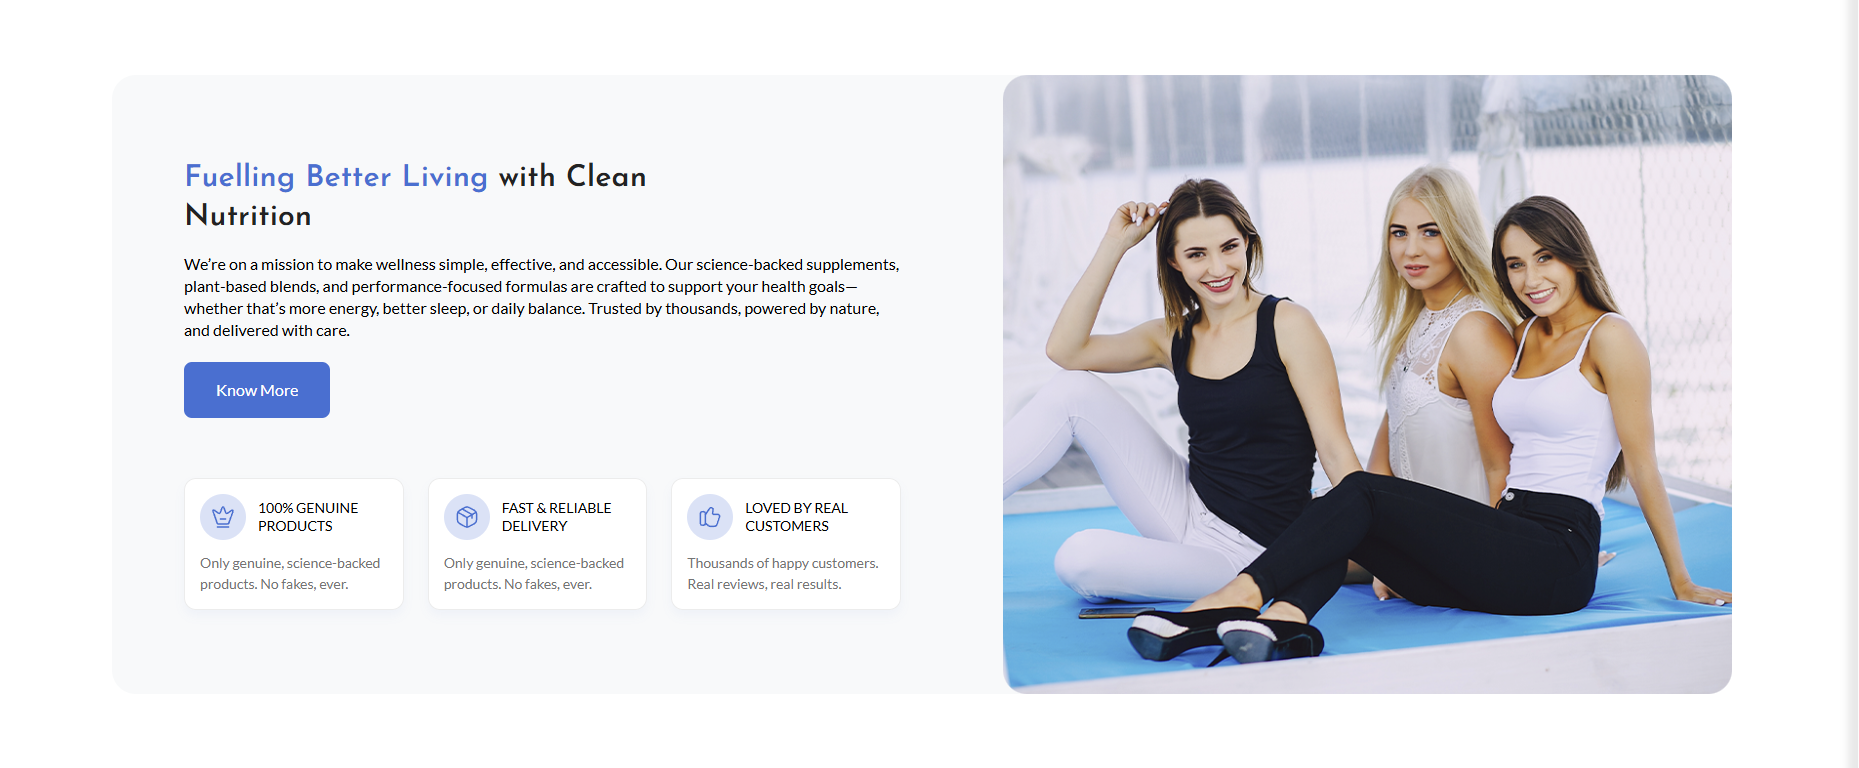
Hide About us Section: If checked, it will hide the About us section from the home page.
Hide About us USP: If checked, it will hide the About us USP.
About us Image: Add the image file for the About us section.

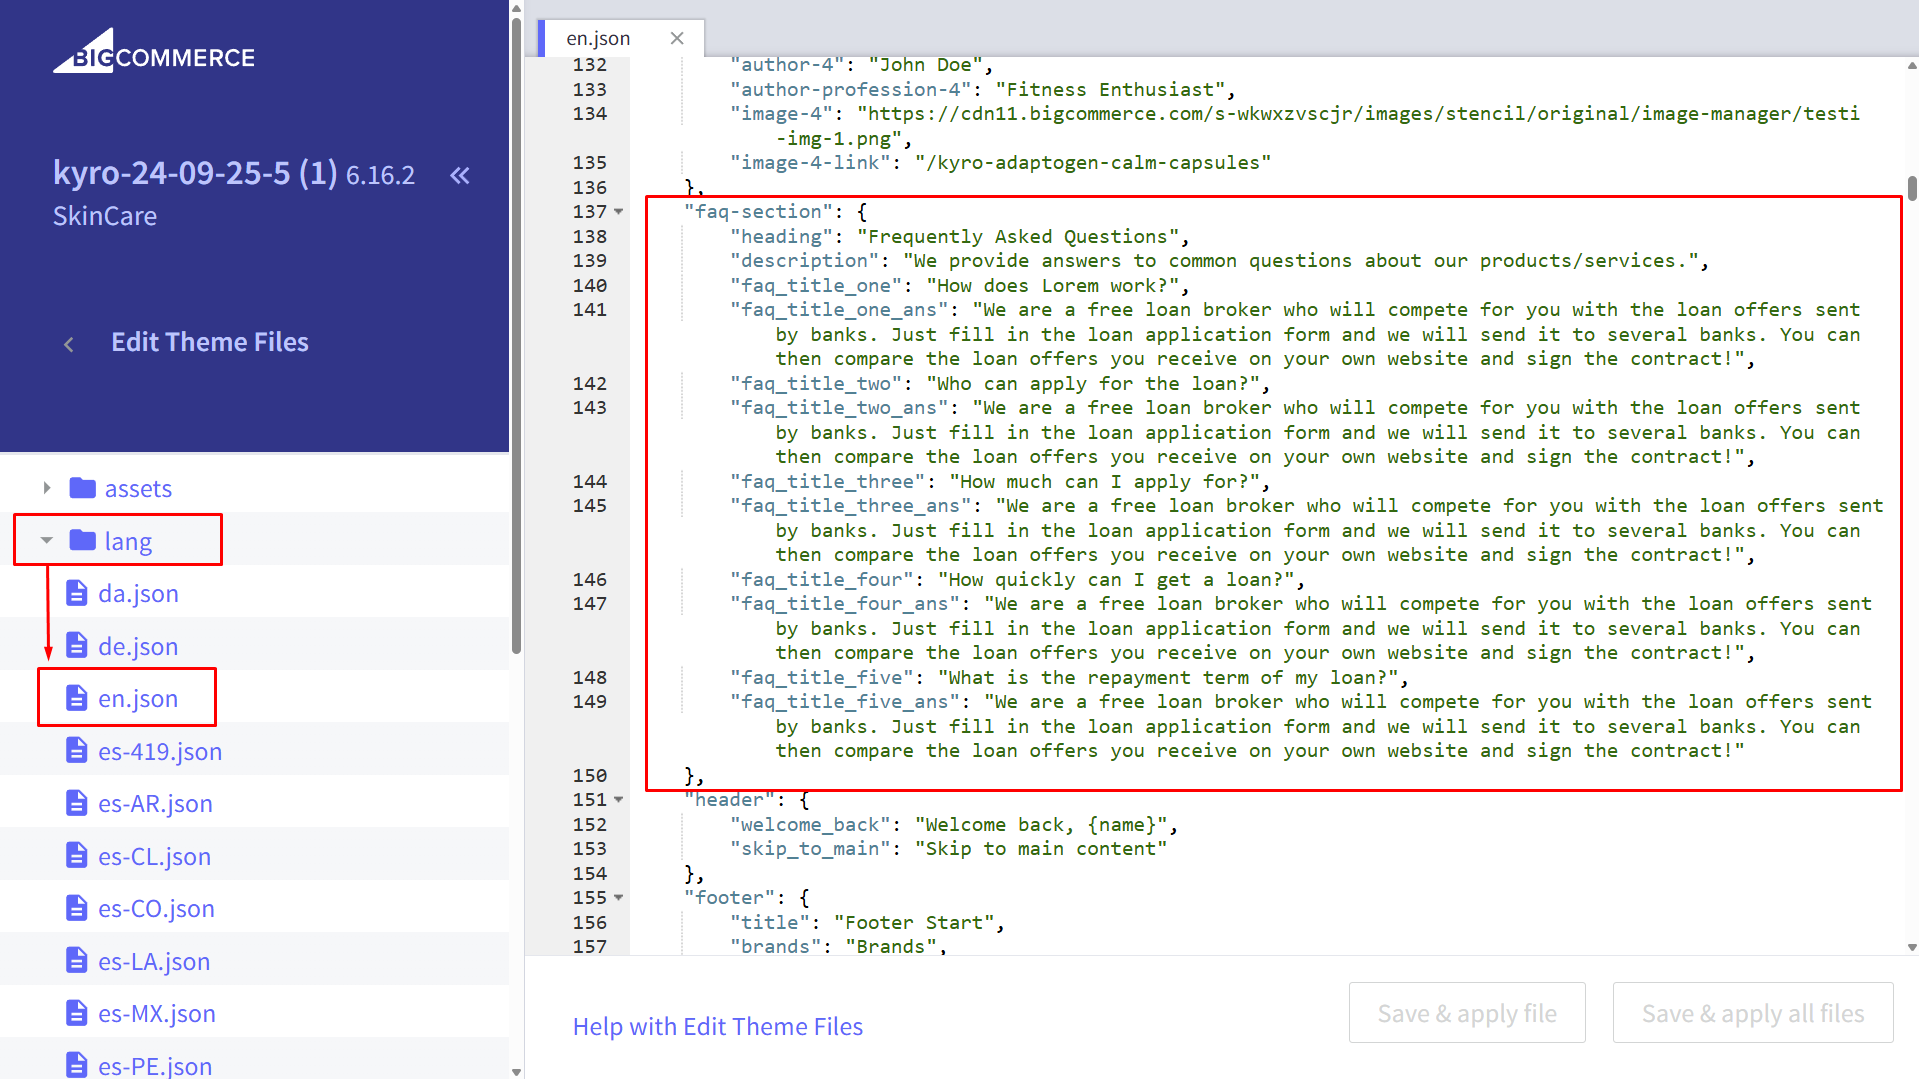
FAQ Section
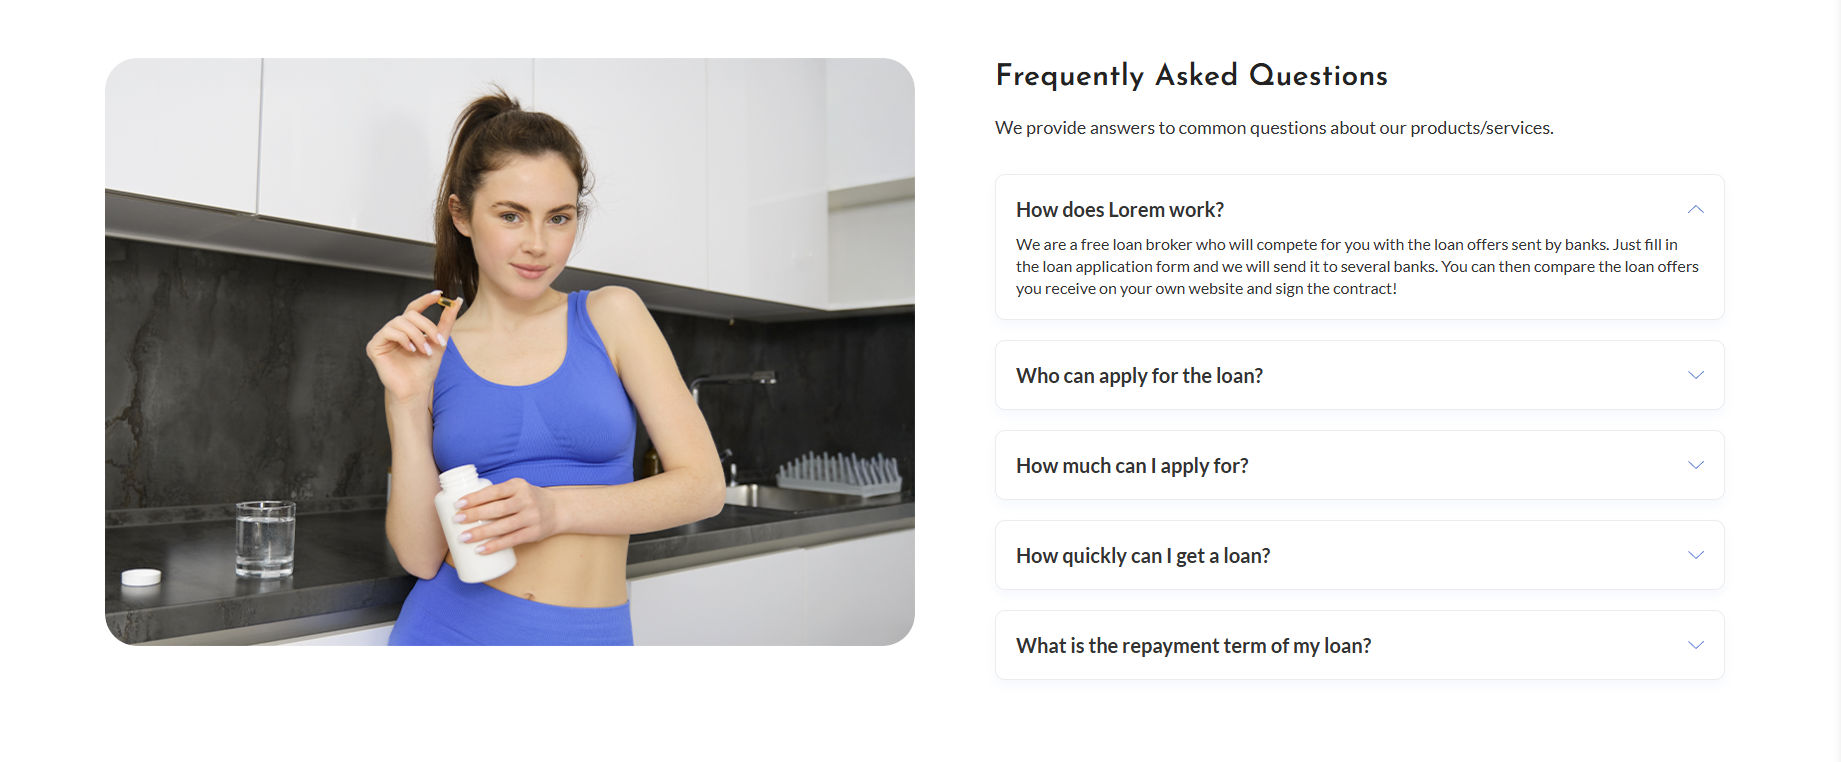
Hide FAQ Section: If checked, it will hide the FAQ section from the home page.
FAQ Section image: Add the image file for the FAQ section.
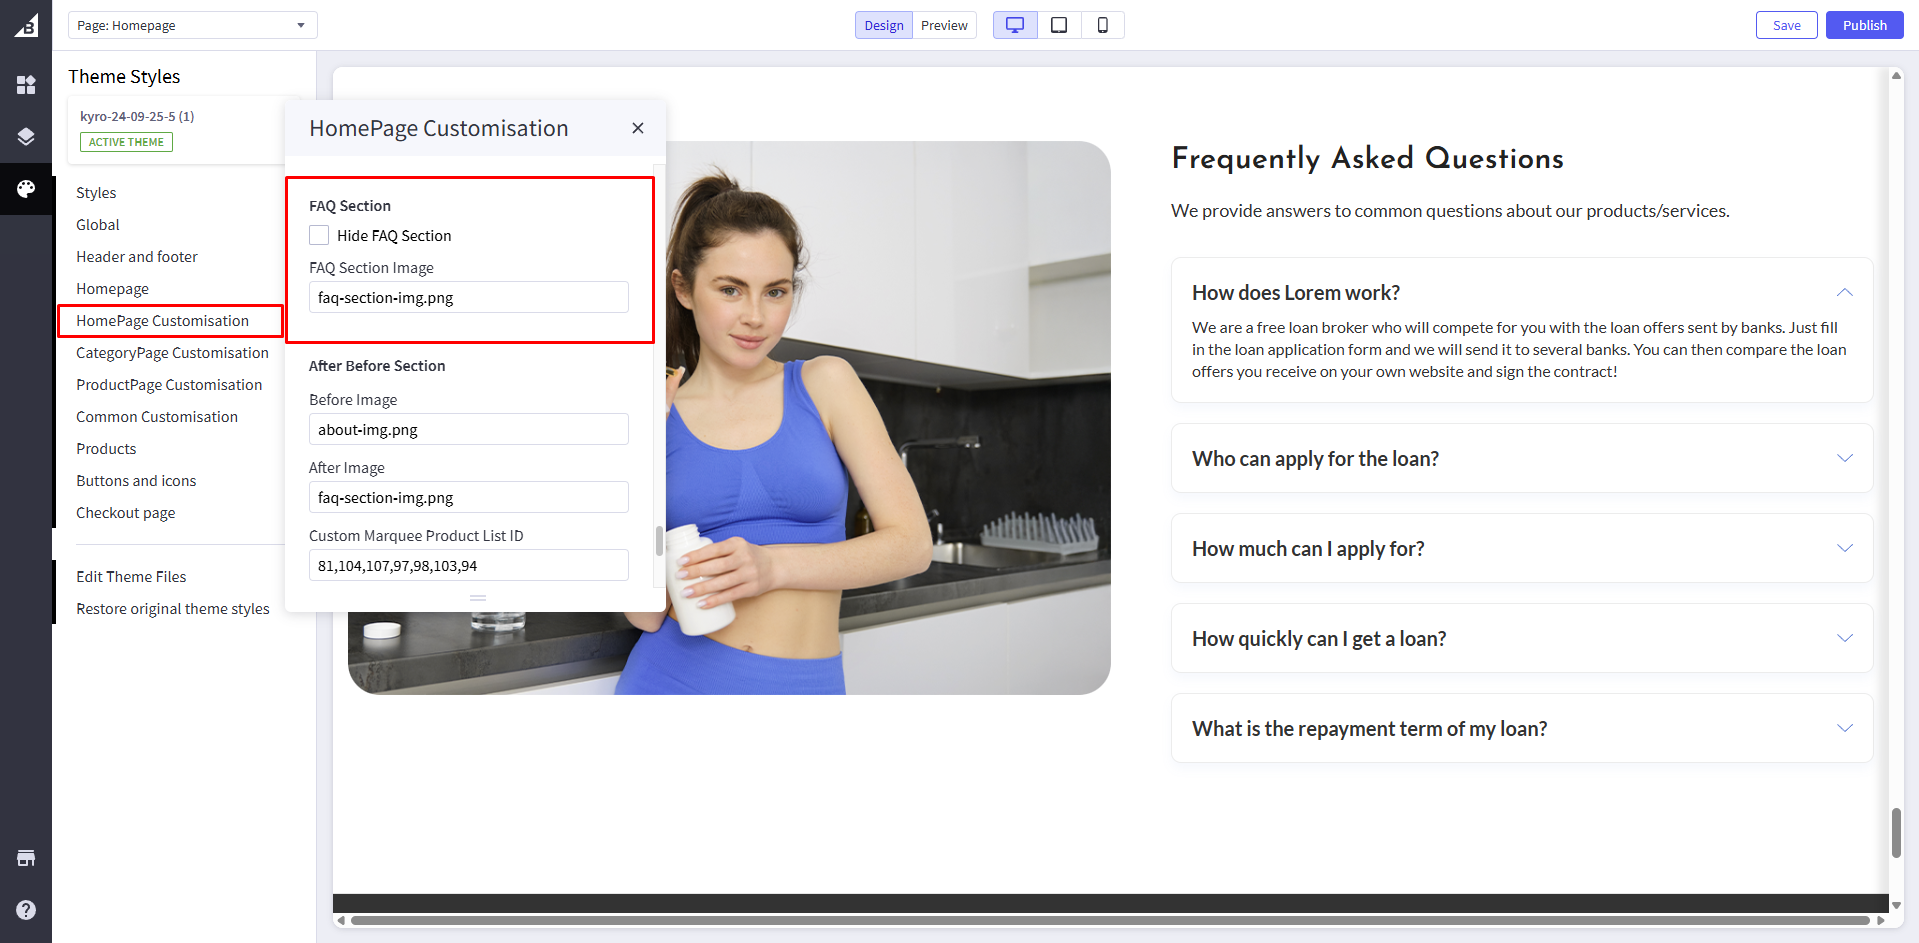
FAQ content can be changed from en.json
After Before Section
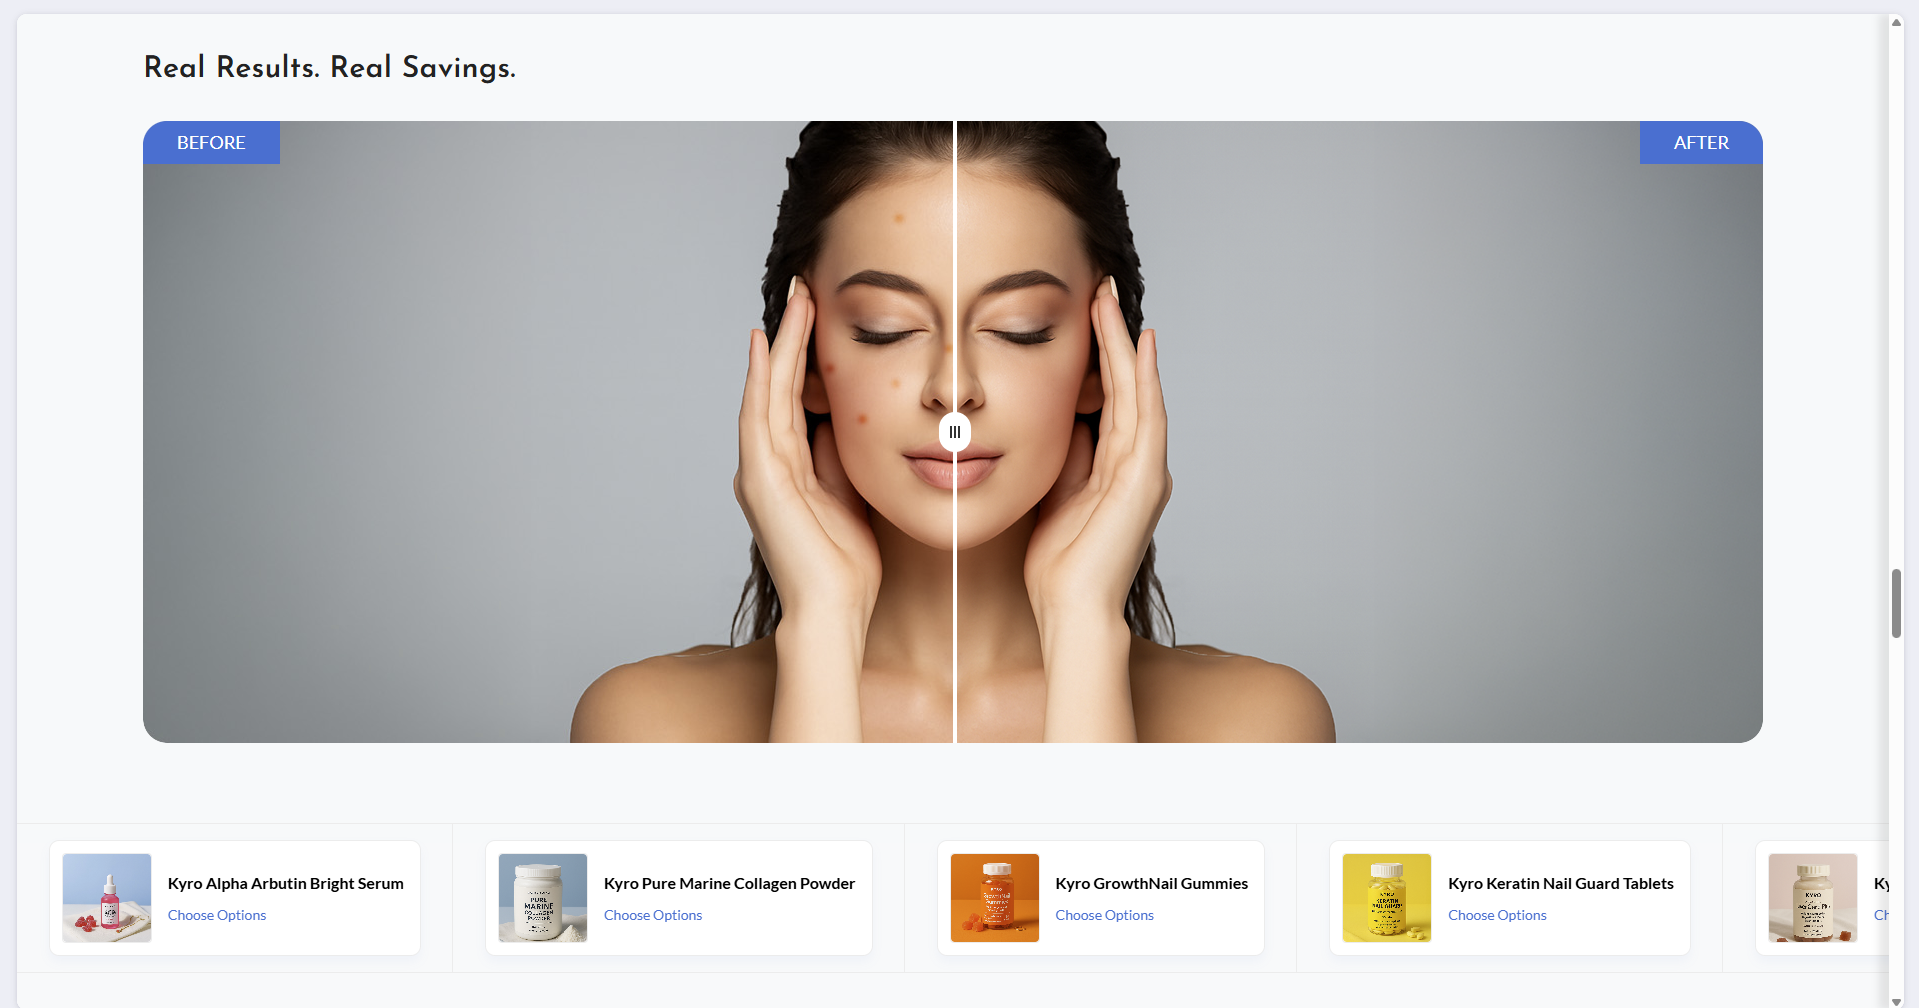
Before image: Add Before image.
After image: Add Afterimage.
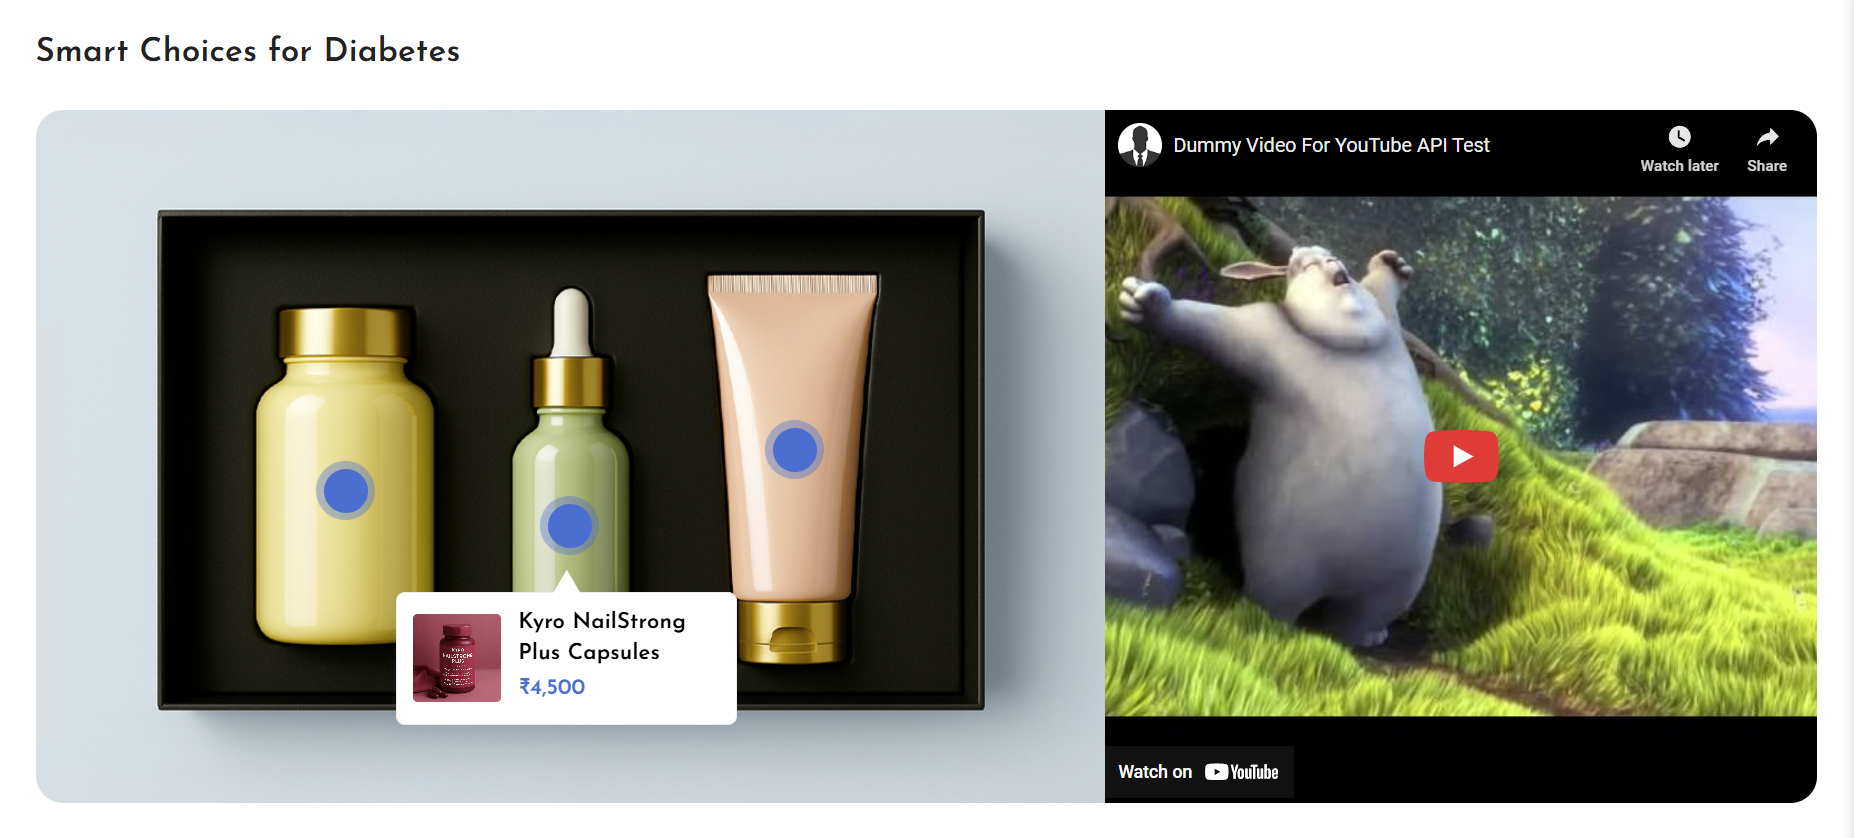
Custom Marquee Product List ID: Add Product IDs separated by a comma(,) without a space.
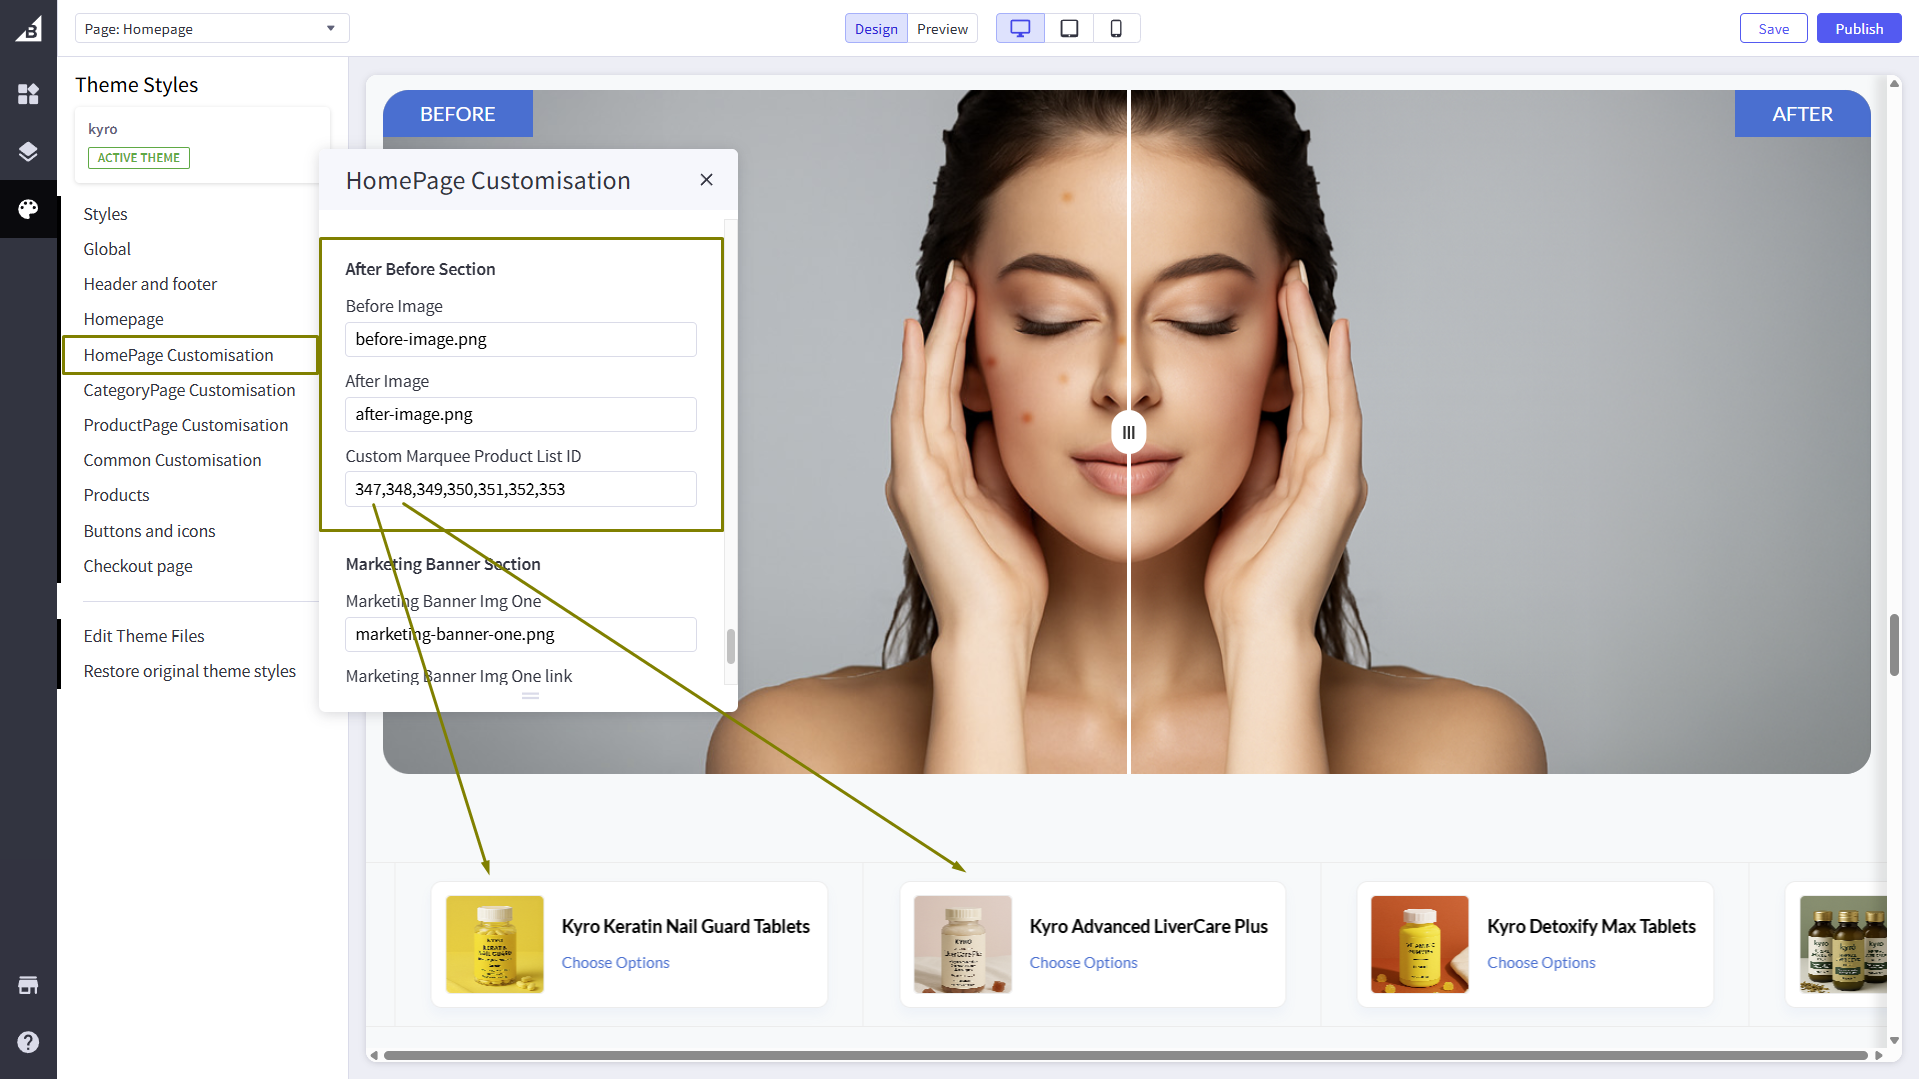
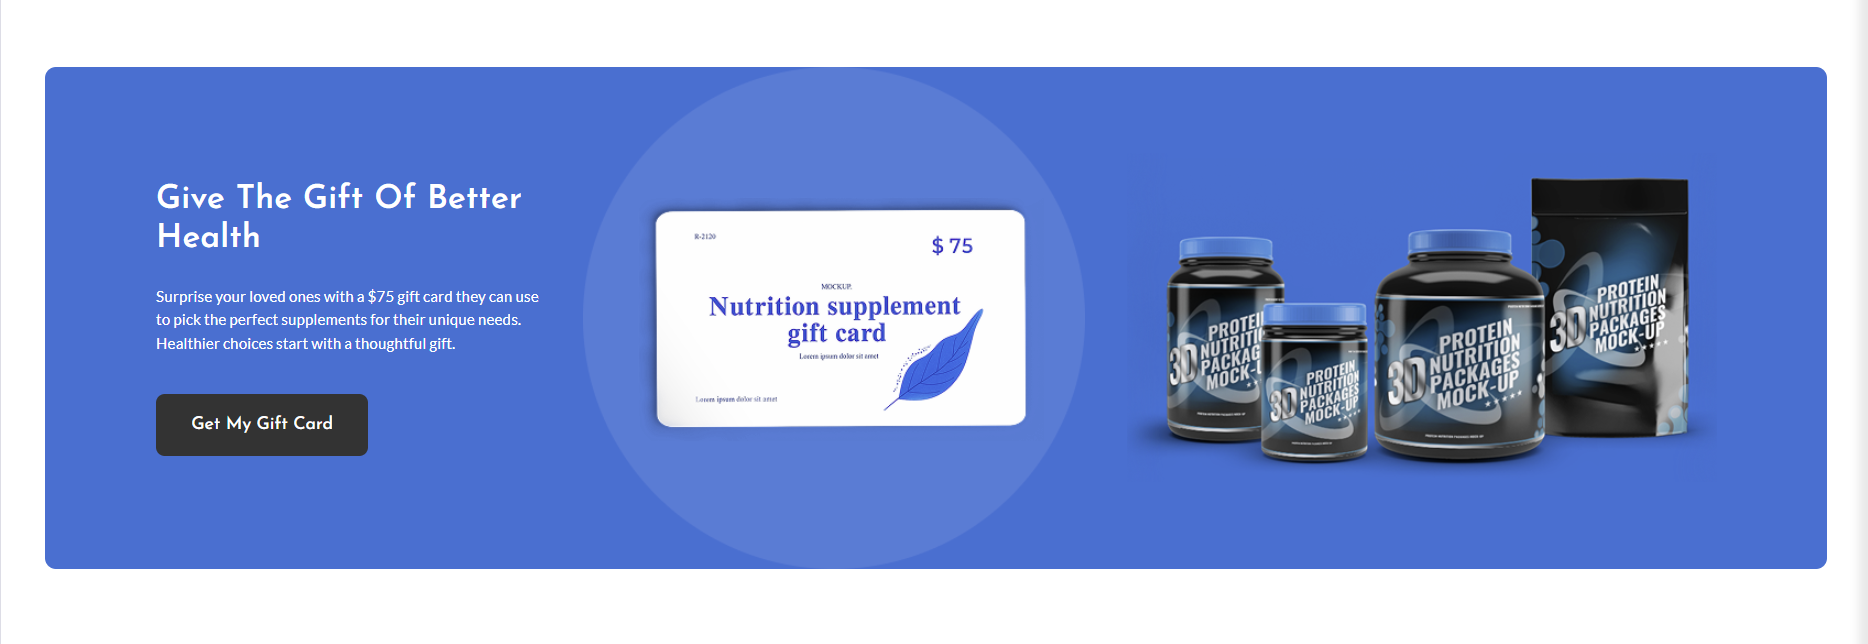
Marketing Banner Section

Marketing Banner Img: Add the marketing banner image file.
Marketing Banner Img link: Add the URL to get redirected to the promoting product/category.
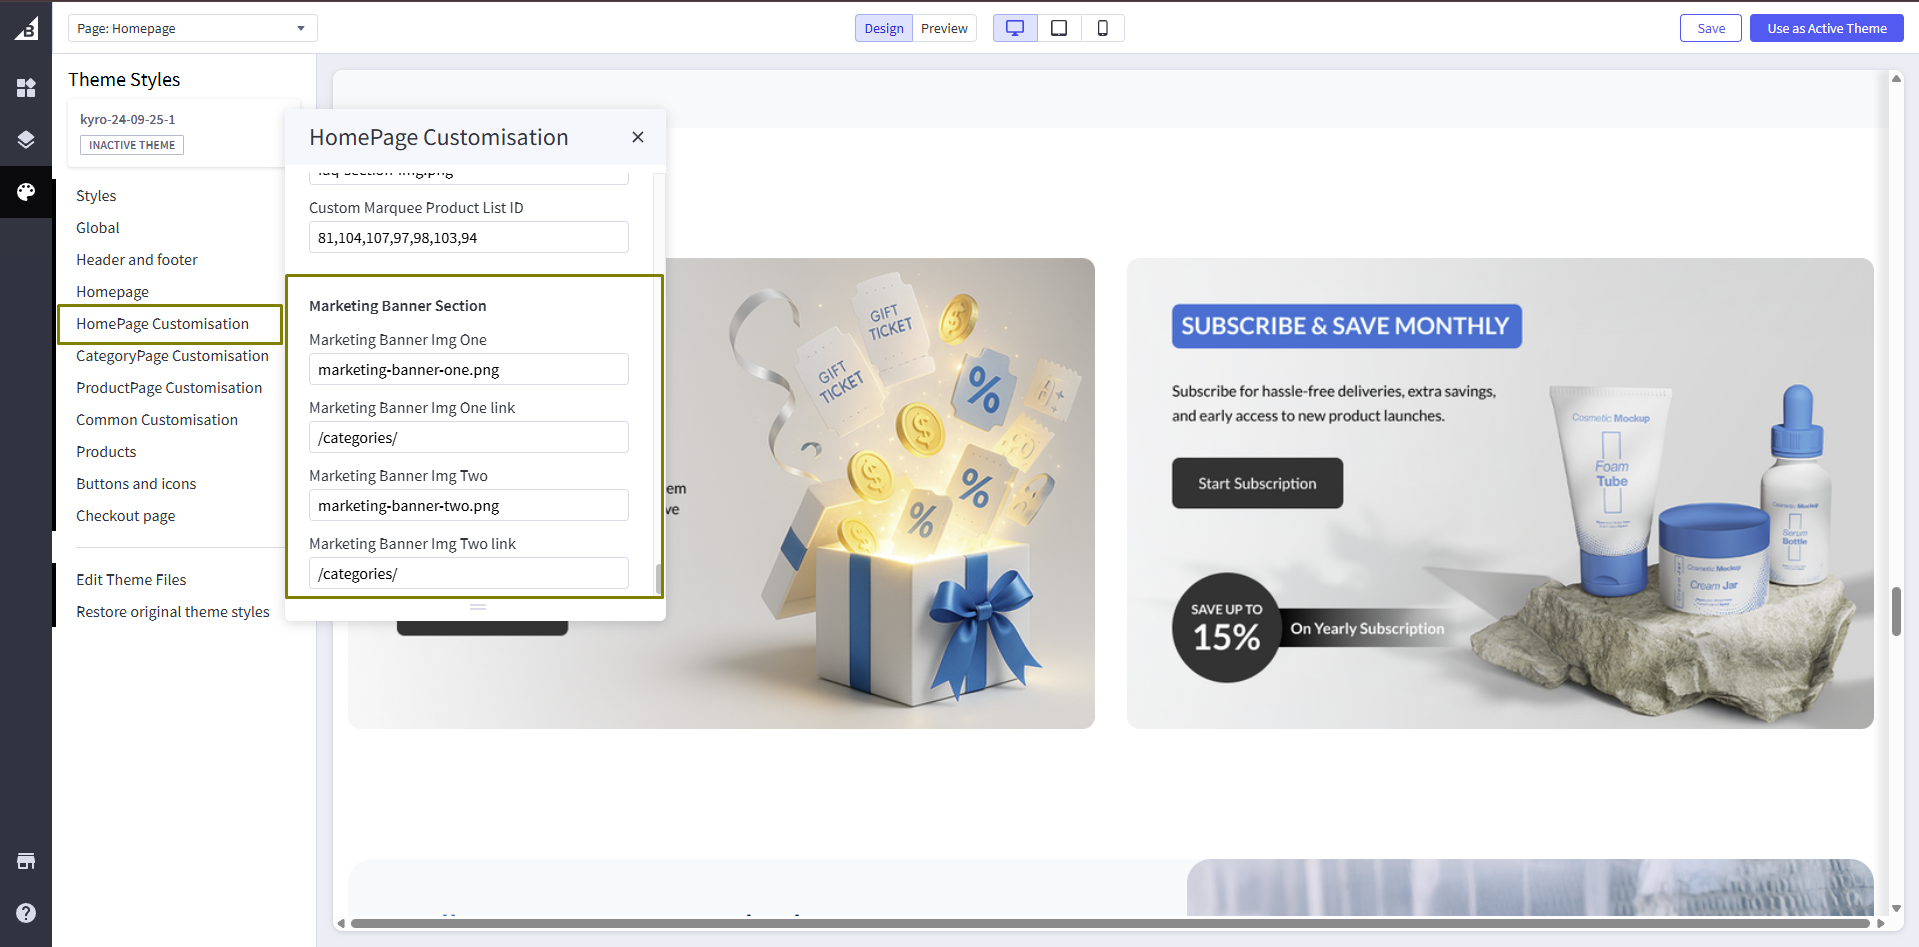
Marketing Banner HTML
Go to Storefront > My Themes in your control panel and click the blue "Customize" button to launch Theme Editor.
First, place the HTML widget on the page
To add a marketing banner, add HTML code in the editor on the left-hand side and click on SAVE HTML.
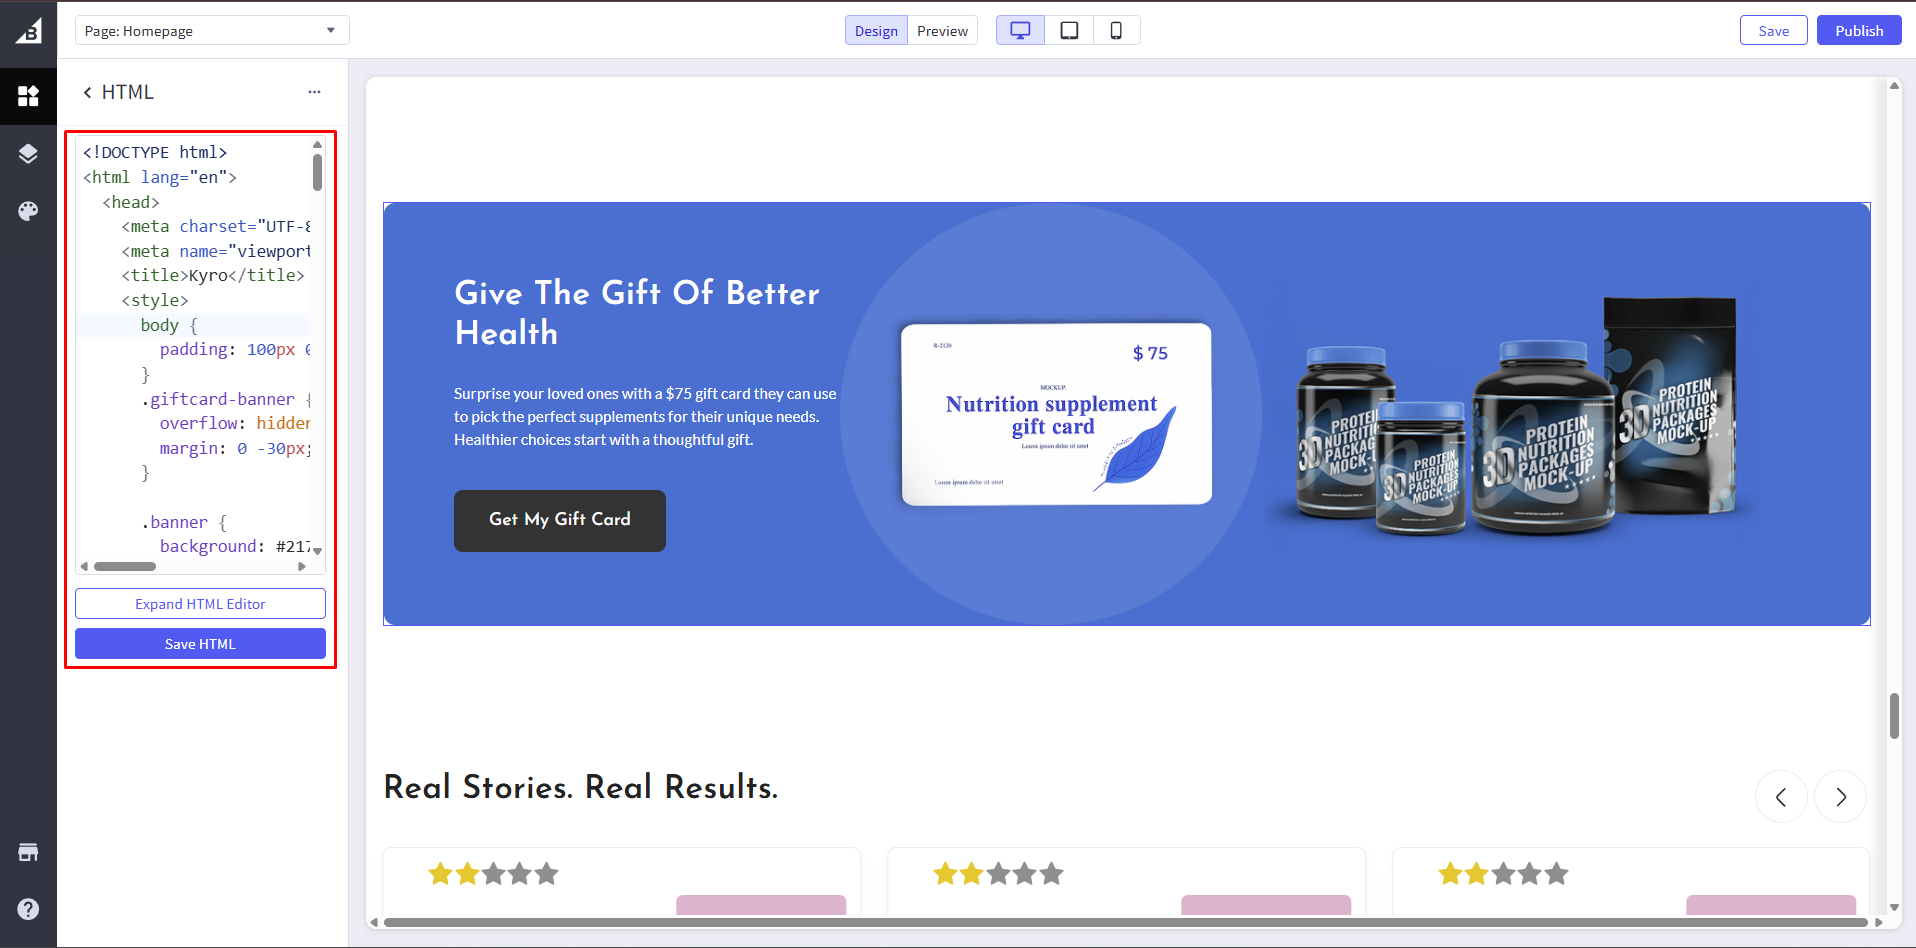
See the Pen Untitled by bigcommerce_ditindia (@bigcommerce_ditindia) on CodePen.
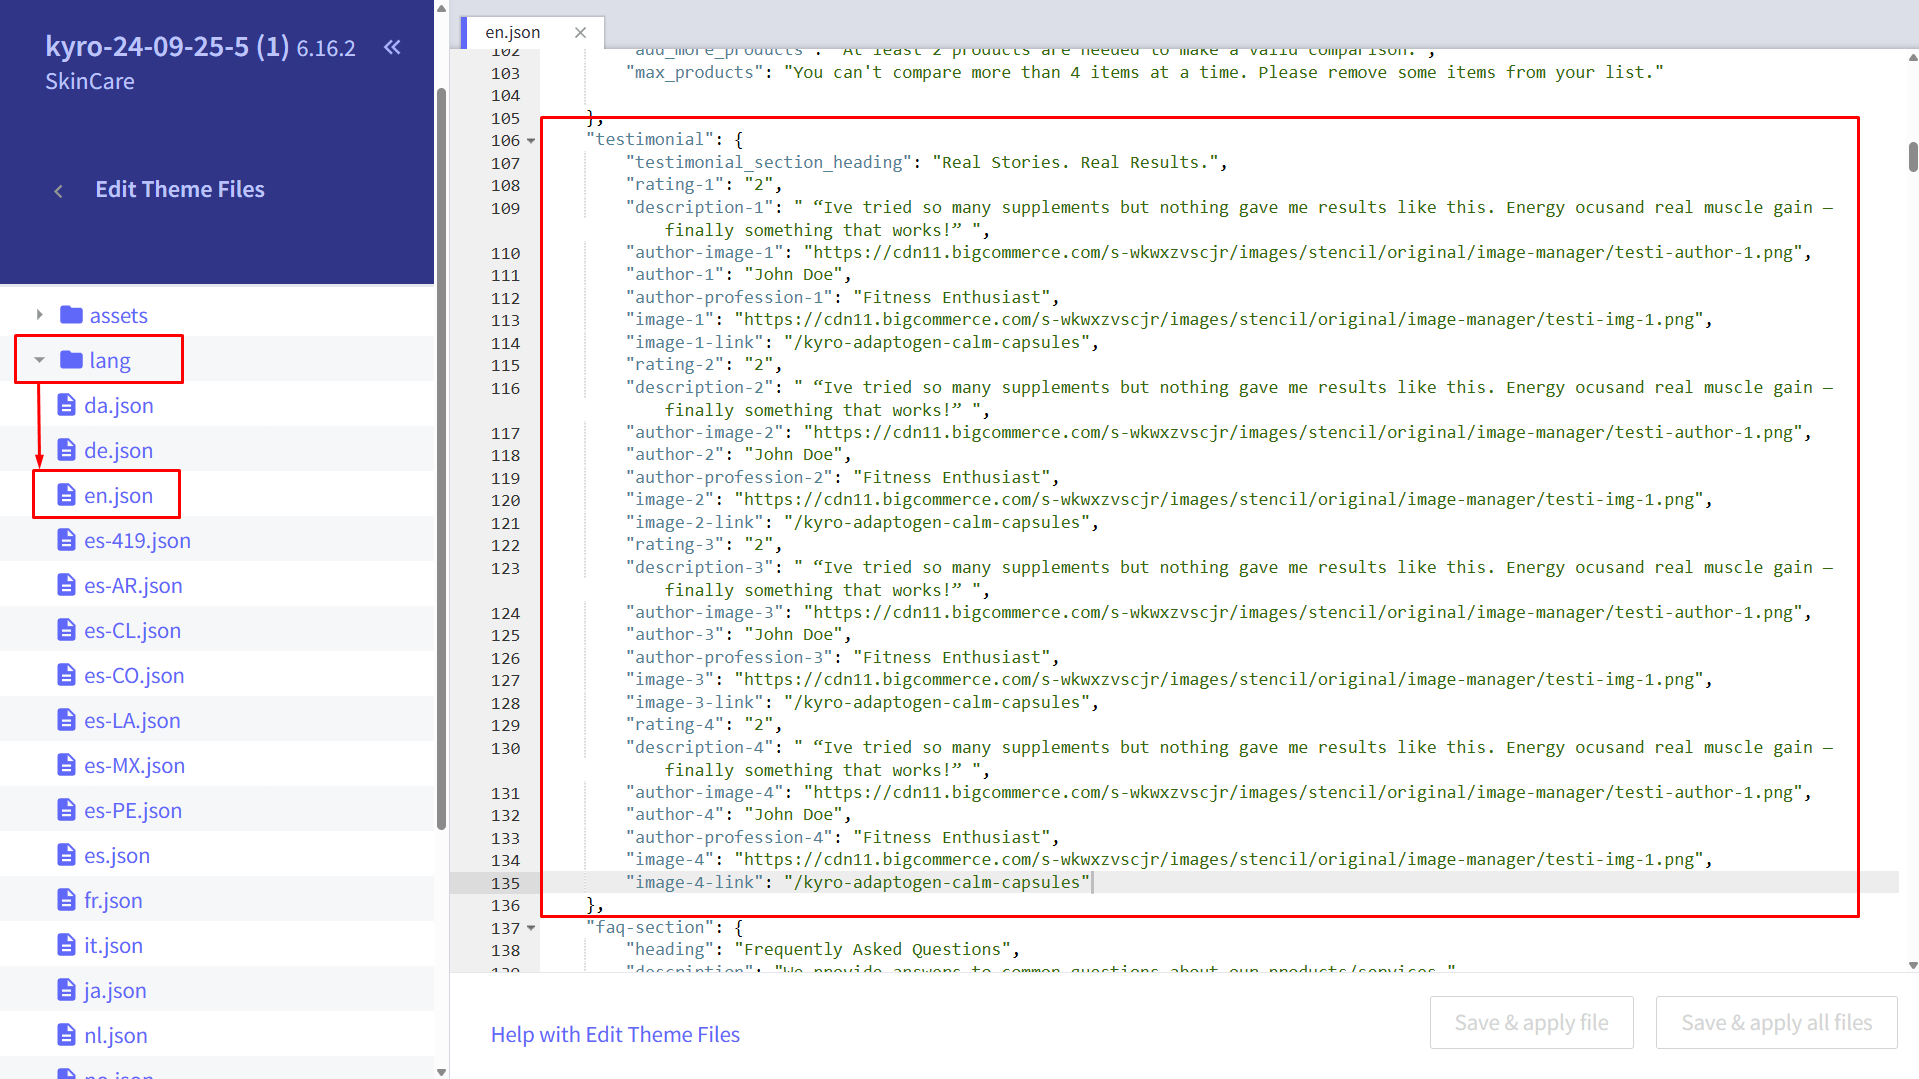
Testimonial Section

Manage Testimonials: To add a testimonial, go to channels > Themes > Advanced > Edit Theme Files > lang > en.json and add the following fields for each review in 'testimonial':
- rating: rating star count.
- description: customer review description
- author-image: add image of author
- author: add author name
- author-profession: add author's profession
- image: add image file, which will be displayed on the right-hand side.
- image-link: add image link to redirect to the product/category the customer reviewed
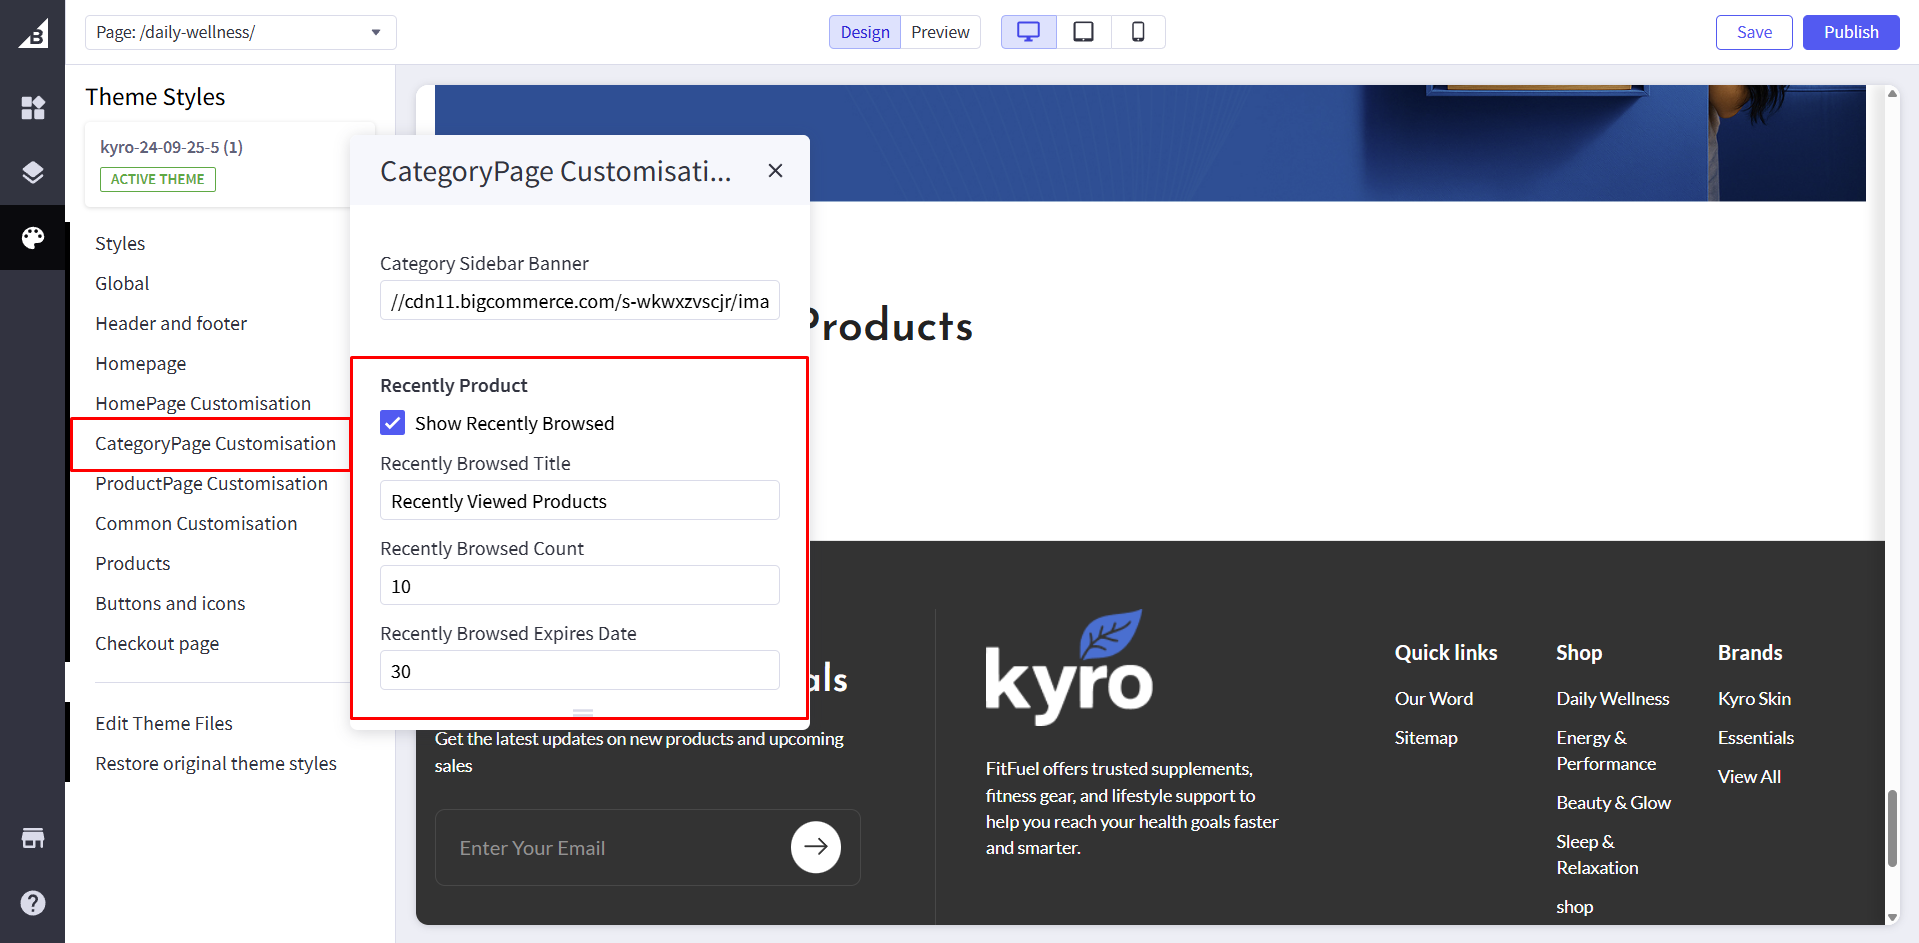
Category Page Customisation
Category Sidebar Banner
Category sidebar Banner: Add an image for the sidebar banner on the category page
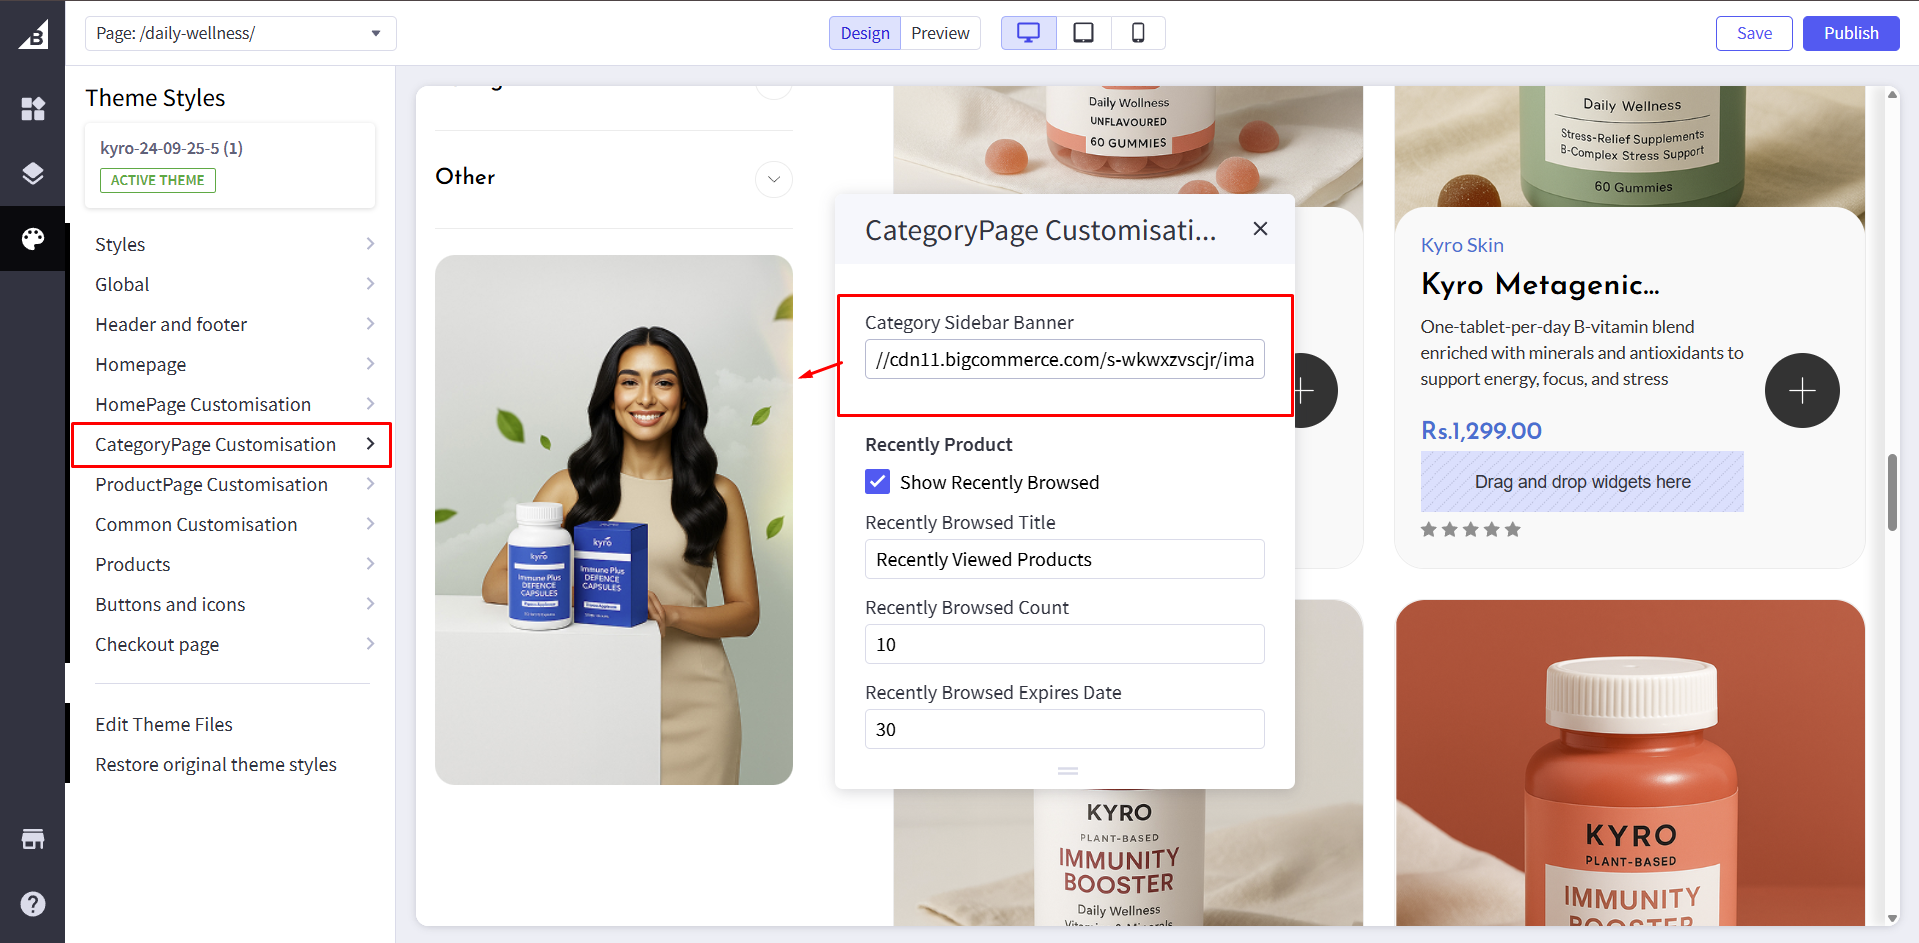
Recently Viewed Product
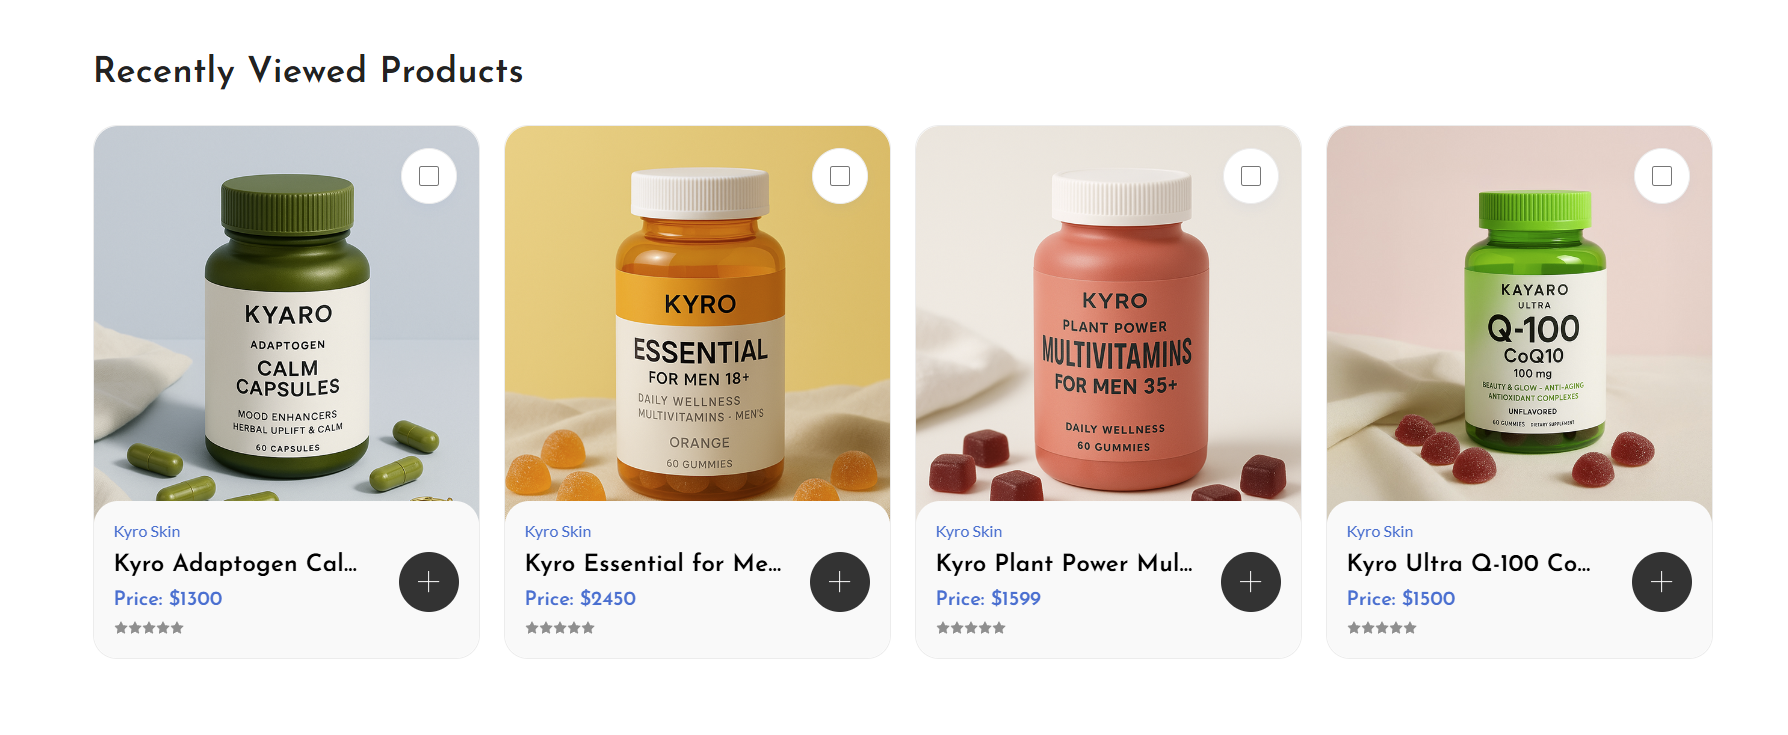
Show Recently browsed: If unchecked, it will hide the Recently viewed product section from the category page.
Recently browsed Title: Add the Title of the section.
Recently browsed count: Add recently Viewed Product count.
Product Page Customisation
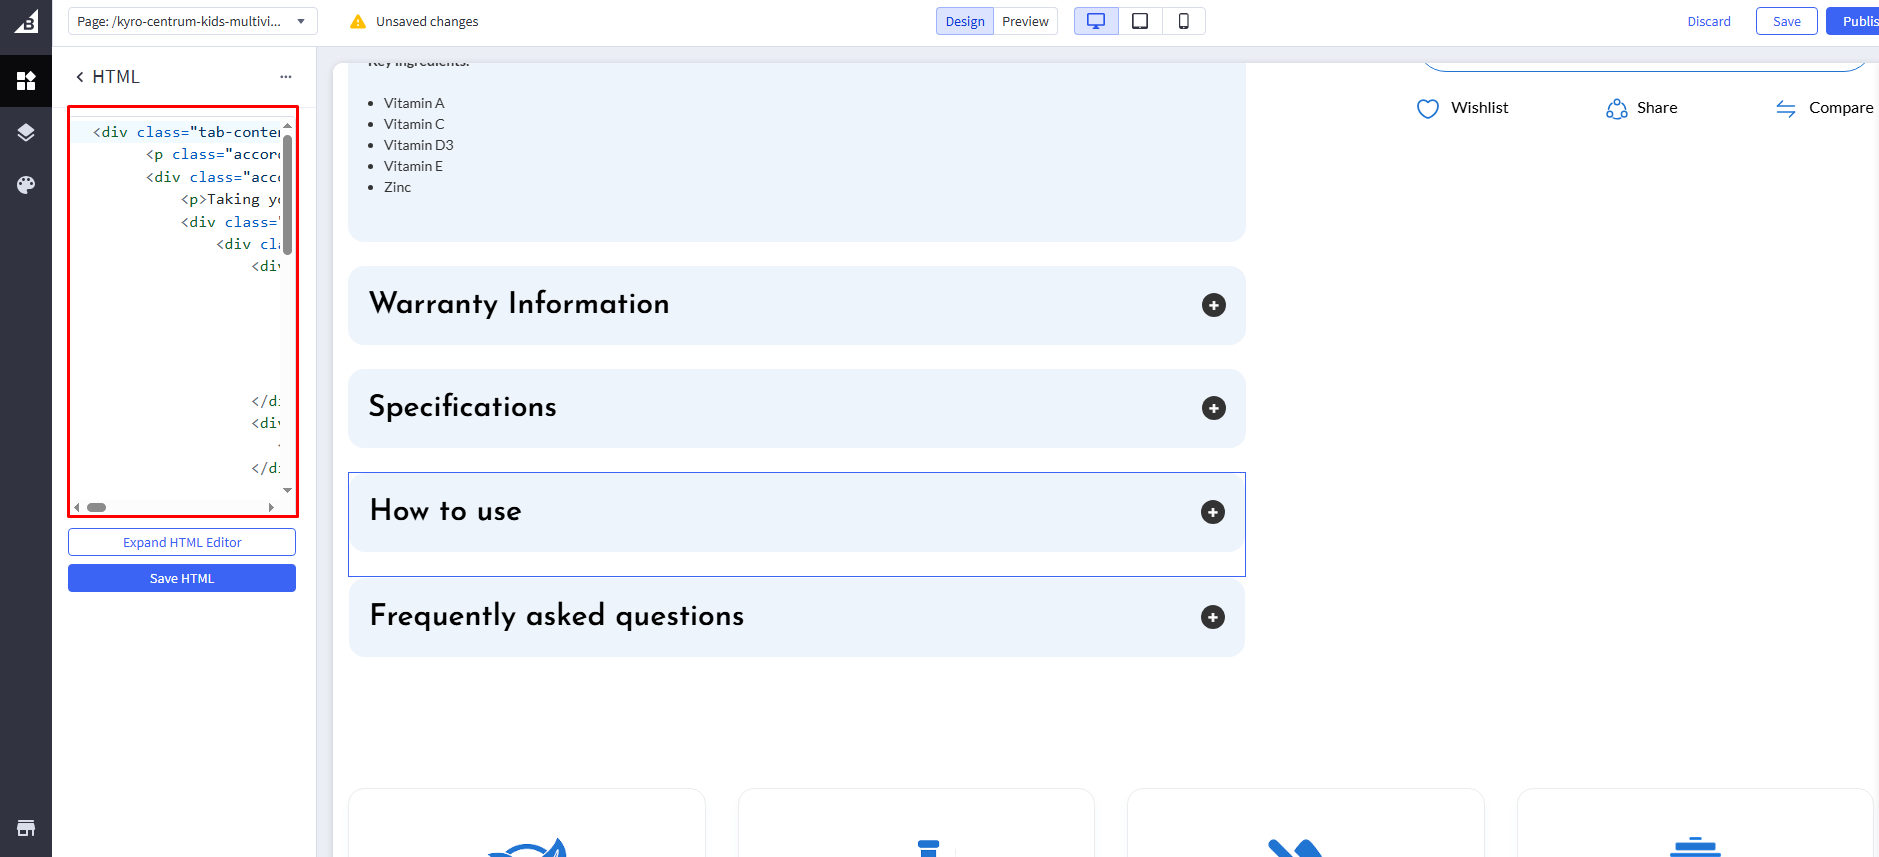
Custom Product Tab Code
How To Use Section
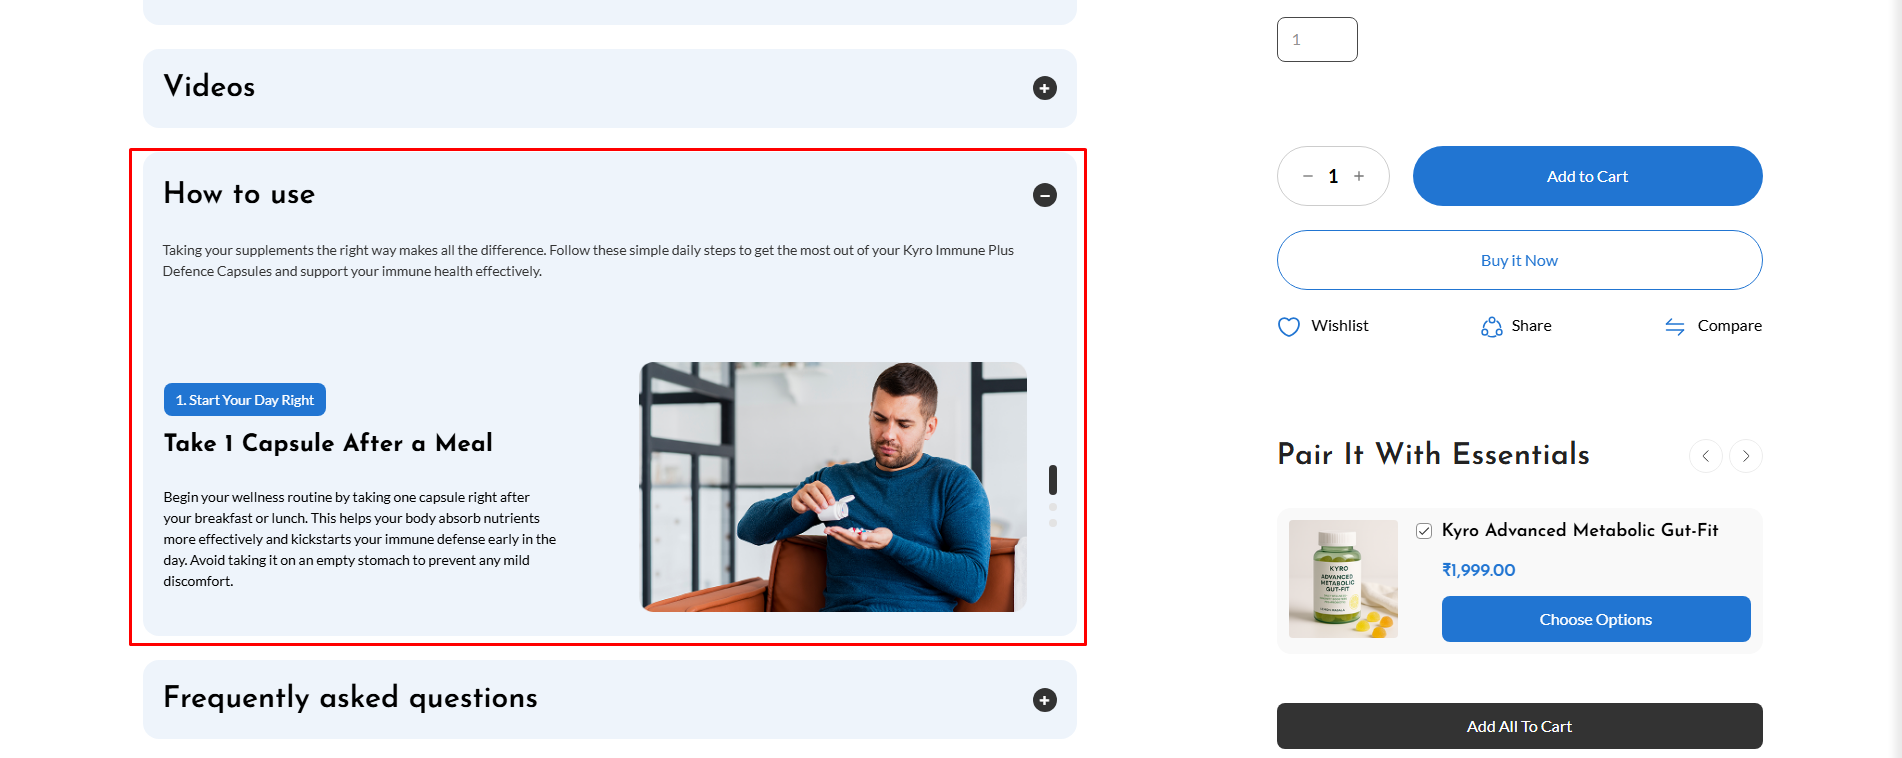
This section is used for a specific product, and its steps and code are given below.
Go to Storefront > Theme > Customize > Preview
Then drag and drop widget on HTML
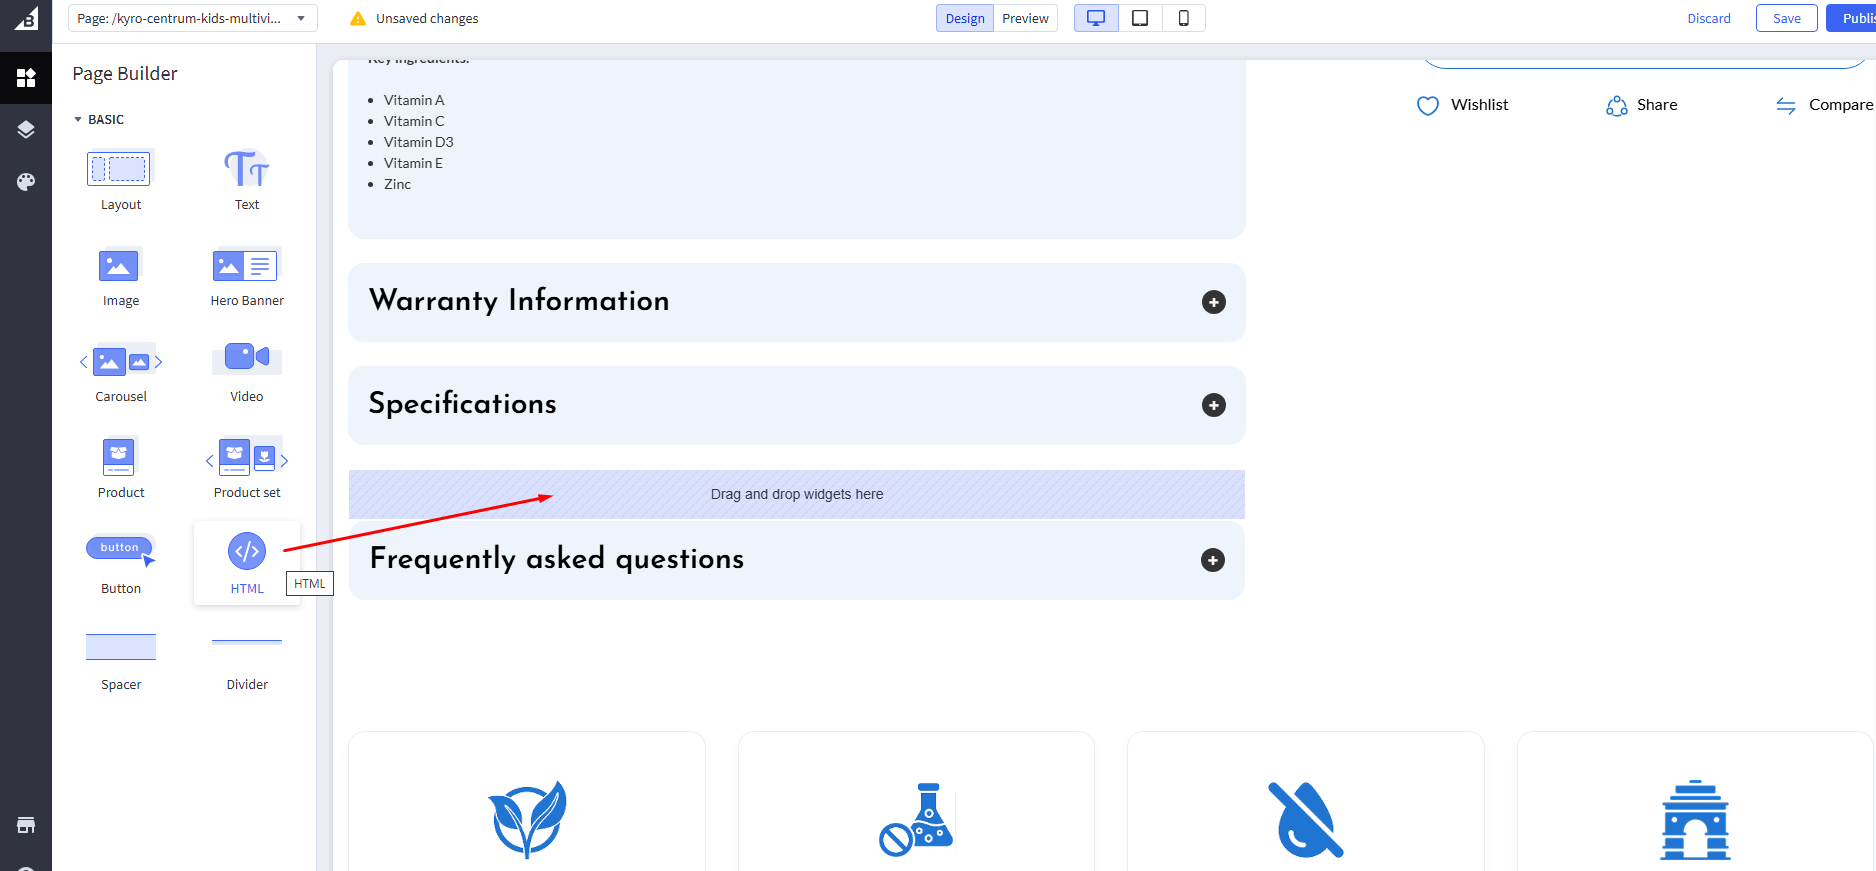
See the Pen Untitled by bigcommerce_ditindia (@bigcommerce_ditindia) on CodePen.
And click on save HTML button and publish your theme.
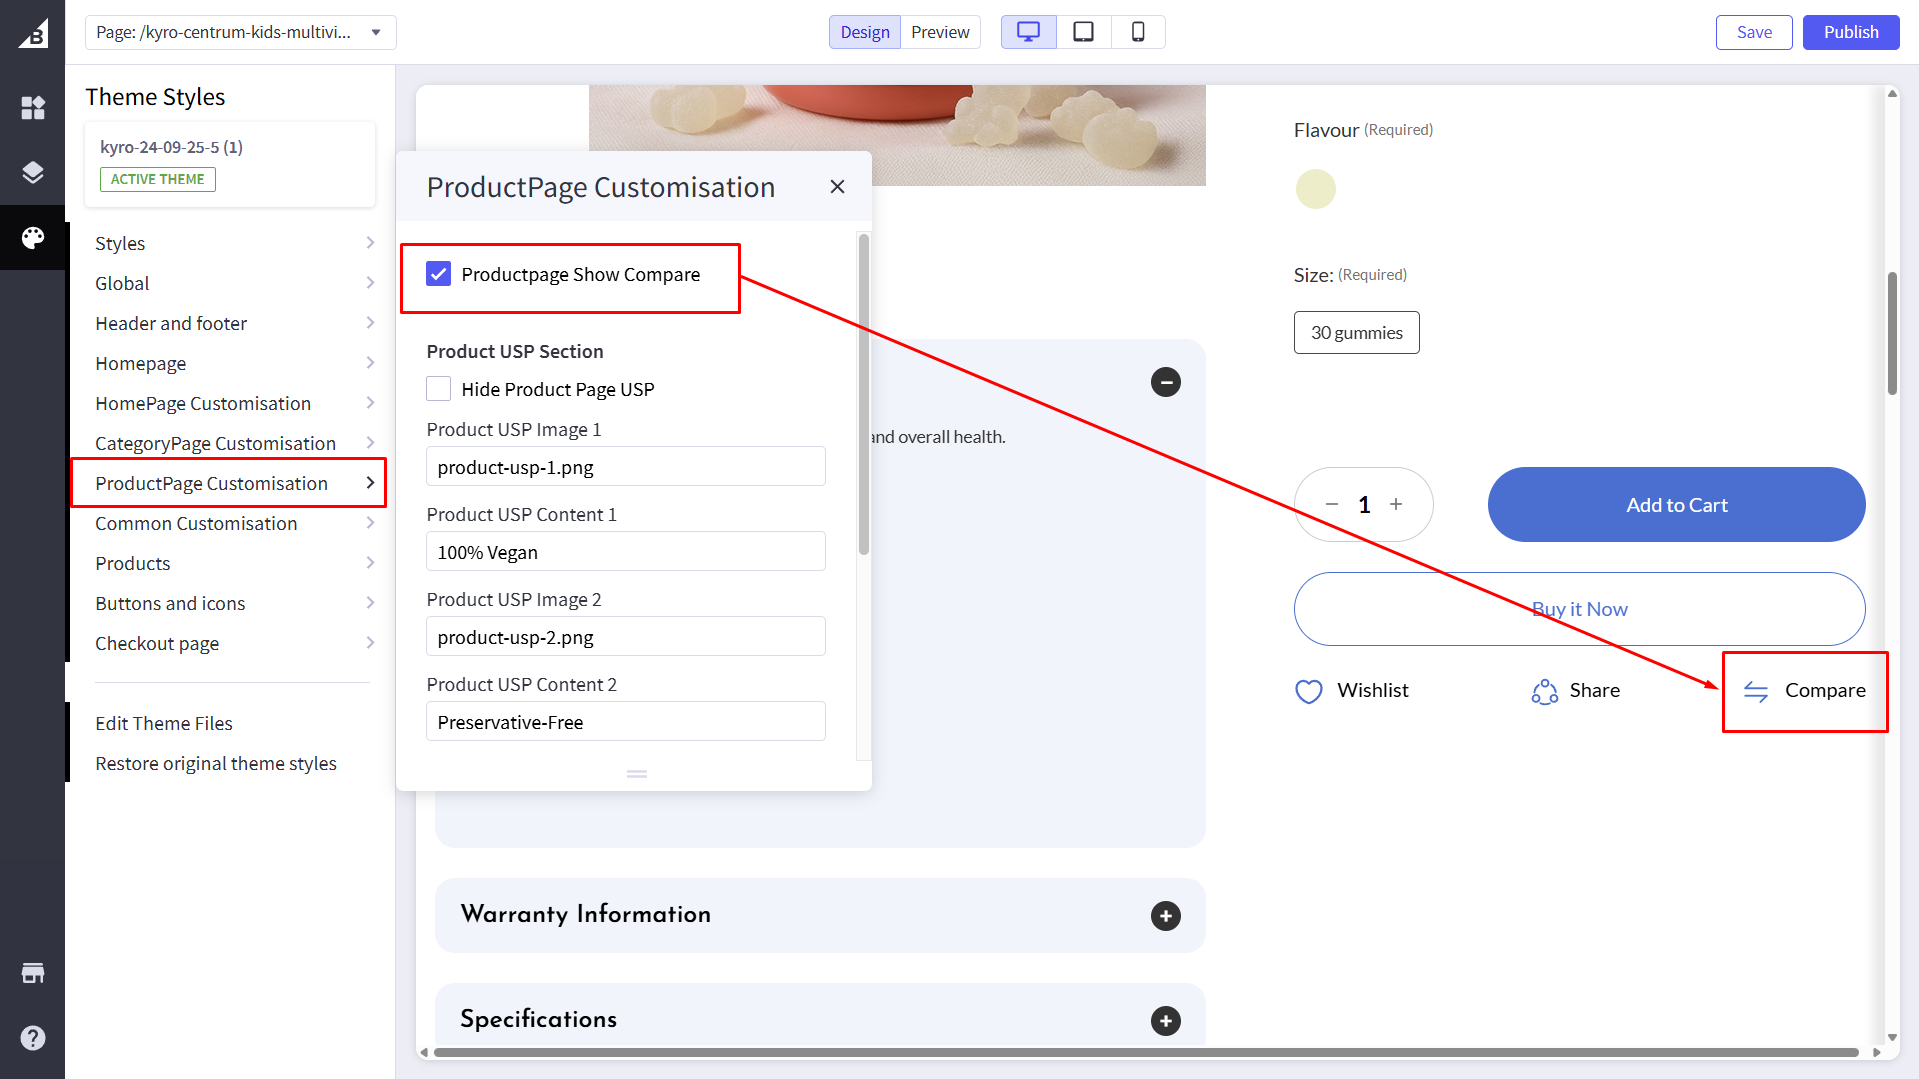
Compare Product
Product Page Show Compare: If unchecked, it will hide compare option from the product detail page.
Product Page FAQ Section
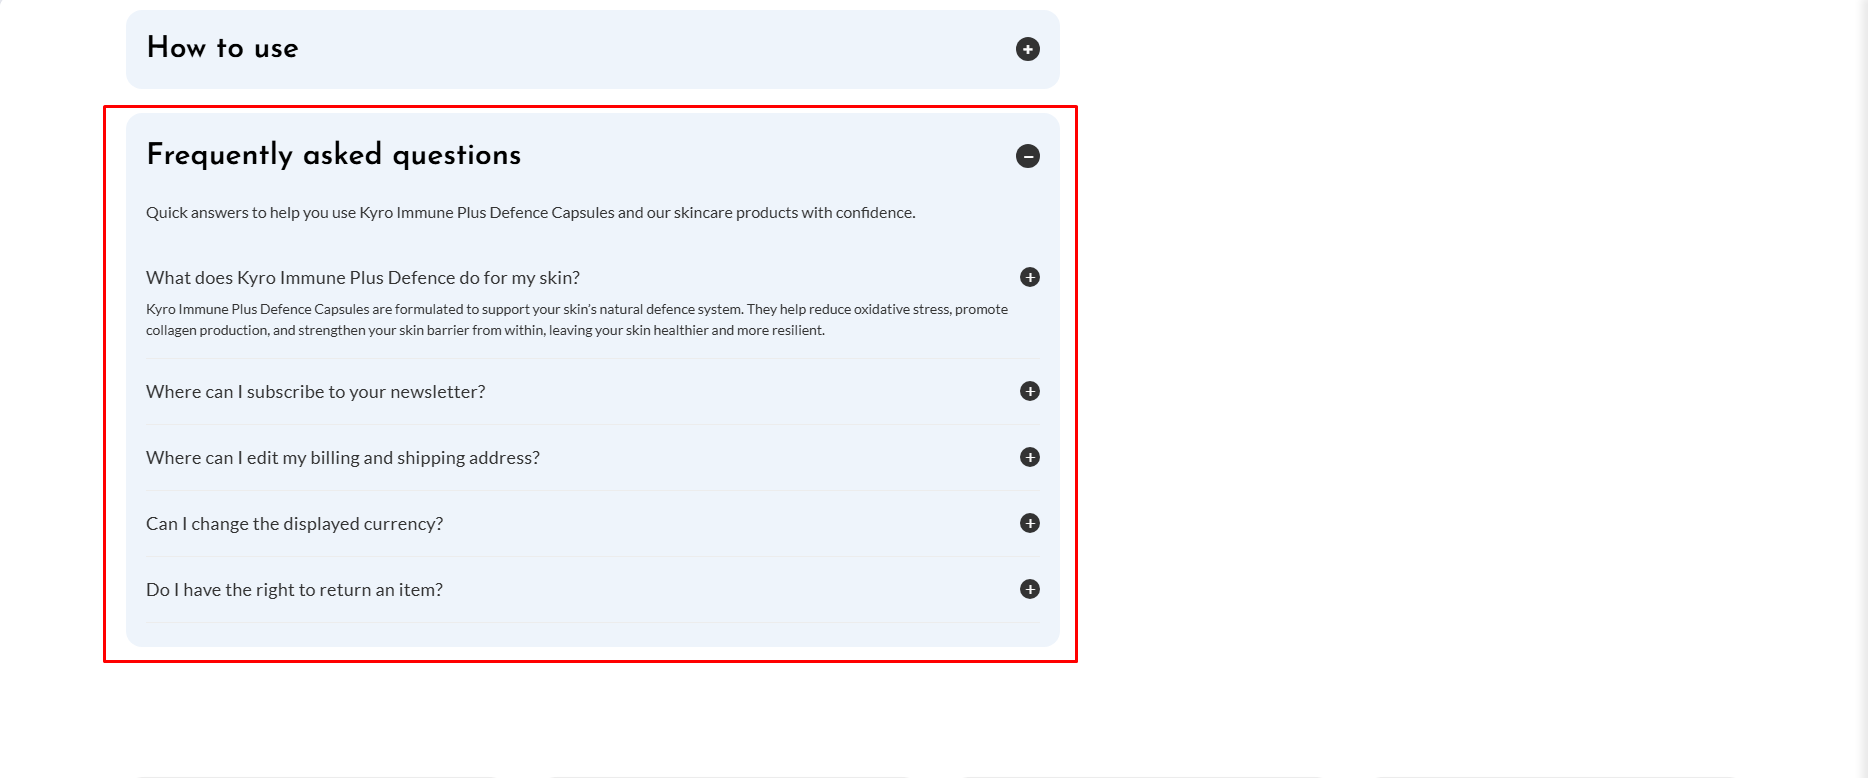
This section is used for a specific product, and its steps and code are given below.
Go to Storefront > Theme > Customize > Preview
Then drag and drop widget on HTML
See the Pen KYRO - PDP page FAQ section Code Generator by bigcommerce_ditindia (@bigcommerce_ditindia) on CodePen.
And click on save HTML button and publish your theme.
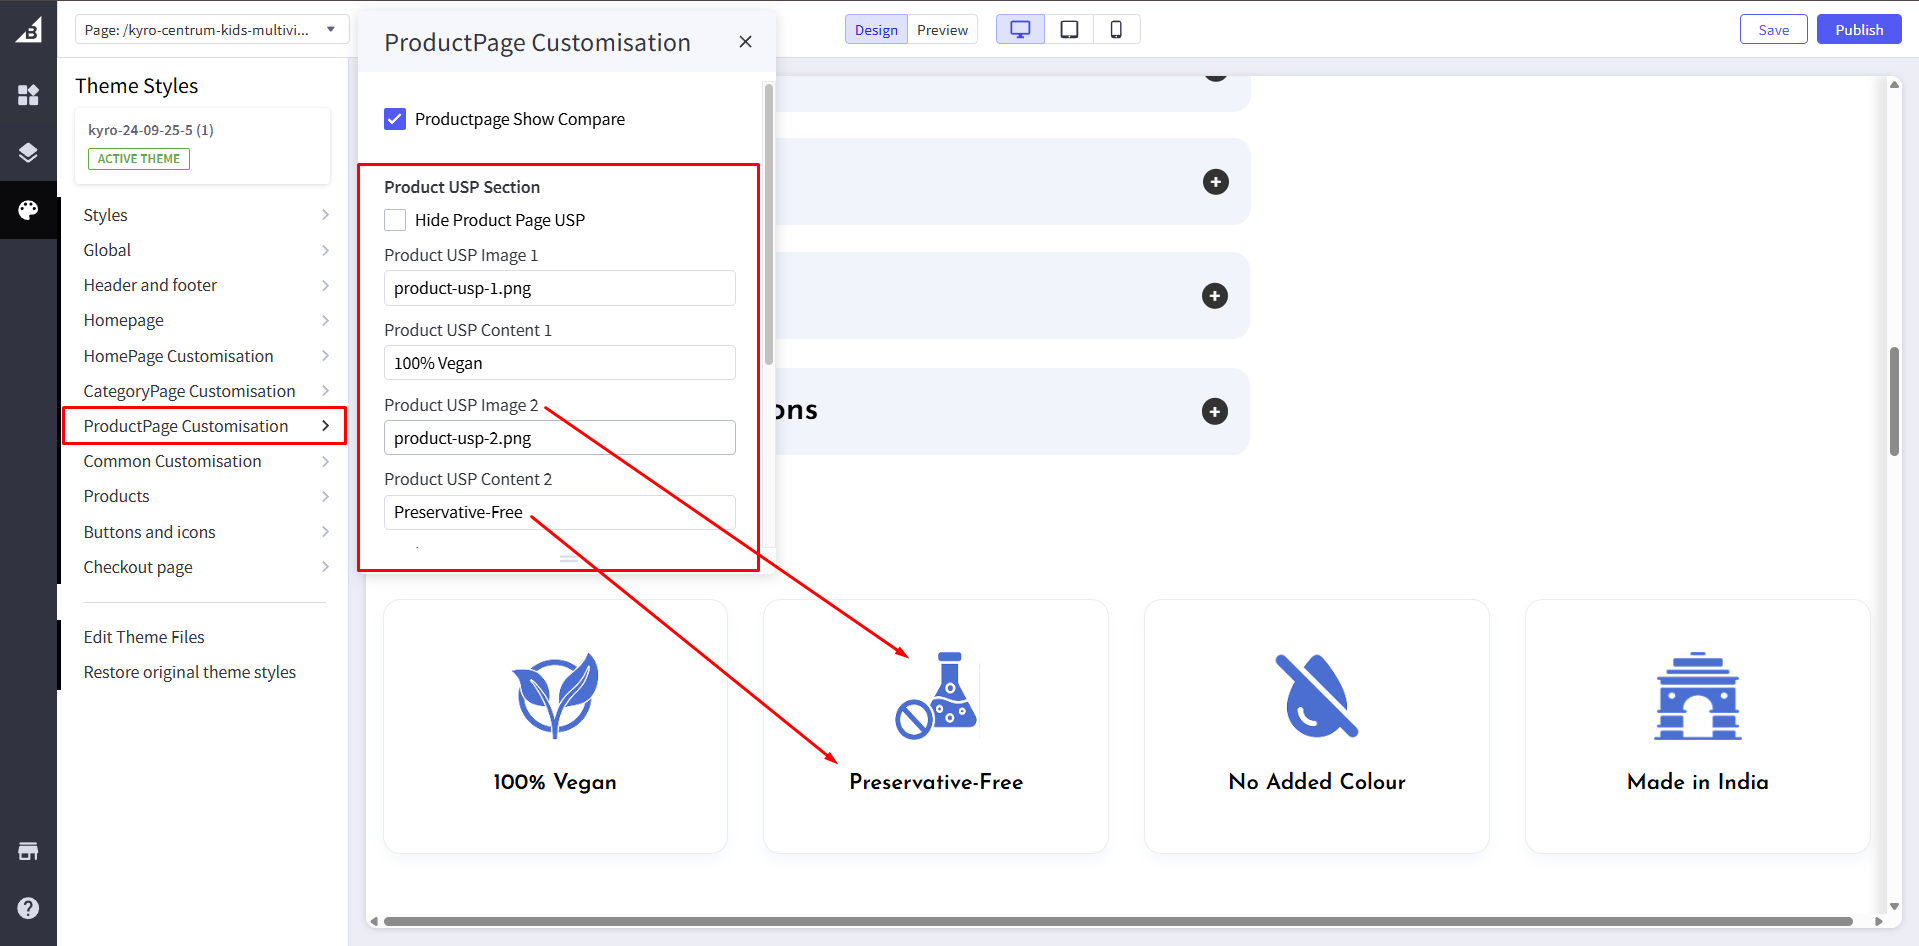
Poduct Page USP Section
Hide Product Page USP: If checked, it will hide USP section from the product detail page.
Product USP image: Add USP image.
Product USP Content: Add USP Content.
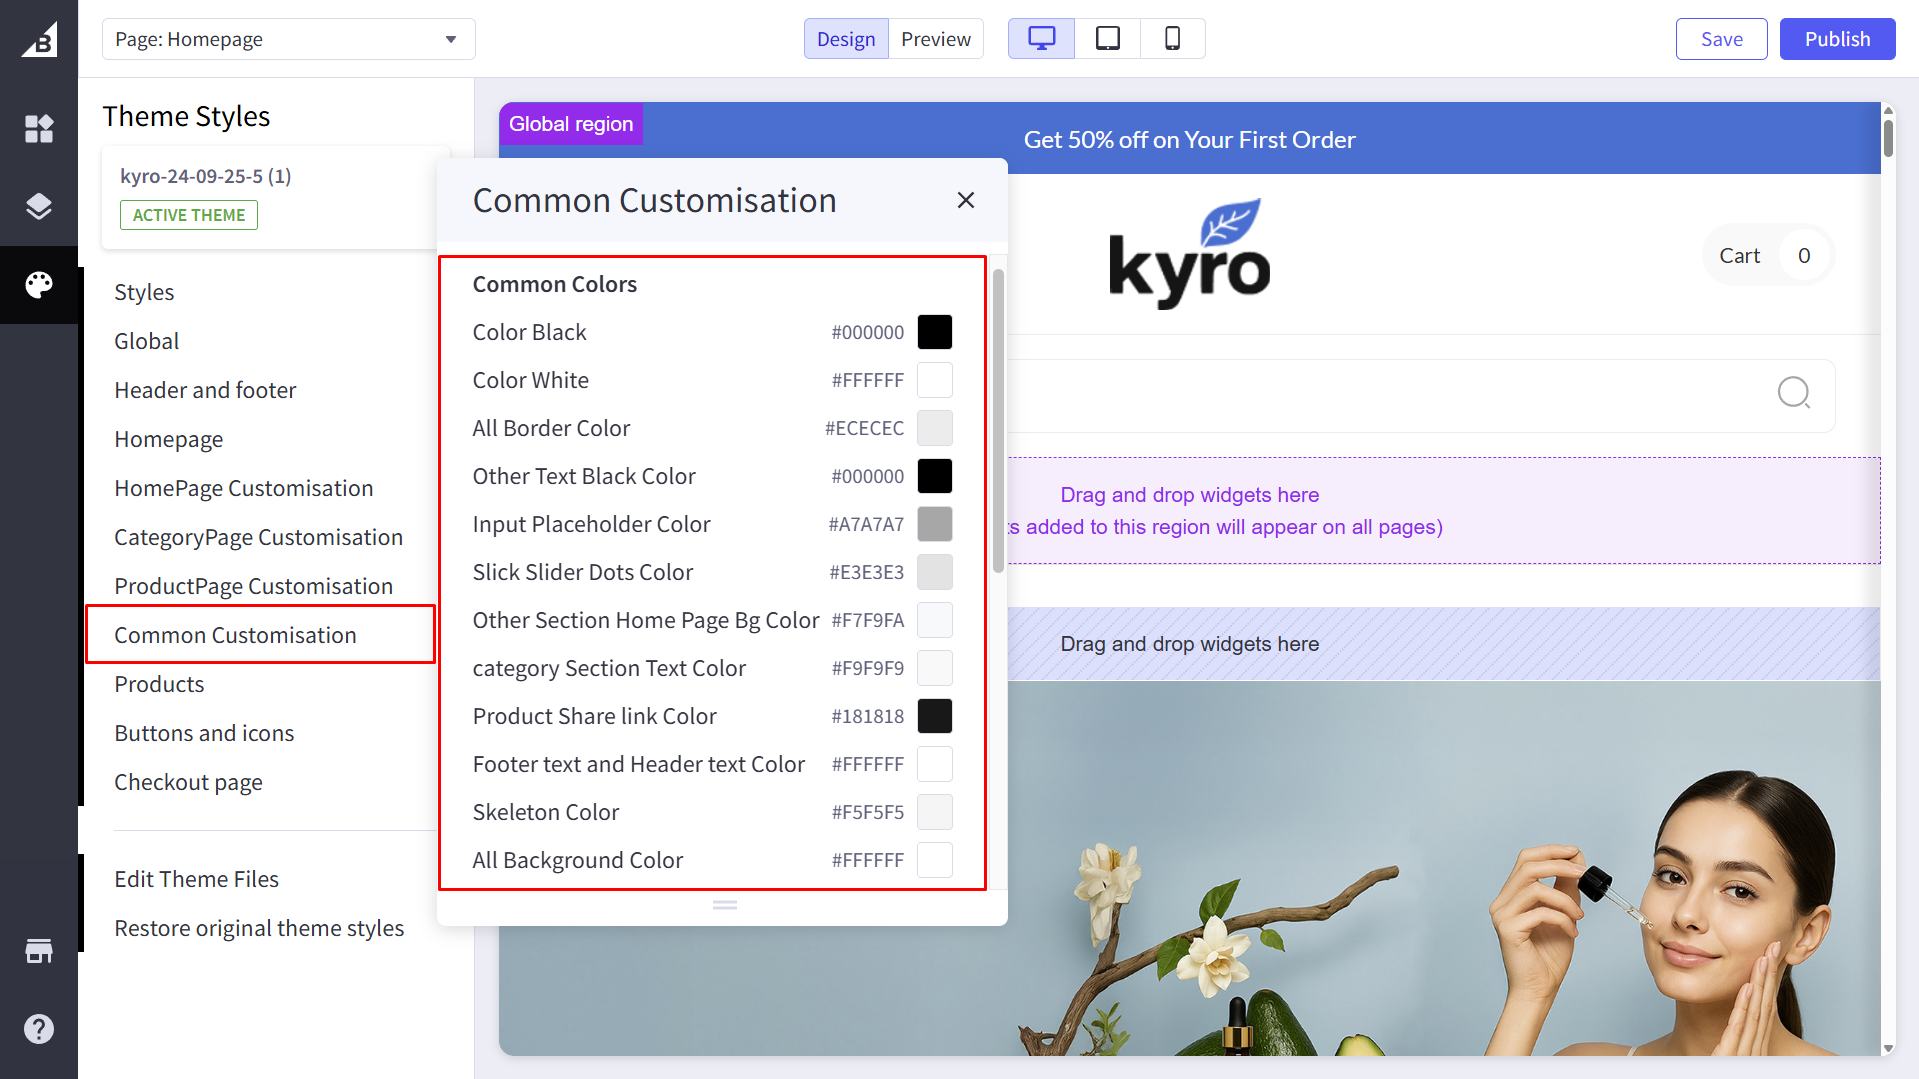
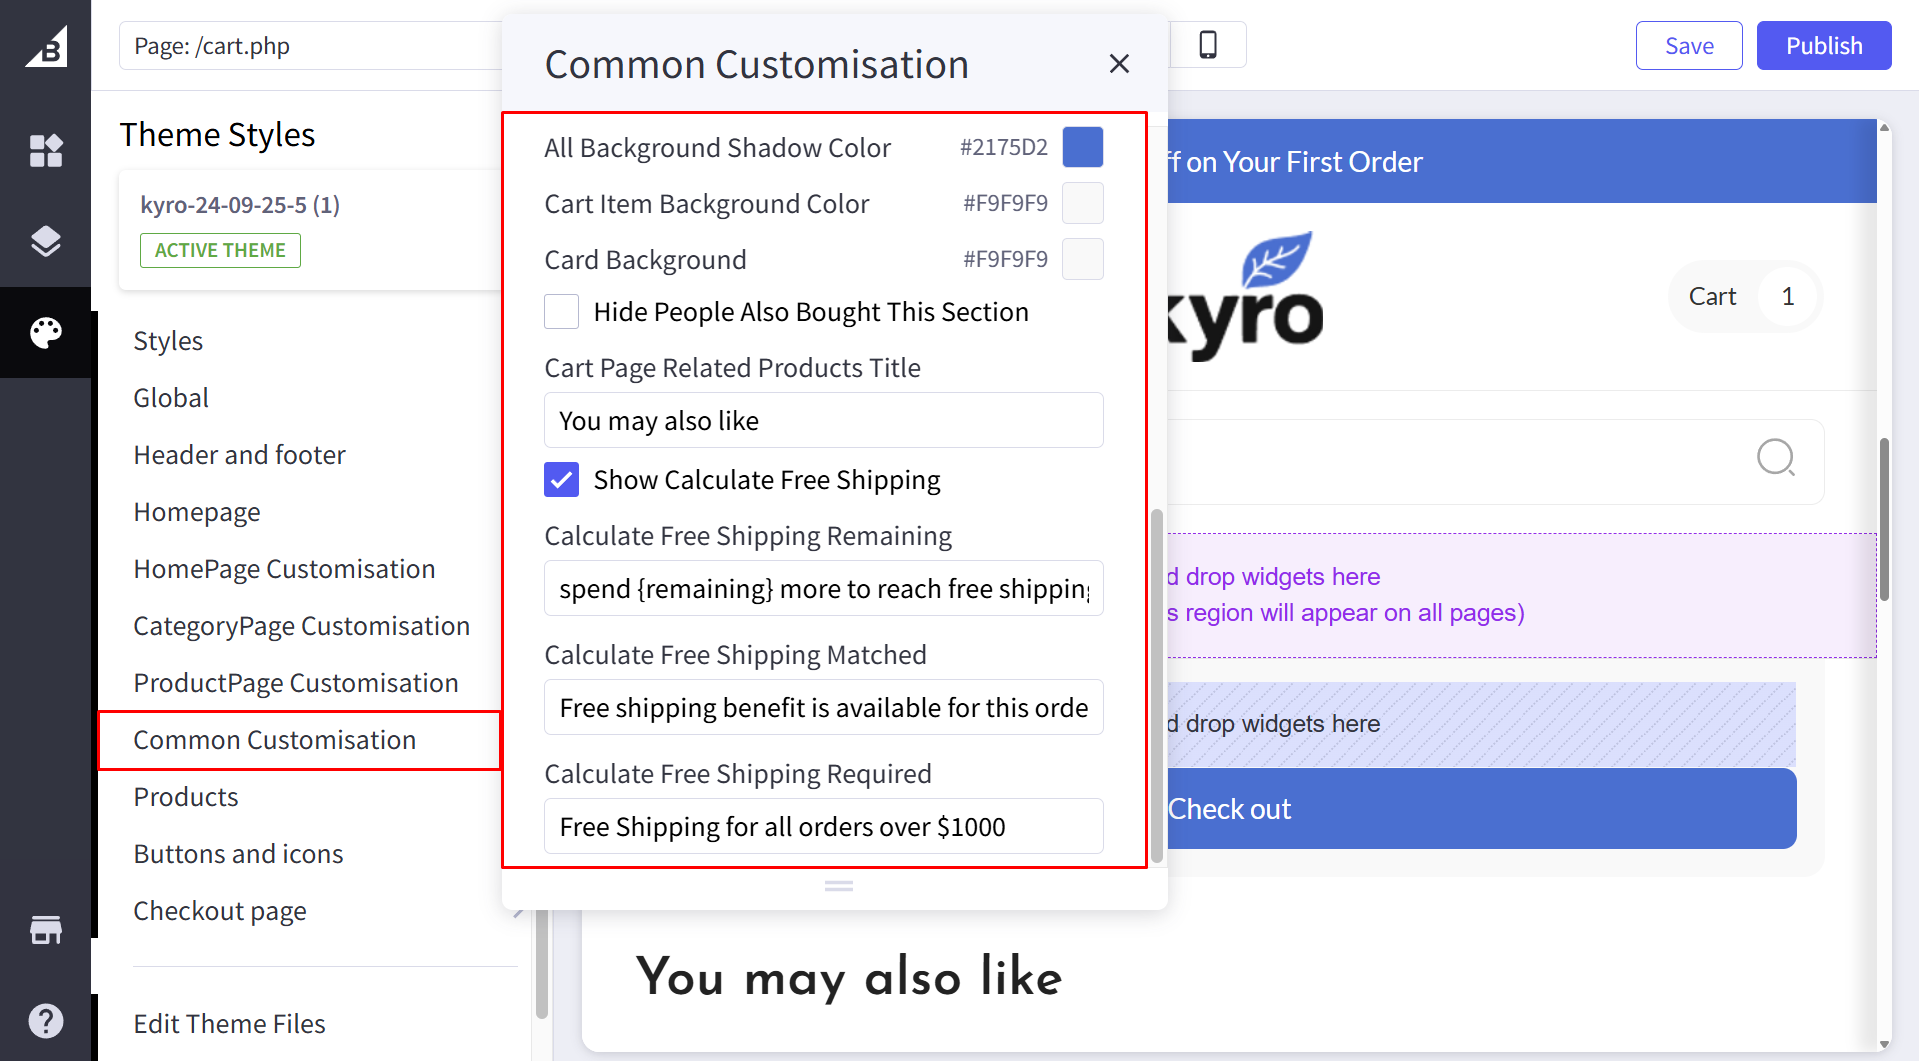
Common Customisation
Common colors: Add all common colors for the theme.
Hide People also Bought This Section: If checked, It will hide People also Bought This Section.
Cart Page Related Products Title: Add Cart page Related Products Title.
Show Calculate Free Shipping: If checked, It will show Calculate Free shipping section.
Calculate Free Shipping Remaining: Add Free shipping remaining text.
Calculate Free Shipping Matched: Add Free shipping matched text.
Calculate Free Shipping Required: Add Free shipping required text.
Recommended Image Dimension
Hero Carousal Image
1920px x 750px
Trending Cartegory Image
960px x 1230px
Product Image
960px x 1045px
Product Trend Image
389px x 527px
Custom Most Popular left Image
960px x 622px
After Before Image
1620px x 622px
Marketing Banner Image
960px x 605px
About us Image
747px x 634px
FAQ Section Image
815px x 592px
Category Promotion Image
1620px x 550px
Category Image
960px x 1230px
Category Sidebar Image
296px x 438px
Image Upload
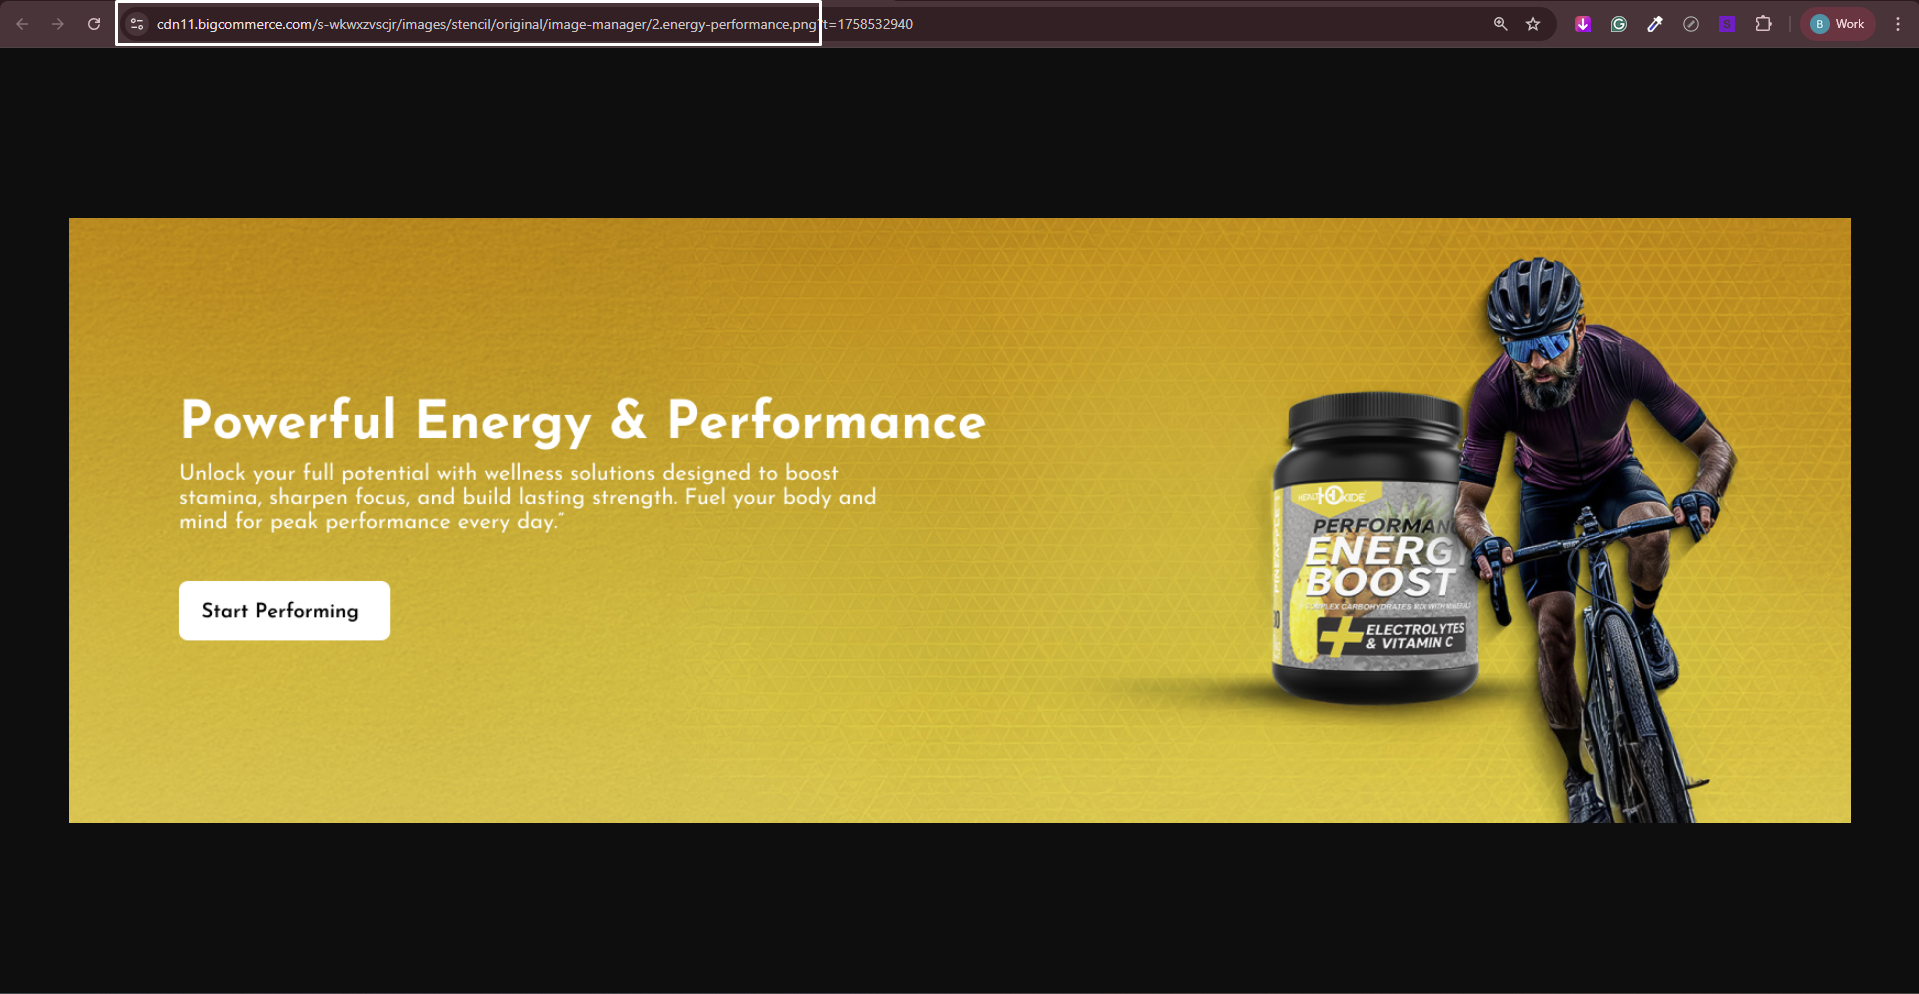
First, navigate to Storefront > Image Manager and upload your images here.
Once uploaded, click on "View Full Size" to open the image in a new tab and copy the image URL.
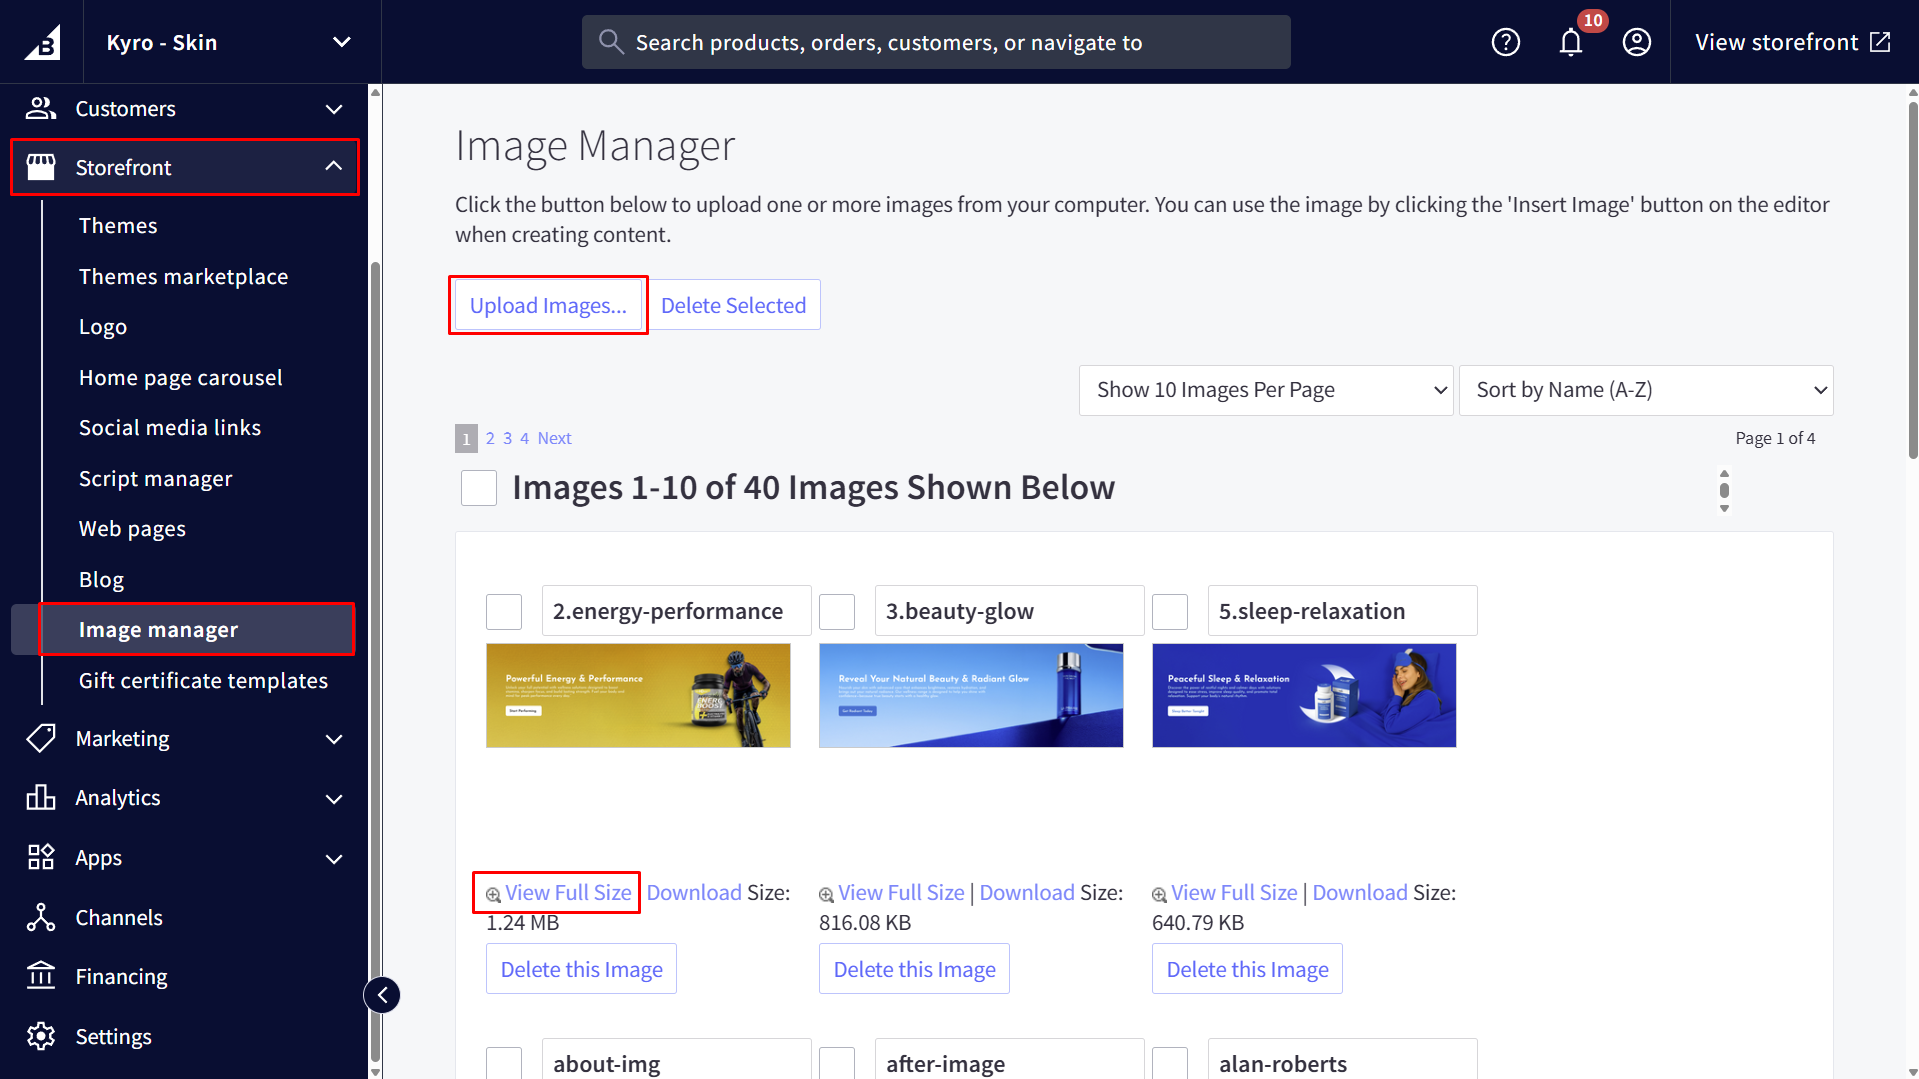
Use this file path to show the image.
Note: Copy the image path up to its file type or extension (JPEG/JPG, PNG and GIF). omit the part of the URL after the file type or extension.

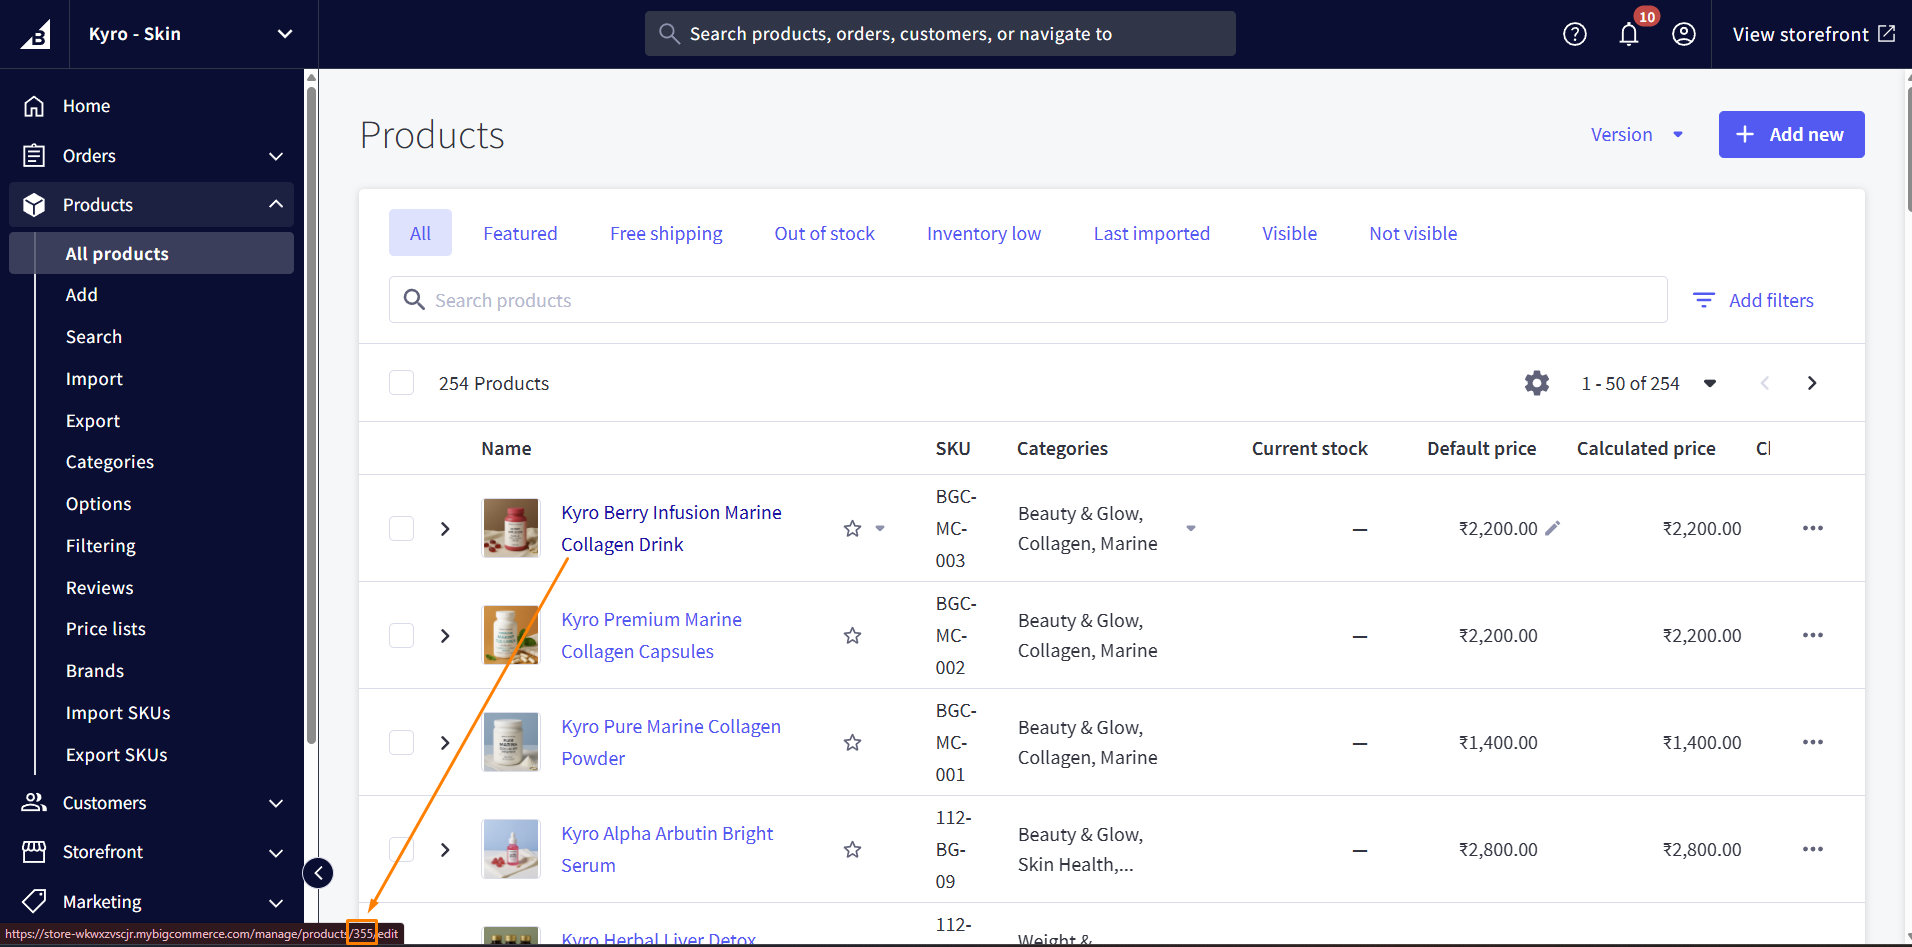
Product ID
To get the Product ID, go to Storefront > Products > All products
Navigate the cursor to the Product name will display the path on the bottom-left side of the webpage. At the end of the path, the Product ID is mentioned.
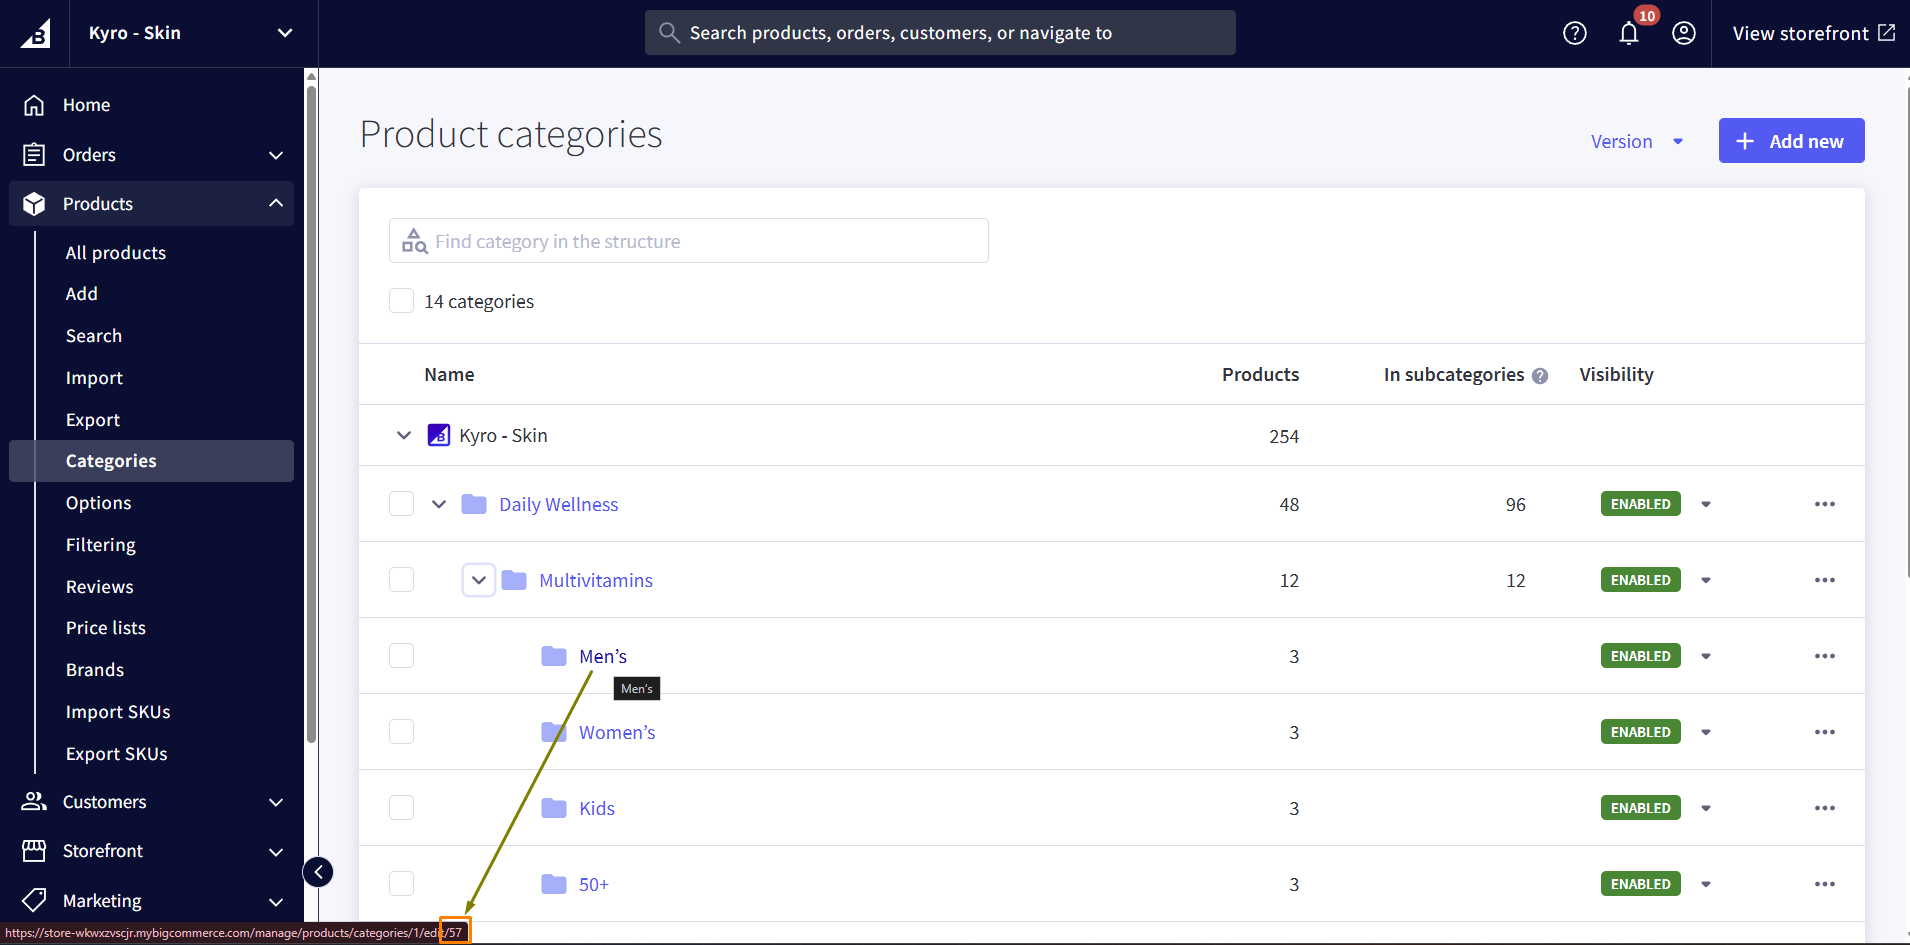
Category ID
To get the CategoryID, go to Storefront > Products > Categories
Navigate the cursor to the Category name will display the path on the bottom-left side of the webpage. At the end of the path, the Category ID is mentioned.